
How to Operate a Press Brake
This document explains how to operate a hydraulic press brake to form radius and square bends on a metal plate. Follow each step in sequence, and confirm every measurement and safety check before moving to the next stage of the bending process.
Video: Demonstration on how to operate a Hydraulic Press Brake by Shukela Training (2018). All credit for the demonstration goes to the creator; watch the original on YouTube. The written guide below was generated from this video by Docsie. Creator? Request a change or removal.
This document explains how to operate a hydraulic press brake to form radius and square bends on a metal plate. Follow each step in sequence, and confirm every measurement and safety check before moving to the next stage of the bending process.

Purpose
This procedure guides you through preparing a workpiece, configuring the press brake control panel, and forming both a radius shape and a square shape on a single metal plate using correct pressure settings and safety practices.
Scope
This SOP applies to any operator using the hydraulic press brake with the E10-D ESTUN control panel to bend marked metal plates into radius or square profiles.
Required equipment and PPE
- Safety goggles (mandatory at all times during machine operation)
- Gloves (mandatory at all times during machine operation)
- A metal plate marked with equally spaced lines on one side (for the radius bend) and a single line on the other side (for the square bend)
- A paper template to verify the required radius
- Hydraulic press brake with E10-D ESTUN control panel

Put on required safety gear
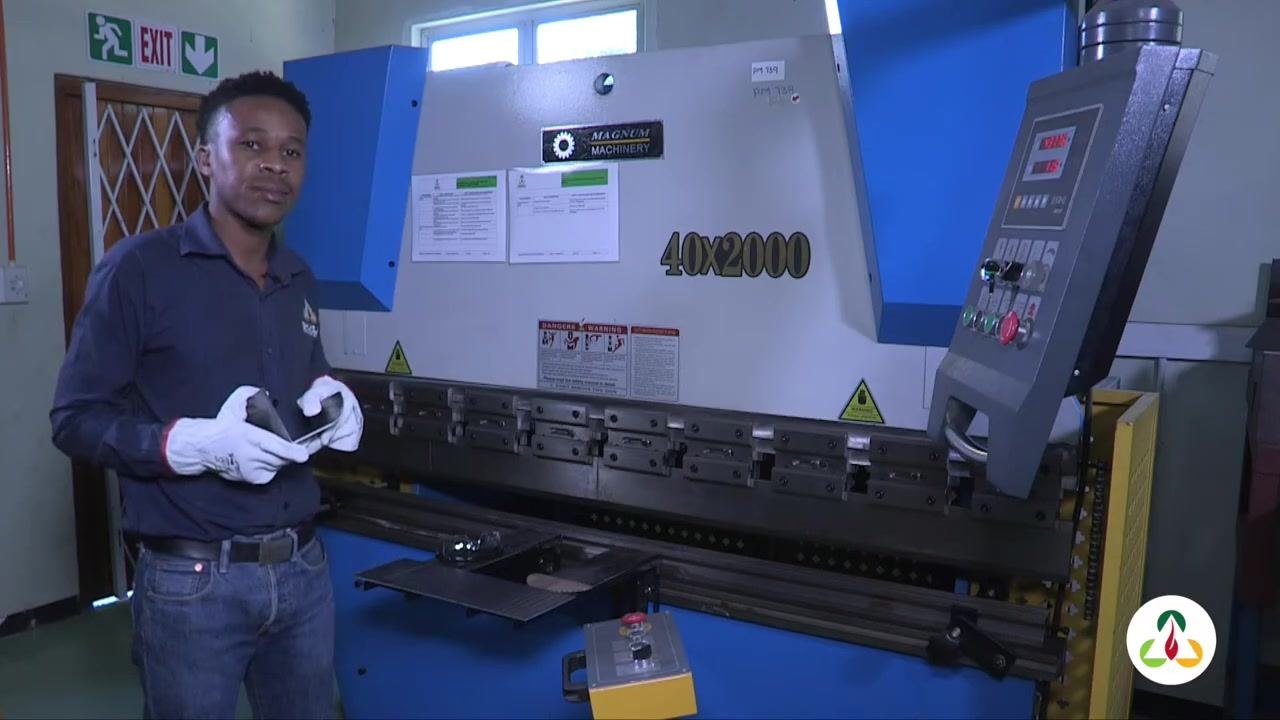
Before approaching the machine, put on your safety goggles and gloves. These safety measures are mandatory at all times during machine operation.
Prepare the workpiece
Obtain the metal plate you will use for forming. One side of the plate should have equally spaced marked lines for bending a radius shape, and the other side should have a single marked line for bending a square shape.
Check the radius against the paper template
Use the provided paper template to check whether the shape you are forming will match the required radius. Align the template with the marked lines on the plate to verify the radius before you proceed.
Confirm plate orientation and markings
Confirm the correct orientation and markings on the metal plate before proceeding to the machine. This check prevents incorrect bends later in the process.
Switch on the press brake
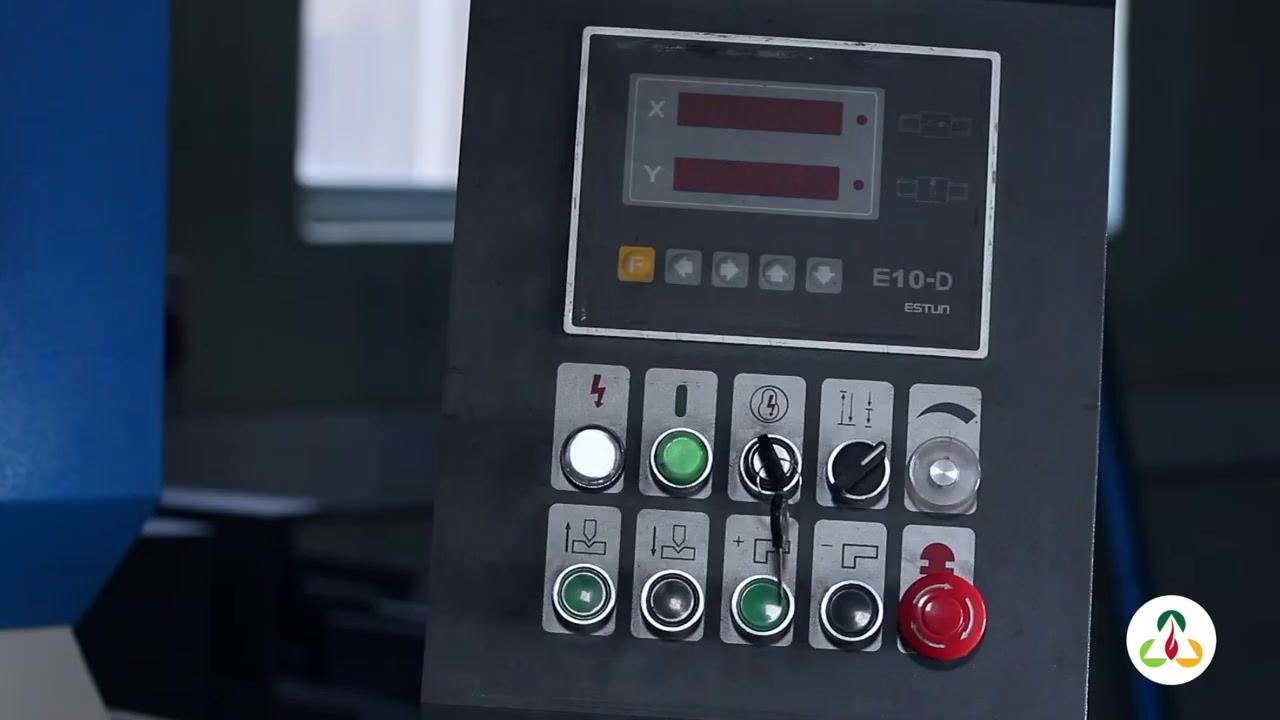
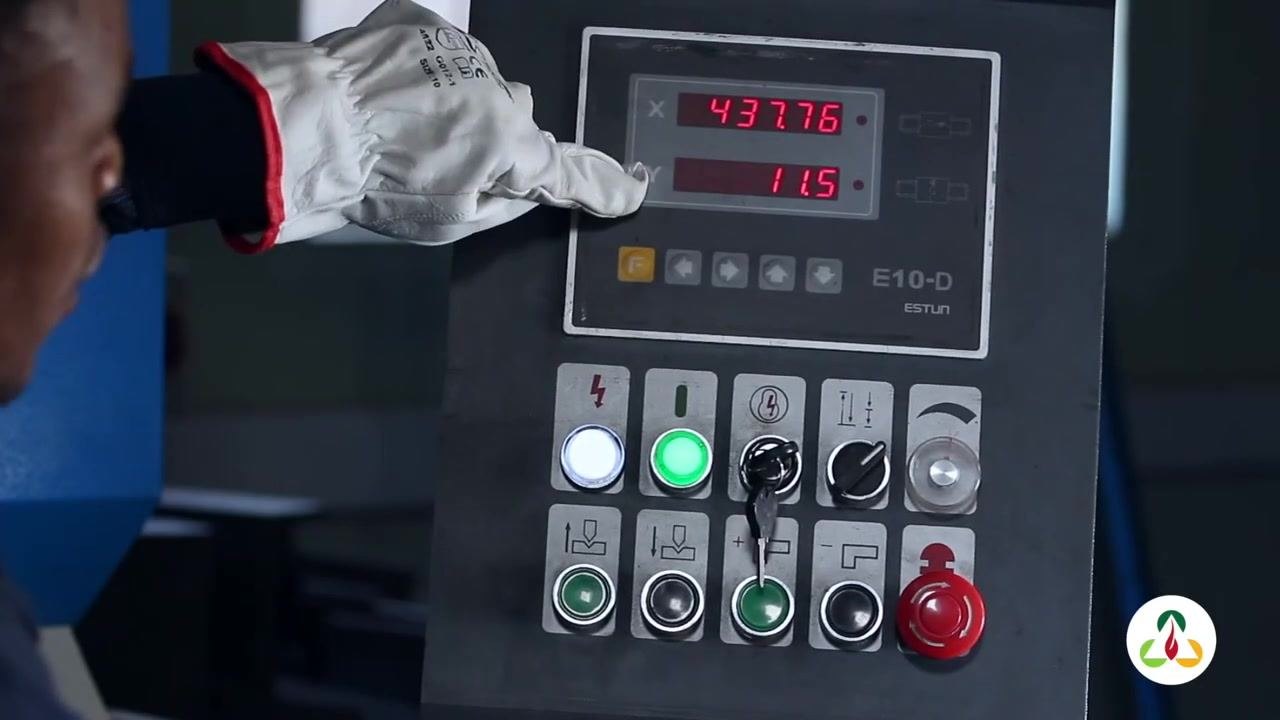
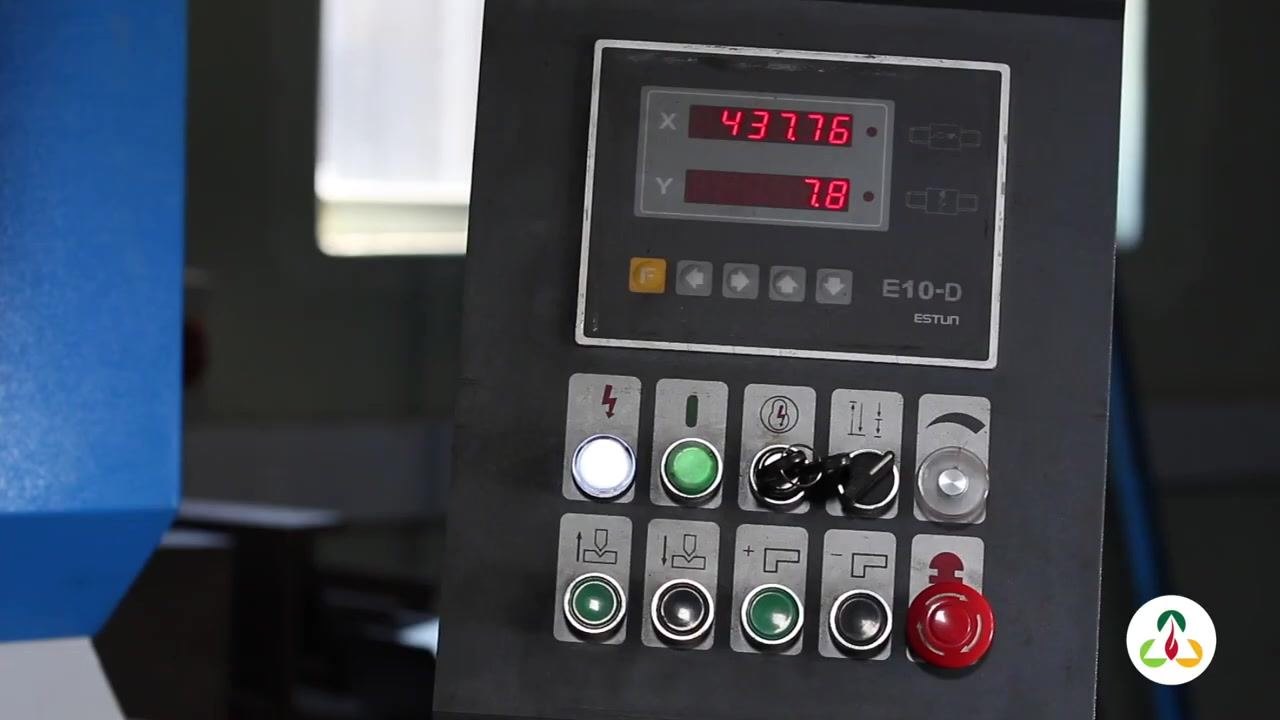
Switch on the hydraulic press brake and locate the main control panel, labeled E10-D ESTUN.
Review the control panel display
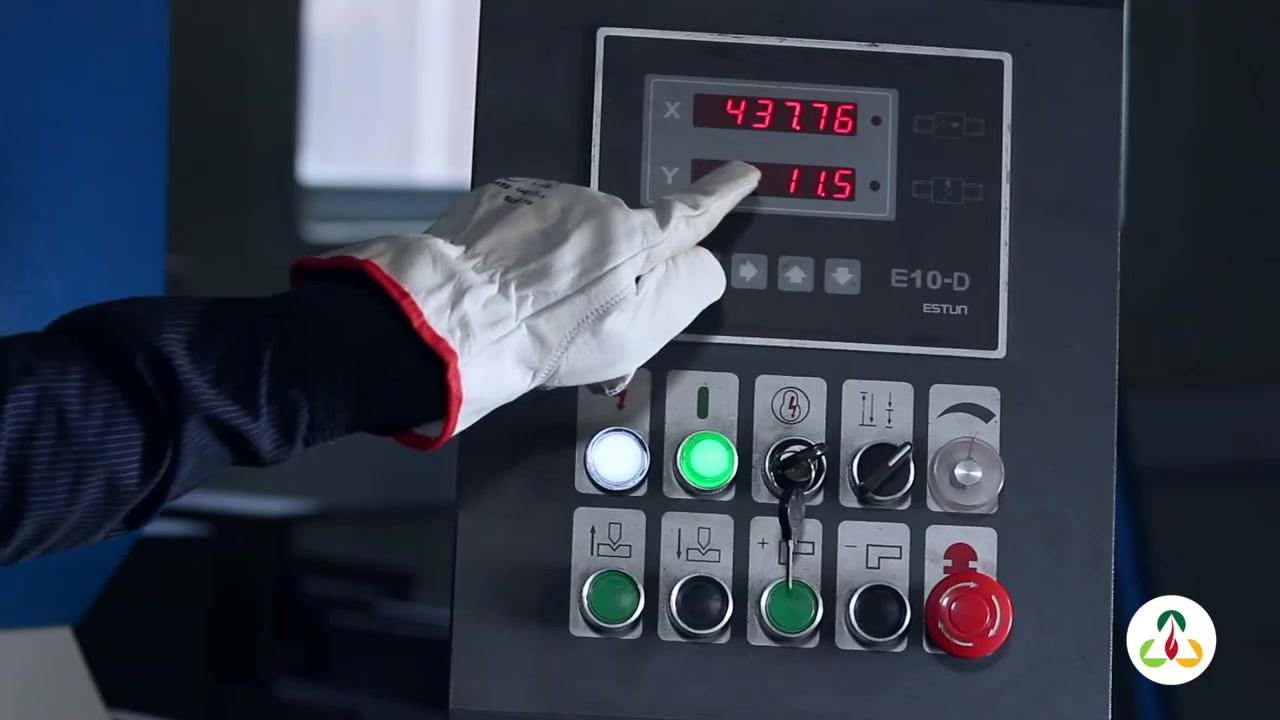
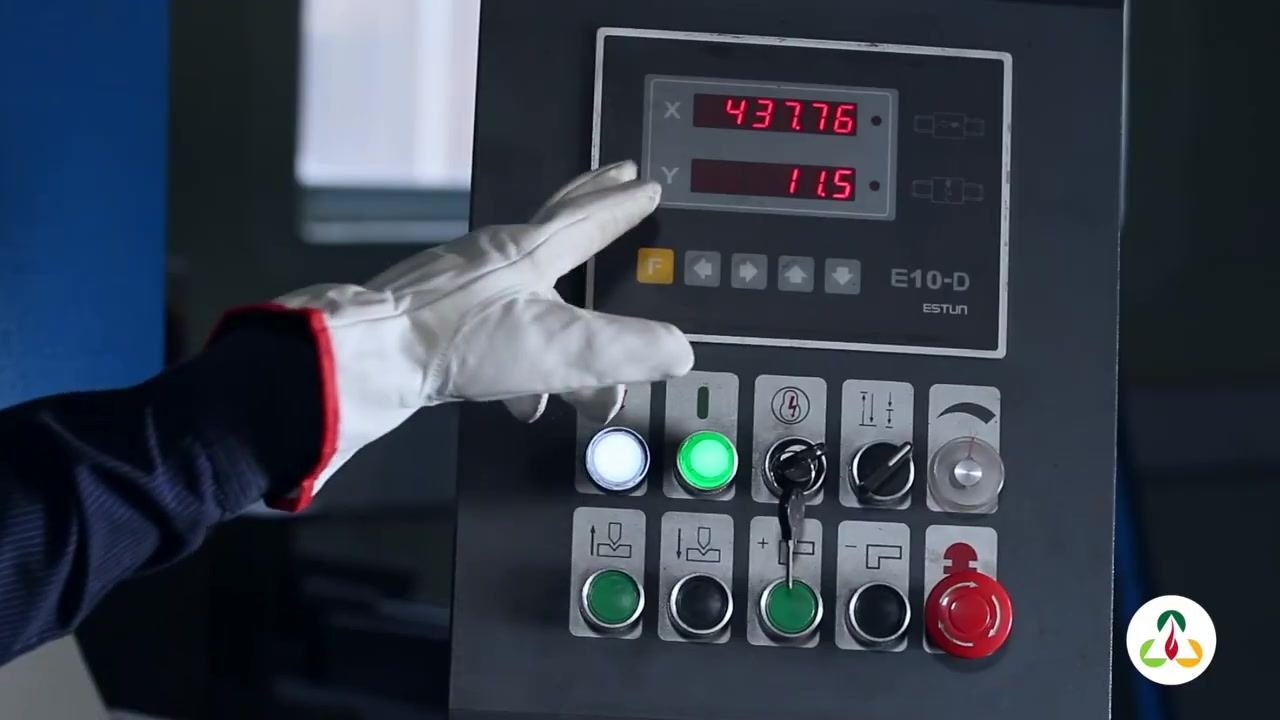
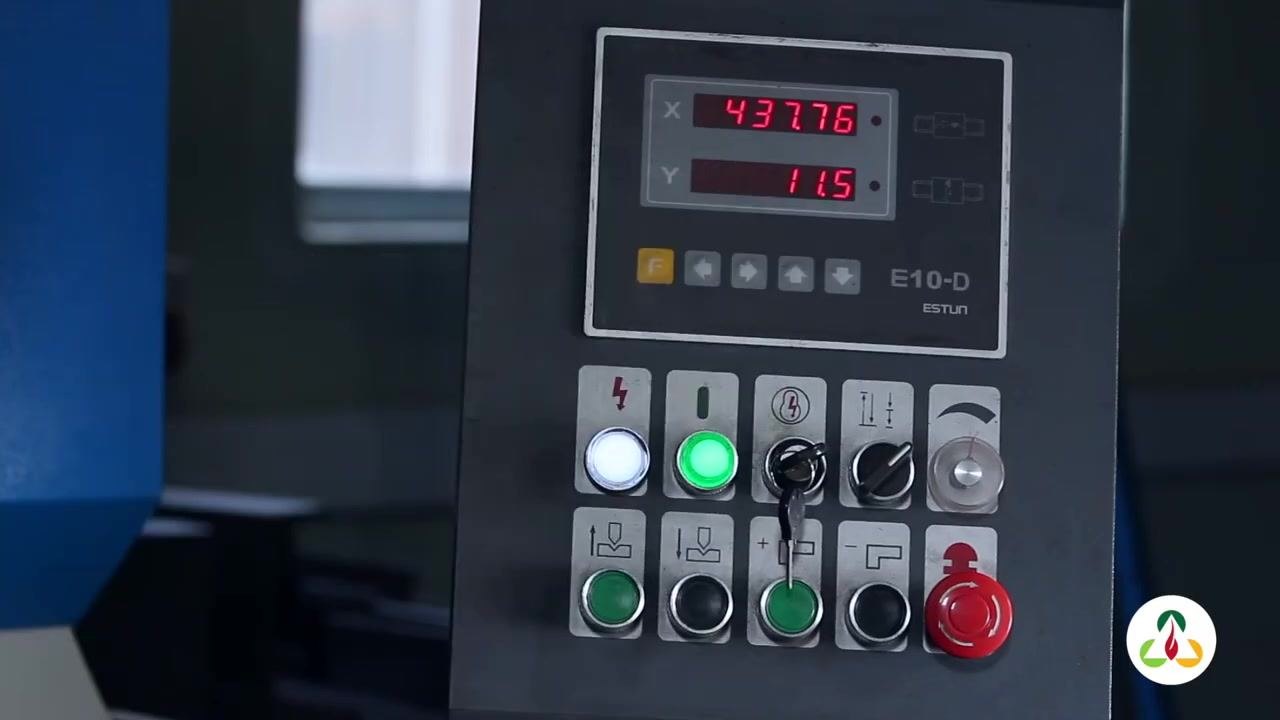
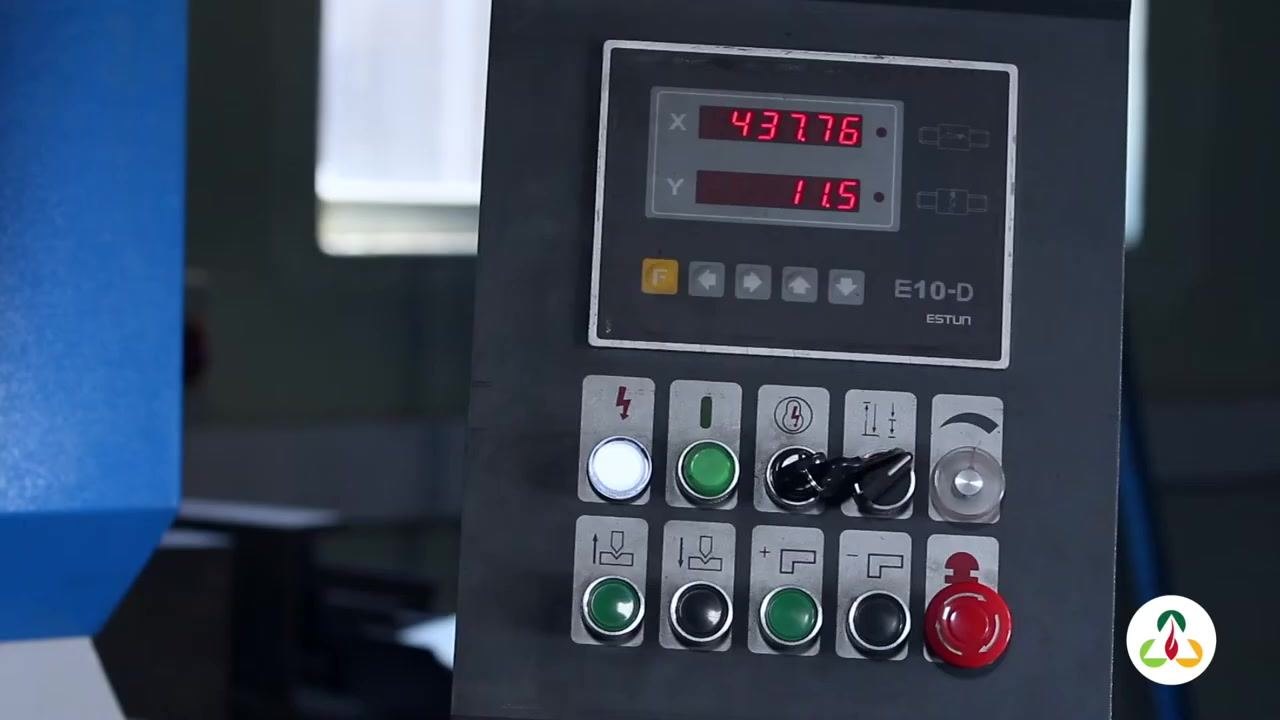
The control panel displays an X value and a Y value. For this operation, you will focus primarily on the Y value. The panel also includes buttons for power, operation modes, and emergency stop.
After starting the machine, the display shows the initial values: X = 437.76 and Y = 11.5.
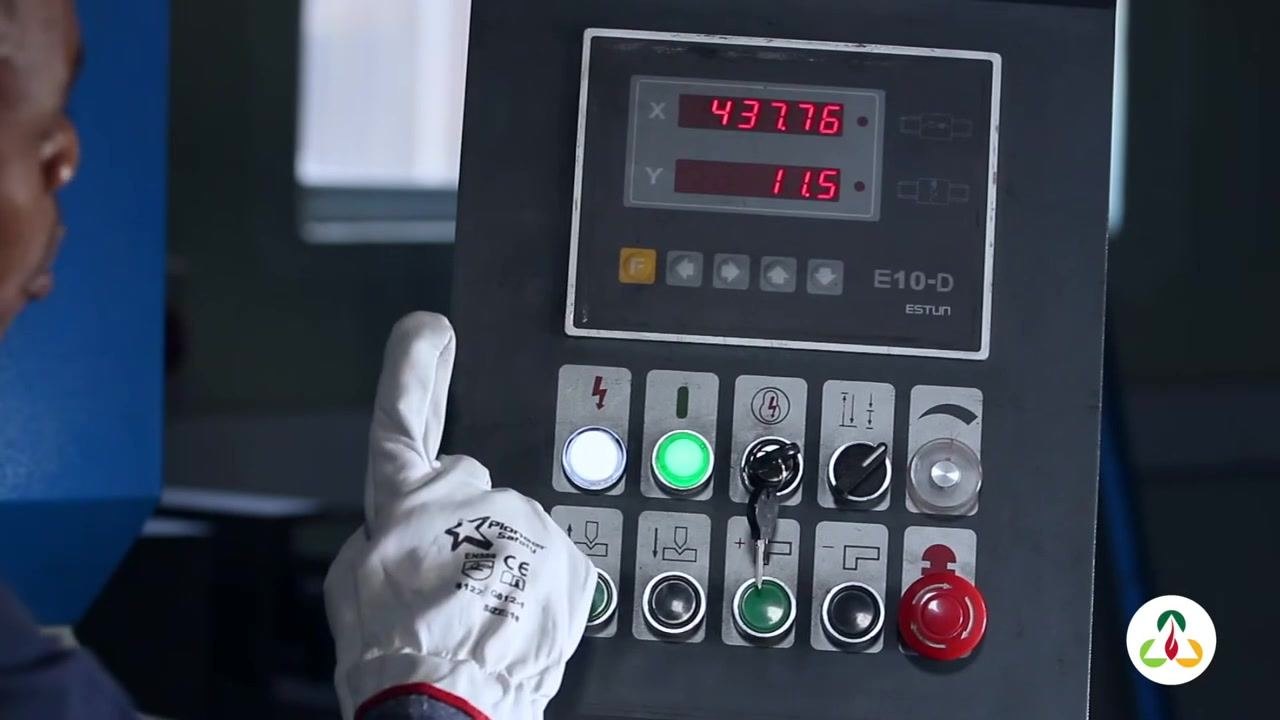
Adjust the Y value using the up arrow
Press the button with the upward arrow to increase the Y value. As you press the button, the value increments — for example, from 11.5 to 12.
Confirm the display is updating
Confirm that the numbers on the display change as expected each time you adjust the Y value.
Note: Always follow all safety protocols and double-check your settings before proceeding with the bending operation.
Understand the pressure adjustment controls
Press the button with the upward arrow to reduce pressure on the machine, and press the button with the downward arrow to increase pressure. Increasing pressure applies more force to the plate during bending, while reducing pressure applies less force.
Set the Y value for a radius shape
For a radius shape, adjust the Y value so that it falls between 11 and 12. Always check the digital display to confirm the current value.
Verify the Y value on the display
Confirm the display reading matches the required radius range before continuing. The panel should show a value such as Y = 11.5.
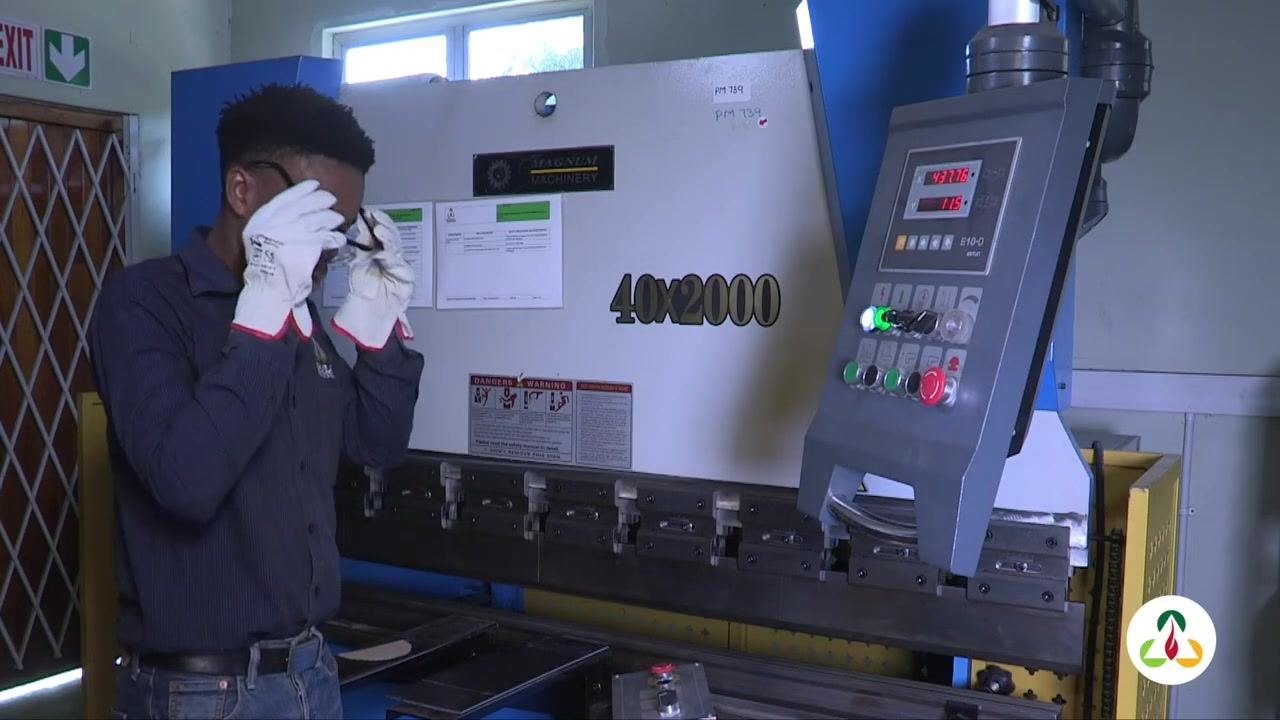
Confirm your safety glasses are on
Before operating the machine, double-check that you are wearing your safety glasses. This mandatory step protects your eyes from debris or accidents during bending.
Confirm the panel settings are stable
Check that the control panel display is holding steady with all indicator lights on before you handle the plate.
Put on safety glasses
If not already worn, put on your safety glasses in front of the press brake before handling the plate.
Position the plate on the press brake bed
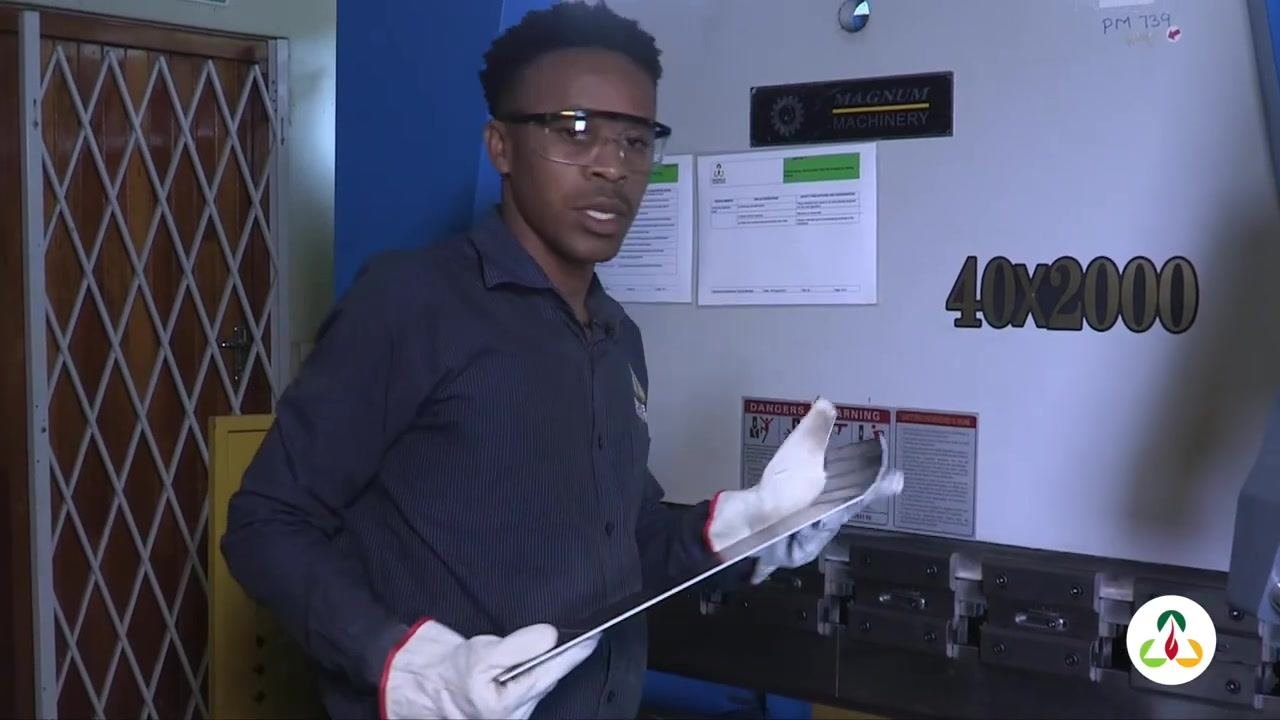
Place the marked metal plate securely on the press brake bed, aligned according to the required radius bend. Hold the plate firmly with both hands, keeping your fingers clear of the bending area.
Hold the plate steady
Continue holding the plate firmly in place on the bed, keeping it aligned with the bend line.
Confirm final plate alignment before bending
Confirm the plate remains correctly positioned and securely held before activating the machine.
Form the radius shape and inspect the result
Activate the press brake according to the machine's operating procedure and monitor the bending process to ensure the plate forms to the correct radius. Once bending is complete, carefully remove the plate and visually inspect it to confirm it matches the intended radius shape.
Note: Always follow all safety protocols, confirm your settings before each operation, and inspect your workpiece after forming. If the shape does not match the template, repeat the adjustment and bending process as needed.
Verify the radius against the template
Hold the finished metal plate up to the paper template to check that the bend matches the desired radius. Ensure the curve of the plate aligns precisely with the template for quality control.
Adjust the machine settings for a square shape
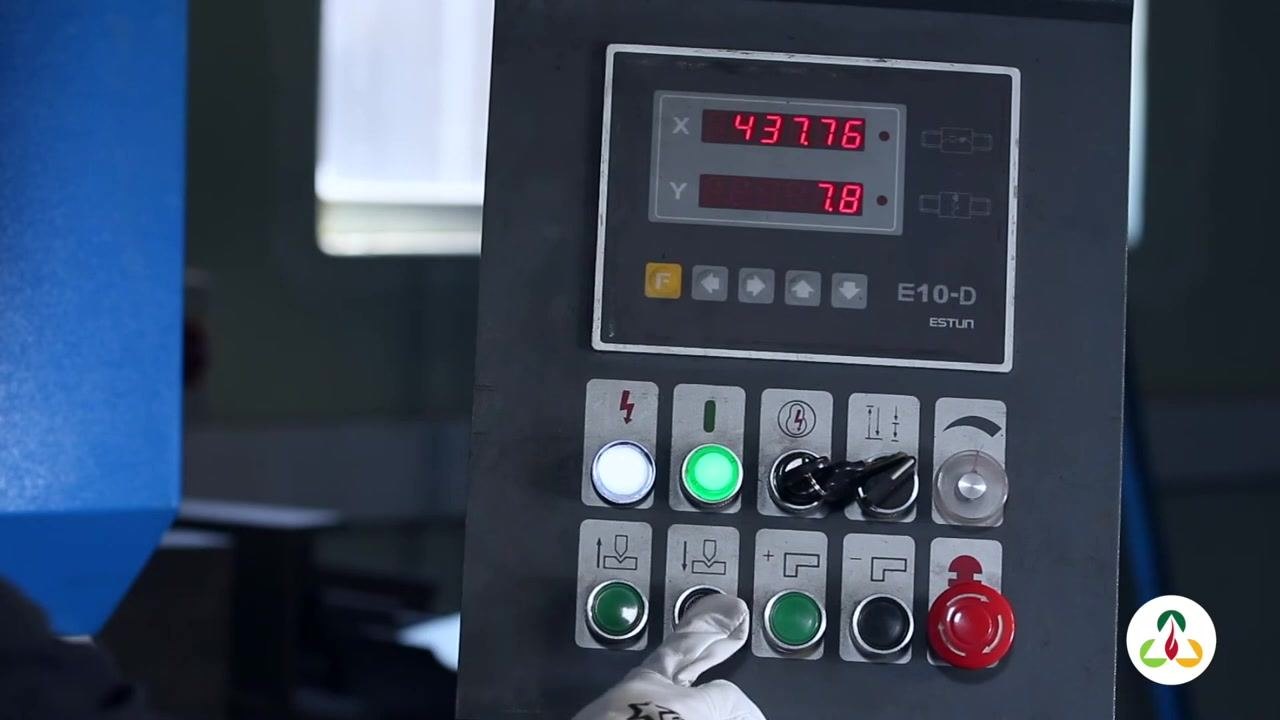
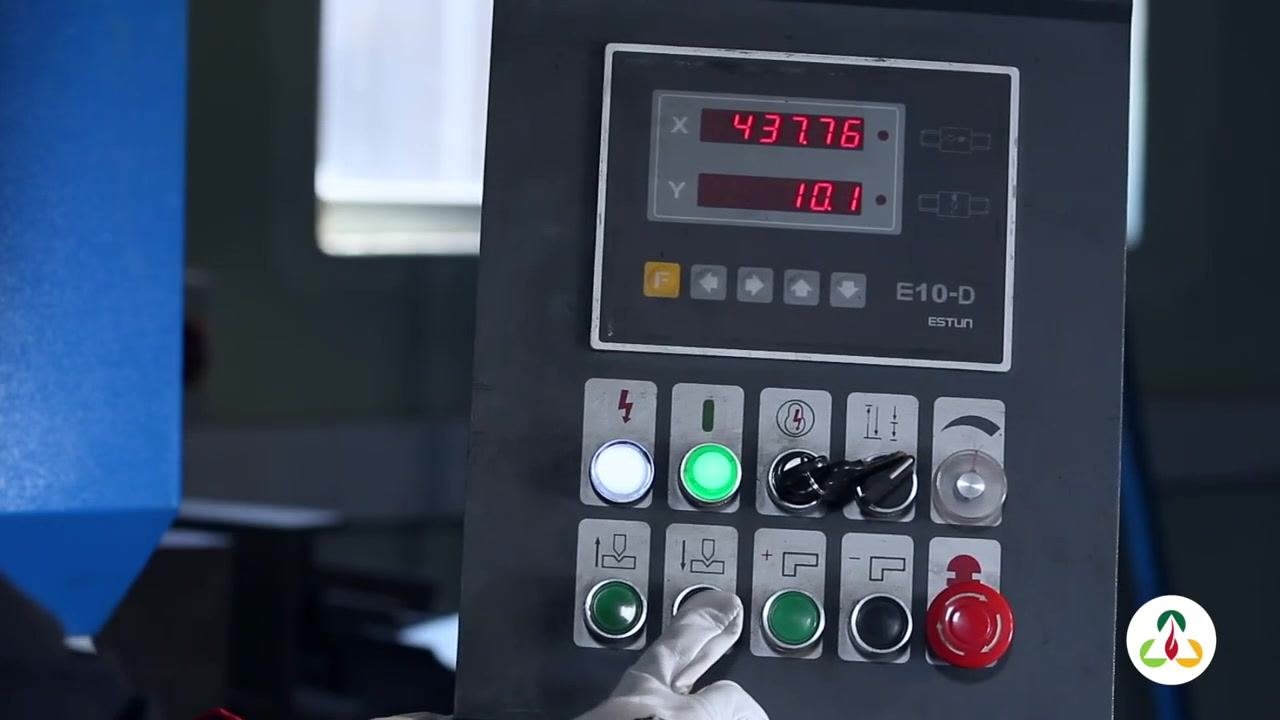
Identify the section of the plate marked for the square bend, and switch the machine back on if it was turned off. On the E10-D ESTUN control panel, press the button with the downward arrow to increase pressure and lower the Y value. As you press the button, the display value decreases from 11.5 downward — the lower the Y value, the greater the pressure applied to the plate. Continue pressing until the Y value is between 6.5 and 8.5, depending on the thickness of the plate.
Position the plate for the square bend
Place the plate securely on the press brake bed at the designated line for the square bend, aligning it with the required bend location. Hold the plate firmly with both hands, keeping your fingers clear of the bending area.
Before proceeding, confirm the following: - The Y value is within the correct range (6.5 to 8.5) for a square shape - You are wearing safety glasses and gloves - The plate is properly aligned and securely held
Form the square shape
Activate the press brake according to the machine's operating procedure and monitor the bending process to ensure the plate forms to the correct square shape.
Note: Always use the paper template to verify the accuracy of your bends, adjust the pressure settings as needed for different shapes, and follow all safety protocols throughout the process. If the square shape does not match the template, repeat the adjustment and bending process as necessary.
Review the completed bends
Visually inspect the metal plate to confirm that both the radius shape and the square shape have been successfully formed and match the required specifications and templates.
Switch off the machine
After completing all bending operations, locate the power switch on the control panel and press it to turn off the machine. Confirm all indicator lights go off and that the machine is fully powered down before leaving the work area.
Shutdown and verification
- Double-check that all tools and materials are safely removed from the machine bed.
- Clean the work area and return any templates or measuring tools to their designated storage locations.
- Keep your safety glasses and gloves on during cleanup.
- Confirm the finished plate shows both a correctly formed radius shape and a correctly formed square shape, matching the paper template in each case.
What's next
Once you have completed this exercise, acknowledge the practical session and prepare for your next training session or review as instructed by your supervisor or trainer. For additional training, resources, or support on how to operate a press brake, contact or visit the Shukela Training Centre.
Note: - Always switch off the machine after use to ensure safety. - Maintain a clean and organized workspace. - Refer to your training center for further guidance or advanced modules.
Generation details: cost, quality tiers
Docsie billed 3,000 credits ($2.10) to analyze this 6-minute video at standard quality. The rewrite, template fill and Word/PDF exports were included. The same video at each quality tier:
| Quality | Frames sampled | Credits | Approx. cost |
|---|---|---|---|
| Draft | every 16-30 s | 1,500 | $1.05 |
| Standard (this guide) | every 8-15 s | 3,000 | $2.10 |
| Detailed | every 4-7 s | 6,000 | $4.20 |
| Ultra | every 1-3 s | 12,000 | $8.40 |
Credits priced at $0.70 per 1,000; plans include a monthly allowance. Enterprise customers on on-premise or bring-your-own-model deployments run this on their own inference and pay no per-video credits.
Generated by Docsie Video-to-Docs on 2026-09-14 from a 5-minute video. Screenshots are frames from the source video and belong to their creator, Shukela Training, whose original is embedded above. If you own this video and want the guide removed or credited differently, contact us and we will act within one business day.