
How to Terminate an Employee in isolved
This guide walks you through how to terminate an employee in isolved, from initiating the off-boarding process to confirming the employee's final terminated status. You'll learn how to complete the termination wizard, process asset returns, remove organization roles, adjust payroll settings, and verify the termination in the employee's summary record.
Video: Offboarding/Terminating an Employee in isolved | Client User Guide by Simco Media. All credit for the demonstration goes to the creator; watch the original on YouTube. The written guide below was generated from this video by Docsie. Creator? Request a change or removal.
This guide walks you through how to terminate an employee in isolved, from initiating the off-boarding process to confirming the employee's final terminated status. You'll learn how to complete the termination wizard, process asset returns, remove organization roles, adjust payroll settings, and verify the termination in the employee's summary record.
Prerequisites
- You must be logged into the isolved platform with access to Employee Admin Tools.
- Have the employee's termination date, termination reason, and any relevant offboarding documentation ready before you begin.
Access the dashboard
Log in to isolved and access the dashboard
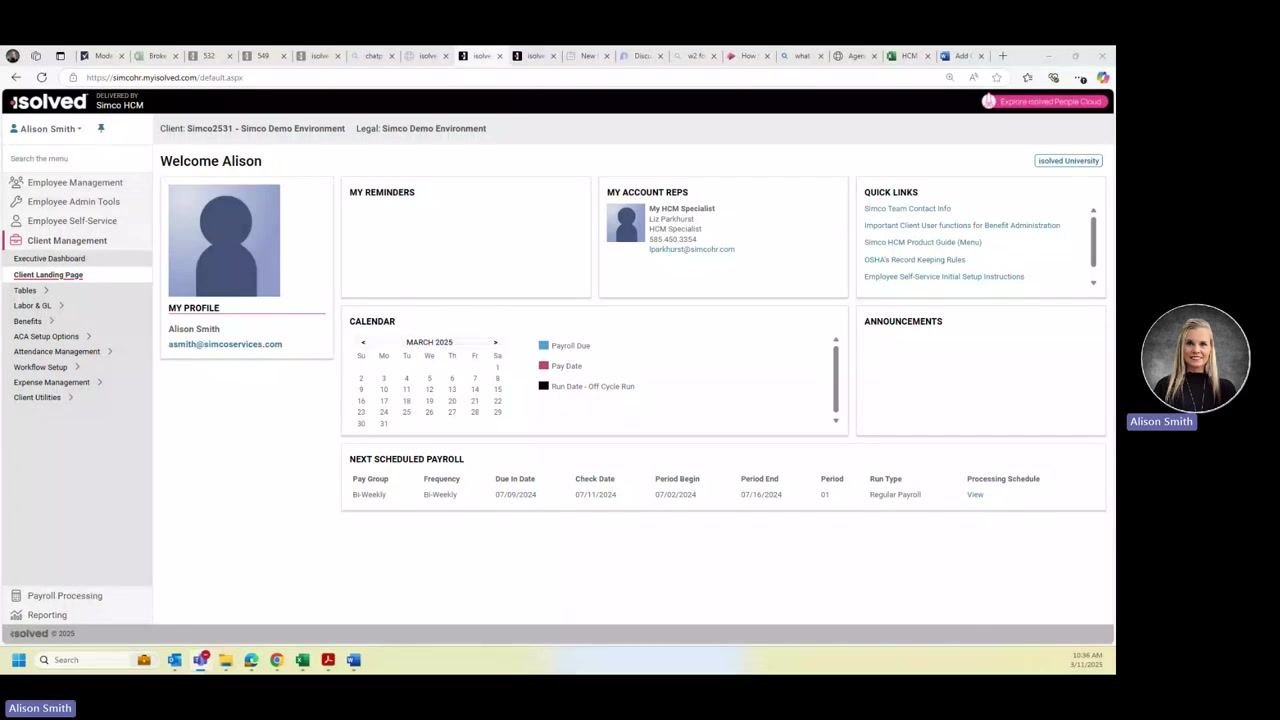
Make sure you are logged into the isolved platform and on the Welcome dashboard. From here, you can view your profile, reminders, account reps, calendar, quick links, and announcements.
Navigate to employee admin tools
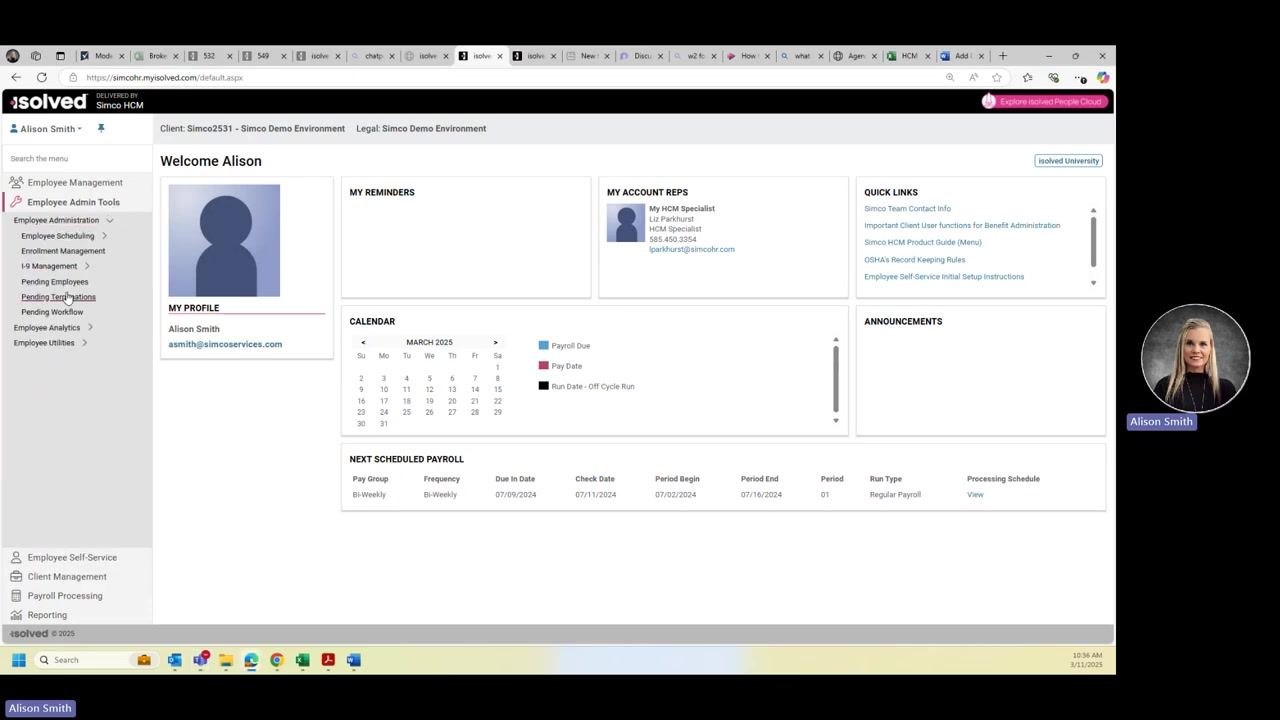
On the left navigation menu, click Employee Admin Tools, then expand Employee Administration. Click Pending Terminations to open the termination section.
Initiate off-boarding
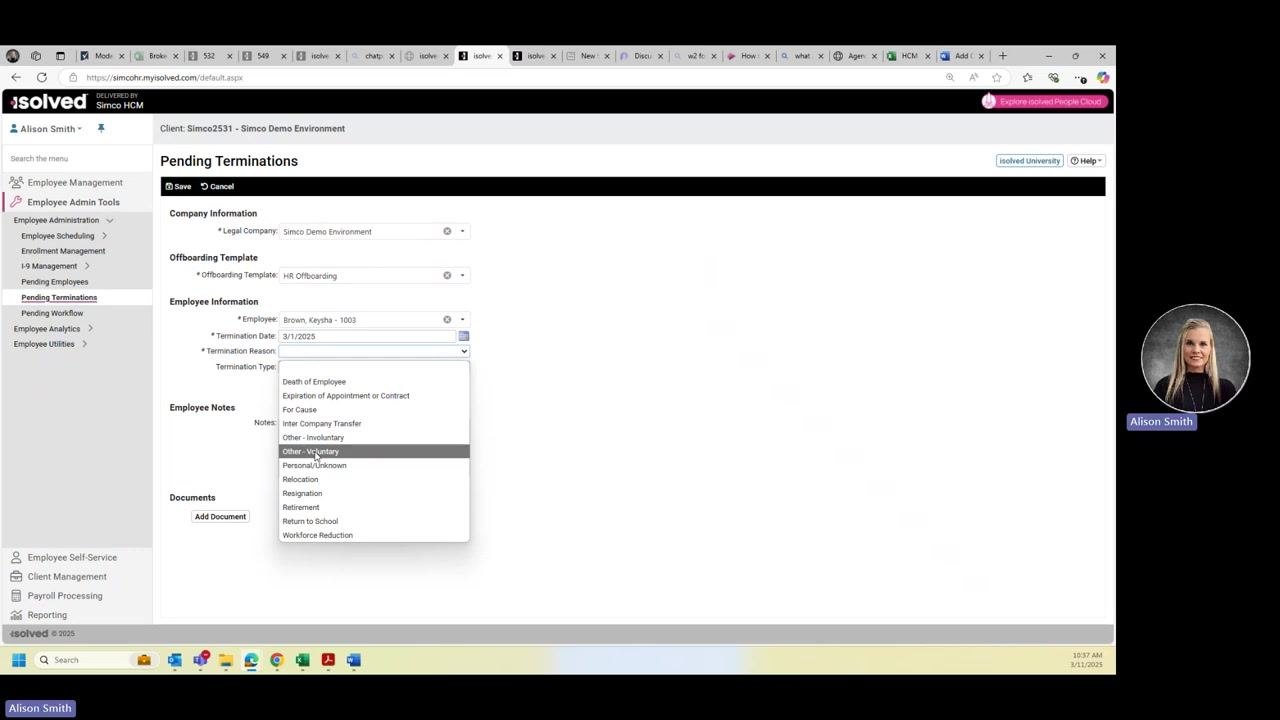
In the Pending Terminations section, click Initiate Offboarding. The Pending Terminations form appears, requiring you to fill out several fields.
Complete required termination details
Under Company Information, verify the Legal Company (for example, Simco Demo Environment). Under Offboarding Template, select the appropriate template (for example, HR Offboarding).
Under Employee Information, complete the following:
- Select the Employee to be terminated (for example, Brown, Keysha - 1003).
- Enter the Termination Date (for example, 3/1/2025).
- Select the Termination Reason from the dropdown (for example, Other - Voluntary, Death of Employee, For Cause, etc.).
- Optionally, check the box if the employee is Eligible for Rehire.
If applicable, add any Employee Notes in the Notes field. If you have documentation to attach, click Add Document.
Save the termination record
Once you've filled out all required fields (marked with an asterisk), click Save at the top of the form.
Edit and review the pending termination
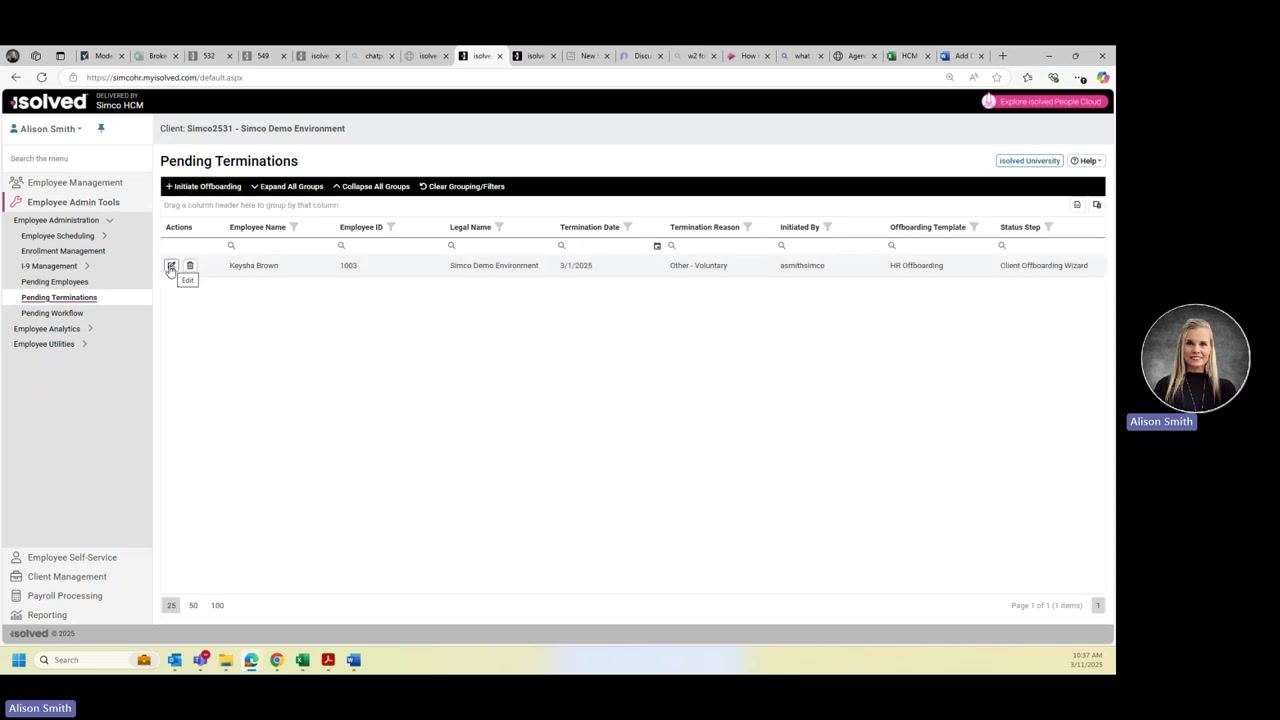
In the Pending Terminations list, locate the employee you just entered (for example, Keysha Brown). Click the Edit button (pencil icon) next to the employee's name to review or update the record.
Process asset return
Review and record asset returns
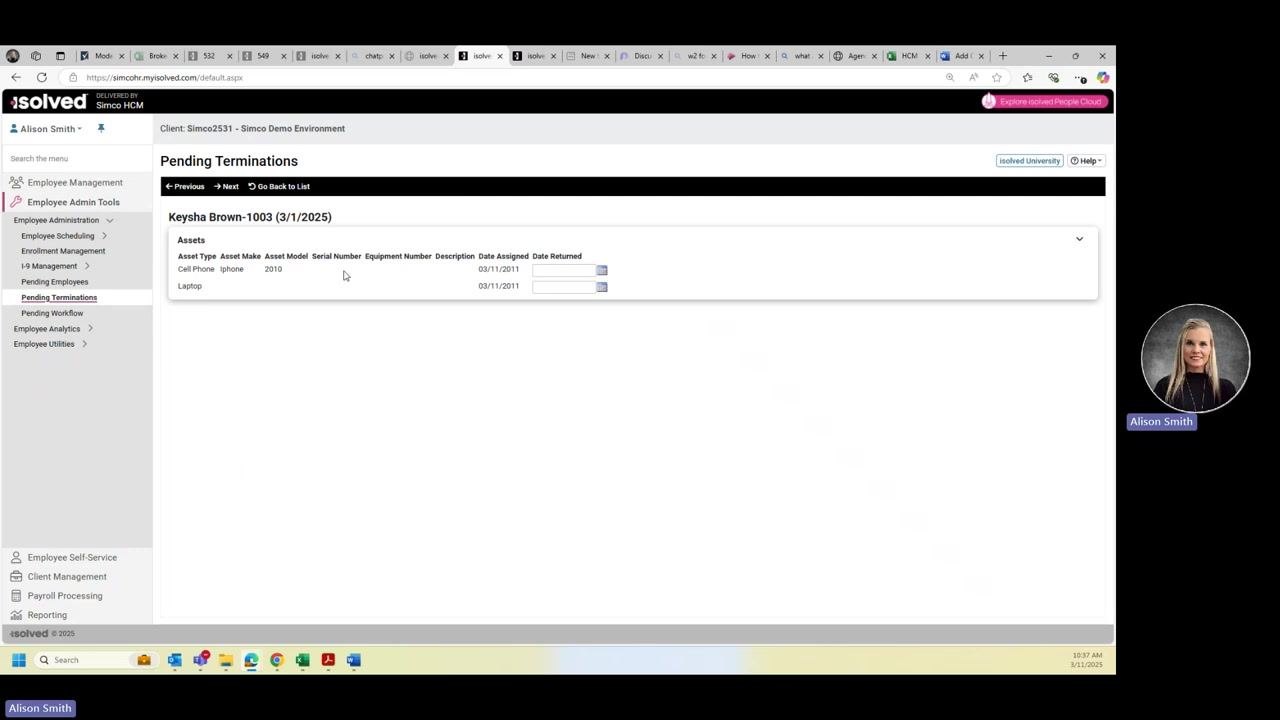
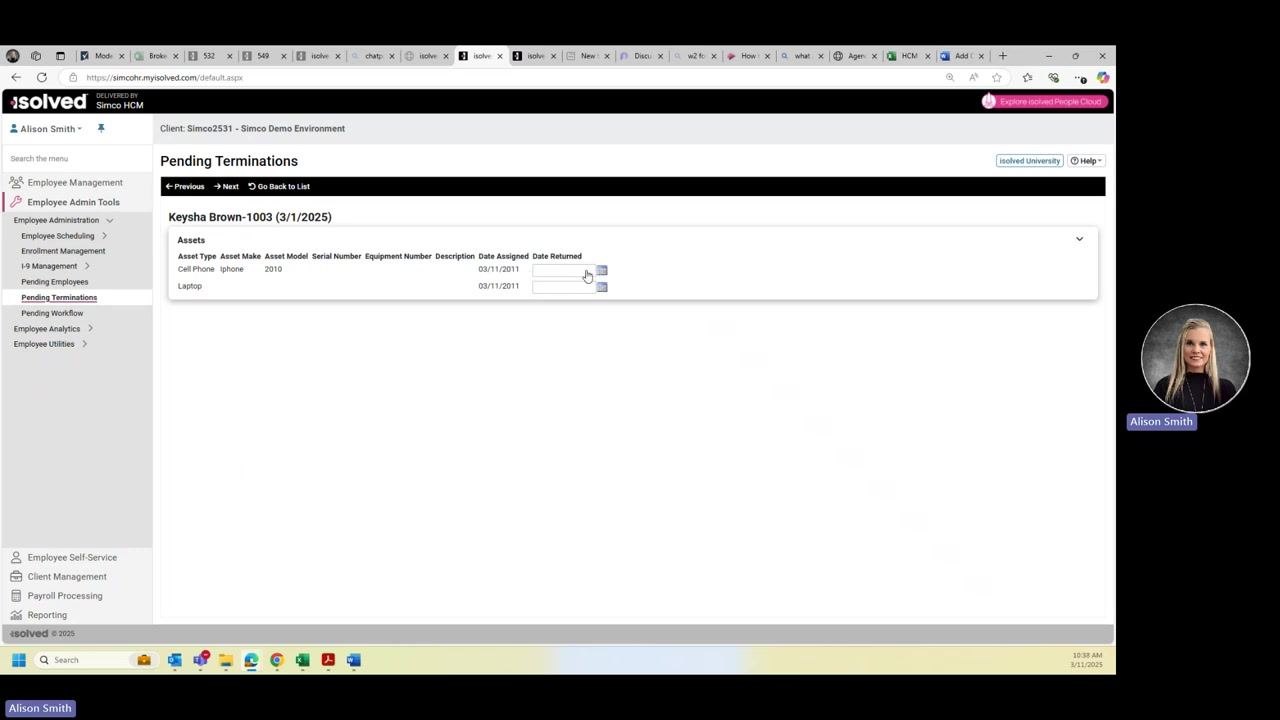
Click Next to proceed to the asset return section for the selected employee. Review the list of company assets assigned to the employee, for example:
- Cell Phone (Make: iPhone, Model: 2010, Date Assigned: 03/11/2011)
- Laptop (Date Assigned: 03/11/2011)
For each asset, enter the Date Returned once the employee returns the item.
Make sure all company assets are accounted for and the return dates are entered. Click Next or Go Back to List as needed to complete the process.
Important: If the employee has benefits, completing this process triggers a COBRA notice. Attach any relevant documentation and add notes as needed for compliance and record-keeping. Always verify all information before saving and finalizing the termination.
Remove organization roles and adjust payroll
Remove organization roles
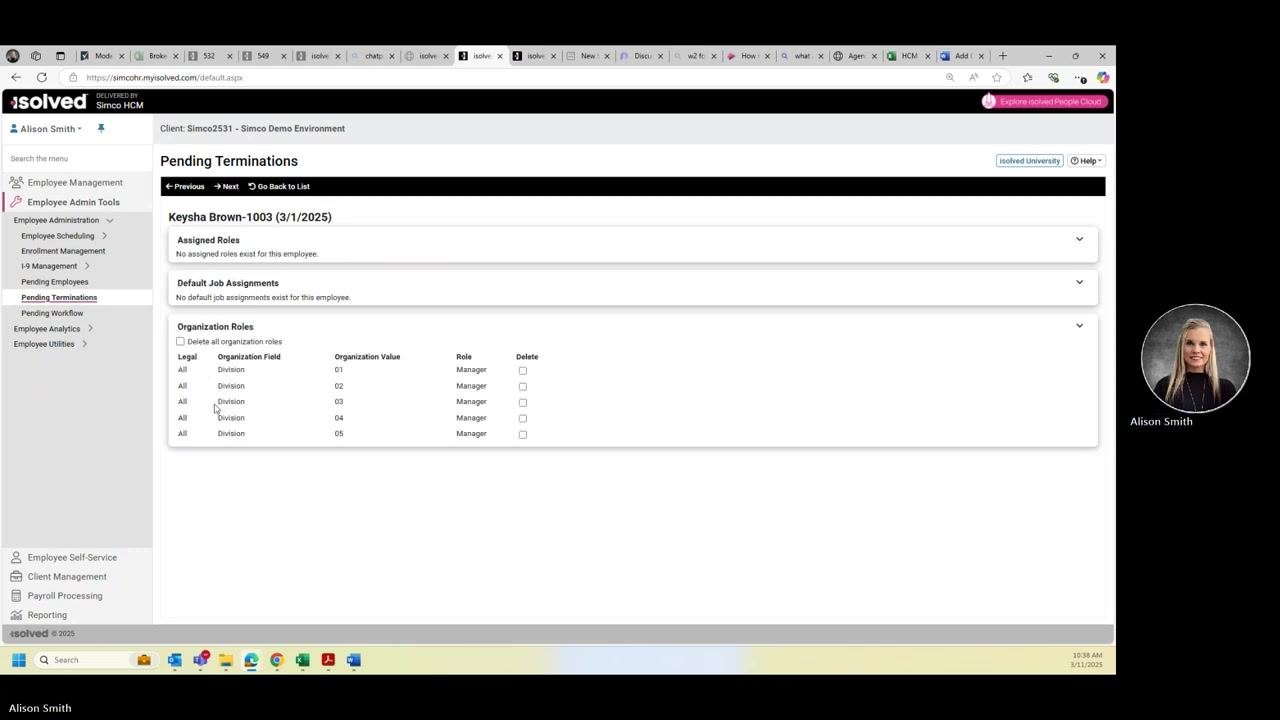
Click Next to move to the Organization Roles section. Review the Assigned Roles and Default Job Assignments for the employee.
Under Organization Roles, you have the option to:
- Check Delete all organization roles to remove all roles at once.
- Individually check the Delete box for specific roles (for example, Manager in Division 01, 02, 03, 04, 05).
Select the appropriate roles to terminate based on the employee's responsibilities, then click Next to continue.
Handle direct deposit and payroll adjustments
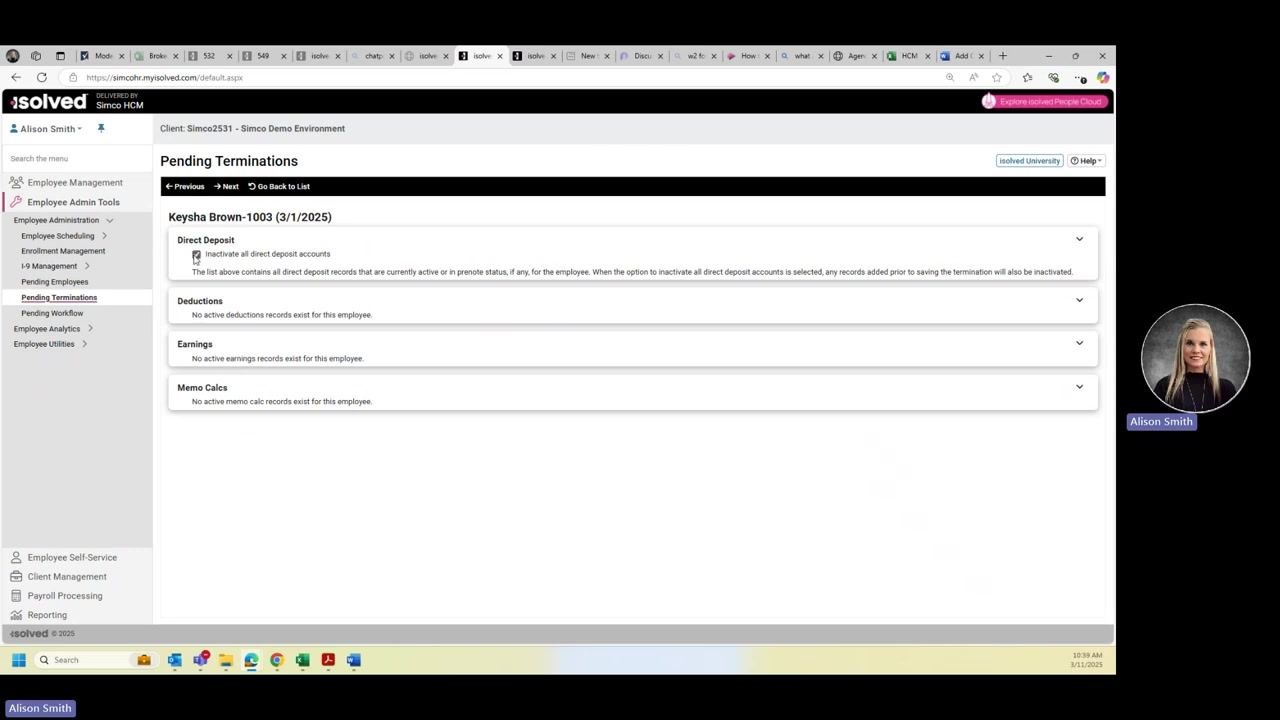
In the Direct Deposit section, if you want to issue a live check instead of a direct deposit (for example, if assets are not returned), check Inactivate all direct deposit accounts. This ensures the employee receives a live check for their final pay.
Review the Deductions, Earnings, and Memo Calcs sections for any active records. No action is needed if none exist.
Review performance reviews and miscellaneous fields
Click Next to proceed to the Pending Performance Reviews section. Confirm that there are no pending performance reviews for the employee, or address any that appear. Review any other miscellaneous fields that may be applicable and complete them as needed.
Note: If the employee has garnishments, you may inactivate them at this stage. Always ensure all fields are reviewed and completed according to your organization's off-boarding policies, and continue through any additional steps or sections that appear based on your company's isolved configuration.
Finalize the employee termination
Run the termination audit
Navigate to the Pending Terminations section and locate the employee listed for termination (for example, Keysha Brown-1003 with a termination date of 3/1/2025). Click Run Audit to begin the audit process.
The audit checks for conflicts or incomplete data in the termination wizard. Resolve any conflicts if prompted; otherwise, proceed if none are found.
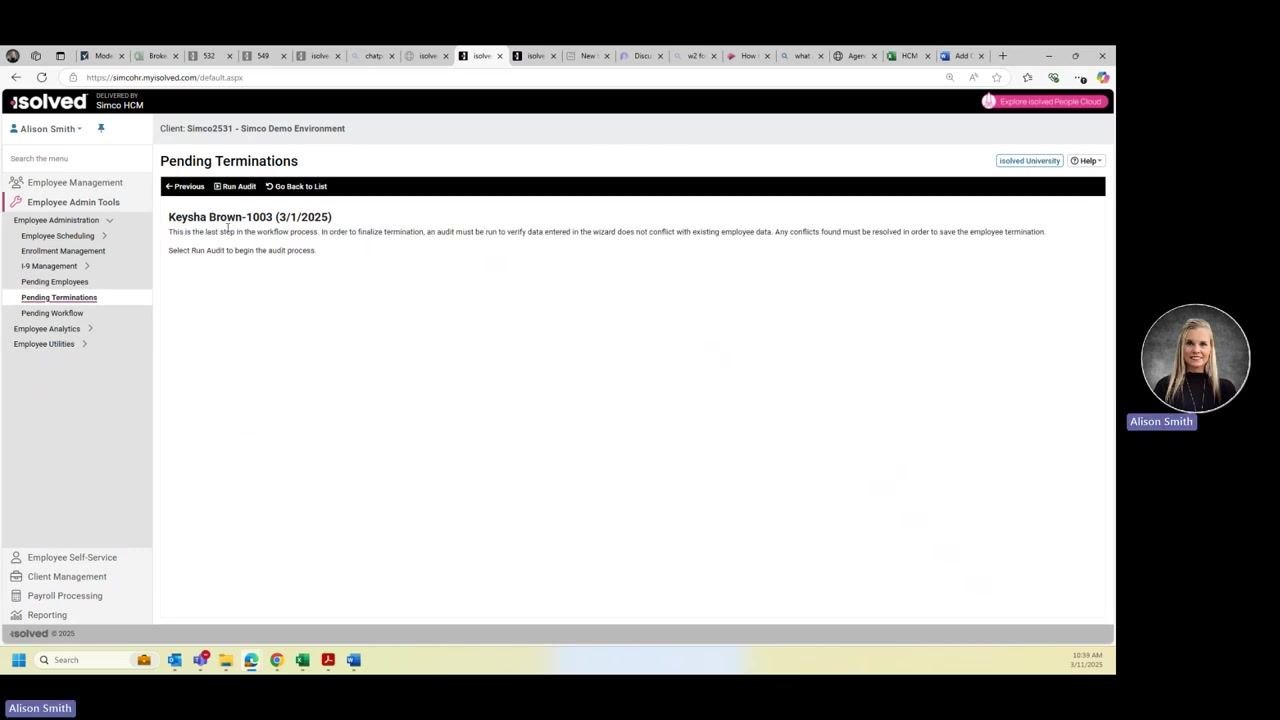
Save and complete the termination wizard
Once the audit confirms there are no conflicts, click Save to finalize the termination. The system returns you to the summary or main Pending Terminations list. Confirm that there are no remaining records for the employee in the Pending Terminations list.
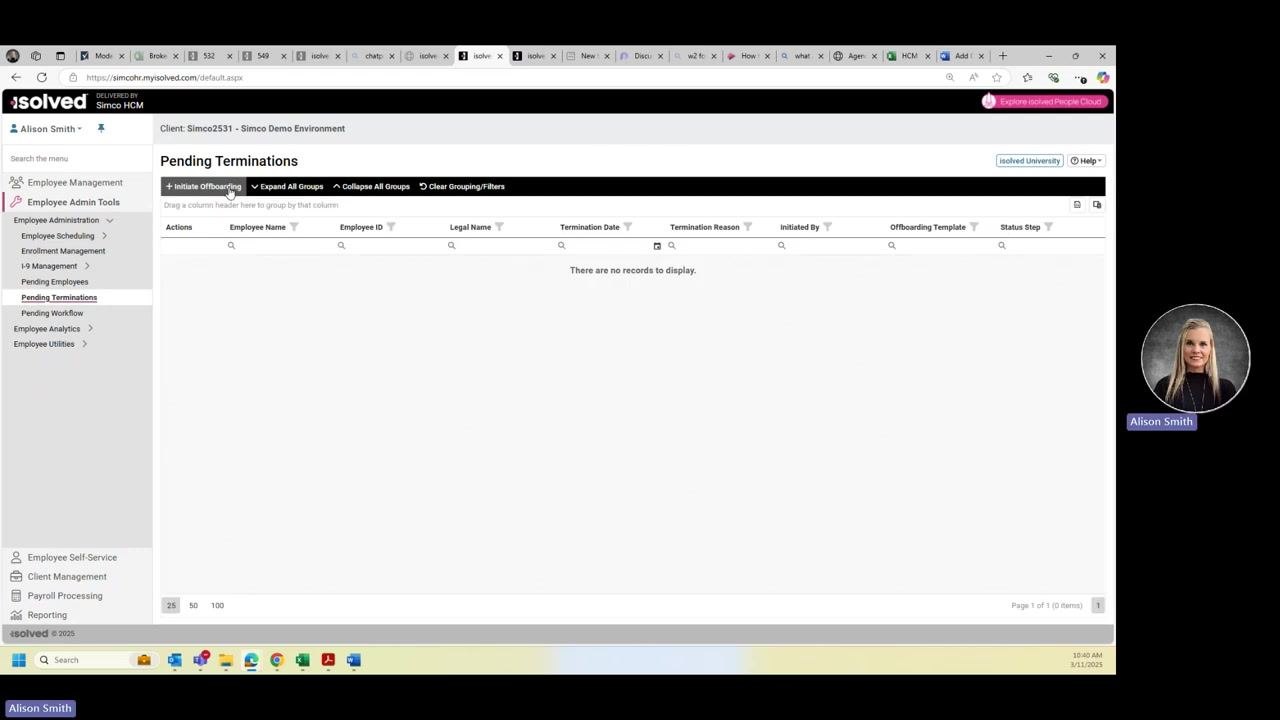
Verify the employee's termination status
Go to the Employee Summary section and use the status filter to select Terminated employees. Confirm that the terminated employee (for example, Keysha Brown) appears in the list with the correct status.
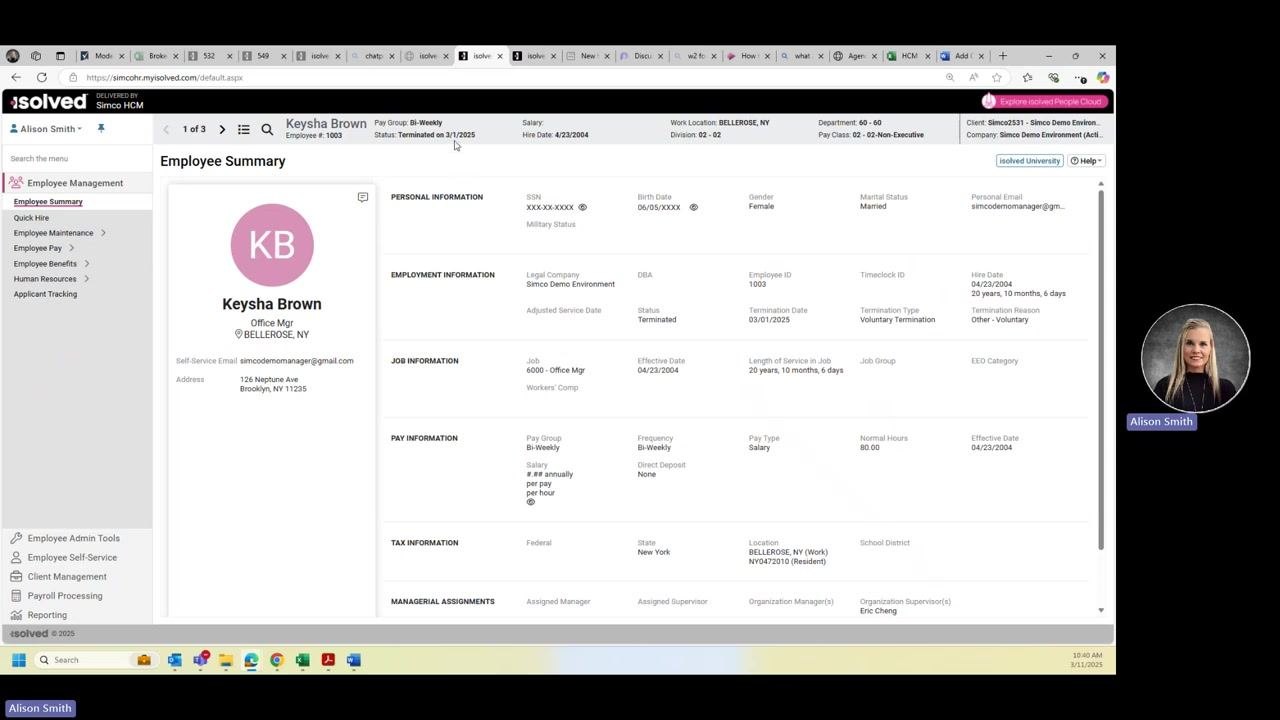
Review the employee summary for the terminated employee
Click the terminated employee's name to open their Employee Summary and verify the following details:
- Status: Terminated
- Termination Date: 03/01/2025
- Termination Type and Reason (for example, Voluntary Termination, Other - Voluntary)
- All other employment, job, pay, and tax information is accurate and reflects the termination.
Summary
The employee is now fully terminated in isolved as of the specified date, with all records, roles, payroll, and status updates complete. By following these steps, you ensure that every aspect of the termination — including asset return, organization roles, payroll, and audit verification — is properly recorded in isolved.
Generation details: cost, quality tiers
Docsie billed 2,500 credits ($1.75) to analyze this 5-minute video at standard quality. The rewrite, template fill and Word/PDF exports were included. The same video at each quality tier:
| Quality | Frames sampled | Credits | Approx. cost |
|---|---|---|---|
| Draft | every 16-30 s | 1,250 | $0.88 |
| Standard (this guide) | every 8-15 s | 2,500 | $1.75 |
| Detailed | every 4-7 s | 5,000 | $3.50 |
| Ultra | every 1-3 s | 10,000 | $7.00 |
Credits priced at $0.70 per 1,000; plans include a monthly allowance. Enterprise customers on on-premise or bring-your-own-model deployments run this on their own inference and pay no per-video credits.
Generated by Docsie Video-to-Docs on 2026-10-12 from a 4-minute video. Screenshots are frames from the source video and belong to their creator, Simco Media, whose original is embedded above. If you own this video and want the guide removed or credited differently, contact us and we will act within one business day.