
How to Request Time Off in isolved
This guide explains how to request time off in isolved People Cloud using both the Classic View and the Adaptive View. You will learn how to submit a new time off request, add optional notes for your manager, and track the status of pending requests through to approval.
Video: Requesting Time Off in isolved (AEE & ESS) | Employee Guide by Simco Media. All credit for the demonstration goes to the creator; watch the original on YouTube. The written guide below was generated from this video by Docsie. Creator? Request a change or removal.
This guide explains how to request time off in isolved People Cloud using both the Classic View and the Adaptive View. You will learn how to submit a new time off request, add optional notes for your manager, and track the status of pending requests through to approval.
Prerequisites
- Access to an isolved People Cloud account with login credentials.
- Knowledge of the absence policy you intend to use (for example, Quarterly PTO or Vacation Time).
Requesting time off in Classic View
Log in to isolved People Cloud
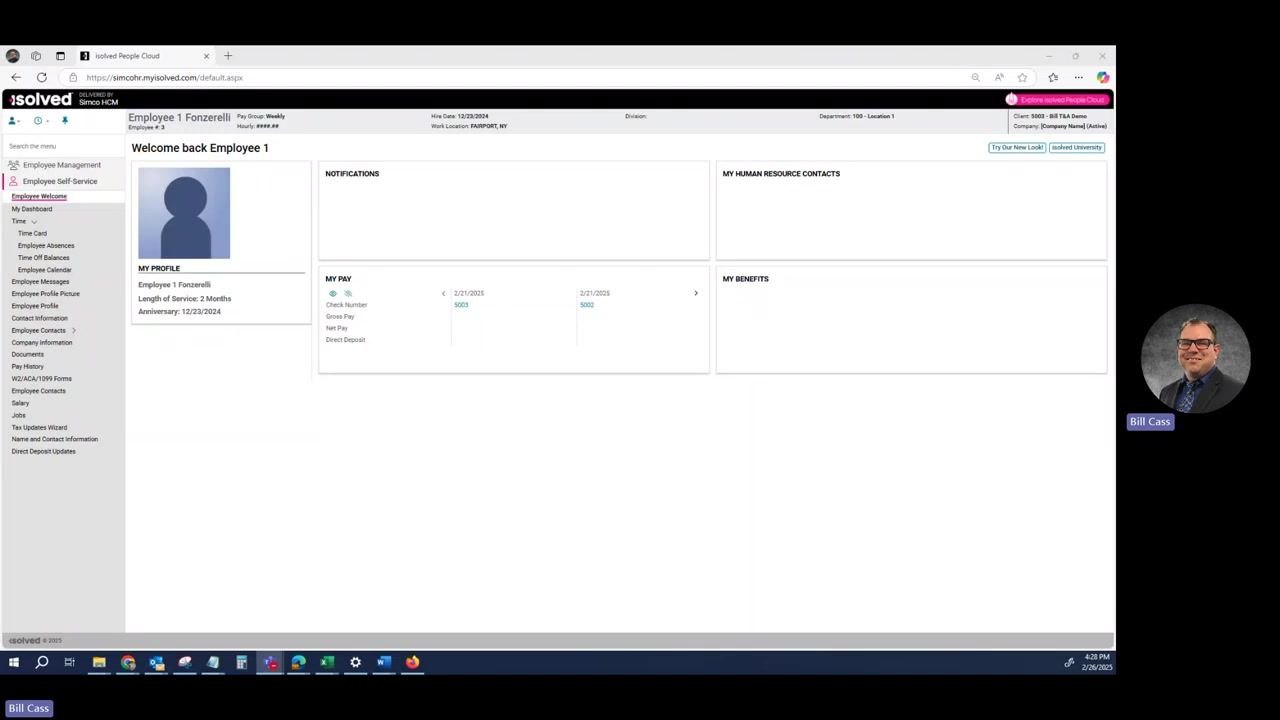
Log in and confirm you have landed on the main dashboard. You should see a welcome message, your profile, pay information, and navigation menus on the left.
Confirm you are in Classic View
Check for the menu bar on the left side of the screen to confirm you are using Classic View. The menu should include options such as Employee Self-Service, Time, Employee Absences, and more.
Open the employee calendar
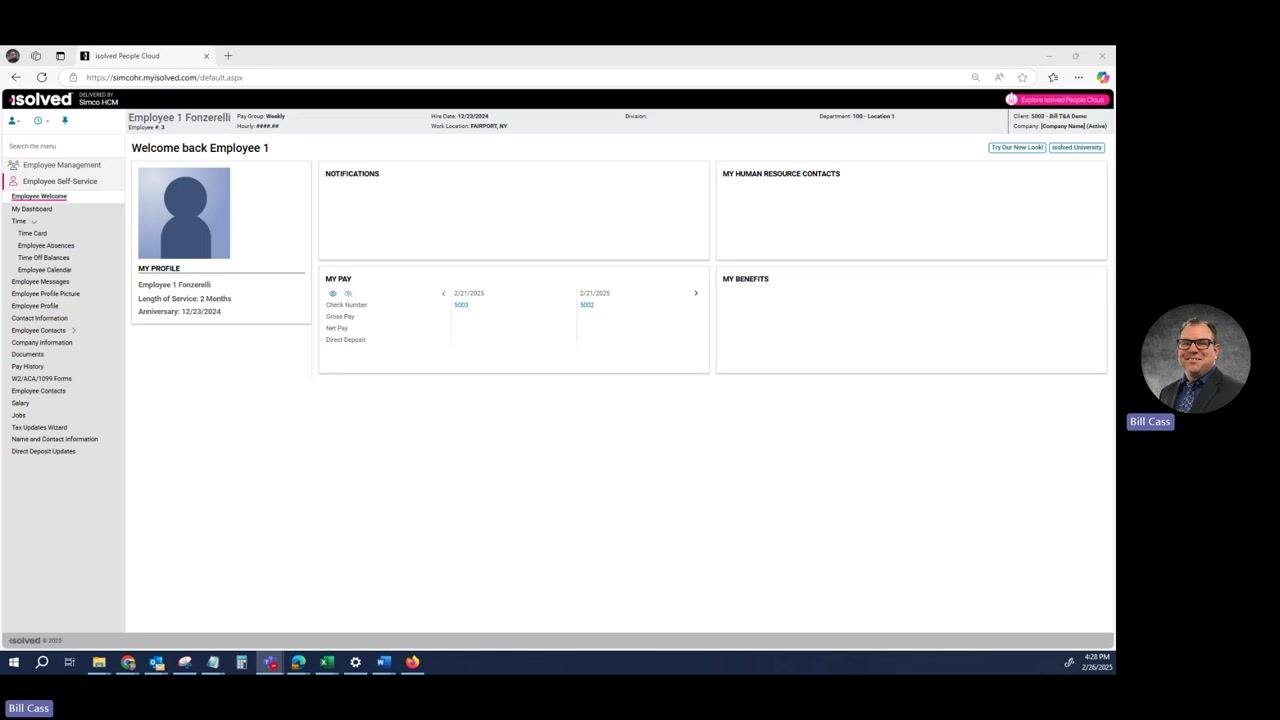
Click Employee Self-Service in the left menu to expand its options, then hover over or select Time to reveal related options.
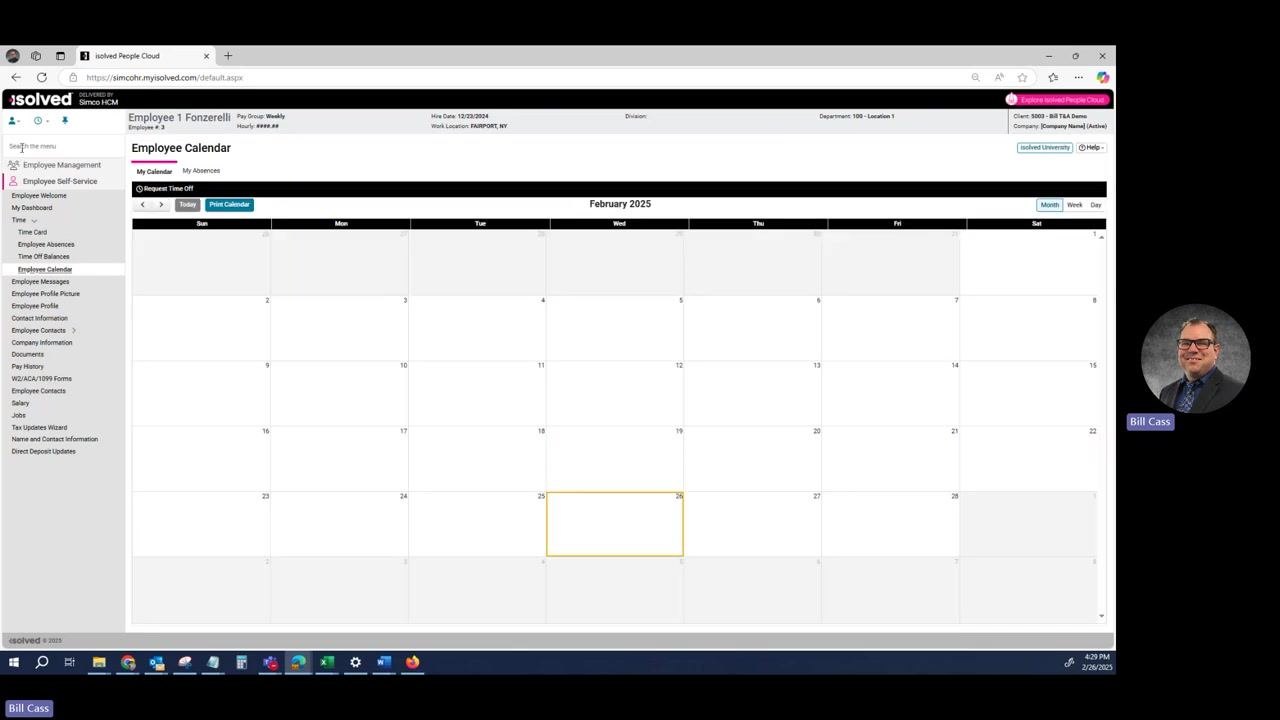
From the expanded menu, select Employee Calendar. The main area displays a calendar view for the current month. You can also use the search bar at the top left to quickly find menu items if needed.
Start a time off request
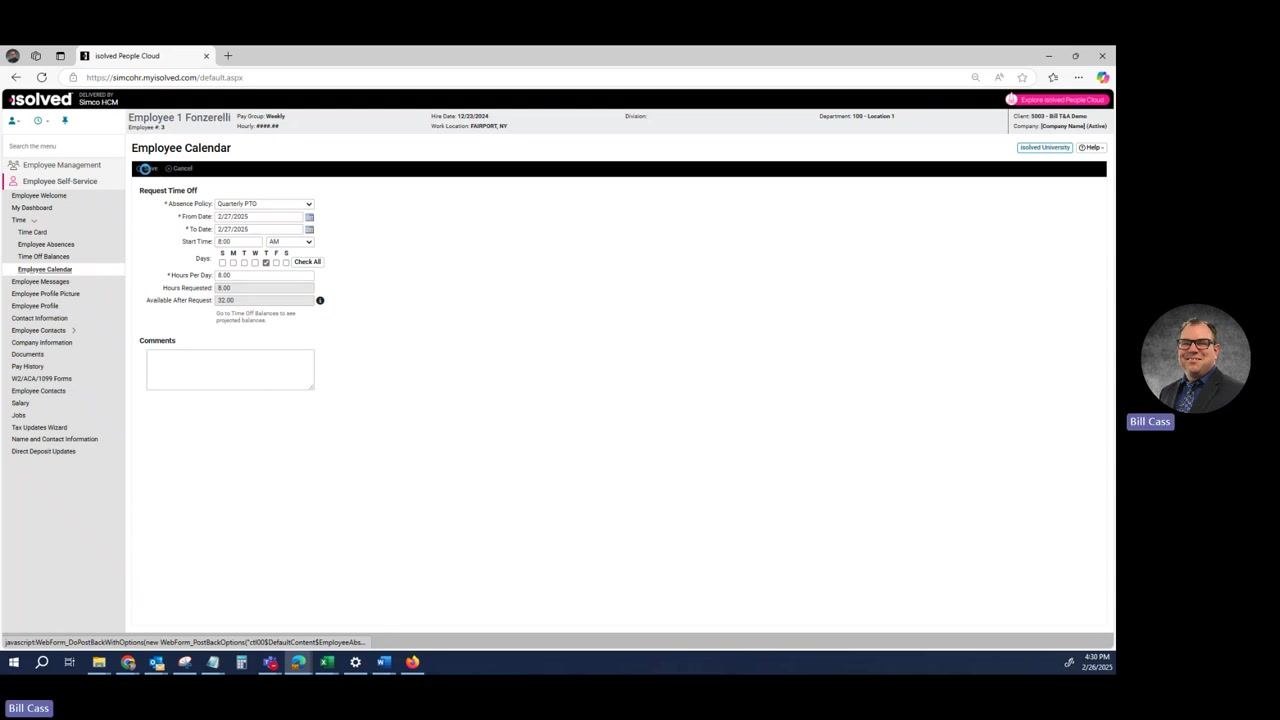
Click the Request Time Off button, typically found above the calendar grid or in the black bar at the top. A Request Time Off form appears on the left side of the screen.
Fill out the time off request form
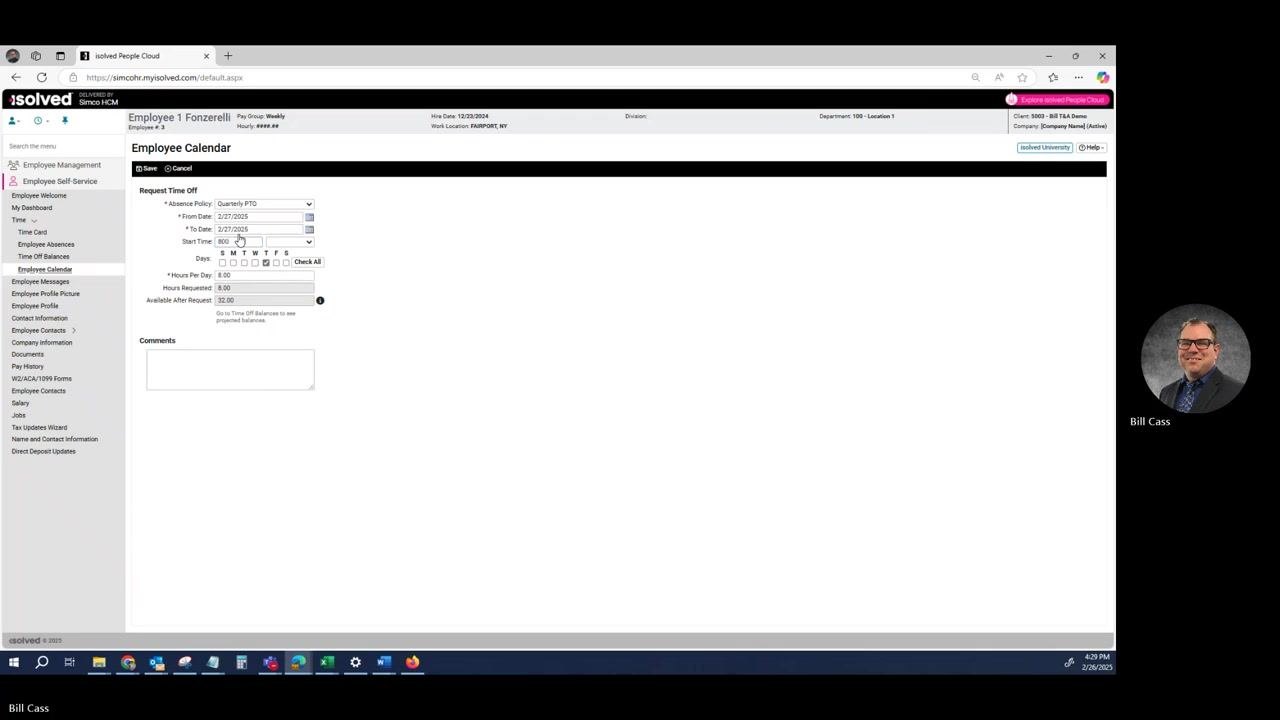
Complete the following fields in the form:
- Absence Policy: Select the appropriate policy from the dropdown (for example, "Quarterly PTO" or "Vacation Time").
- From Date: Enter the start date for your time off (for example, 2/27/2025).
- To Date: Enter the end date for your time off (for example, 2/27/2025 for a single day).
- Start Time: Enter your normal start time (for example, 8:00 AM).
- Days: Select the day(s) you are requesting off (for example, Thursday).
- Hours Per Day: Enter the number of hours you typically work in a day (for example, 8.00).
- Hours Requested: Confirm the total hours requested matches your entry (for example, 8.00).
- Available After Request: Review your remaining balance after the request (for example, 32.00).
- Comments: Optionally, add any comments regarding your request.
Submit the time off request
Review all entered information for accuracy, then click the Save button at the top of the form to submit your request.
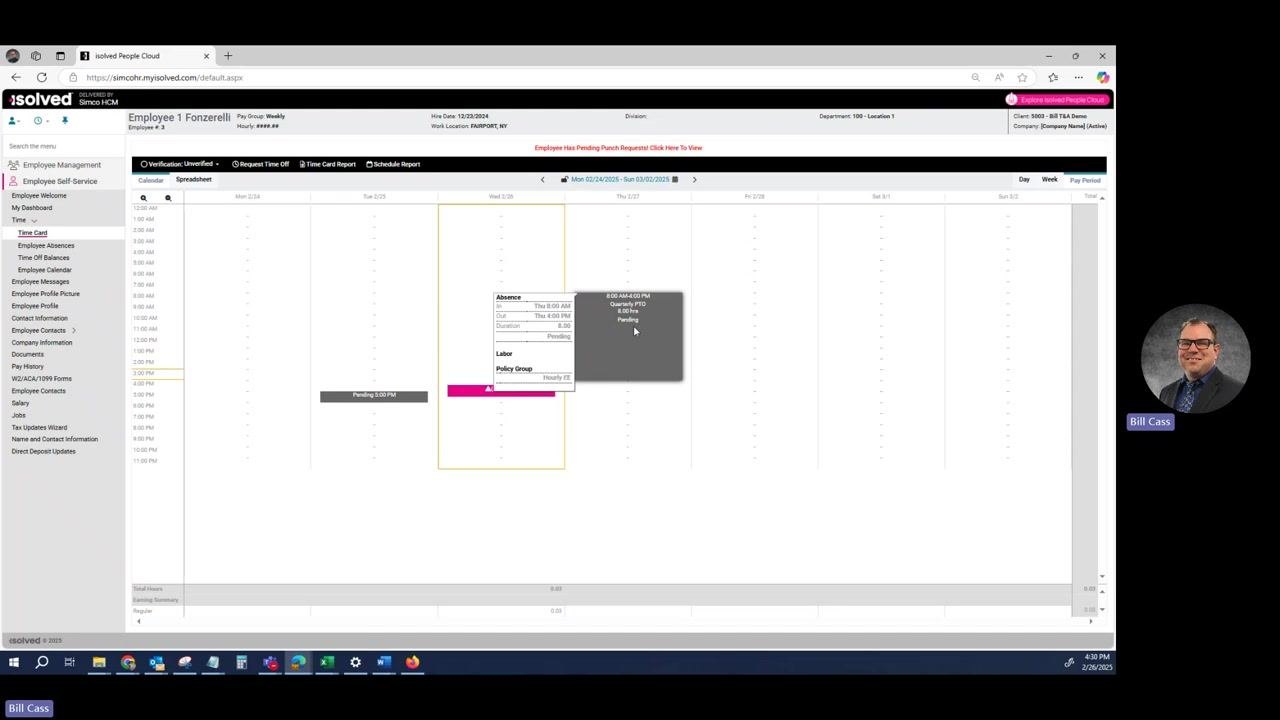
After you submit your time off request in Classic View, your manager is automatically notified and will review your request to either approve or reject it.
Verify your pending request
Return to your time card or calendar after submitting. You should see a block of time indicating a pending time off request for the selected date(s).
By following these steps, you can successfully request time off in the Classic View of isolved People Cloud. Each field and option should be completed as shown to ensure your request is processed correctly.
Switching to Adaptive View
Switch to Adaptive View
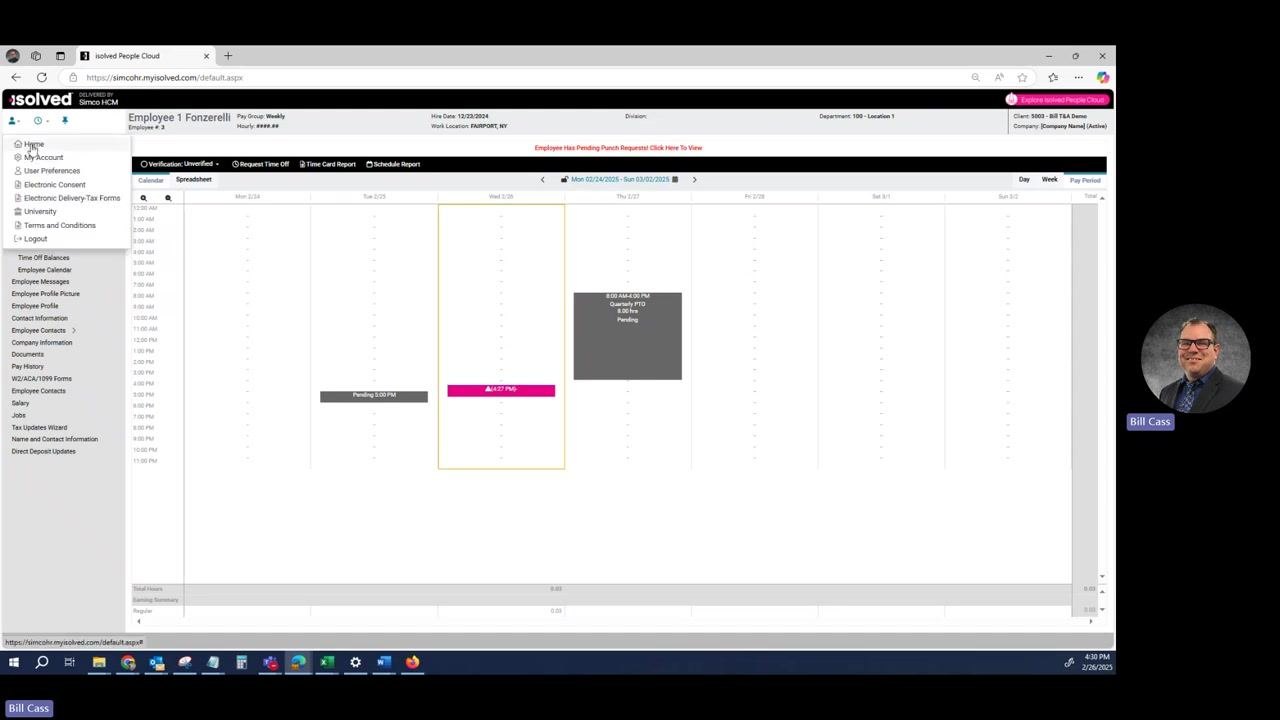
Locate the person icon (profile icon) in the upper left corner of the Classic View interface and click it to open a dropdown menu. Select Home from the dropdown menu.
Activate the Adaptive View
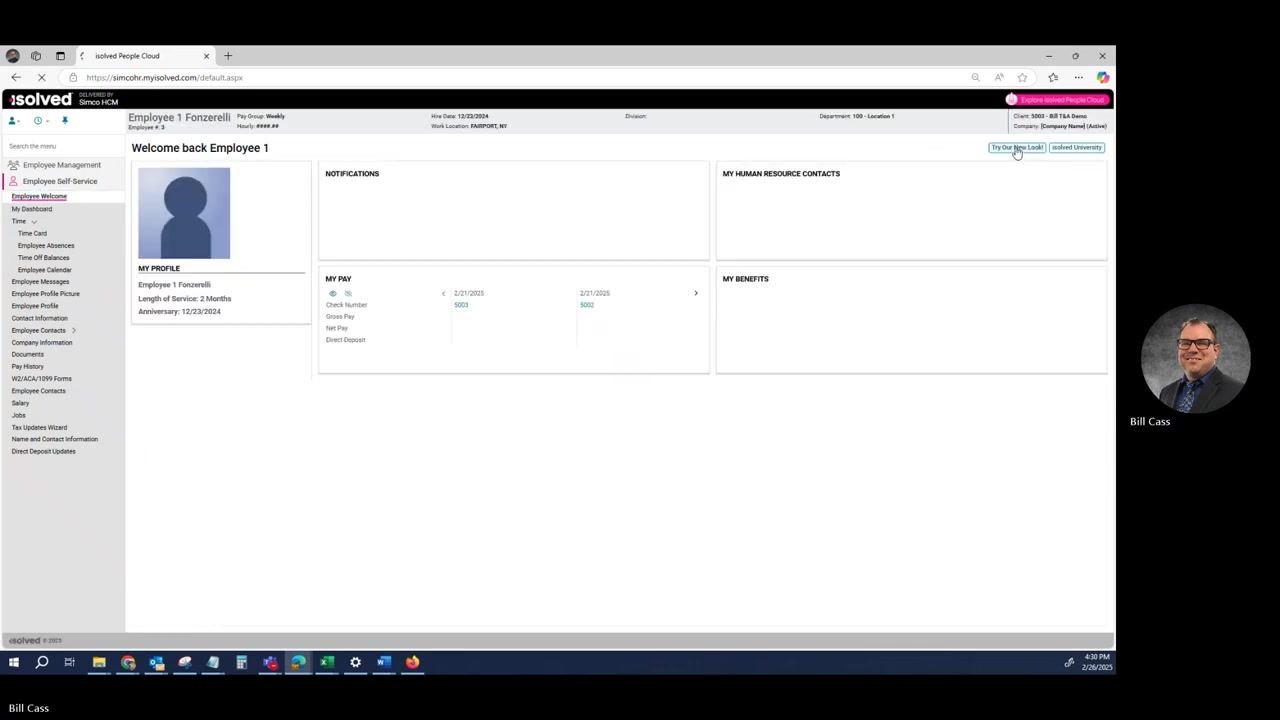
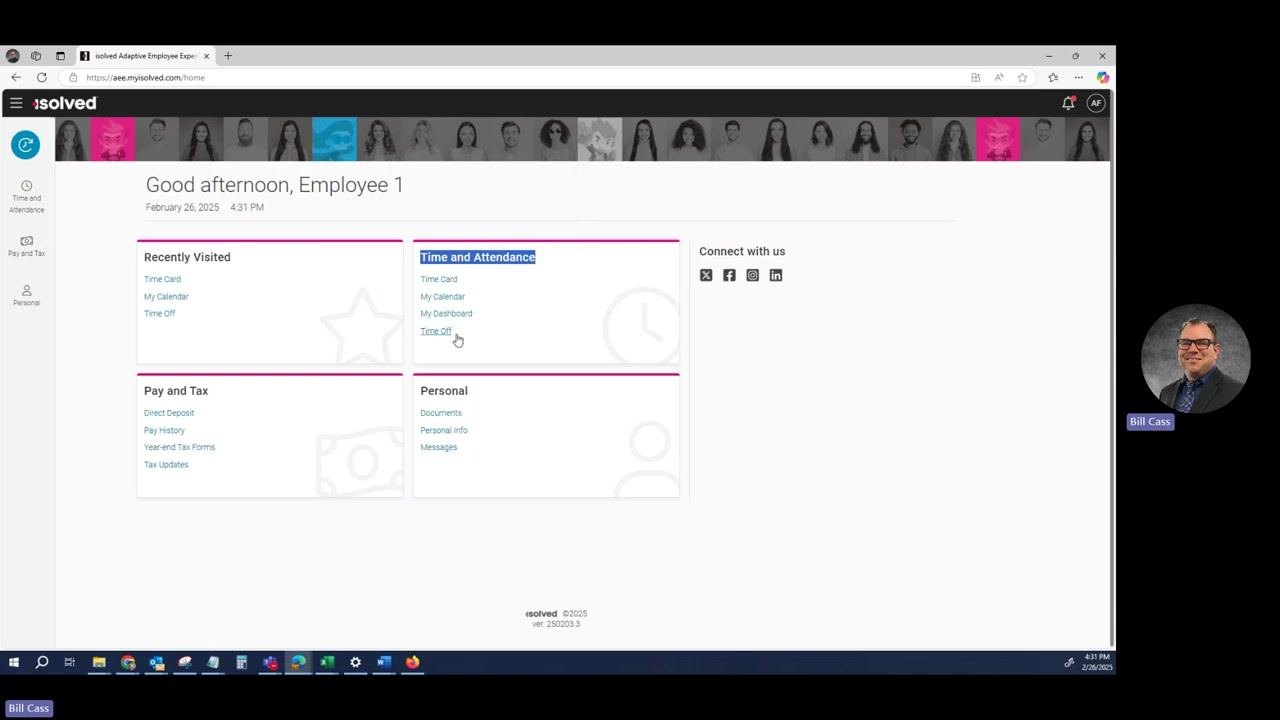
On the Home (Employee Welcome) screen, find the Try our New Look! button in the upper right corner and click it to switch to the Adaptive View.
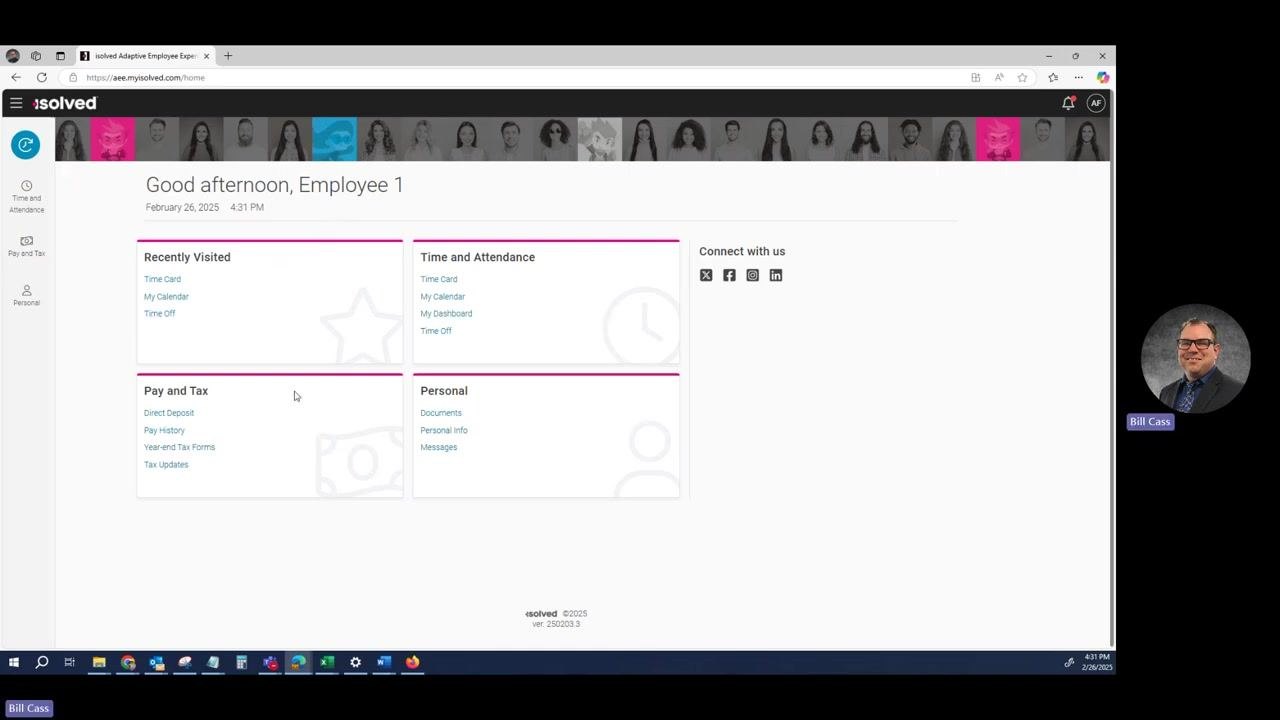
The Adaptive View features a colorful banner across the top, your name, and navigation buttons along the left side. The main area displays tiles such as "Recently Visited," "Time and Attendance," "Pay and Tax," and "Personal." The options in the center tiles are mirrored in the left navigation menu for quick access.
Navigate to Time Off in Adaptive View
Under the Time and Attendance tile (or from the left navigation menu), click Time Off.
Review existing and pending time off
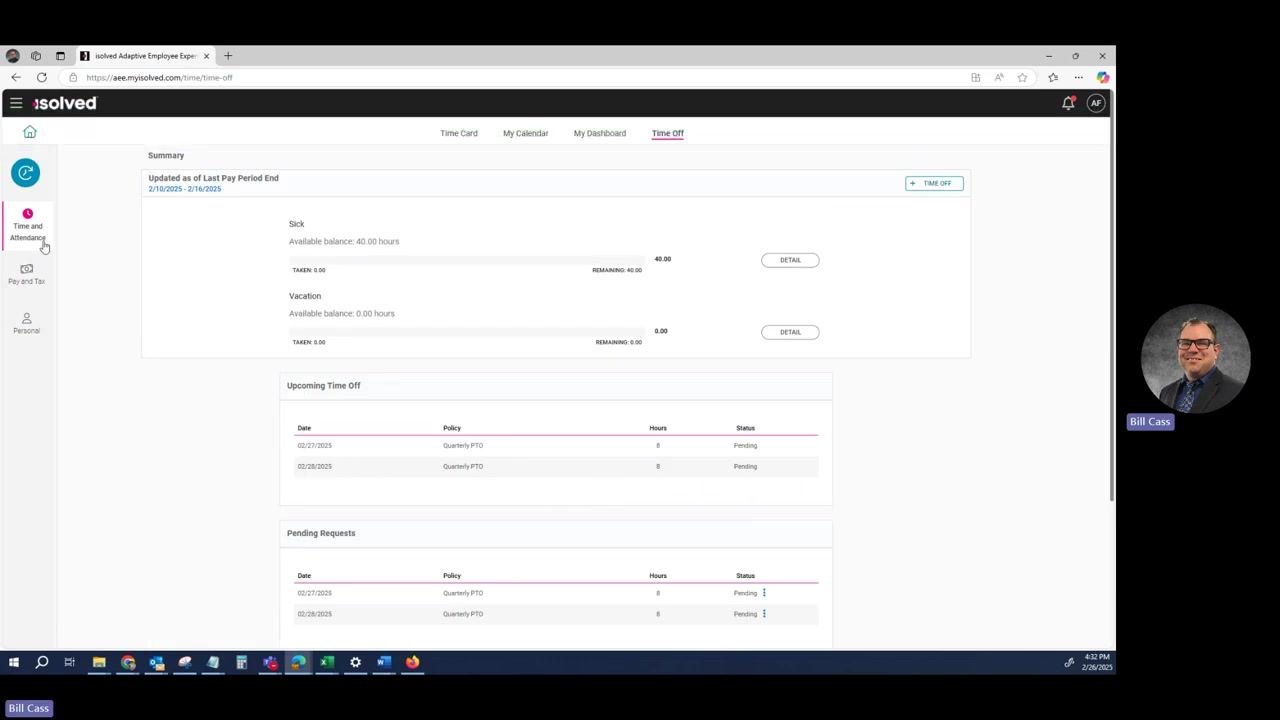
The Time Off page displays your current balances for Sick and Vacation time, along with sections for Upcoming Time Off, Pending Requests, and Past Time Off. Confirm that your previously submitted request appears under Pending Requests with the correct date, policy, hours, and status.
Completing and reviewing a time off request in Adaptive View
Select the date for your time off
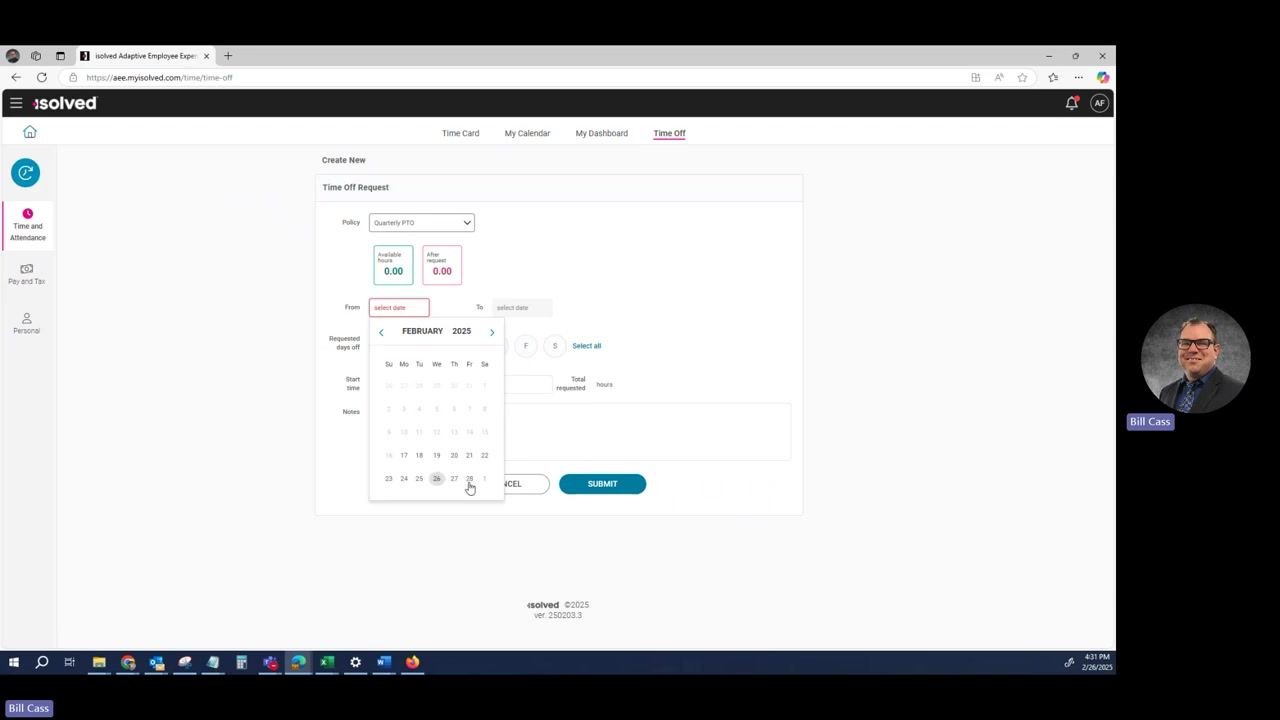
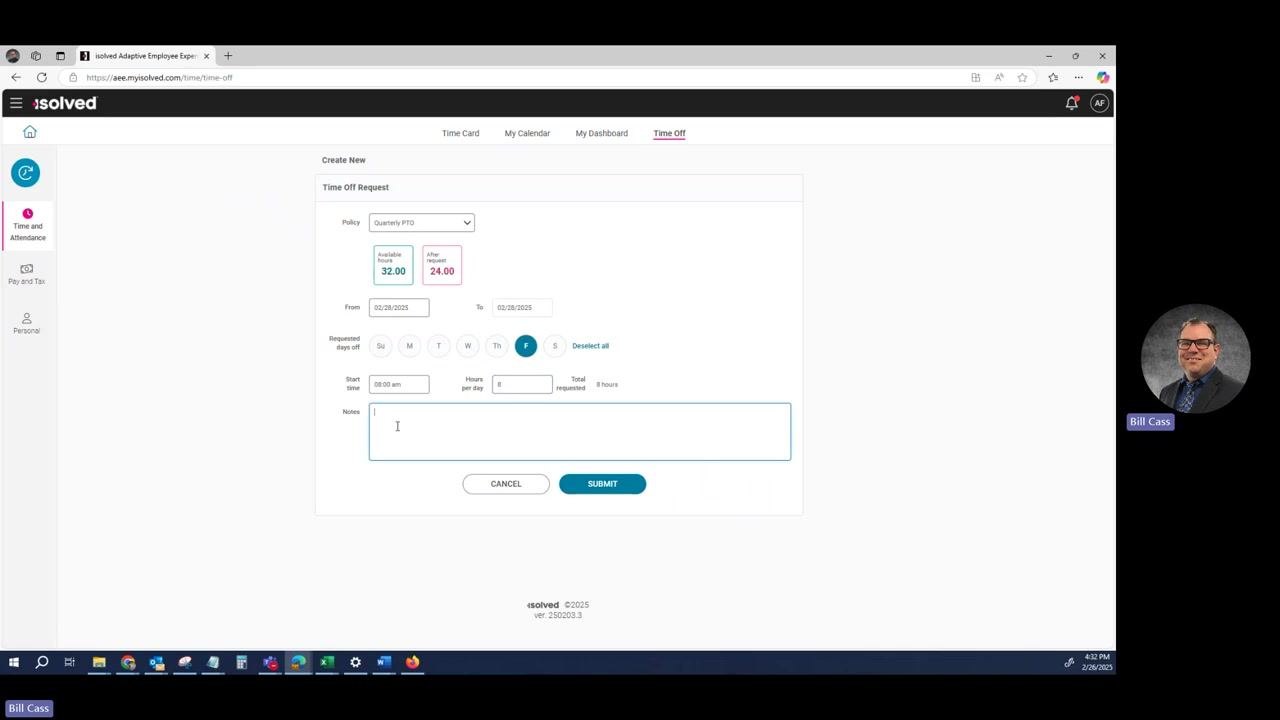
In the "Create New" Time Off Request form, click the From field to open the calendar and select the desired date for your time off (for example, February 28, 2025). The calendar highlights your selection.
Enter request details
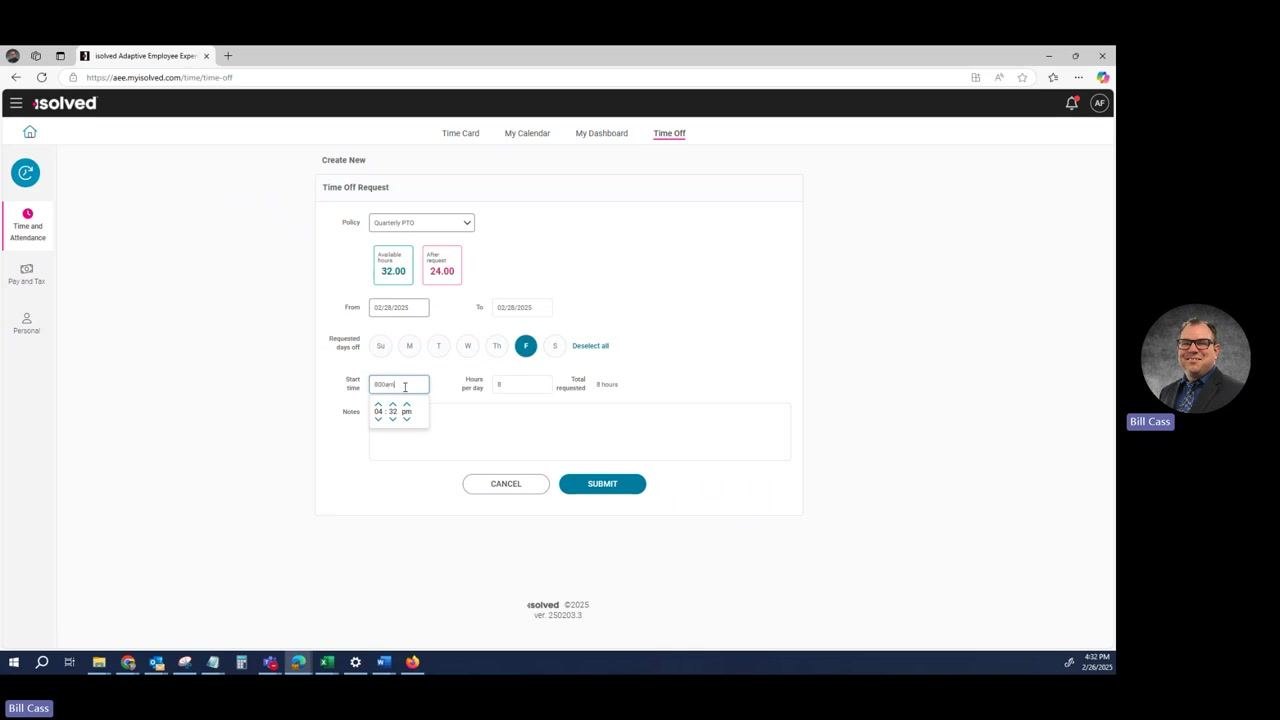
Ensure the Policy dropdown is set to "Quarterly PTO." Confirm the Available hours (for example, 32.00) and After request hours (for example, 24.00) update automatically as you enter your request. Set the Requested days off by selecting the appropriate day (for example, "F" for Friday), enter the Start time as "08:00 am," and specify Hours per day as "8." The Total requested field displays "8 hours."
Add notes for your manager (optional)
Enter notes in the Notes field if you wish to provide additional information (for example, "Doctor's appointment in the morning"). This field is optional and can be left blank if not needed.
Submit the time off request
Review all entered details for accuracy, then click the Submit button to send your request to your management team for approval.
View pending time off requests
Return to the Time Off summary page after submission. Under Upcoming Time Off and Pending Requests, verify your new request appears with the correct date (for example, 02/28/2025), policy ("Quarterly PTO"), hours (8), and status ("Pending").
Review time off on your time card
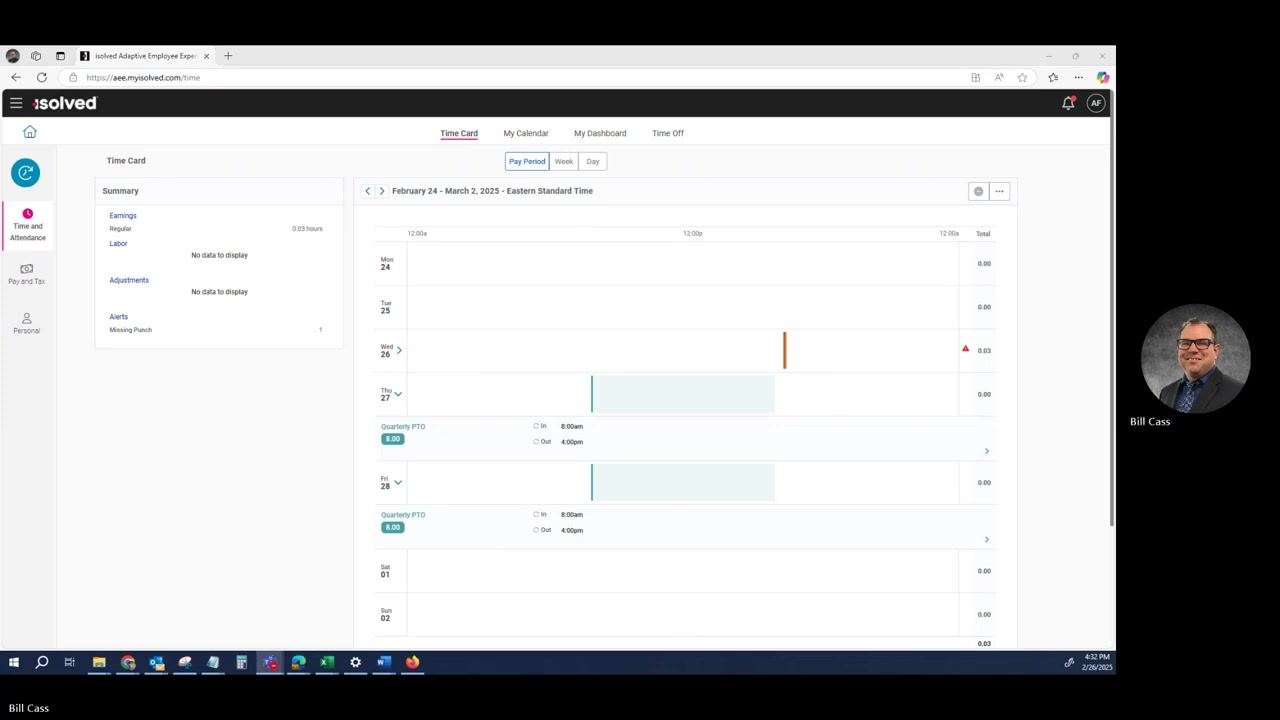
Navigate to the Time Card section from the left menu under "Time and Attendance." Locate your requested days (for example, Thursday the 27th and Friday the 28th) and confirm that "Quarterly PTO" is listed for the selected dates, with 8.00 hours each and the correct in/out times (for example, In: 8:00 am, Out: 4:00 pm).
Monitor approval status
Your manager will review your request and either accept or decline it. Pending requests are highlighted in a different color for easy identification. Click any pending request in the summary or time card view to see more details.
Summary
By following these steps, you can confidently complete, submit, and track your time off requests in isolved People Cloud, whether in Classic View or Adaptive View. All pending and approved requests are clearly visible, and you can add notes for your manager as needed.
Generation details: cost, quality tiers
Docsie billed 2,500 credits ($1.75) to analyze this 5-minute video at standard quality. The rewrite, template fill and Word/PDF exports were included. The same video at each quality tier:
| Quality | Frames sampled | Credits | Approx. cost |
|---|---|---|---|
| Draft | every 16-30 s | 1,250 | $0.88 |
| Standard (this guide) | every 8-15 s | 2,500 | $1.75 |
| Detailed | every 4-7 s | 5,000 | $3.50 |
| Ultra | every 1-3 s | 10,000 | $7.00 |
Credits priced at $0.70 per 1,000; plans include a monthly allowance. Enterprise customers on on-premise or bring-your-own-model deployments run this on their own inference and pay no per-video credits.
Generated by Docsie Video-to-Docs on 2026-10-12 from a 4-minute video. Screenshots are frames from the source video and belong to their creator, Simco Media, whose original is embedded above. If you own this video and want the guide removed or credited differently, contact us and we will act within one business day.