
How to Calculate Cfm for an Hvac System
This standard operating procedure explains how to calculate CFM for an HVAC system and how to determine the resulting air velocity when duct dimensions change. Use this procedure whenever you need to size ductwork, verify airflow, or evaluate the effect of reducing duct dimensions to route around obstacles such as structural beams.
Video: Calculating CFM or Velocity from Area by MEP Academy (2022). All credit for the demonstration goes to the creator; watch the original on YouTube. The written guide below was generated from this video by Docsie. Creator? Request a change or removal.
This standard operating procedure explains how to calculate CFM for an HVAC system and how to determine the resulting air velocity when duct dimensions change. Use this procedure whenever you need to size ductwork, verify airflow, or evaluate the effect of reducing duct dimensions to route around obstacles such as structural beams.
Purpose
This procedure provides a step-by-step method to calculate total Cubic Feet per Minute (CFM) of airflow in a duct and to understand how air velocity changes when duct size is altered while CFM remains constant.
Scope
This procedure applies to any duct section where you need to determine airflow (CFM), cross-sectional area, or velocity, including situations where duct dimensions must be reduced to clear obstructions.
Required equipment
- Tape measure (to measure duct width and height)
- Anemometer (to measure air velocity)
- ASHRAE Handbook of Fundamentals (for recommended maximum velocity guidelines)
Procedure
Step 1: Review the CFM formula
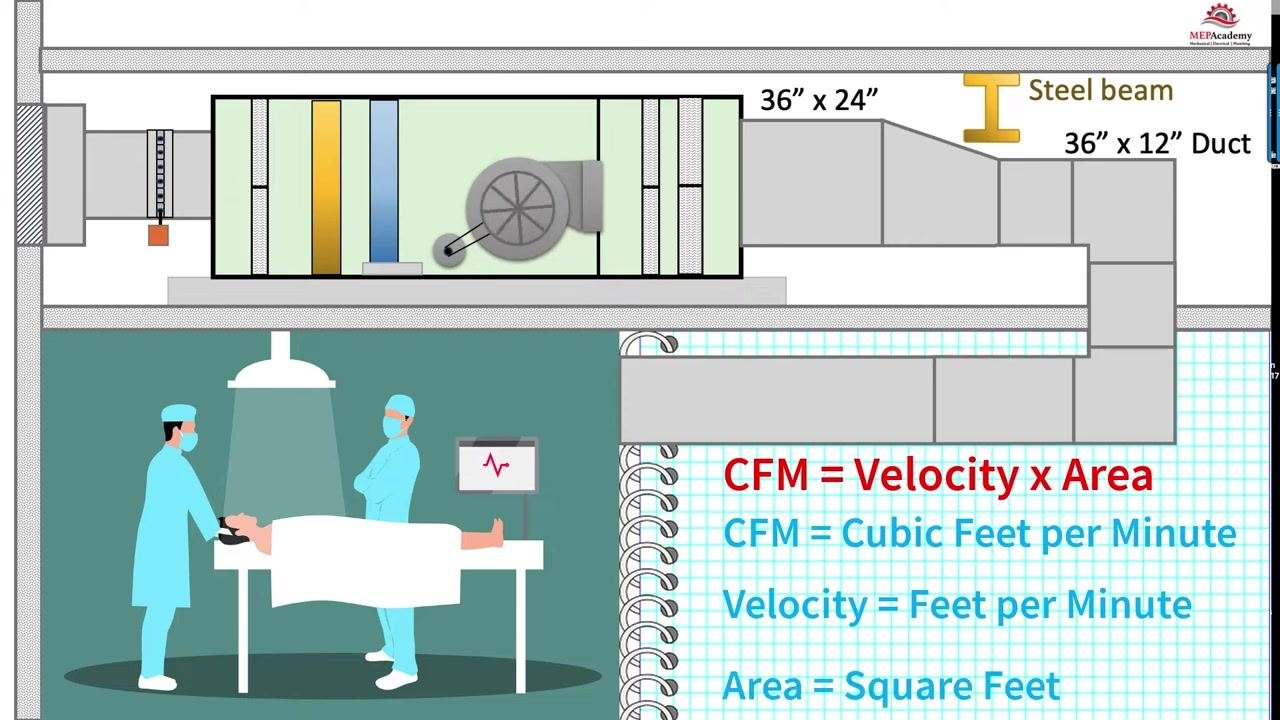
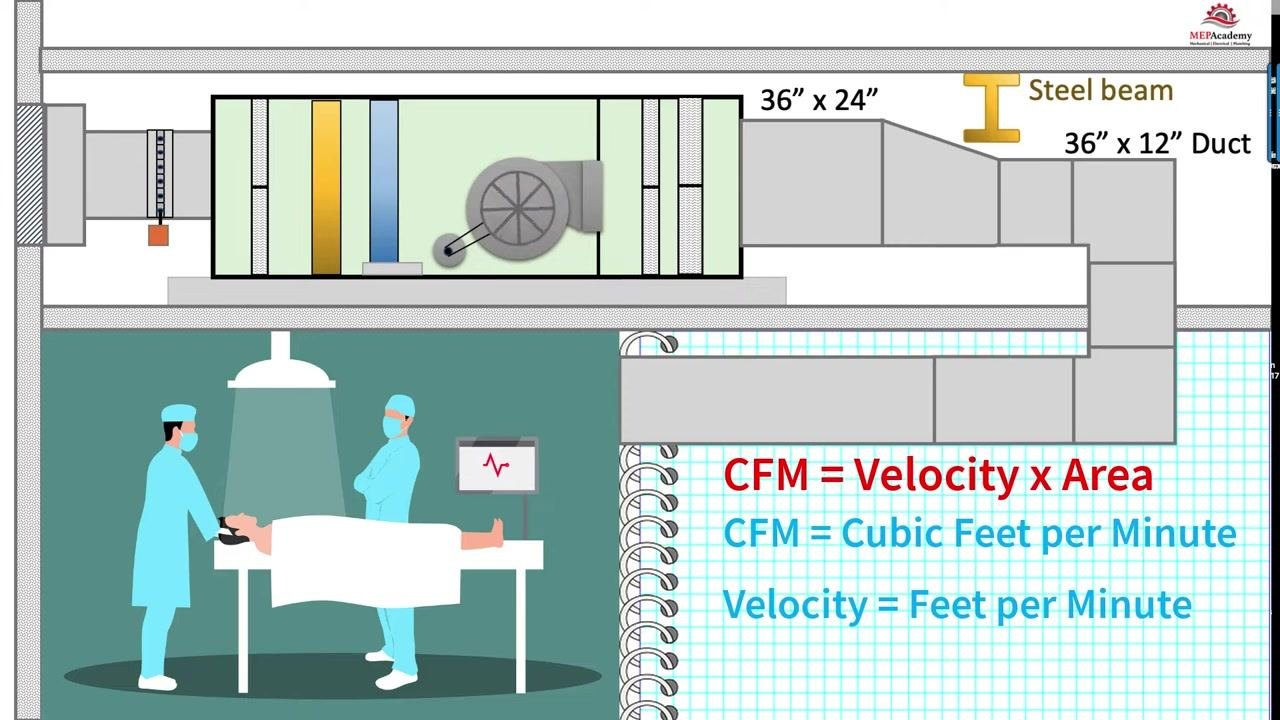
Use the following formula to calculate airflow:
CFM = Velocity × Area
- CFM = Cubic Feet per Minute (airflow)
- Velocity = Feet per Minute (FPM)
- Area = Square Feet (cross-sectional area of the duct)
A cubic foot of air is a volume measuring 1 ft × 1 ft × 1 ft.
Step 2: Measure the duct dimensions
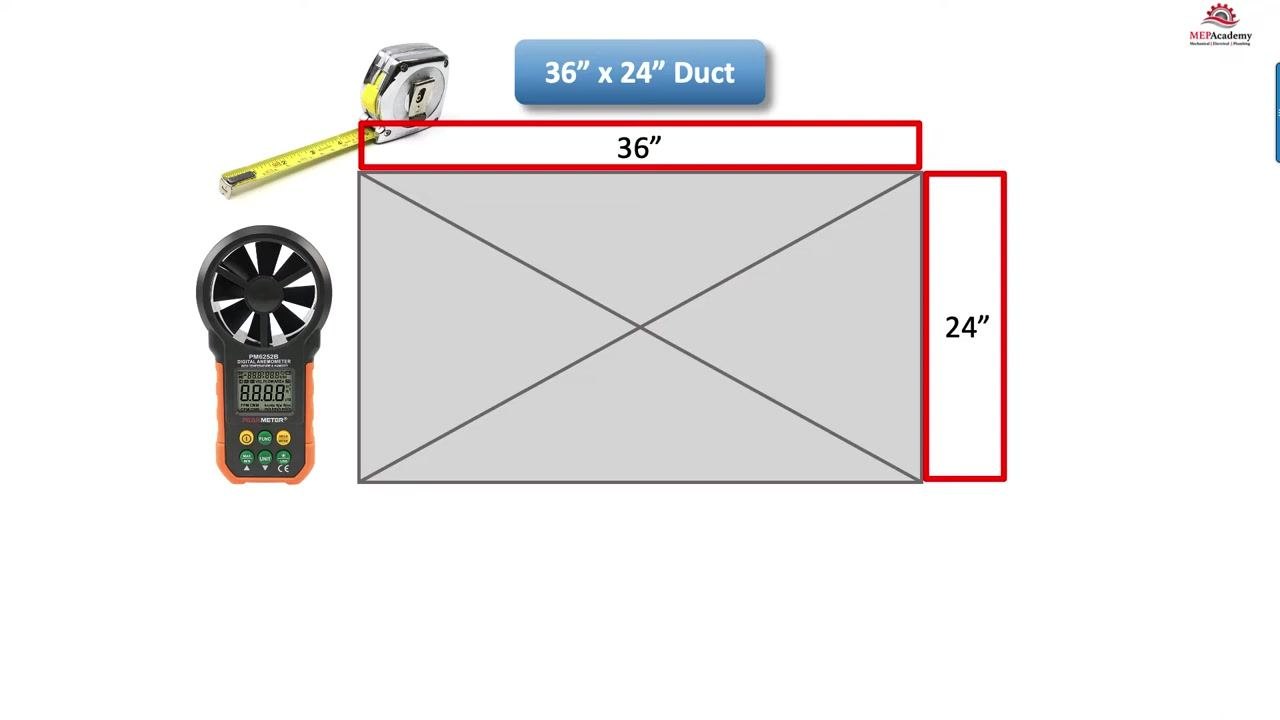
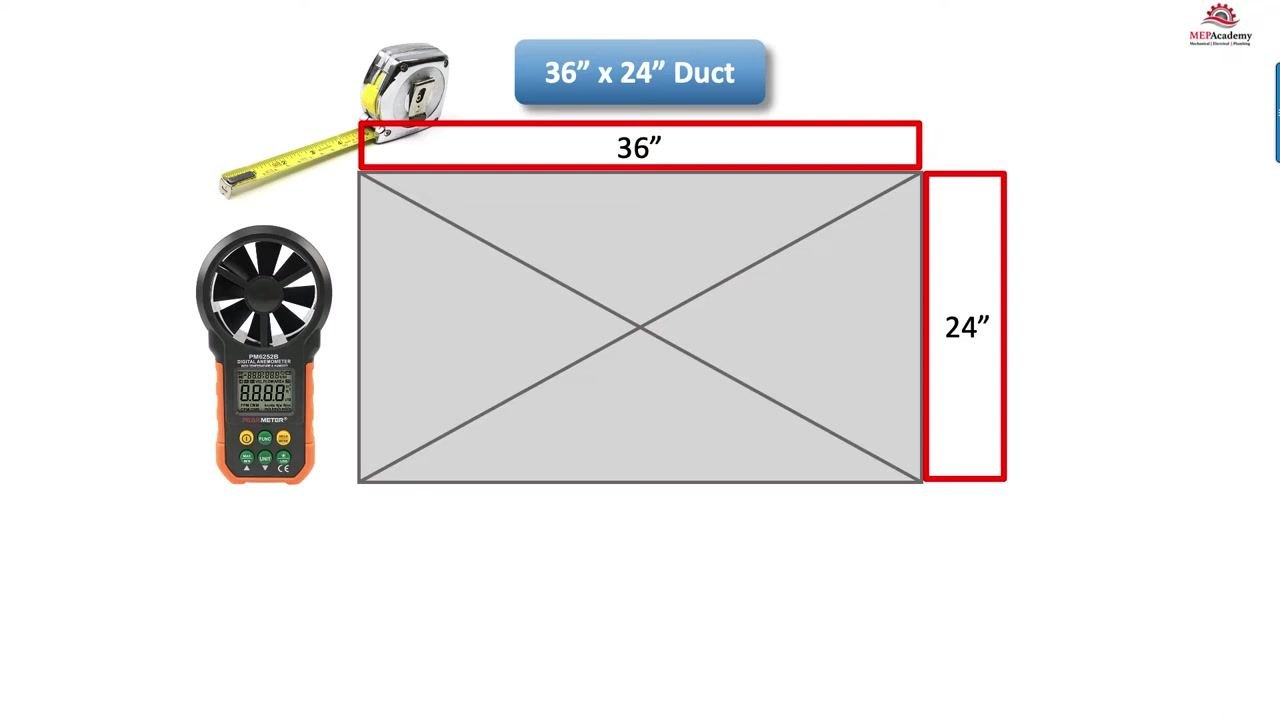
Measure the width and height of the duct using a tape measure. For this example, the recorded dimensions are:
- Width = 36 inches
- Height = 24 inches
Step 3: Measure the air velocity
Use an anemometer to obtain an average velocity reading across the duct section. For this example, the recorded velocity is:
- Velocity = 450 feet per minute (FPM)
Step 4: Convert the duct area to square feet
Calculate the area in square inches by multiplying width by height:
- Area = 36 in × 24 in = 864 in²
Convert square inches to square feet, using the conversion that 1 square foot equals 144 square inches:
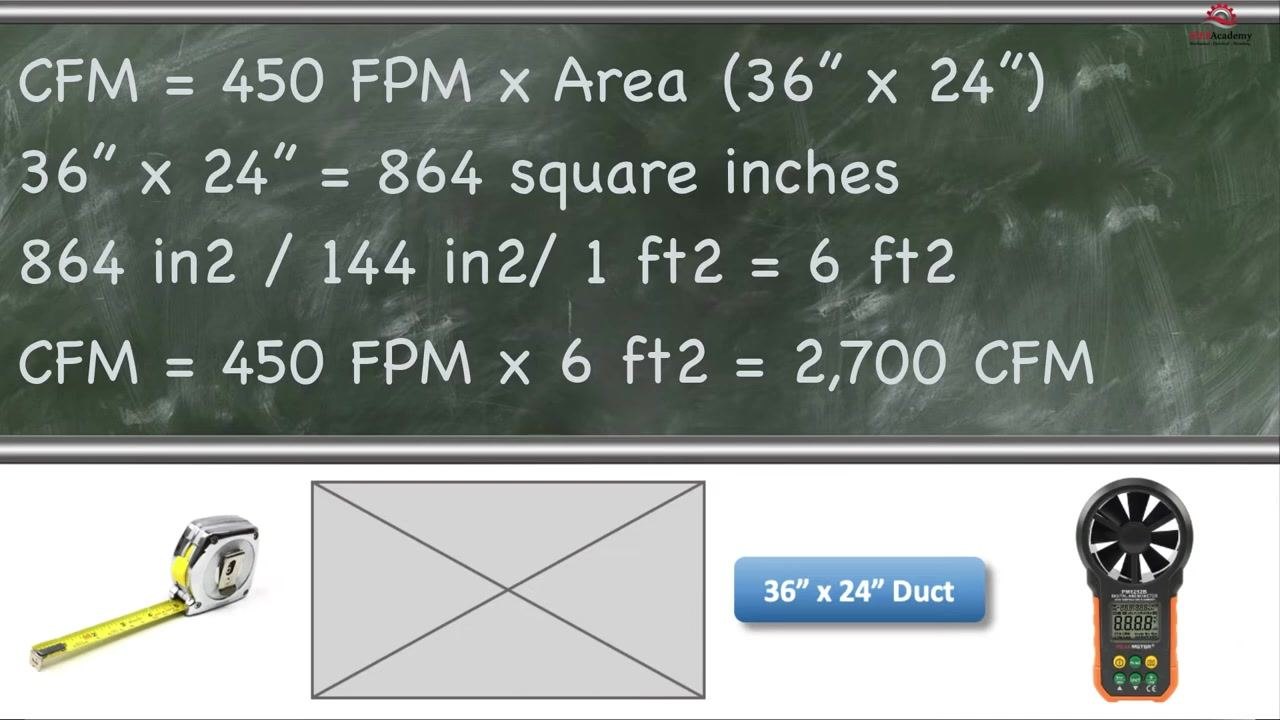
- Area = 864 in² ÷ 144 = 6 square feet
Step 5: Apply the CFM formula
Substitute the measured velocity and calculated area into the formula:
CFM = 450 FPM × 6 ft² = 2,700 CFM
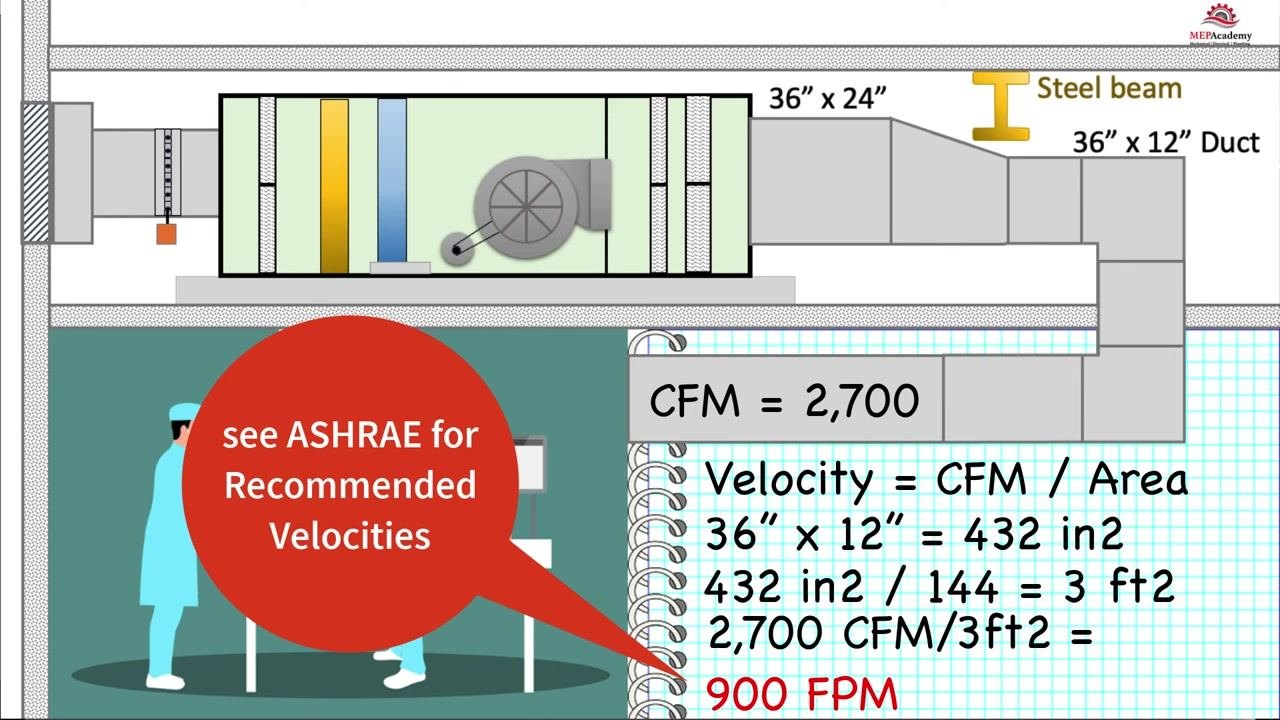
This result is the total airflow through the duct section.
Reference: The chalkboard below shows the formula applied with the measured velocity value before the final area is substituted.
Step 6: Note the relationship between duct size and velocity
If you reduce the duct size while keeping the CFM the same, the velocity will increase. Keep this relationship in mind for system design and noise considerations, as covered in the following steps.
Calculating velocity after reducing duct size
Step 7: Reference recommended velocity guidelines
Consult the ASHRAE Handbook of Fundamentals for recommended maximum velocities in ductwork. Maximum recommended velocities for rectangular ducts range from 950 to 3,500 feet per minute (FPM), depending on location and noise criteria. Actual velocities are often kept lower than these maximums for noise and comfort considerations.
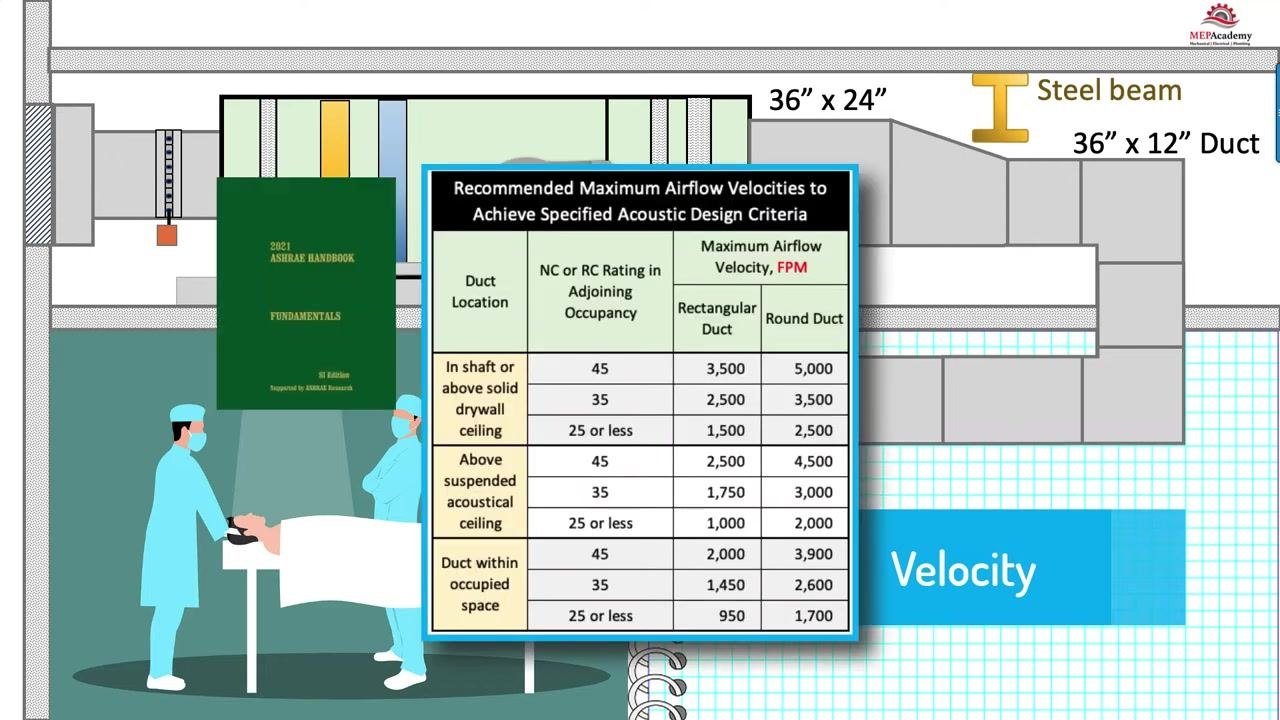
Safety and design note: When routing ducts under obstacles like beams, verify that any resulting velocity increase stays within these recommended limits.
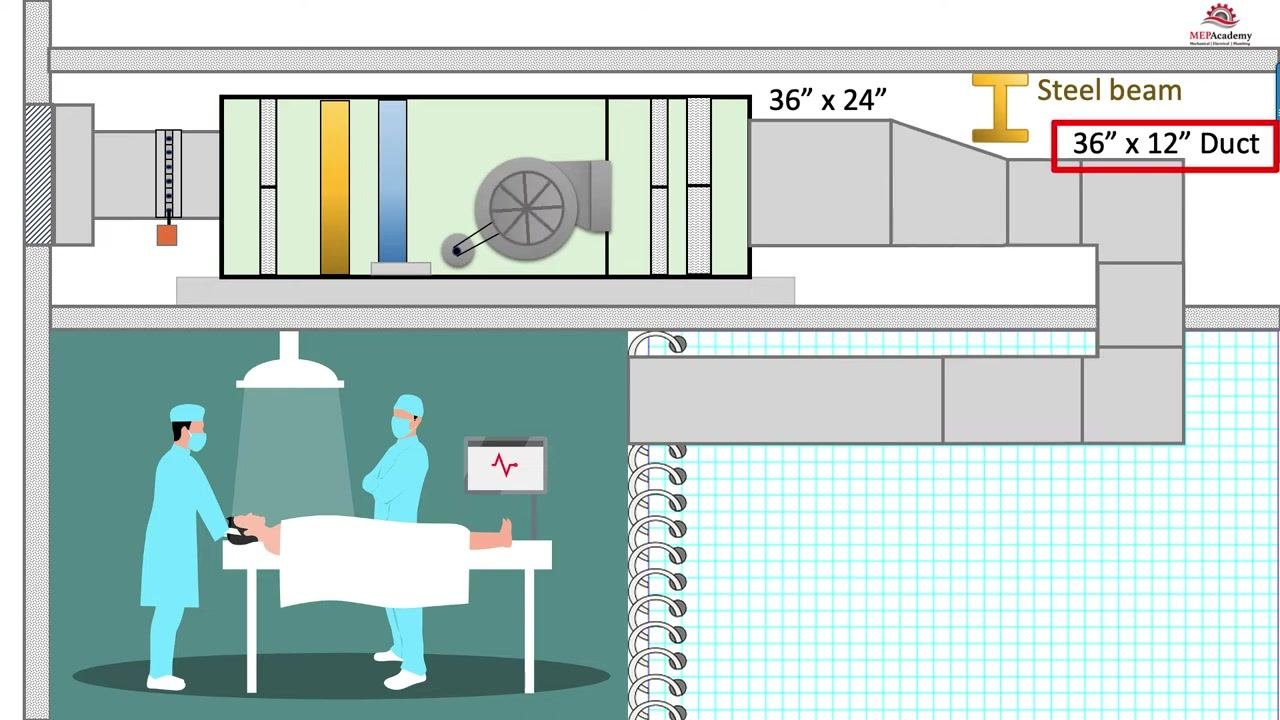
Step 8: Identify the new duct dimensions
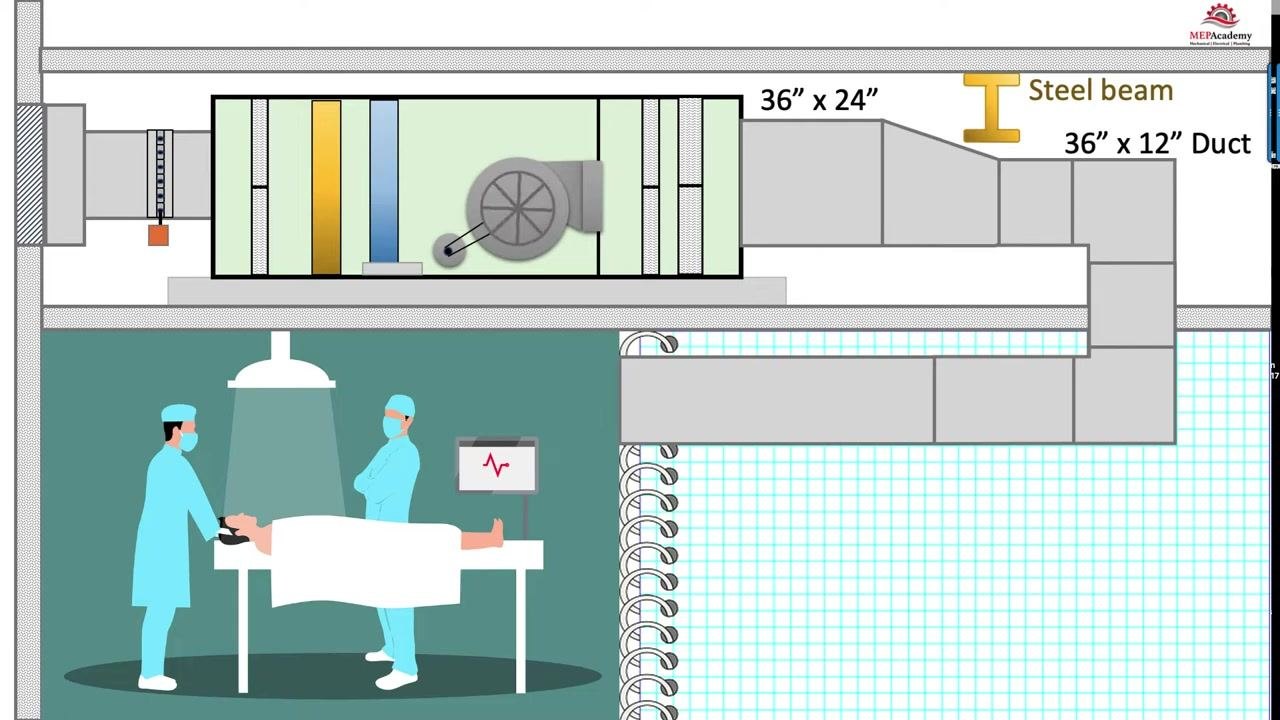
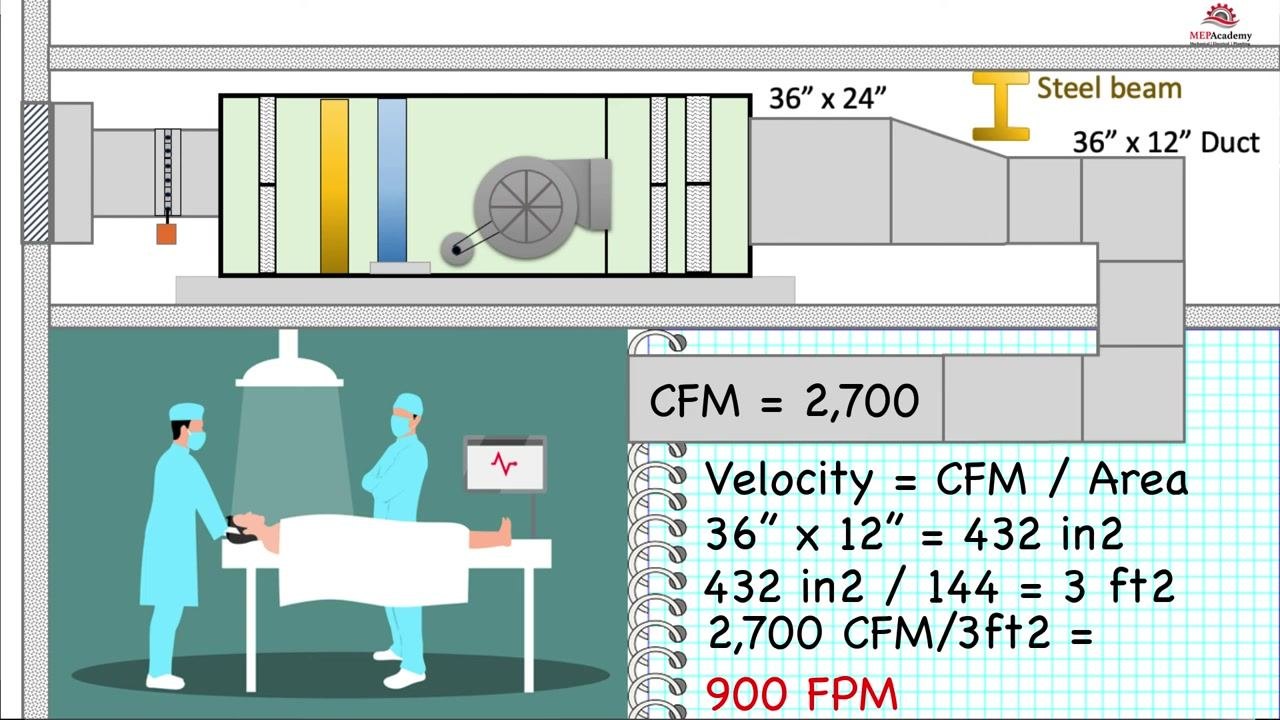
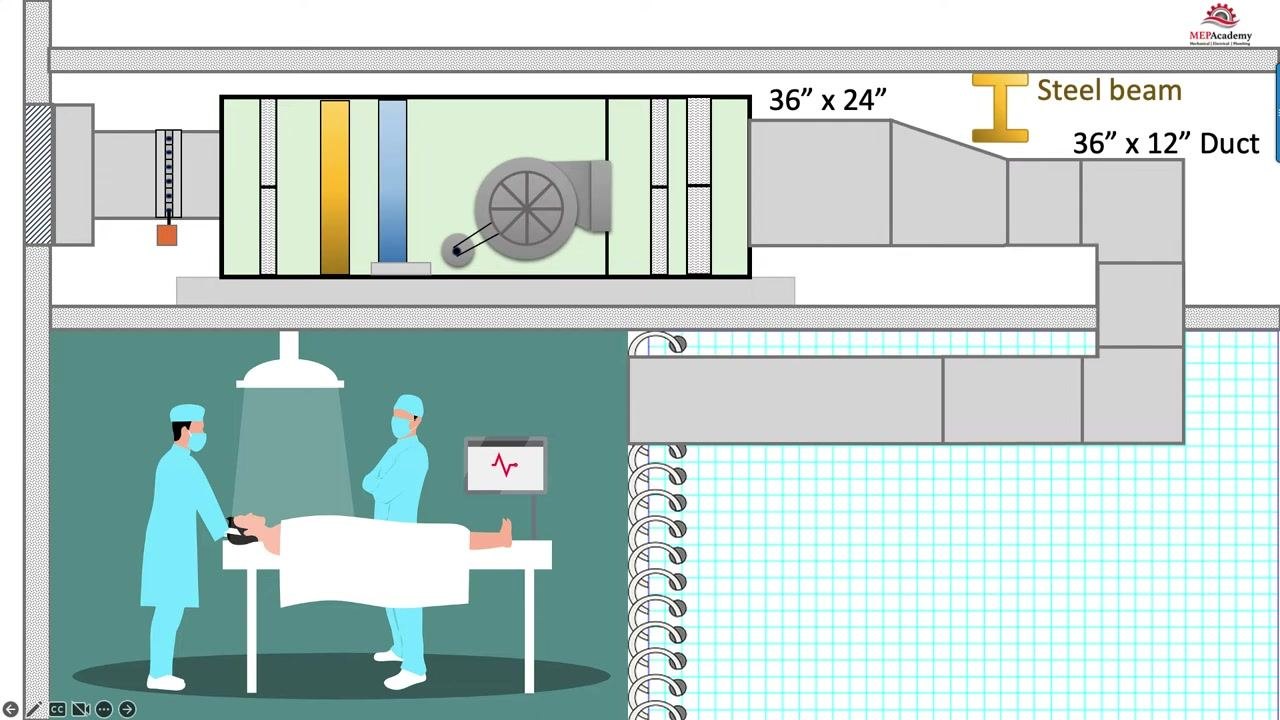
Determine the reduced duct size needed to clear the obstruction. In this example, the duct is reduced from 36 inches × 24 inches to 36 inches × 12 inches to fit under a steel beam. The CFM remains constant at 2,700.
Step 9: Convert the new duct area to square feet
Calculate the area in square inches:
- Area = 36 in × 12 in = 432 in²
Convert to square feet:
- Area = 432 in² ÷ 144 = 3 square feet
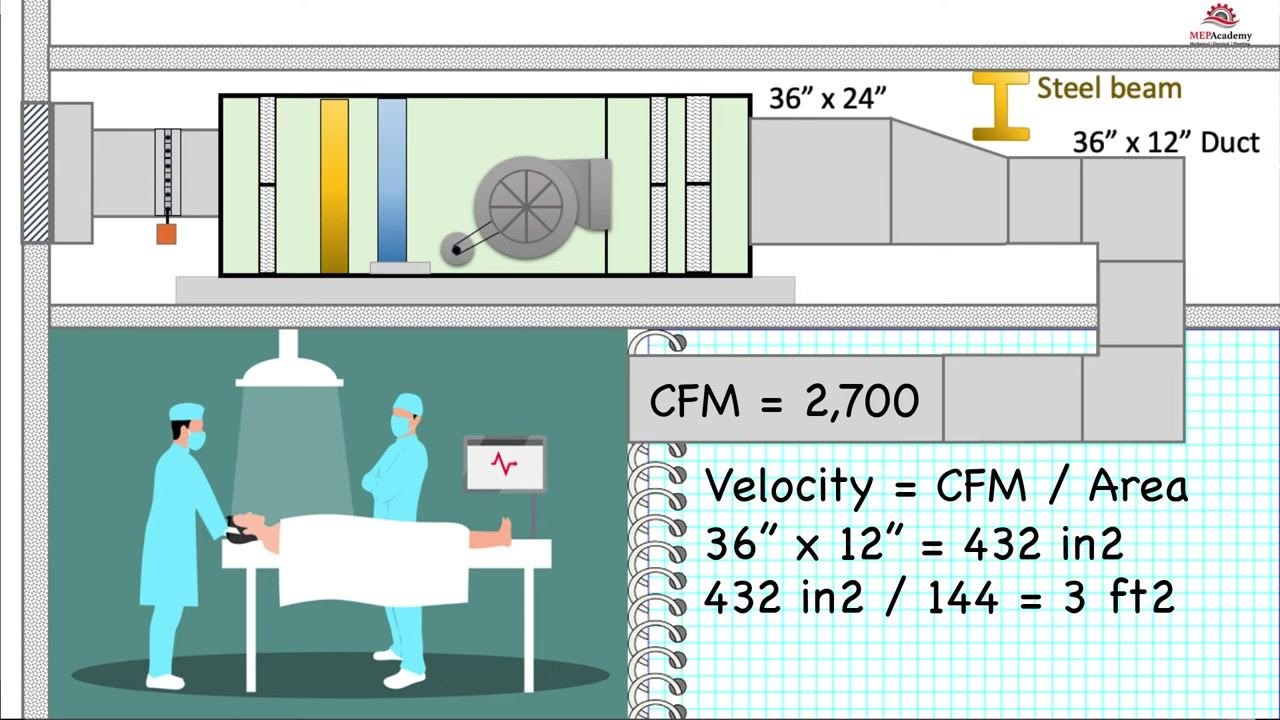
Step 10: Apply the velocity formula
When CFM and area are known, rearrange the CFM formula to solve for velocity:
Velocity (FPM) = CFM ÷ Area (ft²)
Substitute the known values:
Velocity = 2,700 CFM ÷ 3 ft² = 900 FPM
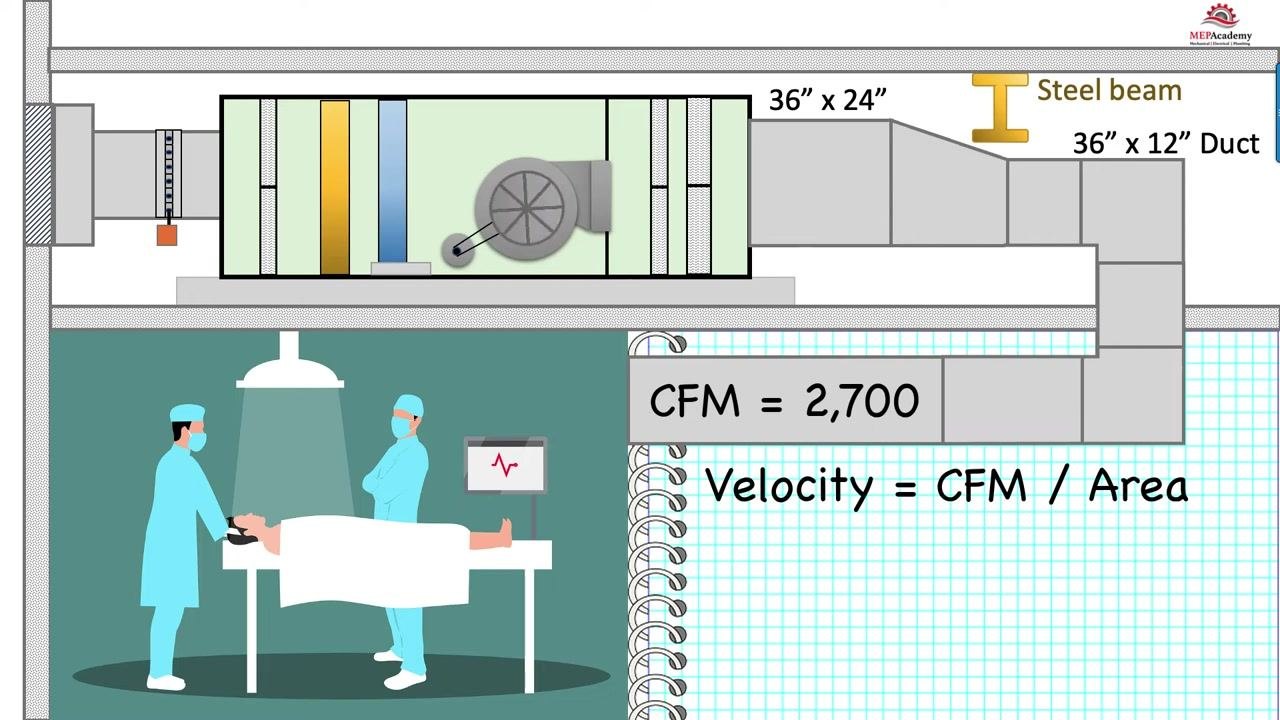
The velocity doubles compared to the previous duct size because the area is halved.
Step 11: Compare velocities before and after duct reduction
Review the change in velocity resulting from the duct size reduction:
- Previous velocity with 36" × 24" duct (6 ft²): 450 FPM
- New velocity with 36" × 12" duct (3 ft²): 900 FPM
The velocity increases as the duct area decreases, given constant airflow.
Verification and summary
Step 12: Confirm the direct correlation between area and velocity
Verify that when duct area is cut in half (from 6 ft² to 3 ft²), the velocity doubles (from 450 FPM to 900 FPM), provided the CFM remains constant. This confirms the relationship: if CFM is constant, reducing duct area increases velocity proportionally.
Step 13: Verify against industry standards
Always check ASHRAE (American Society of Heating, Refrigerating and Air-Conditioning Engineers) guidance for recommended air velocities in ductwork to confirm compliance and optimal system performance.
Step 14: Review the complete calculation in context
Confirm the final summarized calculation:
- Duct size reduced to 36" × 12"
- Area = 432 in² = 3 ft²
- Velocity = 2,700 CFM ÷ 3 ft² = 900 FPM
This calculation is especially important in critical environments, such as above an operating room, where proper airflow control is essential.
Summary table
| Duct Size | Area (ft²) | Velocity (FPM) | CFM |
|---|---|---|---|
| 36" × 24" | 6 | 450 | 2,700 |
| 36" × 12" | 3 | 900 | 2,700 |
Key takeaways
- Velocity increases as duct area decreases, if CFM is unchanged.
- Always verify that resulting velocities are within recommended guidelines (see ASHRAE).
- Proper duct sizing is critical for system efficiency and occupant safety, especially in sensitive environments like operating rooms.
What's next
Apply this same method to other duct sections in your system, always measuring dimensions and velocity directly, converting units carefully, and checking final velocities against ASHRAE recommendations before finalizing any duct size changes.
Generation details: cost, quality tiers
Docsie billed 3,000 credits ($2.10) to analyze this 6-minute video at standard quality. The rewrite, template fill and Word/PDF exports were included. The same video at each quality tier:
| Quality | Frames sampled | Credits | Approx. cost |
|---|---|---|---|
| Draft | every 16-30 s | 1,500 | $1.05 |
| Standard (this guide) | every 8-15 s | 3,000 | $2.10 |
| Detailed | every 4-7 s | 6,000 | $4.20 |
| Ultra | every 1-3 s | 12,000 | $8.40 |
Credits priced at $0.70 per 1,000; plans include a monthly allowance. Enterprise customers on on-premise or bring-your-own-model deployments run this on their own inference and pay no per-video credits.
Generated by Docsie Video-to-Docs on 2026-09-14 from a 5-minute video. Screenshots are frames from the source video and belong to their creator, MEP Academy, whose original is embedded above. If you own this video and want the guide removed or credited differently, contact us and we will act within one business day.