
How to Write a Progress Note in Epic
This guide walks you through how to write a progress note in Epic for a physical therapy patient using the EpicCare daily note workflow. You'll learn how to select a diagnosis, populate the note with the DAX Daily Note template, document objective measures and interventions, and sign the finished note.
Video: EPIC & DAX Copilot - Daily Note - 1st Daily Note Workflow - May 2025 by Dr. Michael Jeanfavre (2025). All credit for the demonstration goes to the creator; watch the original on YouTube. The written guide below was generated from this video by Docsie. Creator? Request a change or removal.
This guide walks you through how to write a progress note in Epic for a physical therapy patient using the EpicCare daily note workflow. You'll learn how to select a diagnosis, populate the note with the DAX Daily Note template, document objective measures and interventions, and sign the finished note.
Prerequisites
- Access to the patient's chart in EpicCare.
- An active episode of care with a documented diagnosis (or the ability to add one).
- Familiarity with the DAX Daily Note template and available SmartPhrases.
Open the patient chart
Locate and open the chart for the relevant patient (for example, "Test Patient, Five"). Confirm that the patient details—name, age, pronouns, MRN, and care plan—are visible on the left sidebar before proceeding.
Select the episode and diagnosis
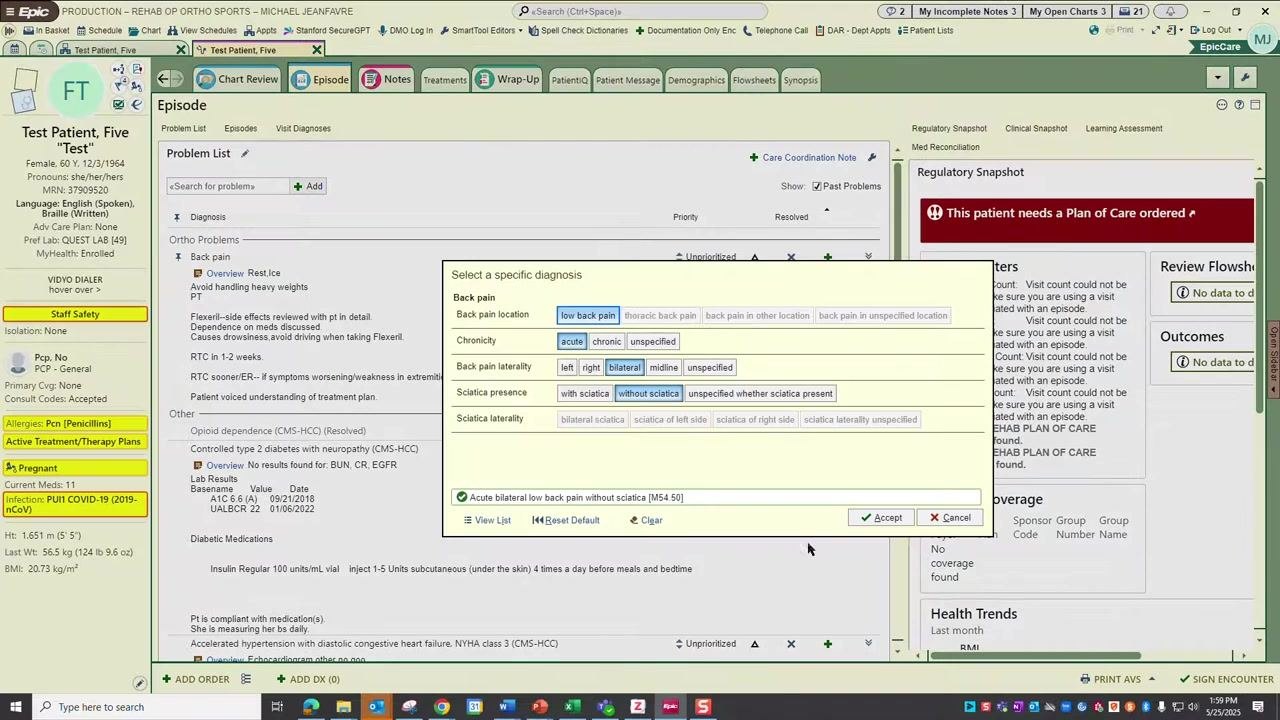
Navigate to the Episode tab. In the Problem List section, click to add or select the relevant diagnosis, such as "Back pain." If prompted, specify the diagnosis details:
- Back pain location: select low back pain
- Chronicity: select acute
- Back pain laterality: select bilateral
- Sciatica presence: select without sciatica
Confirm the diagnosis reads "Acute bilateral low back pain without sciatica (M54.50)," then click Accept to confirm it.
Verify the diagnosis was added
Check that the selected diagnosis now appears under Ortho Problems in the Problem List. Confirm that associated recommendations—such as "Rest, Ice," "Avoid handling heavy weights," and "PT"—are visible alongside it.
Open the Notes tab
Click the Notes tab at the top of the screen and confirm you are in the correct patient context with the sidebar visible. If no notes exist yet for this patient, you'll see the message "There are no notes to show."
Create a new daily note
Click DAX Daily 1 or the appropriate daily note template to open the note editor on the right side of the screen. Confirm the note type (for example, "Rehab Daily Note"), the date of service, and the service type (for example, "Physical Therapy").
Populate the note using smart sections
The DAX daily note template automatically populates several sections:
- Assessment and Plan: prompts you to "COPY & PASTE EVAL ASSESSMENT"
- History of Present Illness: prompts you to enter the HPI
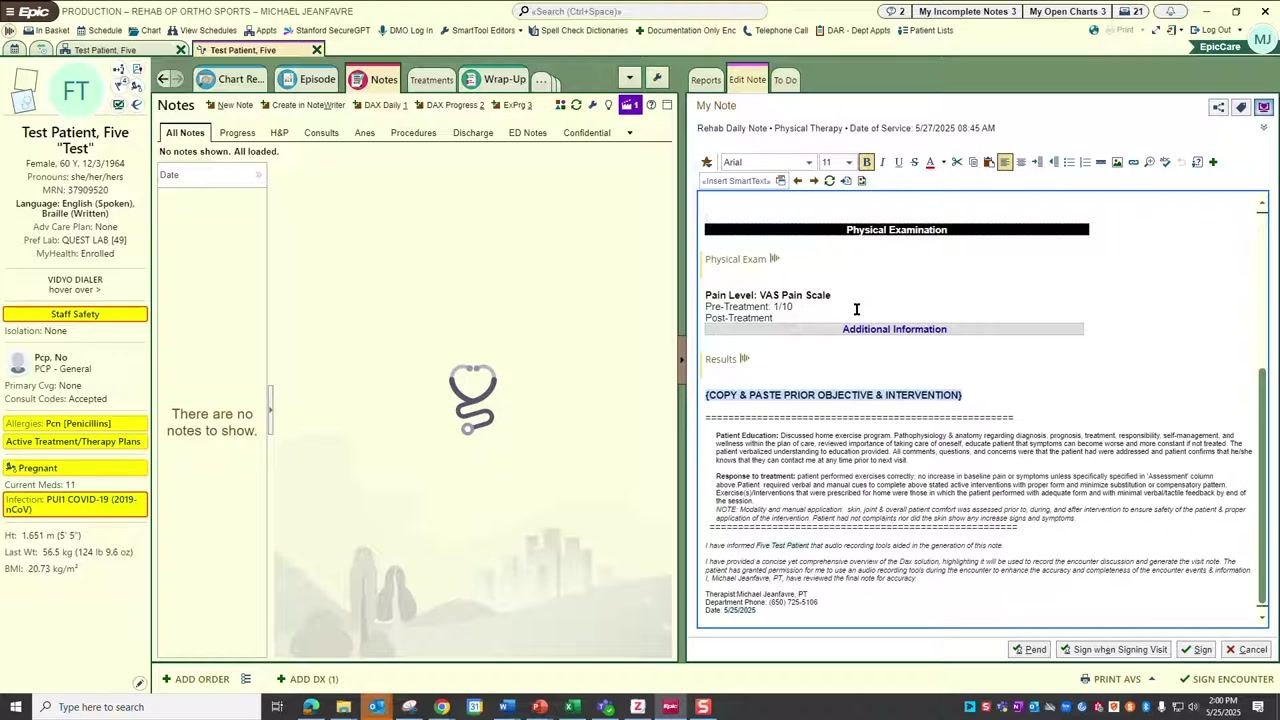
- Physical Examination: includes pain level fields, such as "VAS Pain Scale Pre-Treatment: 1/10, Post-Treatment:"
- Results: prompts you to "COPY & PASTE PRIOR OBJECTIVE & INTERVENTION"
Press F2 to quickly jump between open fields and prompts within the note.
Review the completed smart sections
Confirm that each section—Assessment and Plan, History of Present Illness, Physical Examination, and Results—is filled in and positioned correctly, matching clinical documentation standards. Make sure the therapist signature and date fields are visible at the bottom of the note.
Copy forward key elements and verify populated sections
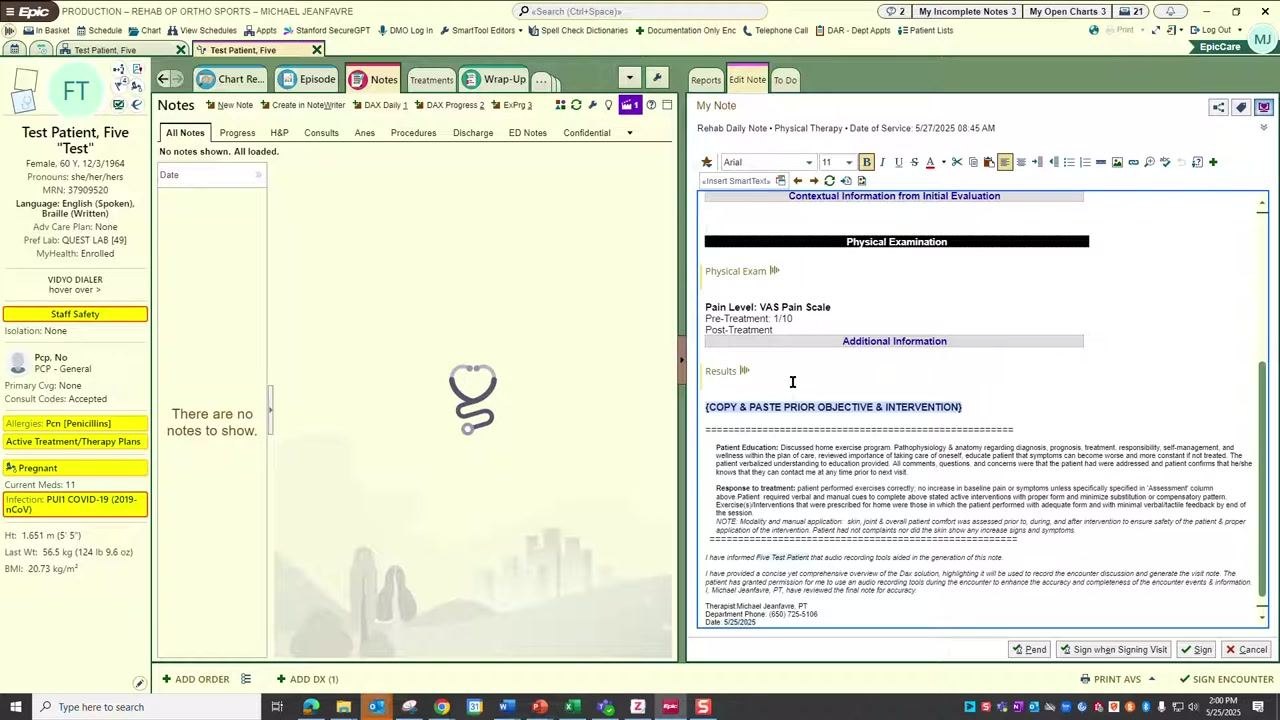
Copy the assessment portion from the initial evaluation note and paste it into the Assessment and Plan section of your new daily note. The DAX system will then automatically populate the HPI and other related fields.
Verify that the following sections are correctly populated:
- Assessment and Plan: contains the pasted evaluation assessment
- History of Present Illness: populated by DAX or entered manually as needed
- Physical Examination: includes pain scale values, such as "VAS Pain Scale Pre-Treatment: 1/10"
- Results: contains prior objective measures and interventions, either pasted or auto-populated
Document objective measures
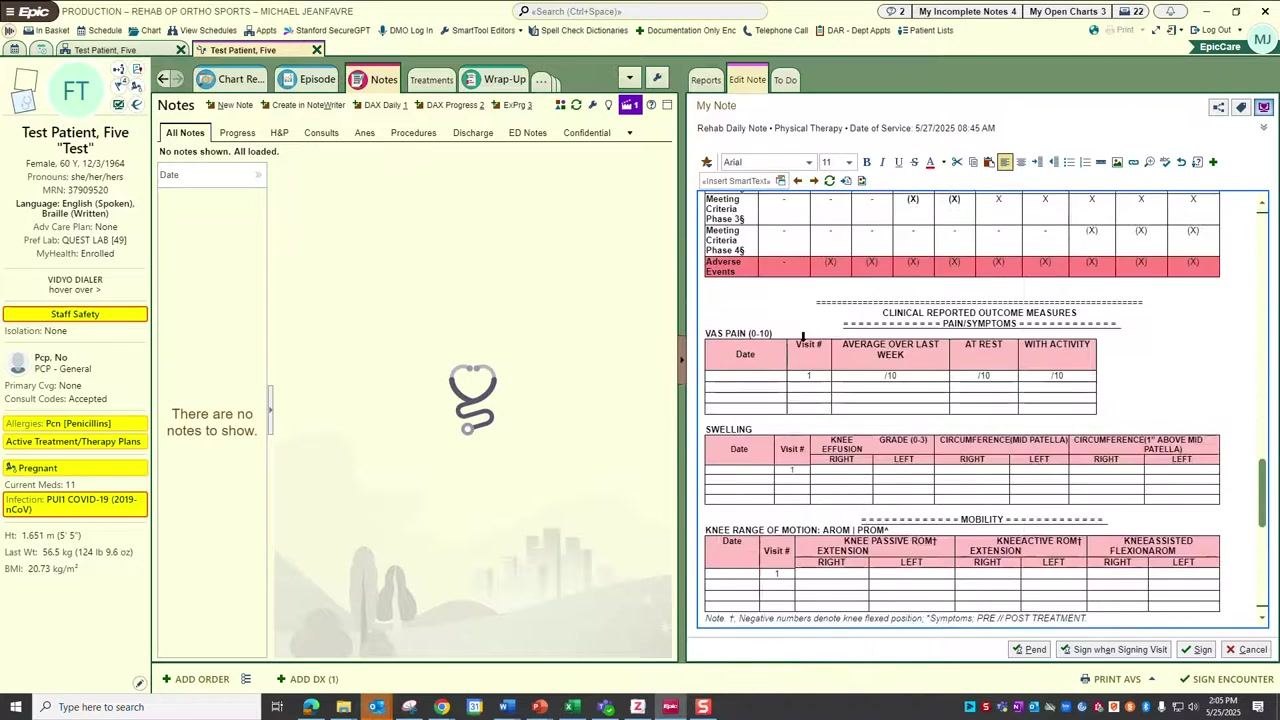
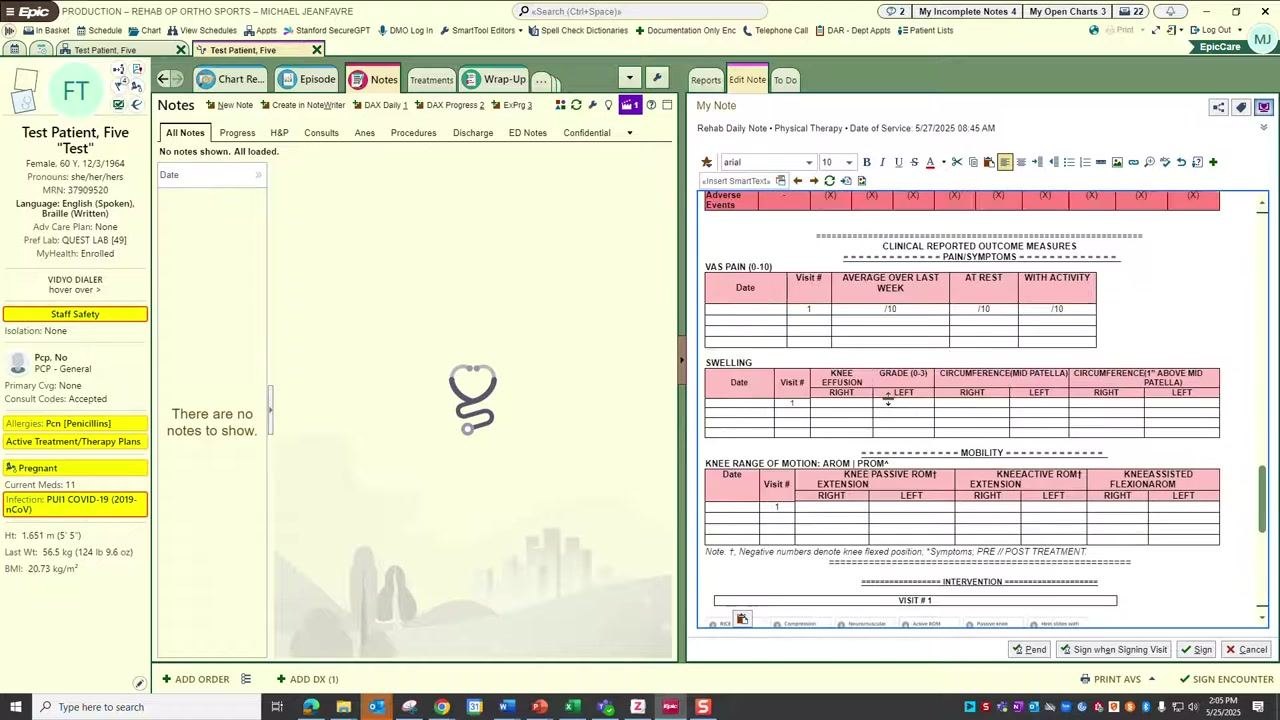
Scroll to the Clinical Reported Outcome Measures section and enter or verify the following data for the current visit:
- VAS Pain (0–10): record pain scores at rest and with activity (for example, "1/10")
- Swelling: document knee effusion grades and circumferences for both knees
- Knee Range of Motion (AROM/PROM): enter extension and flexion values for both knees
Make sure all relevant fields are filled in for Visit #1.
Document interventions
In the Intervention section, use the .tdv SmartPhrase to insert the week of service (for example, "WEEK OF 5/25/2025"). Then enter or select the interventions performed during the visit, such as:
- RICE
- Compression
- Neuromuscular electrical stimulation
- Active ROM (range of motion)
- Passive knee flexion
- Heel slides with towel
- Calf stretching
- Hamstring stretching
- Ankle AAROM
- Hip relaxation
Use the visual icons or text descriptions provided for each intervention.
Add any remaining documentation
Add any additional patient education notes or the patient's response to treatment. Confirm that all required fields are addressed, including patient education details, response to treatment, and any clarifying notes.
Review the note before finalizing
Double-check that every section—Assessment and Plan, HPI, Physical Exam, Results, and Interventions—is complete and accurate. If you needed to copy or carry forward information from another chart due to missing data, make sure this is clearly documented and justified. Scroll through the entire note to confirm its organization and completeness.
Sign or pend the note
Once you're satisfied with the documentation, click Sign or Sign when Signing Visit to finalize the note. If you need to return to it later, click Pend to save your progress without finalizing it.
What's next
With your daily note signed or pended, you've completed the core workflow for how to write a progress note in Epic for a physical therapy visit. For subsequent visits, repeat this process, copying forward relevant assessment details and updating objective measures and interventions as the patient's treatment progresses.
Generation details: cost, quality tiers
Docsie billed 1,500 credits ($1.05) to analyze this 3-minute video at standard quality. The rewrite, template fill and Word/PDF exports were included. The same video at each quality tier:
| Quality | Frames sampled | Credits | Approx. cost |
|---|---|---|---|
| Draft | every 16-30 s | 750 | $0.52 |
| Standard (this guide) | every 8-15 s | 1,500 | $1.05 |
| Detailed | every 4-7 s | 3,000 | $2.10 |
| Ultra | every 1-3 s | 6,000 | $4.20 |
Credits priced at $0.70 per 1,000; plans include a monthly allowance. Enterprise customers on on-premise or bring-your-own-model deployments run this on their own inference and pay no per-video credits.
Generated by Docsie Video-to-Docs on 2026-10-02 from a 2-minute video. Screenshots are frames from the source video and belong to their creator, Dr. Michael Jeanfavre, whose original is embedded above. If you own this video and want the guide removed or credited differently, contact us and we will act within one business day.