
How to Set Up Perfect Day Scheduling in Dentrix
Perfect Day Scheduling in Dentrix helps you transform a cluttered schedule filled with low-production appointments into an organized schedule with dedicated time blocks for high-production procedures, new patients, emergencies, and other priorities. This guide walks you through how to set up Perfect Day Scheduling in Dentrix, from planning your ideal day to configuring time blocks, activating the feature, and keeping your schedule organized going forward.
Video: How to Setup Perfect Day Scheduling in Dentrix by Dental Tech with Jaime (2022). All credit for the demonstration goes to the creator; watch the original on YouTube. The written guide below was generated from this video by Docsie. Creator? Request a change or removal.
Perfect Day Scheduling in Dentrix helps you transform a cluttered schedule filled with low-production appointments into an organized schedule with dedicated time blocks for high-production procedures, new patients, emergencies, and other priorities. This guide walks you through how to set up Perfect Day Scheduling in Dentrix, from planning your ideal day to configuring time blocks, activating the feature, and keeping your schedule organized going forward.
Prerequisites
Before you set up Perfect Day Scheduling in Dentrix, keep the following in mind:
- Perfect Day Scheduling is customizable — each dental practice and provider may have a different ideal schedule.
- Take time to plan how you want your perfect day to flow before setting up time blocks. Think about when to schedule high-production appointments, new patient slots, and emergency time.
- You should be familiar with the main Appointment Book view in Dentrix, as all configuration and verification steps take place there.
Understanding time blocks
Time blocks reserve periods on the schedule for important procedures and high-production appointments. They are visually distinct, typically outlined in different colors (such as pink, yellow, cyan, or red) so they're easy to identify at a glance. For example, labeled blocks like "SMP-HYG," "HP2-DDS1," "NP2-DDS1," and "ER-DDS1" each represent a different type of reserved time.
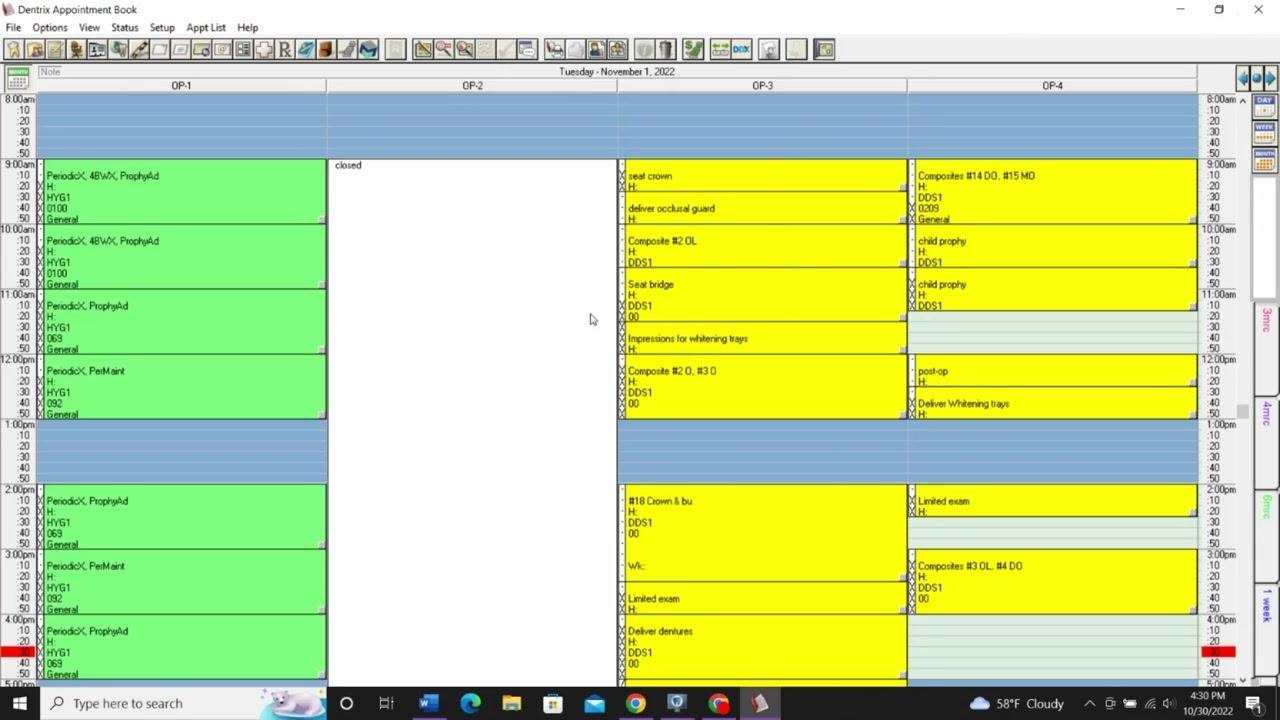
Open the Appointment Book
Make sure you are in the main Appointment Book view before you begin configuring your schedule.
Access Provider Setup
Go to the top menu bar and click Setup, then select Provider Setup from the dropdown menu.
Select the provider to configure
In the Provider Setup window, choose the provider you want to work with (for example, "DDS3"). The dialog displays options for setting time blocks, selecting days of the week, and assigning a provider color. You'll see checkboxes for each day, a list of provider aliases, and a color selection option (for example, magenta).
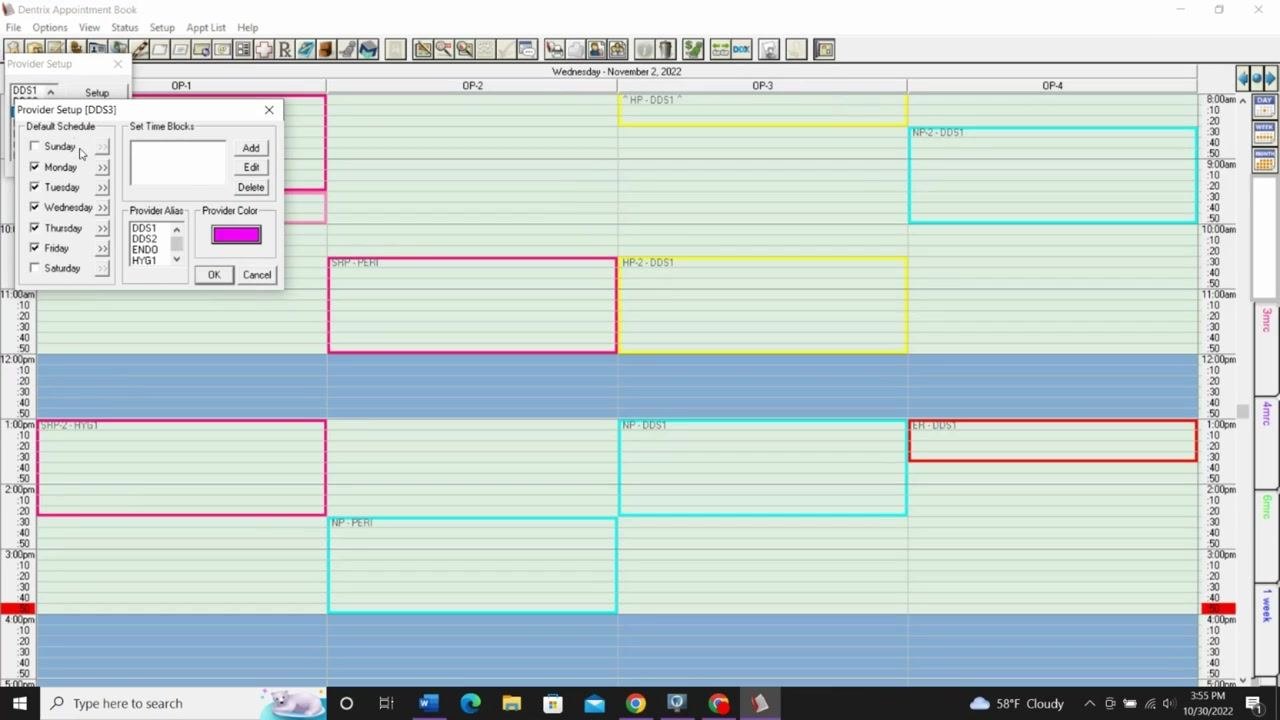
Open the Set Time Blocks section
In the Provider Setup window for your selected provider, locate the Set Time Blocks area on the right side. This is where you create and manage all time blocks for that provider.
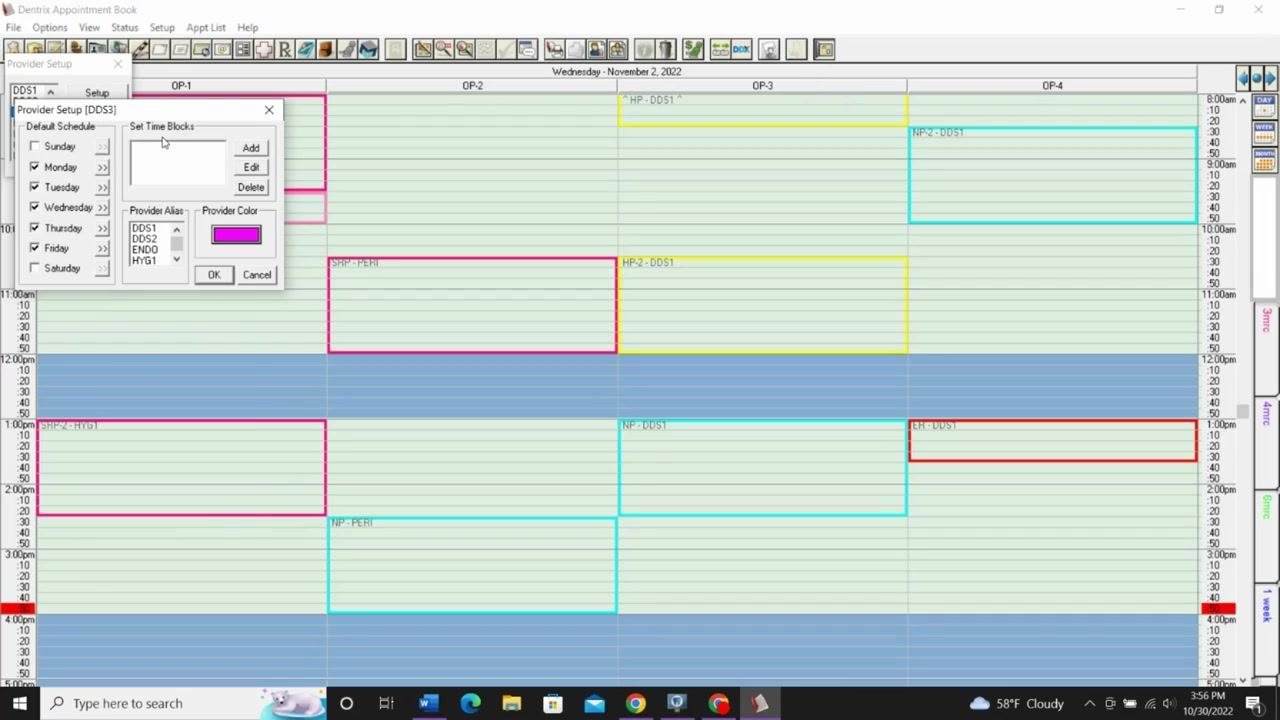
Add a new time block
Click the Add button to open the Block Settings dialog, where you can define the details of your new time block.
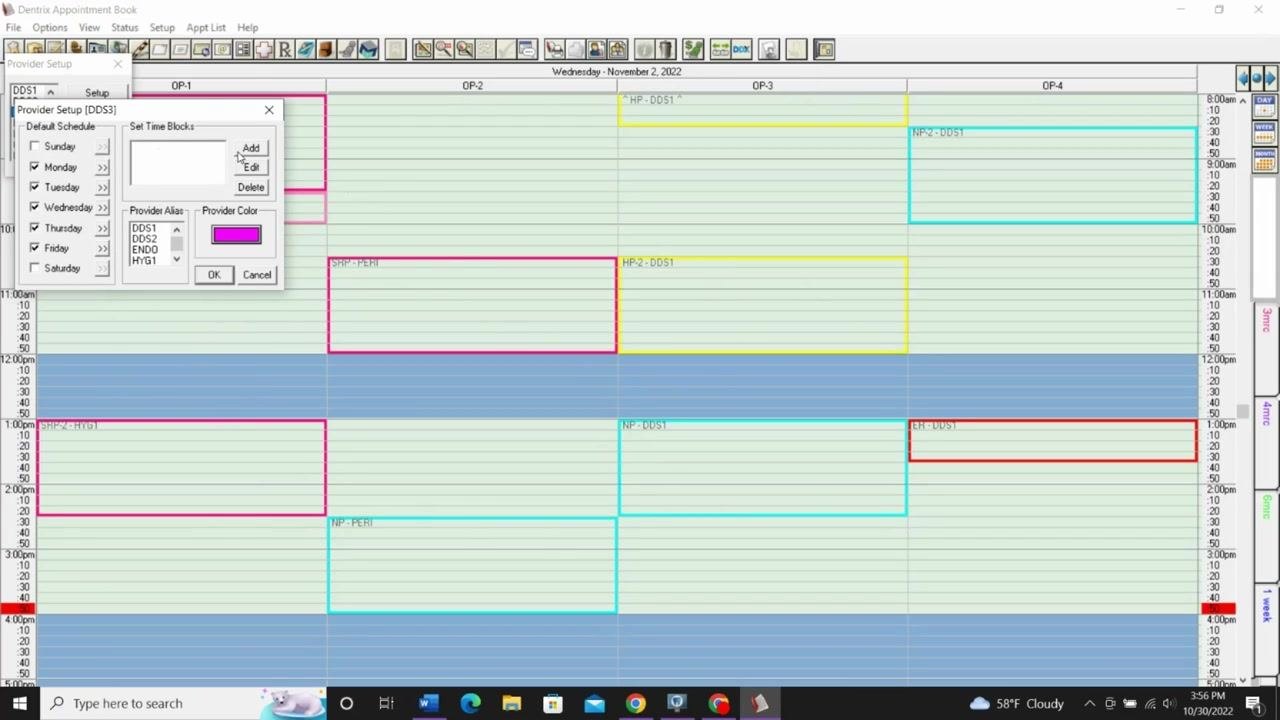
Name and color the time block
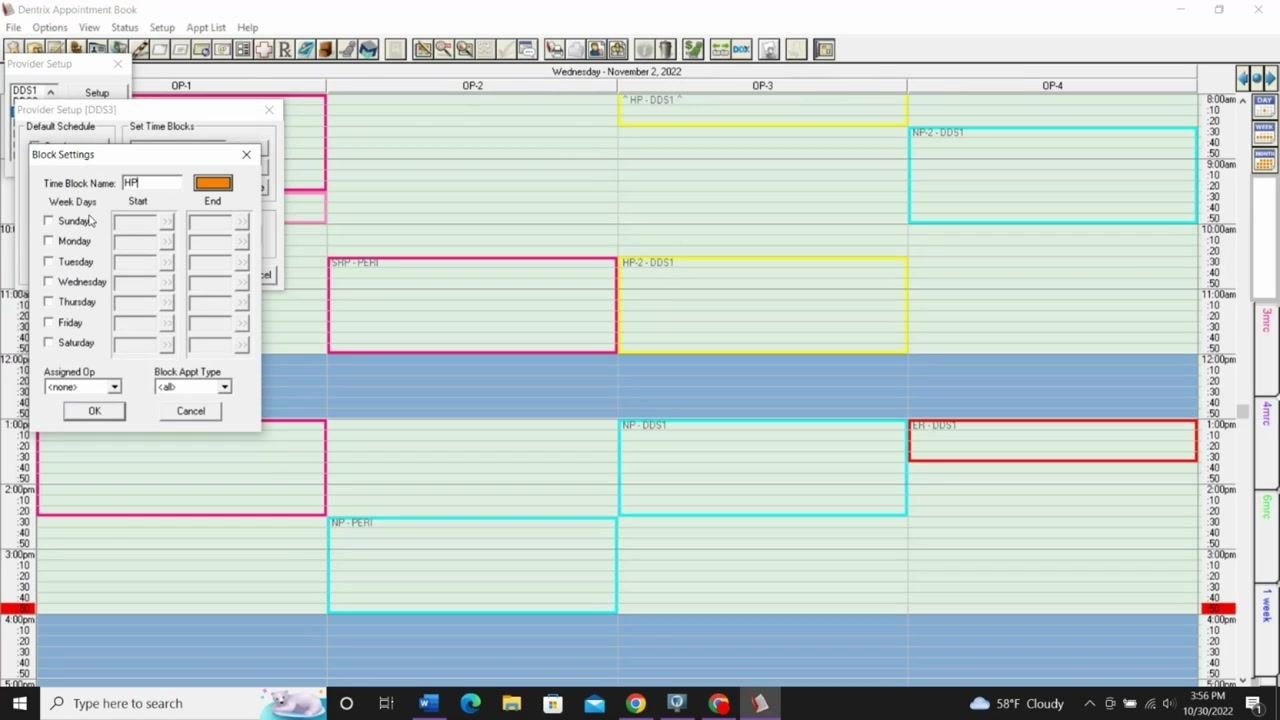
In the Block Settings dialog, enter a descriptive Time Block Name (for example, "HP" for High Production). Click the color box to select a color for the block (for example, orange for high production).
Specify the days and times
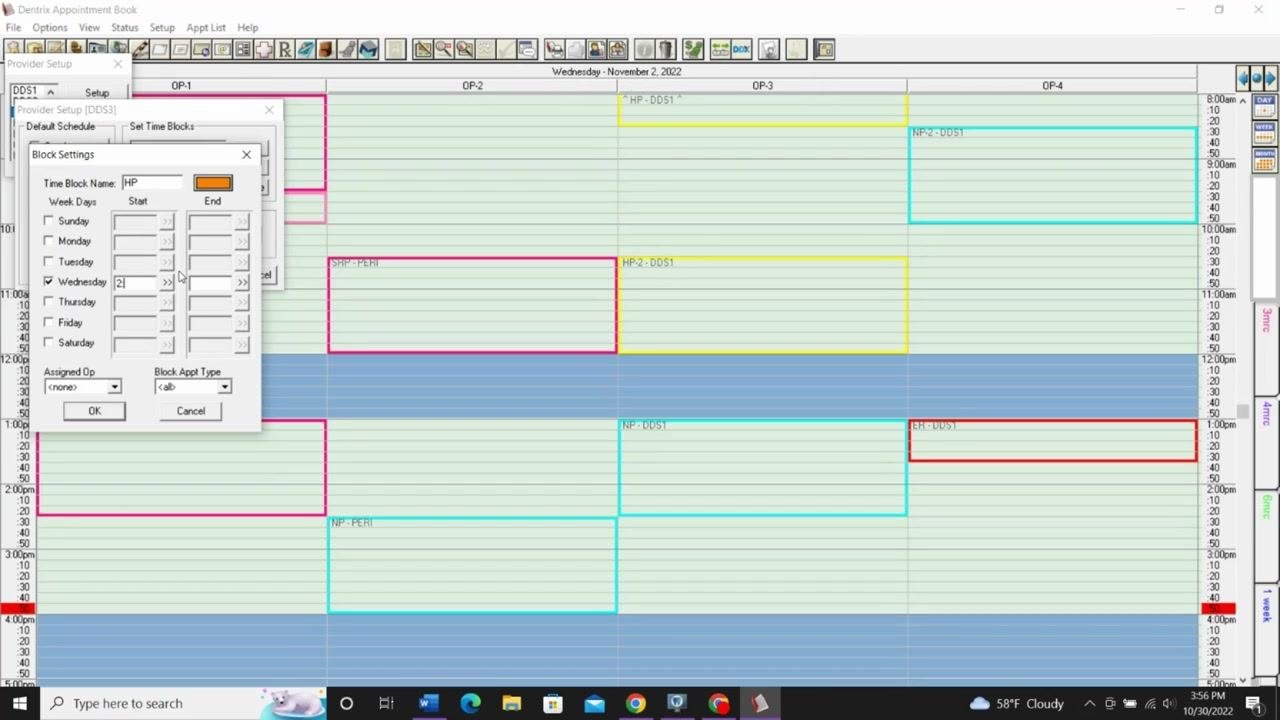
Check the box for each day you want the block to appear (for example, Wednesday), then enter the start and end times for the block (for example, 2:30 pm to 4:00 pm).
Assign an operatory
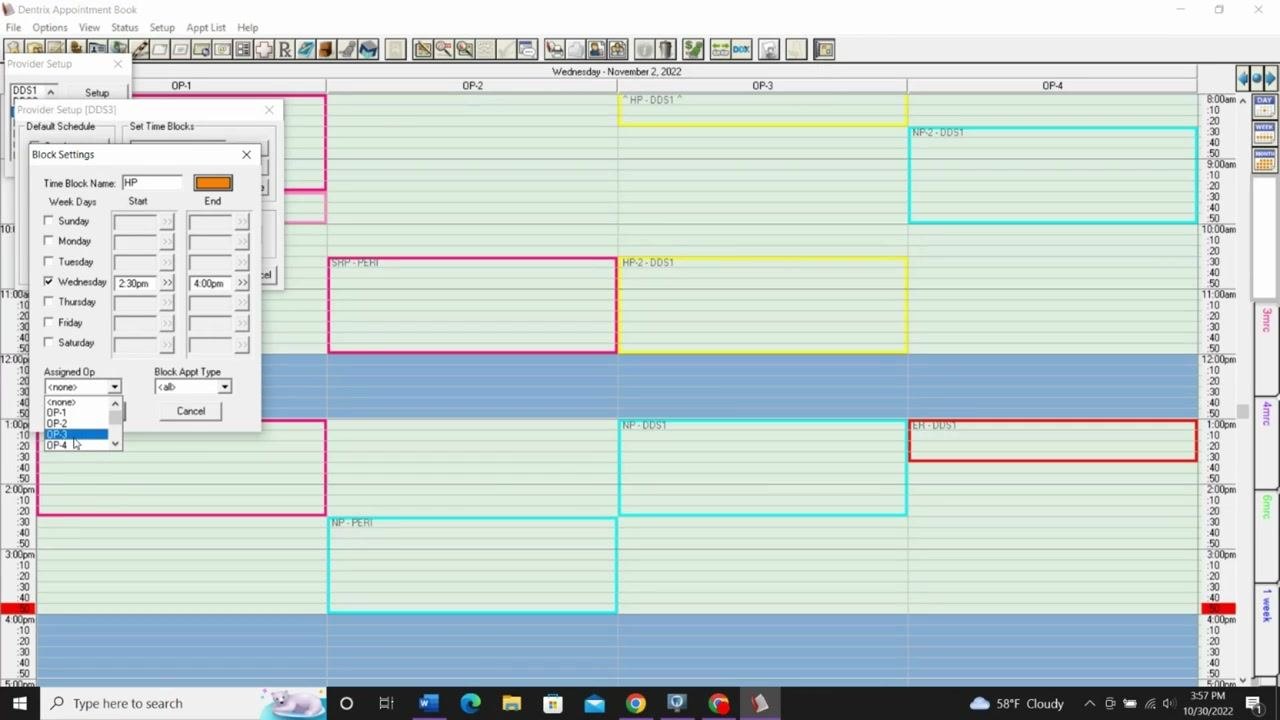
Use the Assigned Op dropdown to select the operatory where this block will be scheduled (for example, OP-4).
Save the time block
Click OK to save the time block. It will now appear in the Set Time Blocks list for the provider. Click OK again in the Provider Setup window to apply the changes.
Verify the time block on the schedule
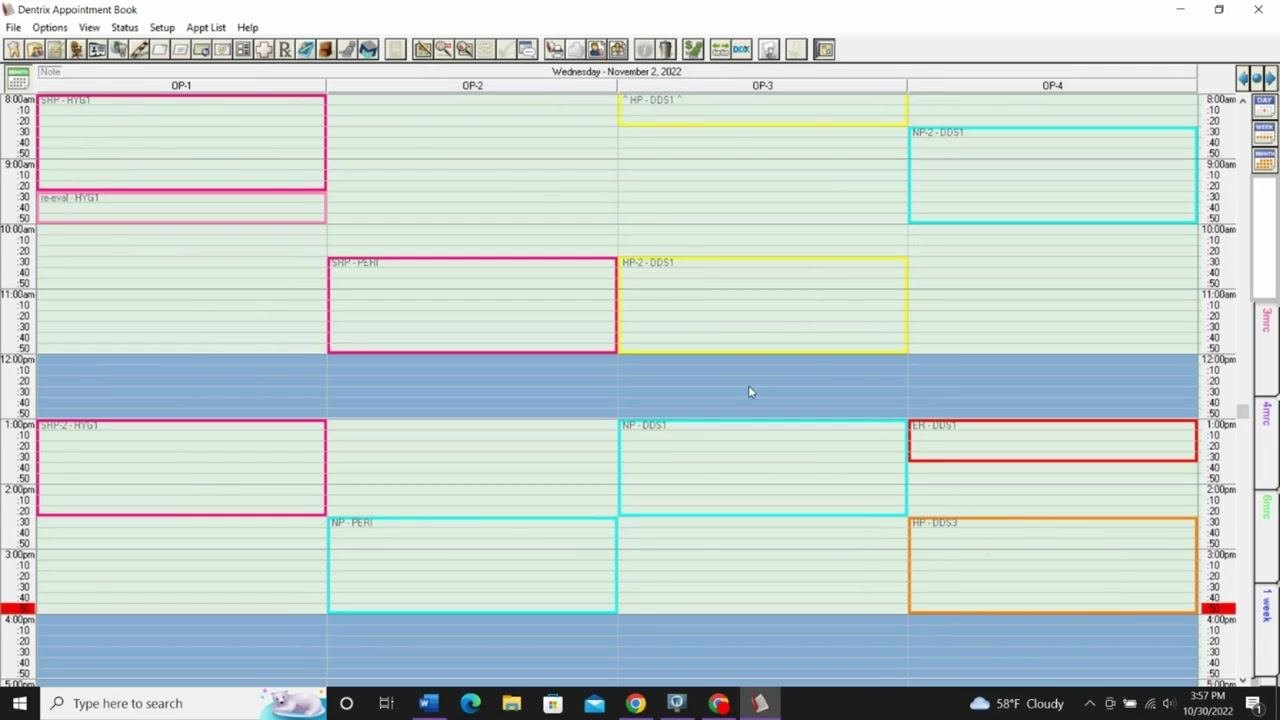
Check the Appointment Book to confirm the new time block appears correctly — for example, an orange "HP" block for DDS3 in OP-4 from 2:30 pm to 4:00 pm on Wednesday.
Activate Perfect Day Scheduling
If you visit your schedule and don't see the time blocks you just created, you likely need to activate Perfect Day Scheduling. Find the icon at the top of the Appointment Book window that resembles a small appointment book, and hover over it to confirm it reads "Perfect Day Scheduling." Click the icon to turn on your time blocks, then confirm that the blocks are now visible in the schedule for each operatory and provider.
Note: You must activate Perfect Day Scheduling on every computer in your office. Once activated, it remains on for that computer, even after closing Dentrix, but it does not automatically activate on other workstations.
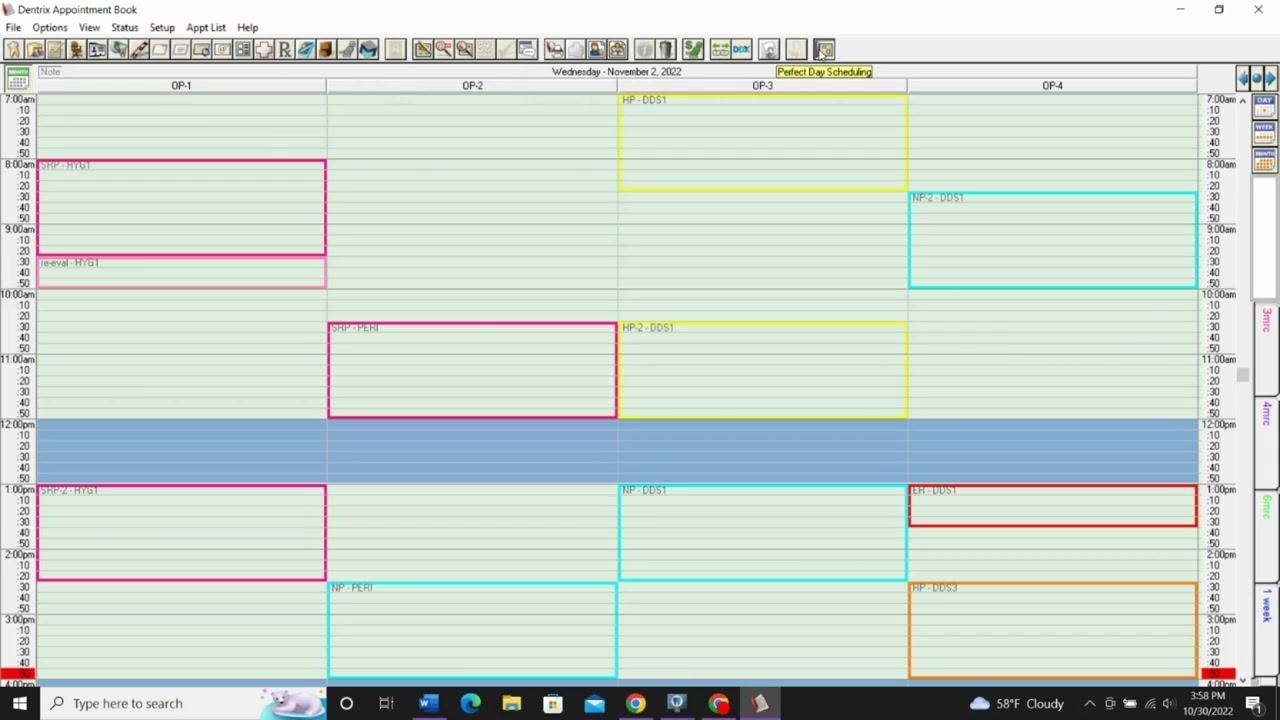
Repeat activation on all workstations
Go to each computer in your office and repeat the activation process so that all operatories display the correct time blocks consistently.
Managing time blocks
Move a time block within an operatory
Your schedule may include various blocks, such as scaling/root planing or new patient blocks. If a time block is in the way of scheduling a specific appointment, click on the block and drag it to a new time slot within the same operatory. You can only move blocks up or down within the same operatory — you cannot move them between operatories.
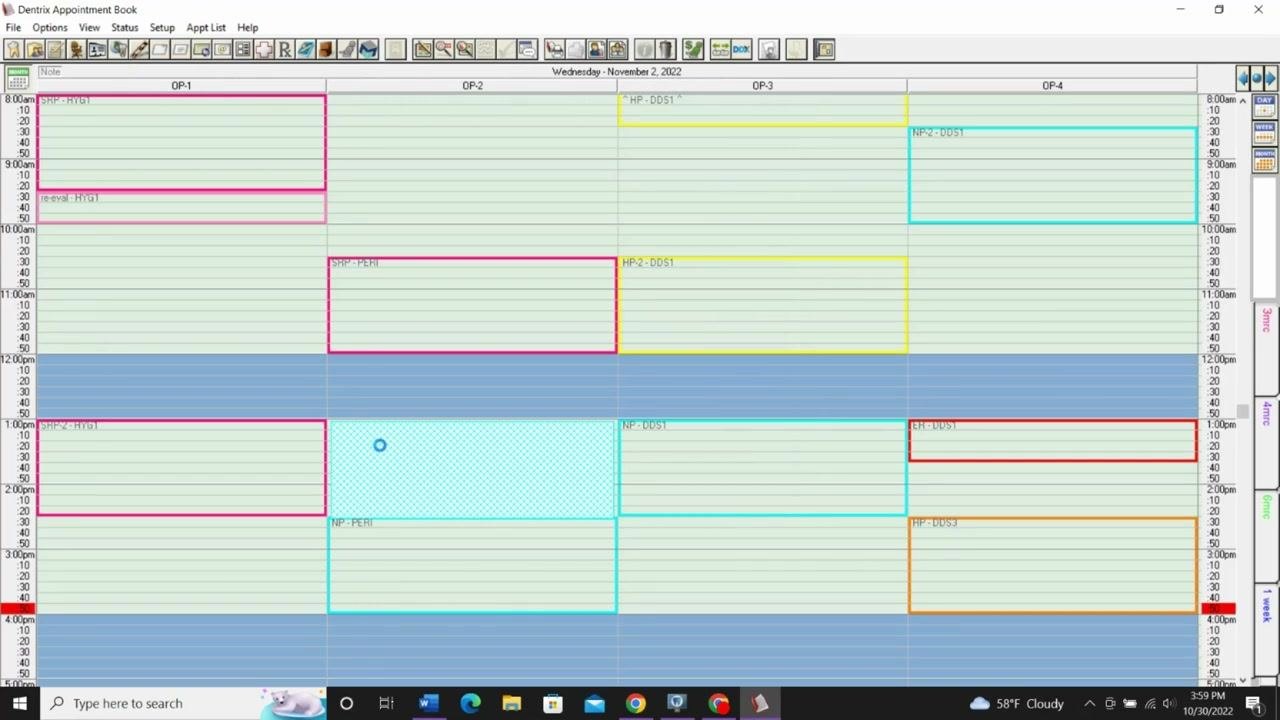
Resize a time block
Click and drag the edge of a time block to make it longer or shorter, just as you would adjust a regular appointment. This lets you customize the block's duration for specific scheduling needs.
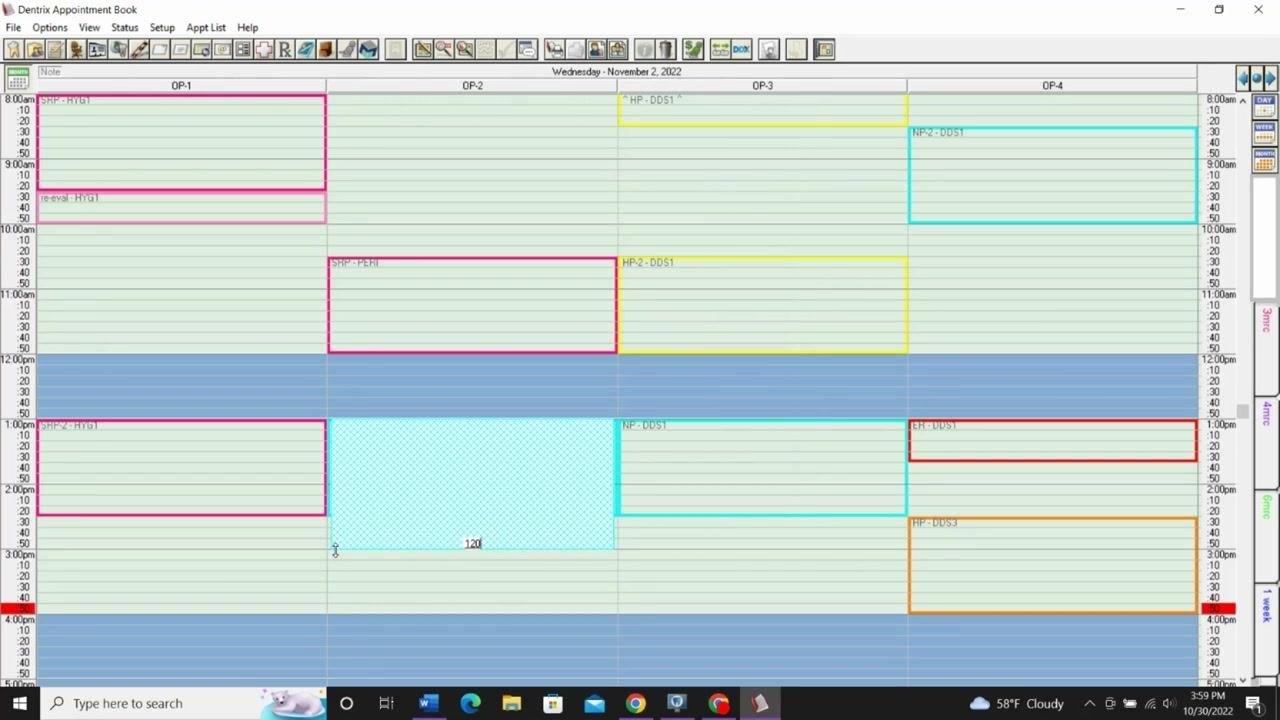
Identify items that don't belong in a time block
Review your appointment book for entries that don't fit the intended purpose of a specific time block. Look for visual indicators such as color-coded blocks and labels (for example, "SNP-HYGI," "HP2-DDS1," "NP2-DDS1") to determine the type of appointment scheduled, and make sure each time block is used only for its designated purpose, such as hygiene, new patient, or doctor-specific appointments.
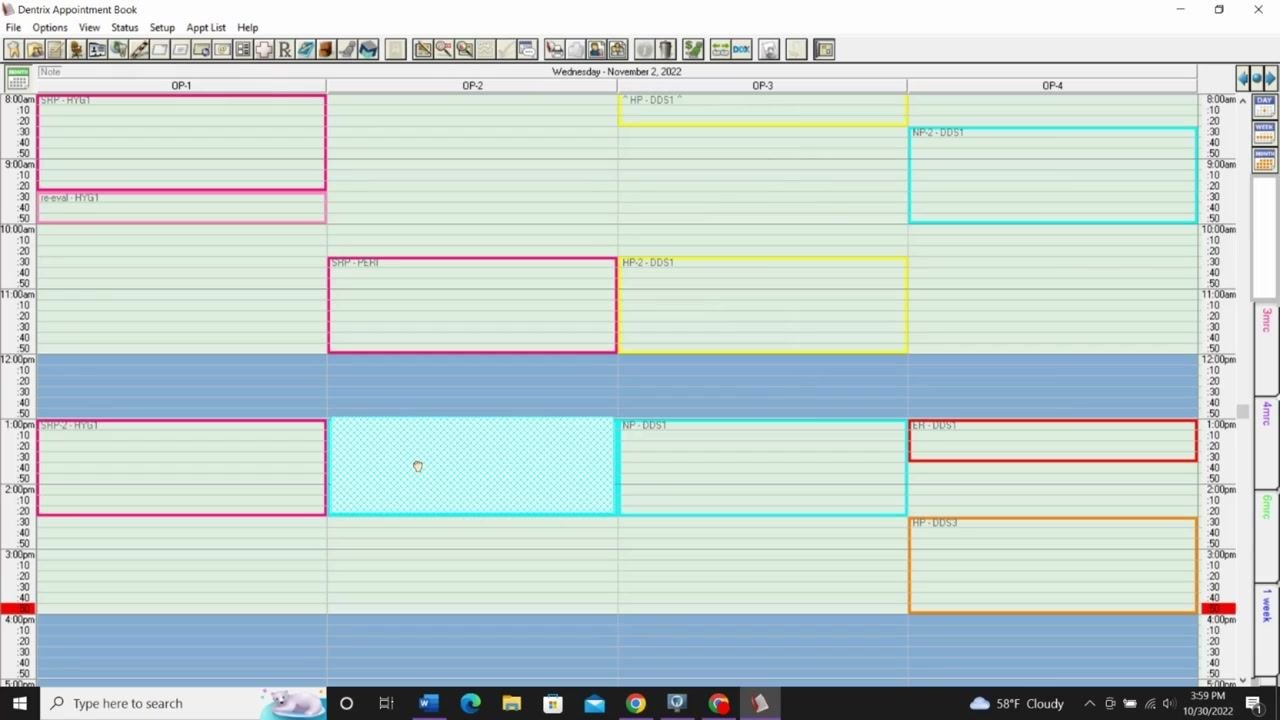
Move or remove misplaced items
If you find an appointment or block that needs to be relocated, select it and drag it to a more appropriate time or operatory, or remove it entirely if it isn't needed. Use this feature to keep your schedule organized so that only relevant appointments remain in each time block.
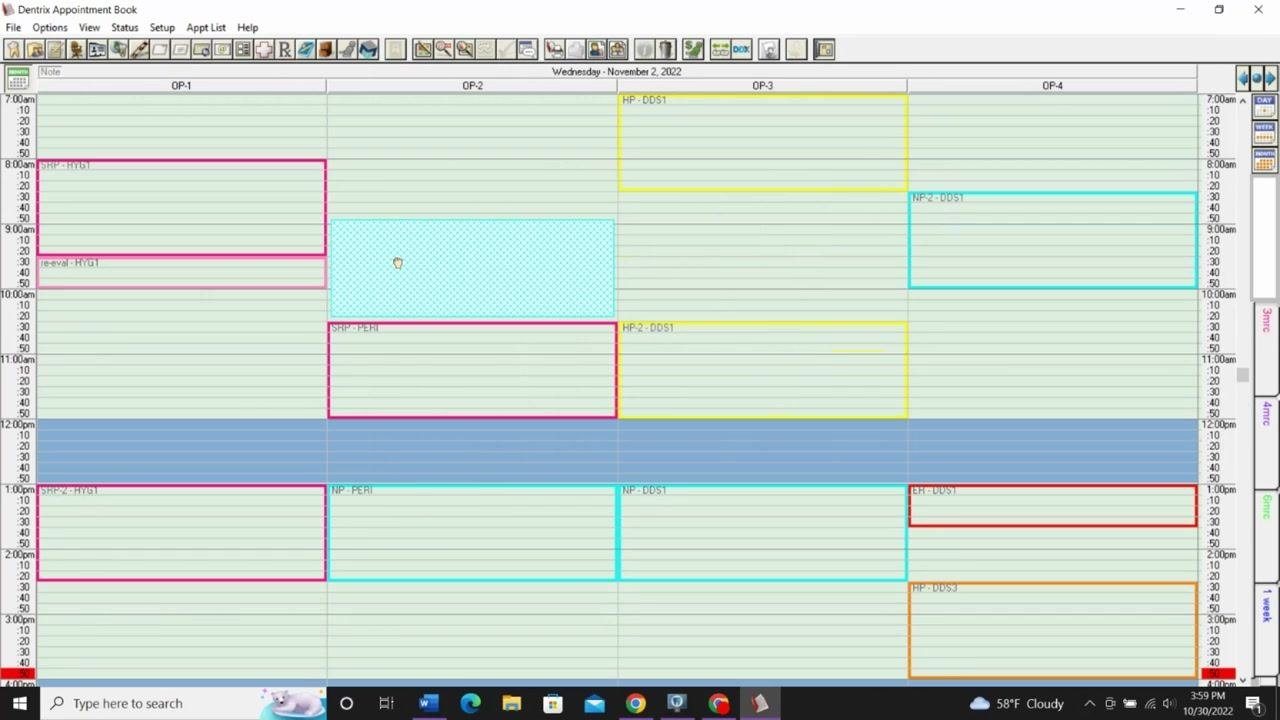
Verify the schedule matches your desired layout
Review the appointment book to confirm that all appointments are scheduled exactly as intended. Each operatory and time block should contain only the appropriate appointments, with color-coded blocks clearly indicating their type, and the schedule should be free of errors, misplaced appointments, or double-bookings.
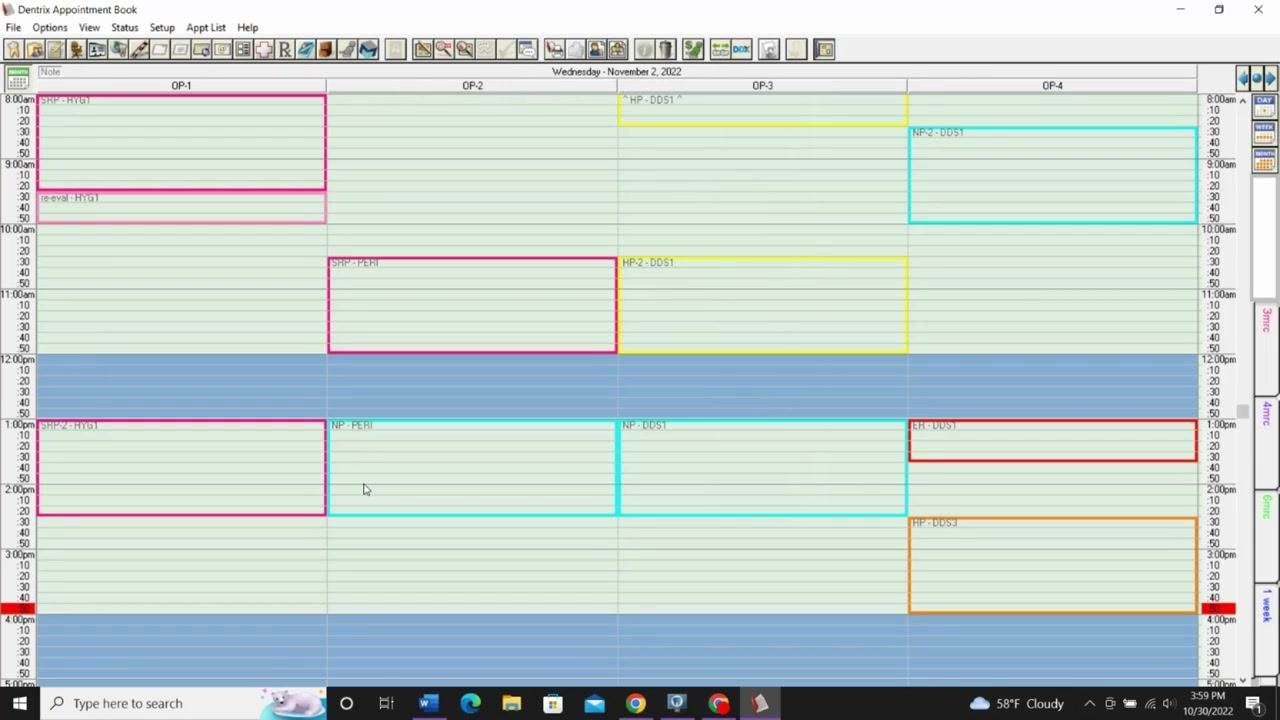
Schedule future appointments without conflicts
Do not schedule anything else in a time block that is already reserved for a specific purpose. Each block should remain dedicated to its intended use, with the appointment book reflecting only the appointments meant for that block and no overlaps or extraneous entries.
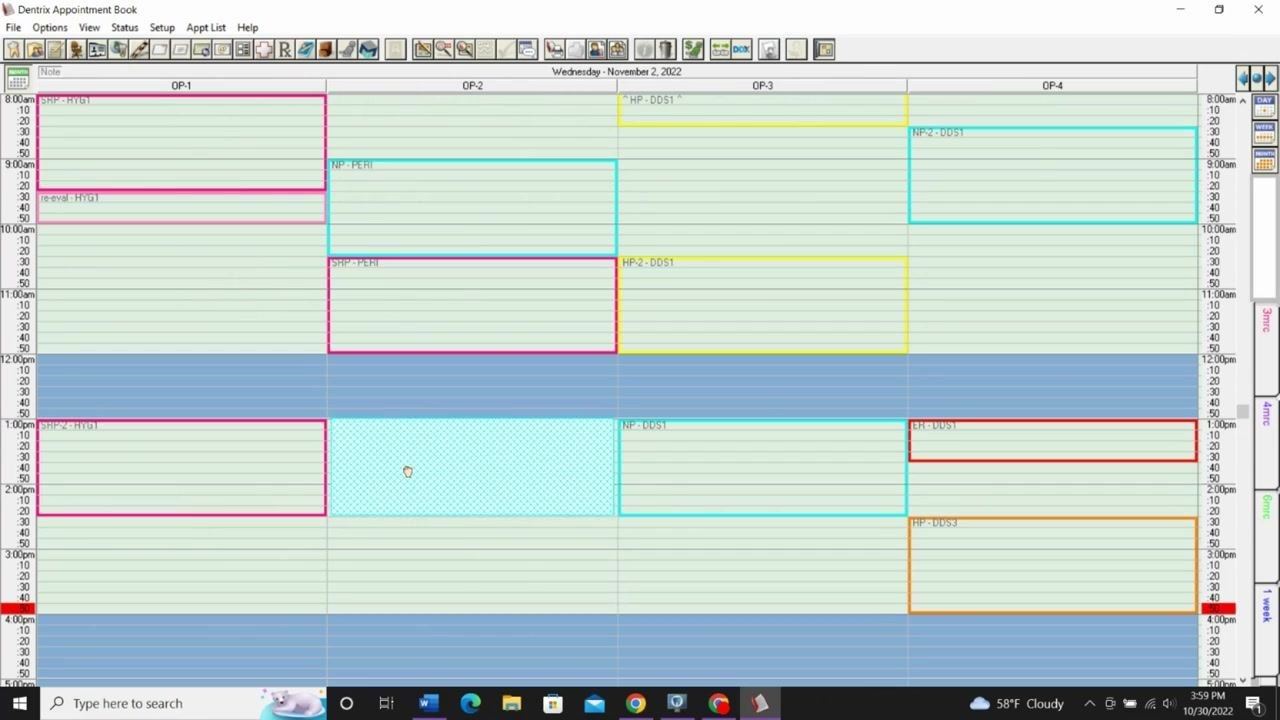
When adding new appointments, always check the existing schedule first to confirm you are not placing anything in a reserved or inappropriate time block. Use the appointment book's visual cues and color codes to guide your scheduling decisions, and maintain the integrity of each time block by following your established scheduling rules.
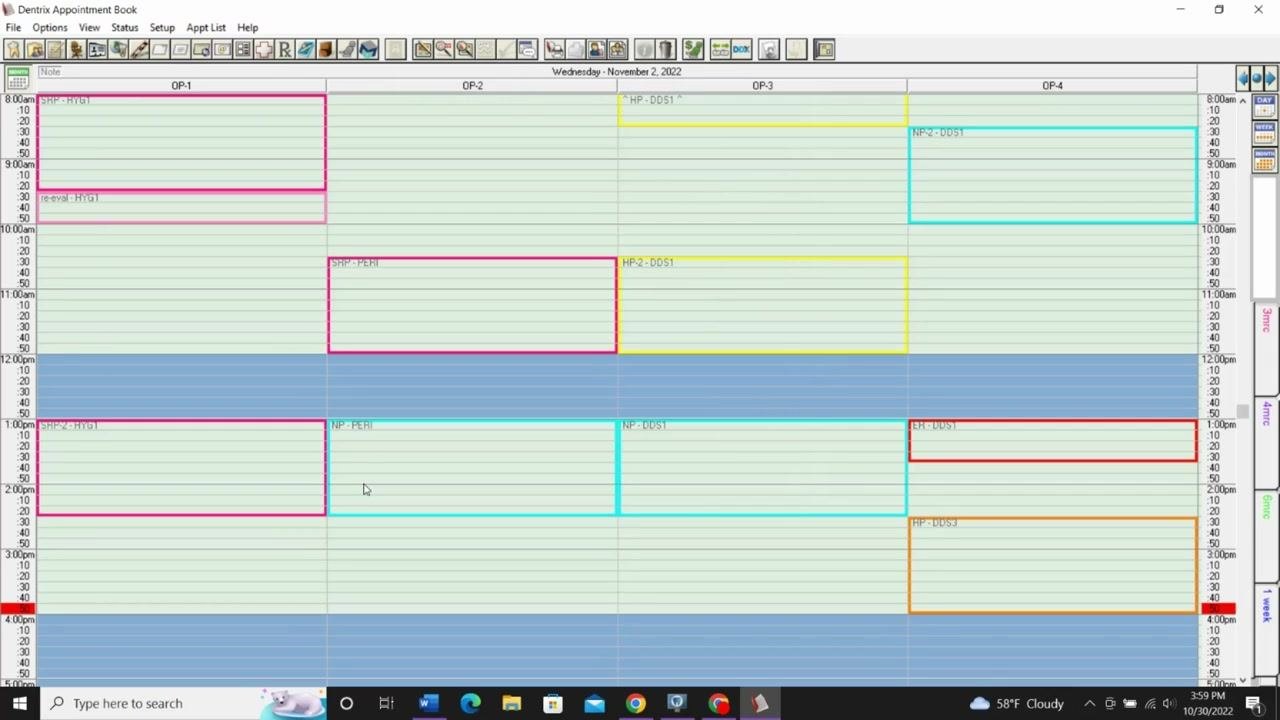
Summary
By following these steps, you can set up Perfect Day Scheduling in Dentrix, configure custom time blocks tailored to each provider, activate the feature across every workstation in your office, and keep your schedule organized so it consistently supports your production goals.
Generation details: cost, quality tiers
Docsie billed 3,500 credits ($2.45) to analyze this 7-minute video at standard quality. The rewrite, template fill and Word/PDF exports were included. The same video at each quality tier:
| Quality | Frames sampled | Credits | Approx. cost |
|---|---|---|---|
| Draft | every 16-30 s | 1,750 | $1.22 |
| Standard (this guide) | every 8-15 s | 3,500 | $2.45 |
| Detailed | every 4-7 s | 7,000 | $4.90 |
| Ultra | every 1-3 s | 14,000 | $9.80 |
Credits priced at $0.70 per 1,000; plans include a monthly allowance. Enterprise customers on on-premise or bring-your-own-model deployments run this on their own inference and pay no per-video credits.
Generated by Docsie Video-to-Docs on 2026-10-14 from a 6-minute video. Screenshots are frames from the source video and belong to their creator, Dental Tech with Jaime, whose original is embedded above. If you own this video and want the guide removed or credited differently, contact us and we will act within one business day.