
How to Dimension in Creo
Knowing how to dimension in Creo Parametric is essential for creating sketches that are flexible during design and fully defined when finished. This guide walks you through recognizing weak dimensions, converting them to strong dimensions, adding new dimensions to lines, angles, and arcs, and finalizing a fully defined sketch.
Video: Tutorial Dimensioning in Sketcher - Creo by CADD Beast. All credit for the demonstration goes to the creator; watch the original on YouTube. The written guide below was generated from this video by Docsie. Creator? Request a change or removal.
Knowing how to dimension in Creo Parametric is essential for creating sketches that are flexible during design and fully defined when finished. This guide walks you through recognizing weak dimensions, converting them to strong dimensions, adding new dimensions to lines, angles, and arcs, and finalizing a fully defined sketch.
Prerequisites
- Creo Parametric Sketcher open with an active sketch.
- A basic understanding of Sketcher tools and the sketching workflow.
Understand weak dimensions and constraints
Recognize weak dimensions and constraints
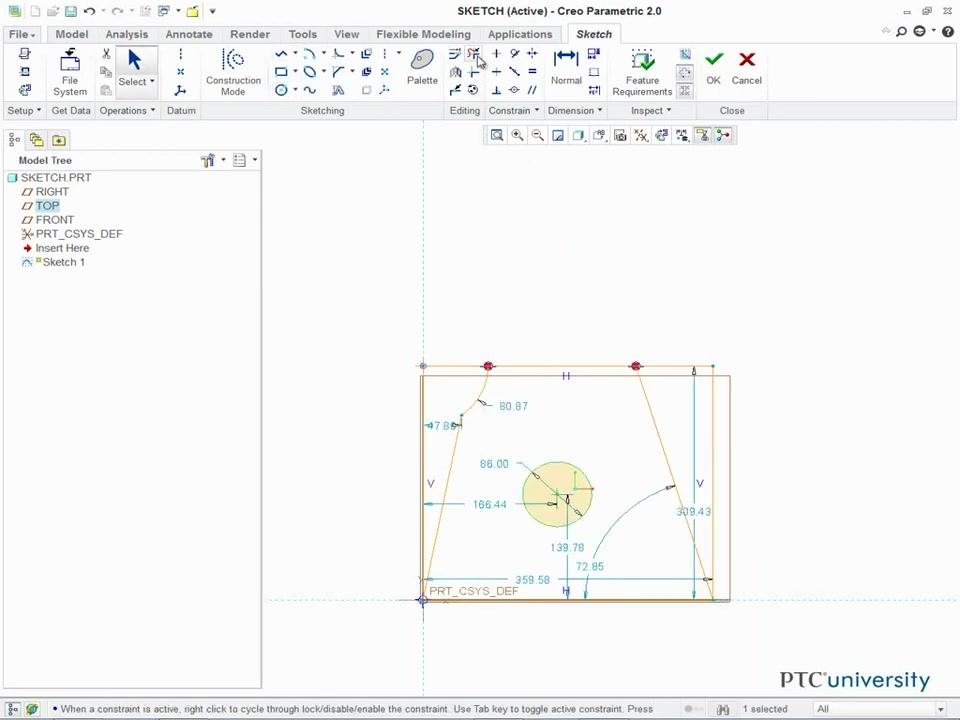
Weak dimensions and constraints are automatically created at every stage of the sketch creation process. These weak dimensions do not appear on screen while you are actively using a Sketcher tool.
Observe when weak dimensions appear
Once you finish using a Sketcher tool, the weak dimensions become visible on your sketch. These dimensions update dynamically as you modify or trim the geometry.
Add new strong dimensions
Convert a weak dimension to a strong dimension
To turn a weak dimension into a strong dimension:
- Select the Normal Dimension tool from the toolbar.
- Double-click the weak dimension you want to strengthen.
Add a new strong dimension to an entity
To dimension an entity:
- Select the Normal Dimension tool.
- Click the entity you want to dimension.
- Click the scroll wheel to confirm the selection.
- Move the cursor to the desired location and click to place the dimension.
Dimension an angle
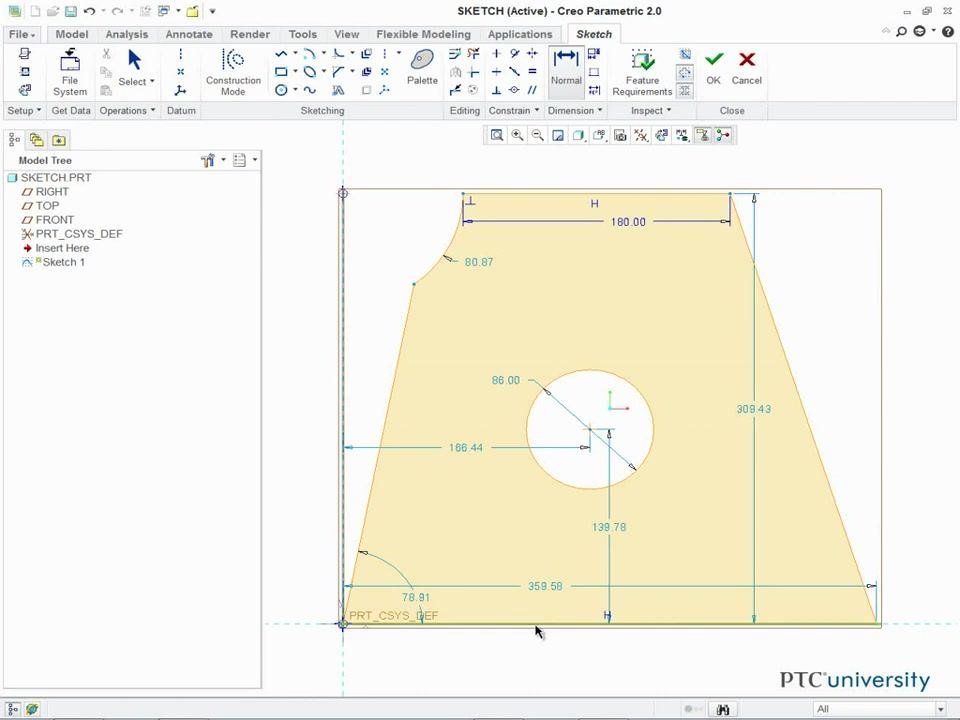
To dimension an angle:
- Hold the Ctrl key.
- Select the first line that forms the angle.
- Select the second line that forms the angle.
- Click the scroll wheel to place the angular dimension.
Dimension an arc
To dimension the angle of an arc, select the three points that define the arc instead of two lines, then follow the same process used for angular dimensions to place the arc angle dimension.
Re-dimension using the Select tool
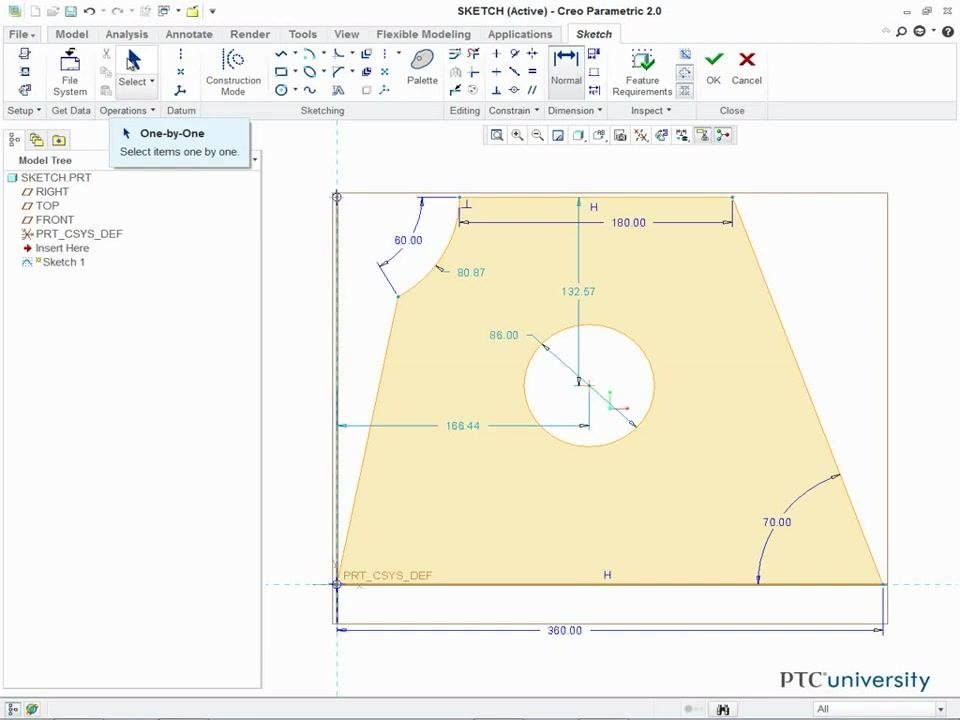
The Select tool lets you re-dimension existing dimensions, but it cannot create new strong dimensions. To re-dimension:
- Double-click an existing weak dimension using the Select tool.
- Enter the new value.
Reposition dimensions for clarity
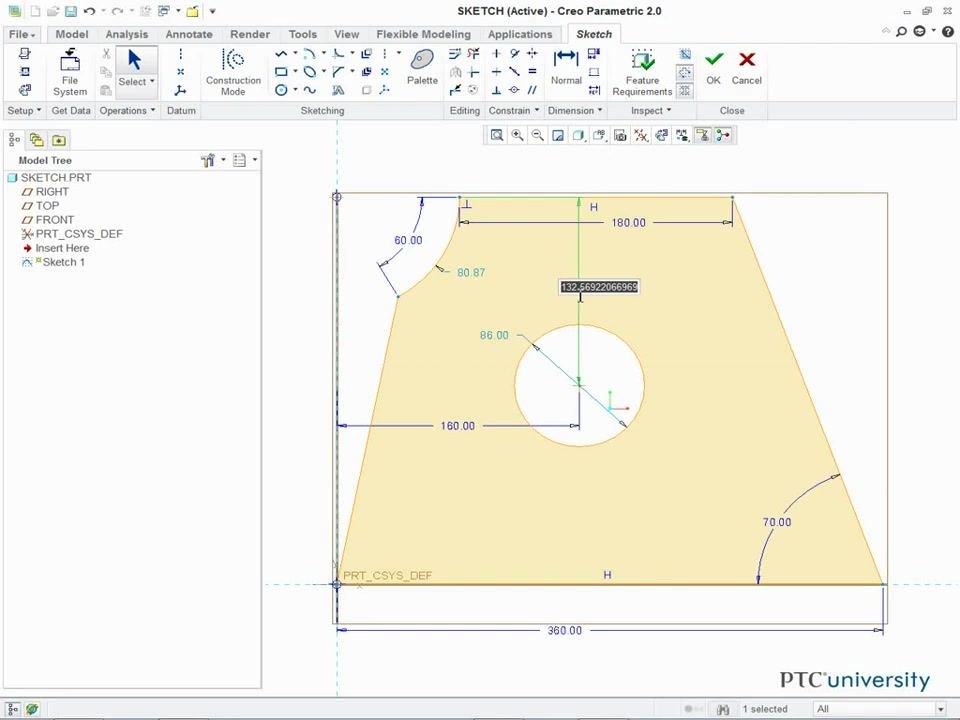
You can drag dimensions with the Select tool to reposition them, improving clarity and manageability within your sketch.
Convert diameter dimensions to radial dimensions
Convert a diameter dimension to a radial dimension
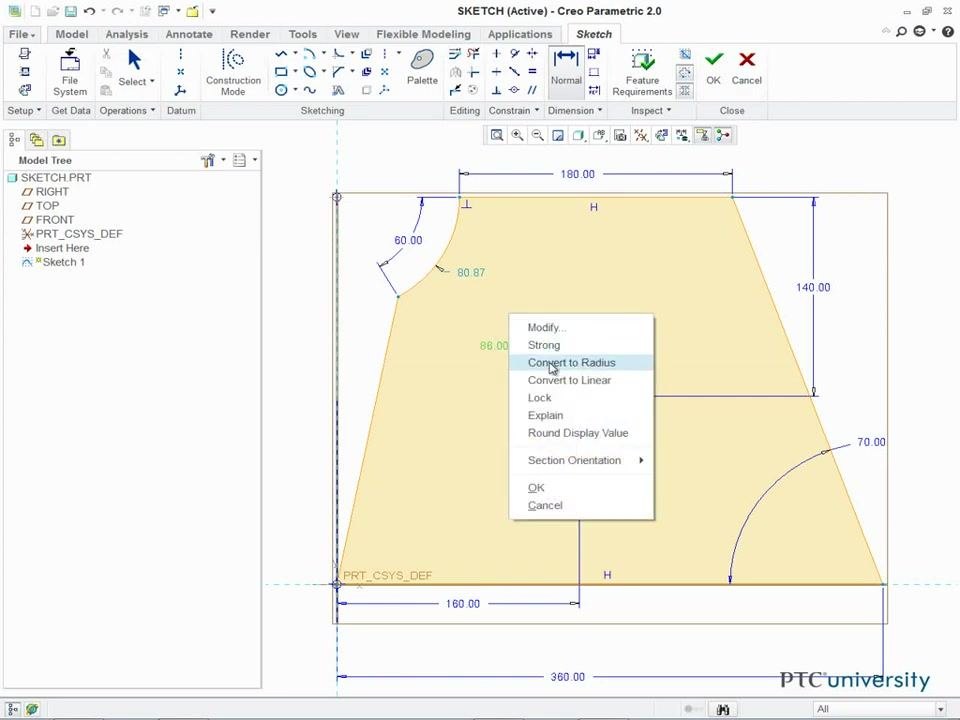
To change a diameter dimension to a radial dimension:
- Select the Normal Dimension tool from the toolbar.
- Click the diameter dimension you want to convert.
- Right-click the selected dimension.
- Choose Convert to Radius from the context menu.
This process also works for arc dimensions.
Convert a radial dimension back to diameter
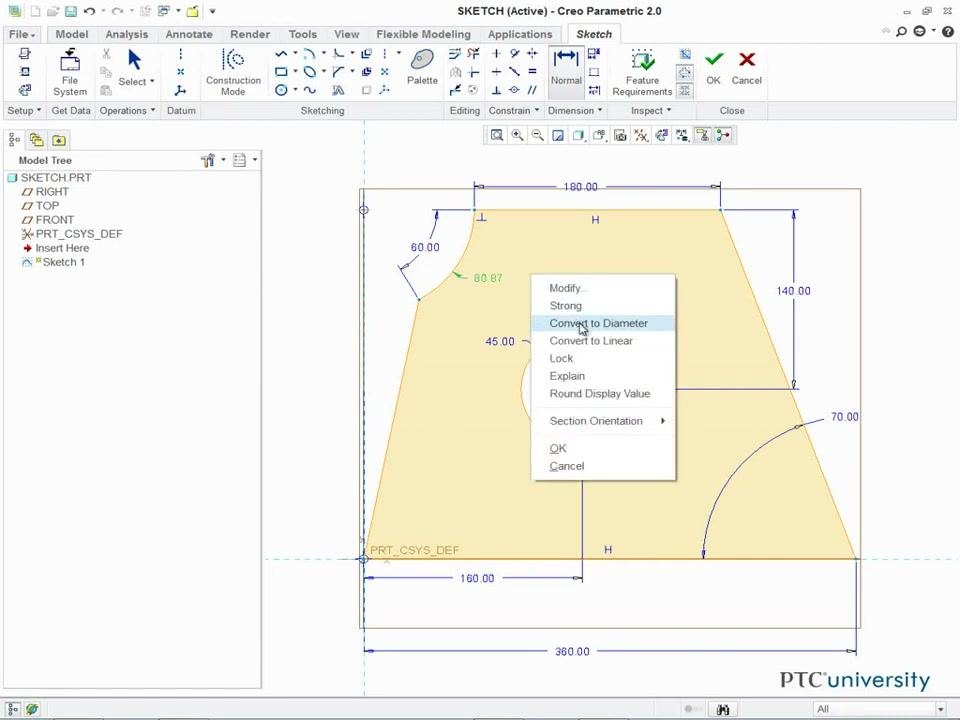
To revert a radial dimension to a diameter dimension:
- Right-click the radial dimension.
- Select Convert to Diameter from the context menu.
Understand fully defined sketches
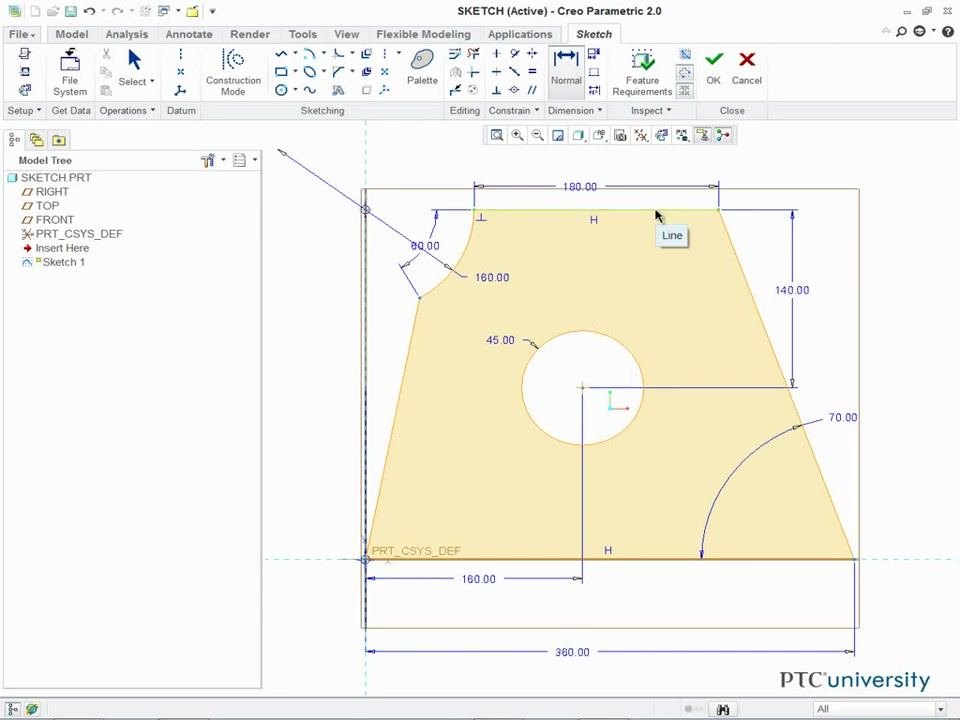
Recognize a fully defined sketch
Once all dimensions in your sketch are strong dimensions, the sketch is considered fully defined. If you try to add more dimensions to a fully defined sketch, a dialog box appears indicating that the sketch is now over-defined. The dialog lists the conflicting constraints and dimensions, letting you select one to delete or convert.
Finish and save the sketch
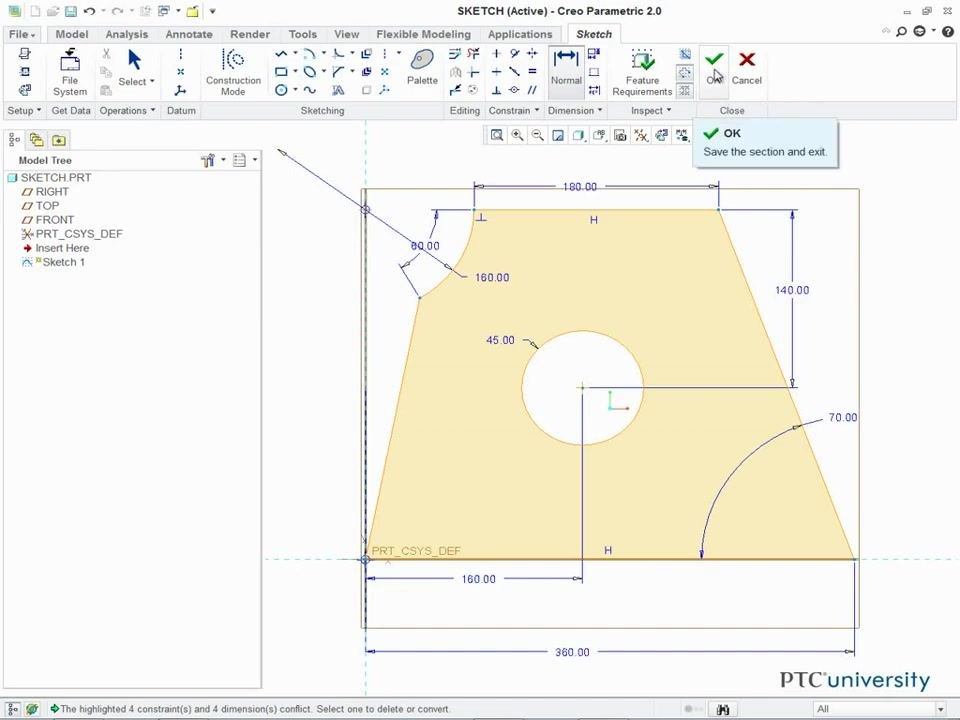
Save and exit Sketcher
After confirming that your sketch is fully defined and all dimensions are correct, click the OK button (green checkmark) in the Sketch tab toolbar to save the section and exit Sketcher mode.
Summary
By following these steps, you now know how to dimension in Creo Parametric Sketcher: managing weak and strong dimensions, dimensioning lines, angles, and arcs, converting between diameter and radial dimensions, recognizing a fully defined sketch, and saving your work to exit Sketcher mode.
Generation details: cost, quality tiers
Docsie billed 1,500 credits ($1.05) to analyze this 3-minute video at standard quality. The rewrite, template fill and Word/PDF exports were included. The same video at each quality tier:
| Quality | Frames sampled | Credits | Approx. cost |
|---|---|---|---|
| Draft | every 16-30 s | 750 | $0.52 |
| Standard (this guide) | every 8-15 s | 1,500 | $1.05 |
| Detailed | every 4-7 s | 3,000 | $2.10 |
| Ultra | every 1-3 s | 6,000 | $4.20 |
Credits priced at $0.70 per 1,000; plans include a monthly allowance. Enterprise customers on on-premise or bring-your-own-model deployments run this on their own inference and pay no per-video credits.
Generated by Docsie Video-to-Docs on 2026-10-12 from a 2-minute video. Screenshots are frames from the source video and belong to their creator, CADD Beast, whose original is embedded above. If you own this video and want the guide removed or credited differently, contact us and we will act within one business day.