
How to Copy a Course in Blackboard
Learning how to copy a course in Blackboard Ultra lets you reuse content from a previous course without rebuilding it from scratch. Unlike the Original experience, where you push content from an old course into a new one, Ultra uses a "pull" model: you select the course you're currently working in and pull the items you need from another course. This guide walks you through copying content, reviewing it for accuracy, and batch editing multiple items at once.
Video: How to Copy Courses in Blackboard Ultra (Including from Original Course View) by The Center for Excellence in Learning and Teaching. All credit for the demonstration goes to the creator; watch the original on YouTube. The written guide below was generated from this video by Docsie. Creator? Request a change or removal.
Learning how to copy a course in Blackboard Ultra lets you reuse content from a previous course without rebuilding it from scratch. Unlike the Original experience, where you push content from an old course into a new one, Ultra uses a "pull" model: you select the course you're currently working in and pull the items you need from another course. This guide walks you through copying content, reviewing it for accuracy, and batch editing multiple items at once.
Prerequisites
- Access to the Ultra course you want to add content to.
- Access to the source course(s) containing the content you want to copy.
- Familiarity with the exact course name or ID of the source course, in case you need to search for it.
Copying course content
Open the Content tab of your course
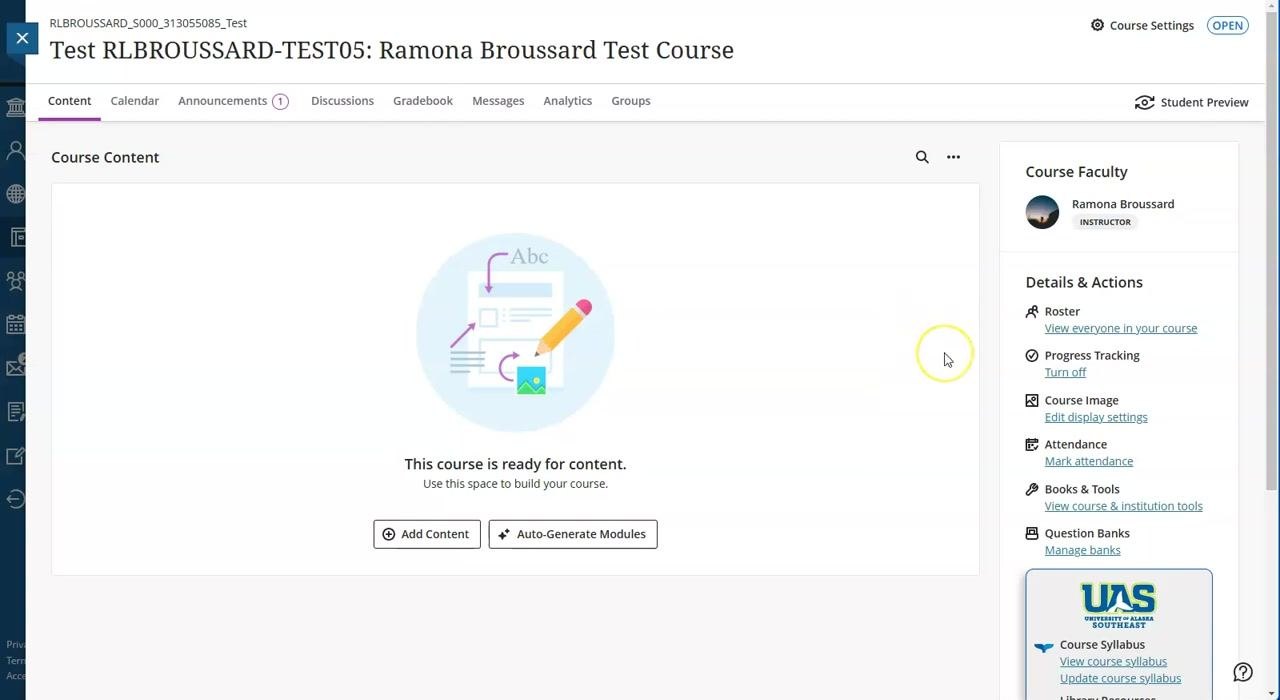
Navigate to the Content tab of your Ultra course. If the course is empty, you'll see a message stating "This course is ready for content. Use this space to build your course," along with options to Add Content and Auto-Generate Modules.
Open the Copy Items panel
In the top right corner of the page, select the three-dot menu (labeled "More options for course content") located next to the search icon.
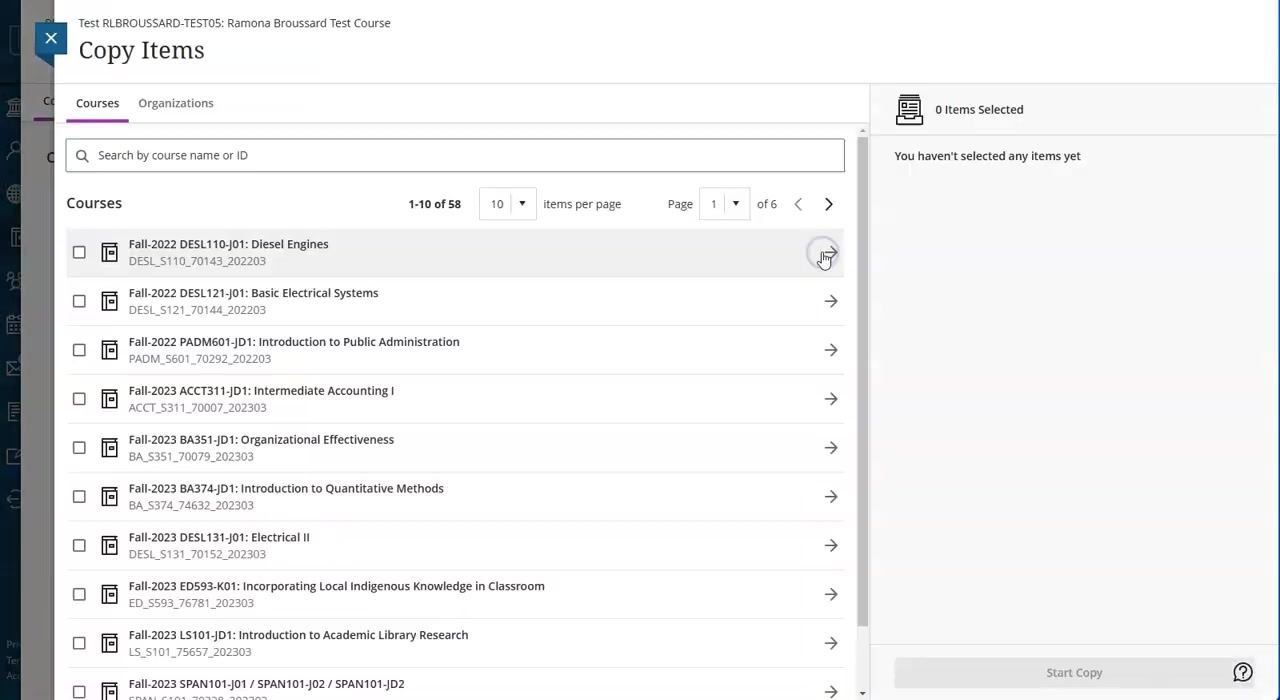
From the drop-down menu, click Copy Items. This opens the Copy Items panel, where a list of your courses appears, sorted alphabetically with the most recent courses (such as the current semester) typically listed first. You can browse this list using the arrows at the top or bottom of the panel, or adjust how many items display per page.
Search for a specific course
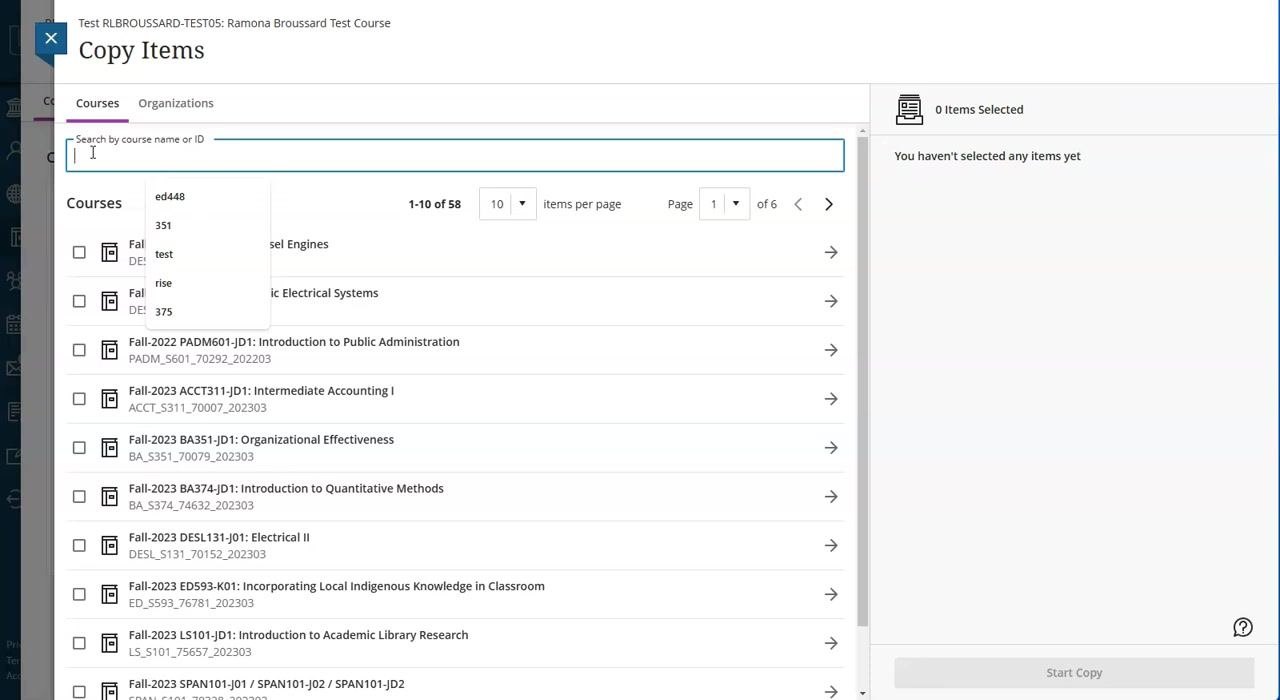
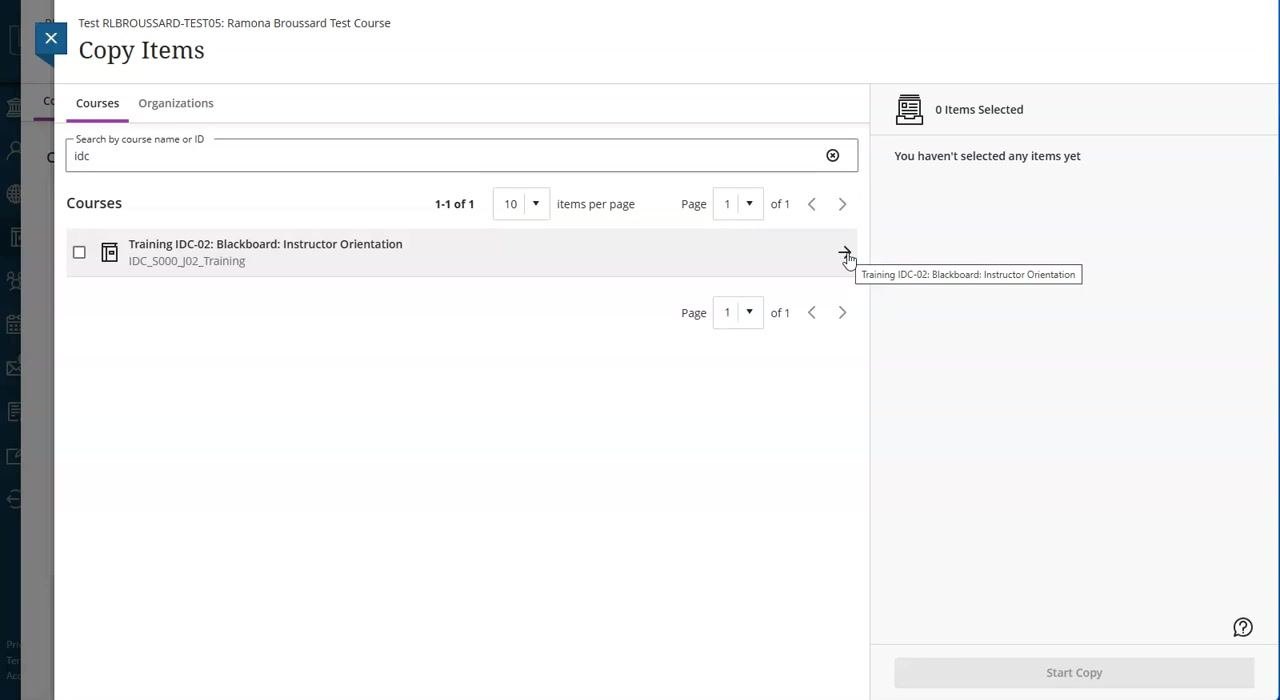
If you don't see the course you need in the list, use the search bar at the top of the Copy Items panel. Enter the exact course name or ID, matching the case, numbers, letters, and spaces precisely. Suggestions will appear in a dropdown as you type.
Select individual items instead of the whole course
Once you locate your course, you'll see a checkbox next to its name. While you can check this box to copy the entire course, this approach is not recommended—a full course copy often brings in extra items from the Original course that aren't needed in Ultra.
Instead, click the arrow to the right of the course name to expand its contents and choose only the specific items you want to import.
Review your selected items
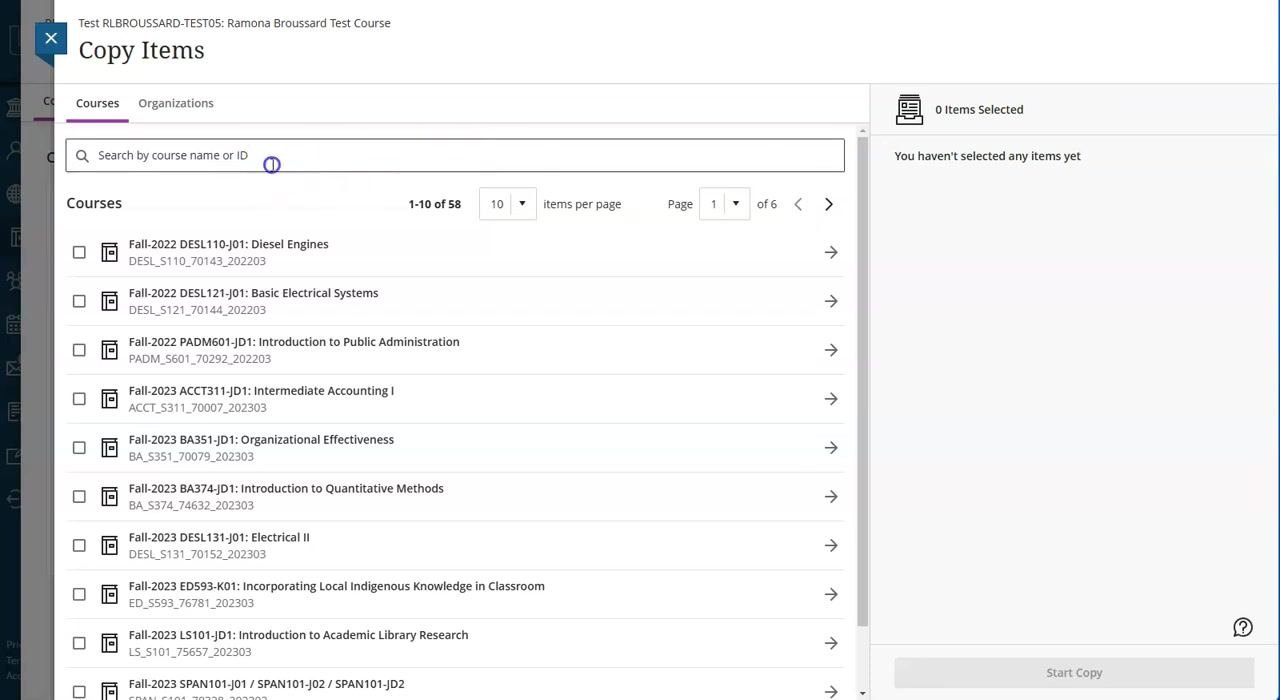
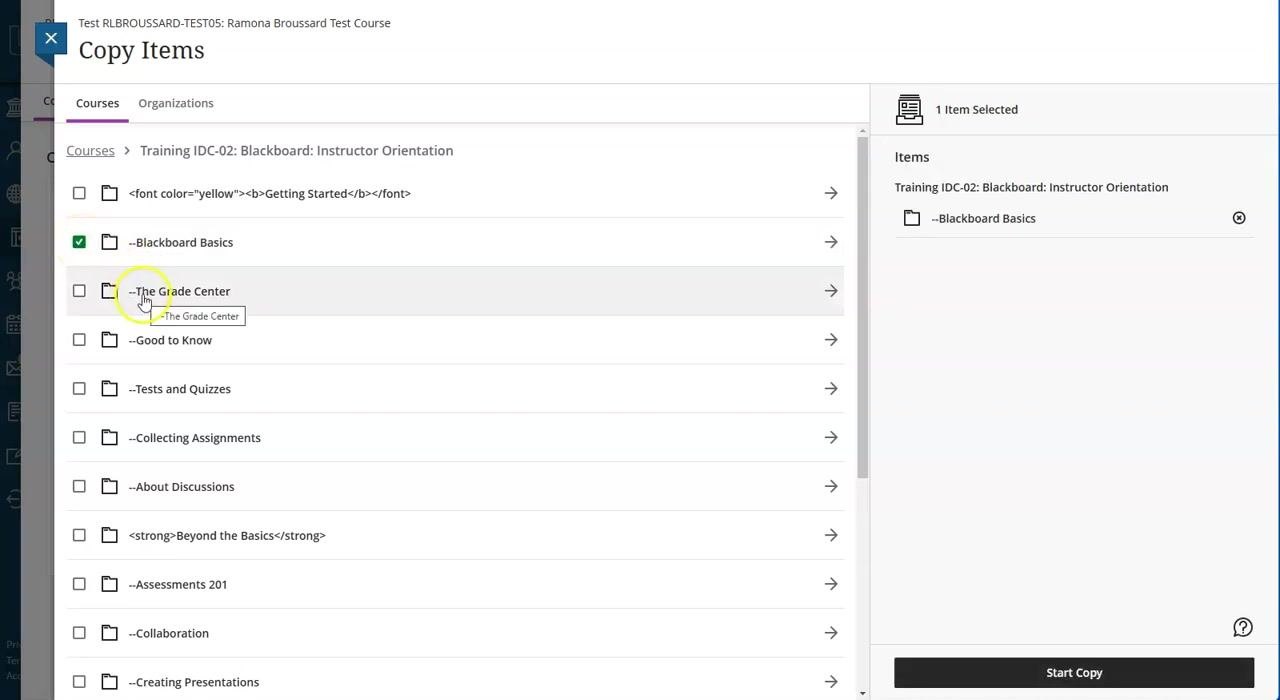
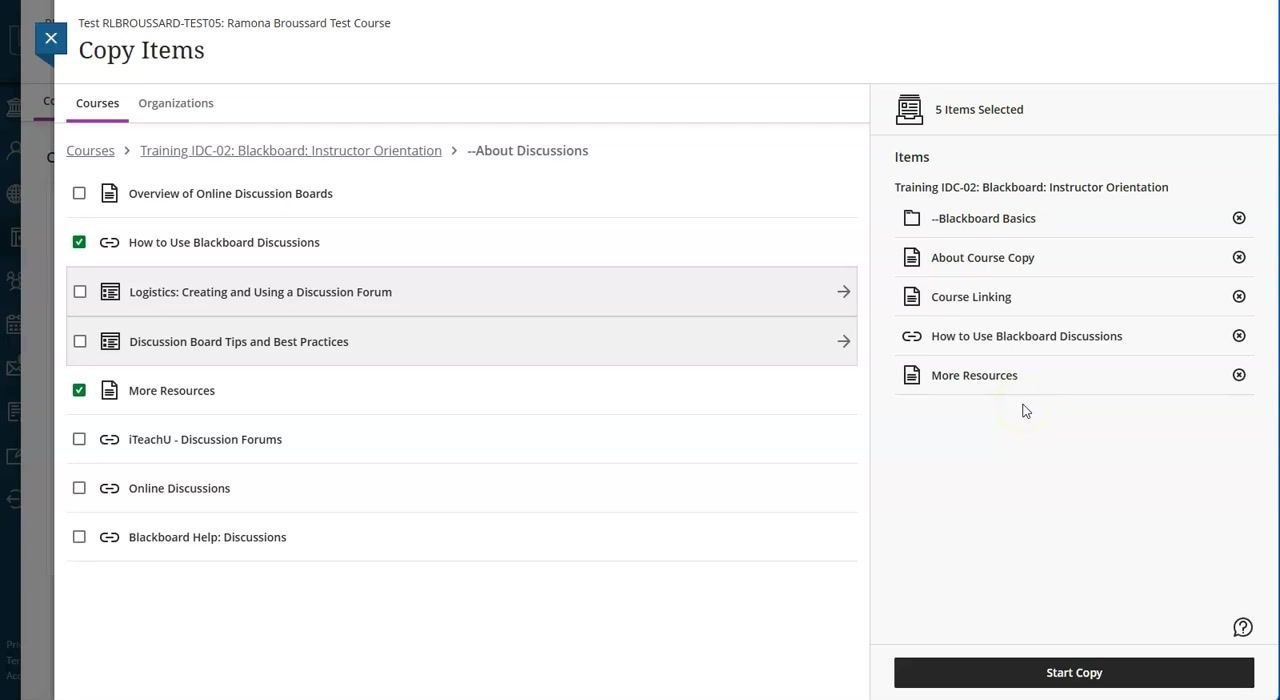
As you select items, they immediately appear in the Items Selected list on the right side of the Copy Items panel. You can continue selecting additional items, and each one will populate this list.
Expand folders to select specific content
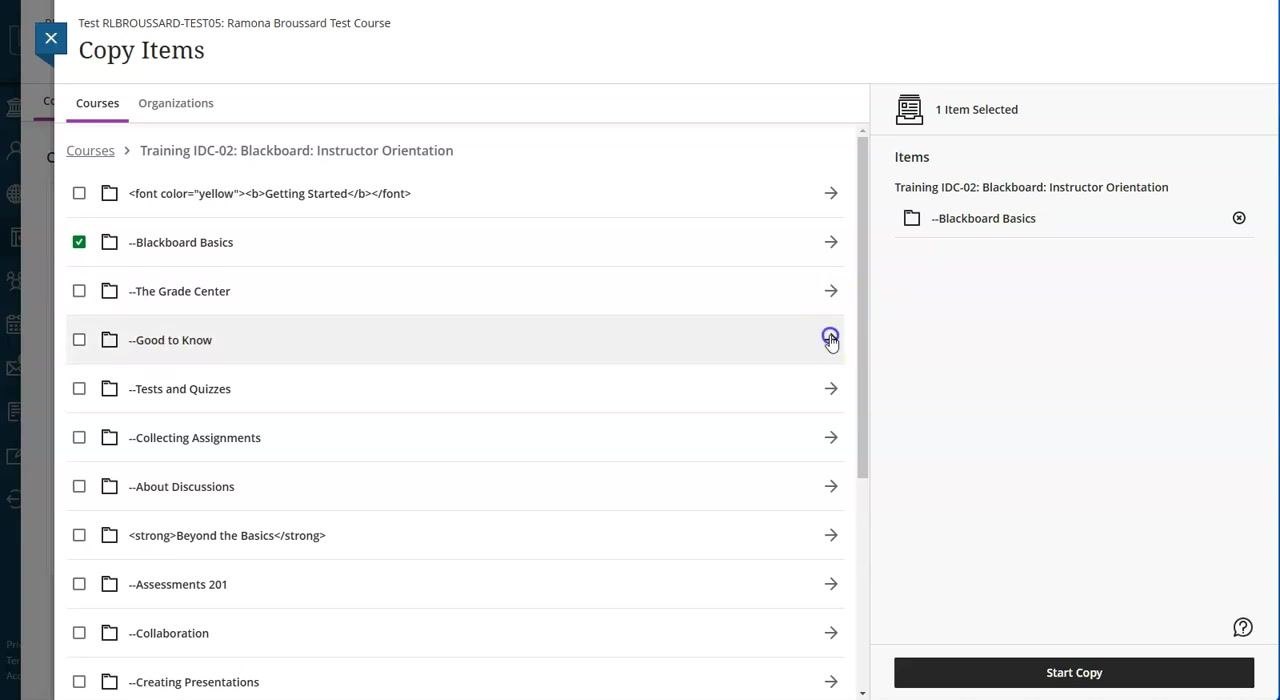
To copy only certain content from a folder—for example, a folder named "Good to Know"—click the right arrow next to the folder name to expand it and display its contents. Select only the items you want from within the folder.
Navigate using breadcrumbs
Use the breadcrumbs at the top of the panel to move back to previous levels within the Copy Items view. Click the appropriate breadcrumb—for example, your course name—to return to the main course content list. Avoid clicking the blue "X" in the upper left corner, as this closes the panel and may discard your selections.
Continue adding content from additional folders
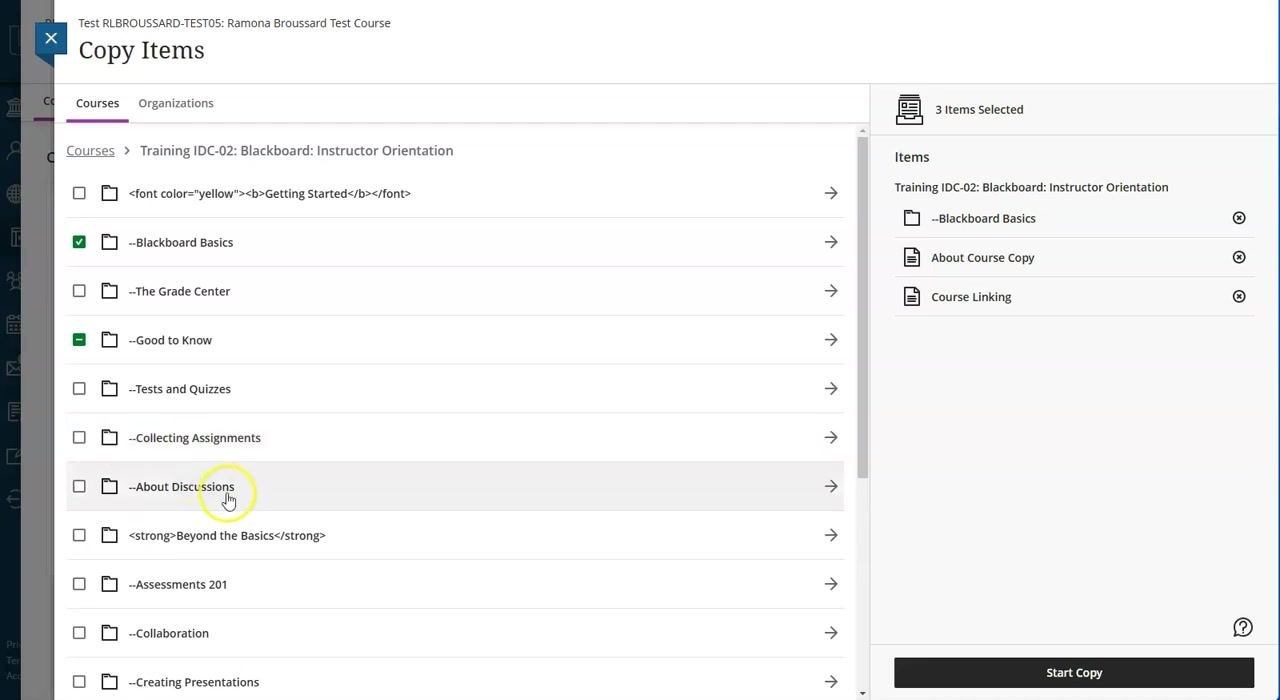
Repeat the expand-and-select process for any other folders you need. For example, expand an "About Discussions" folder and select specific items such as "How to Use Blackboard Discussions" and "More Resources." All selected items will continue to populate the Items list on the right.
Start the copy
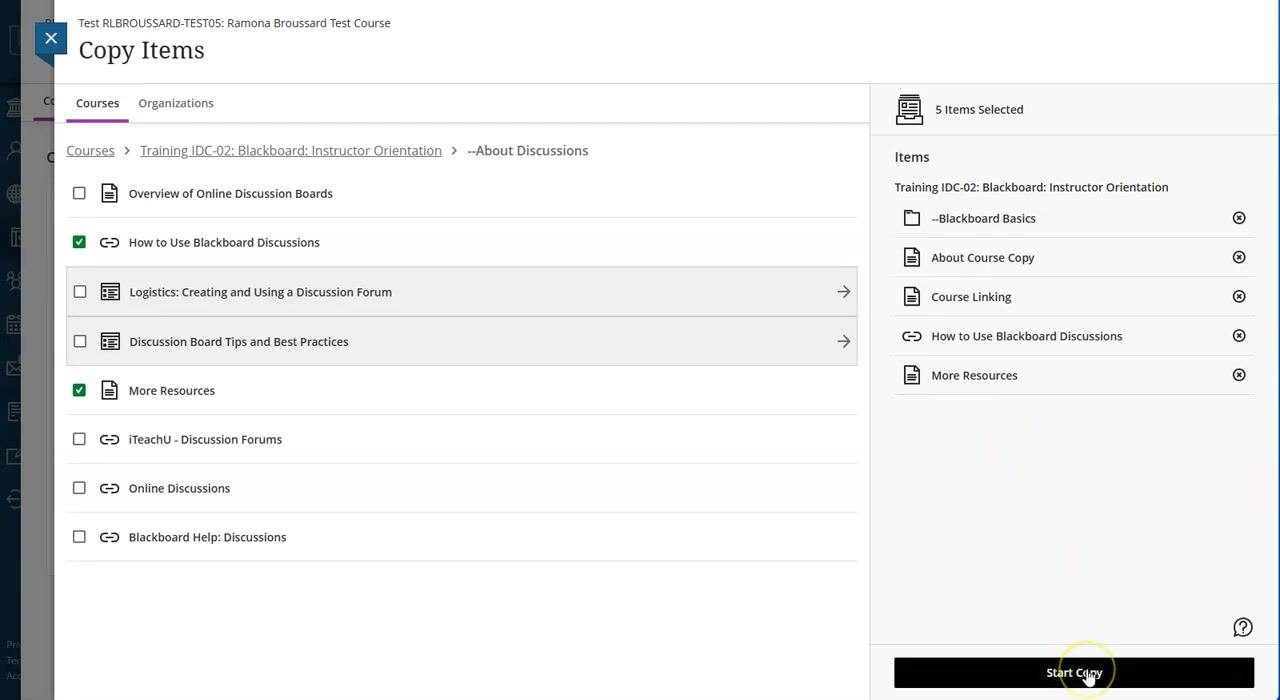
Once you've finished selecting all desired items, click Start Copy at the bottom right of the panel. The copying process begins and may take a few moments to complete.
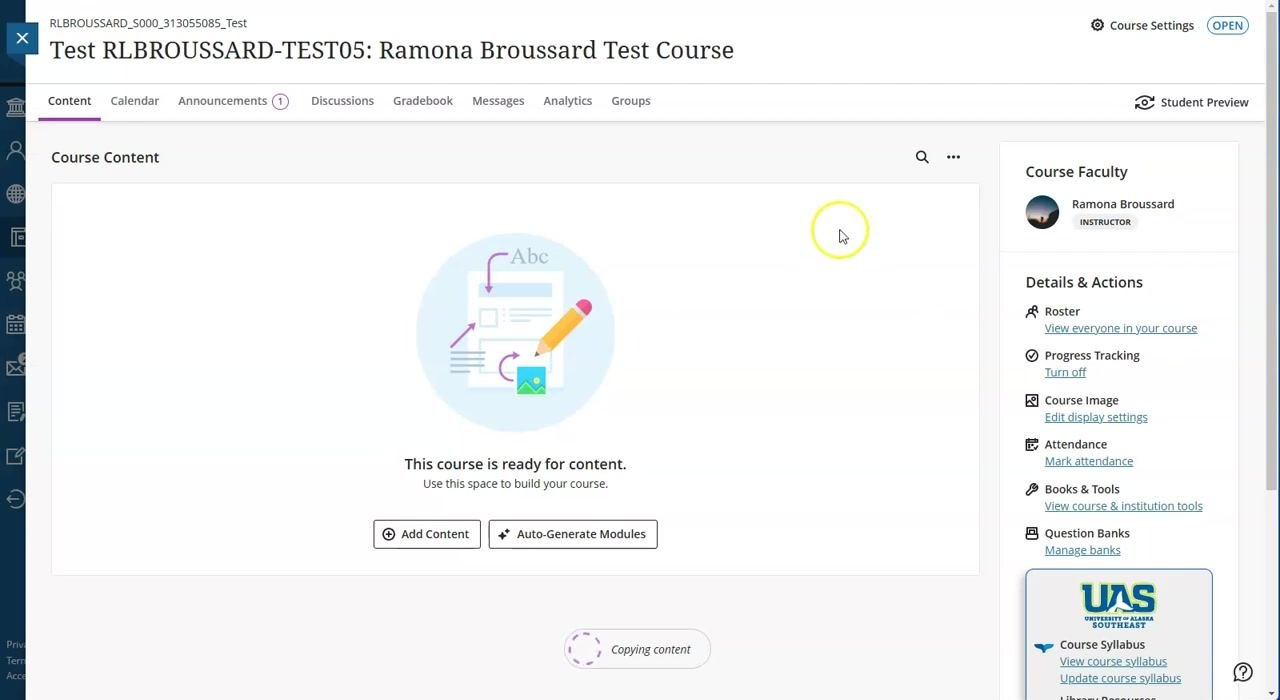
You'll be returned to your course content page, where a status indicator reading "Copying content" appears at the bottom of the screen while the process finishes.
Reviewing your course content
Check the exceptions report
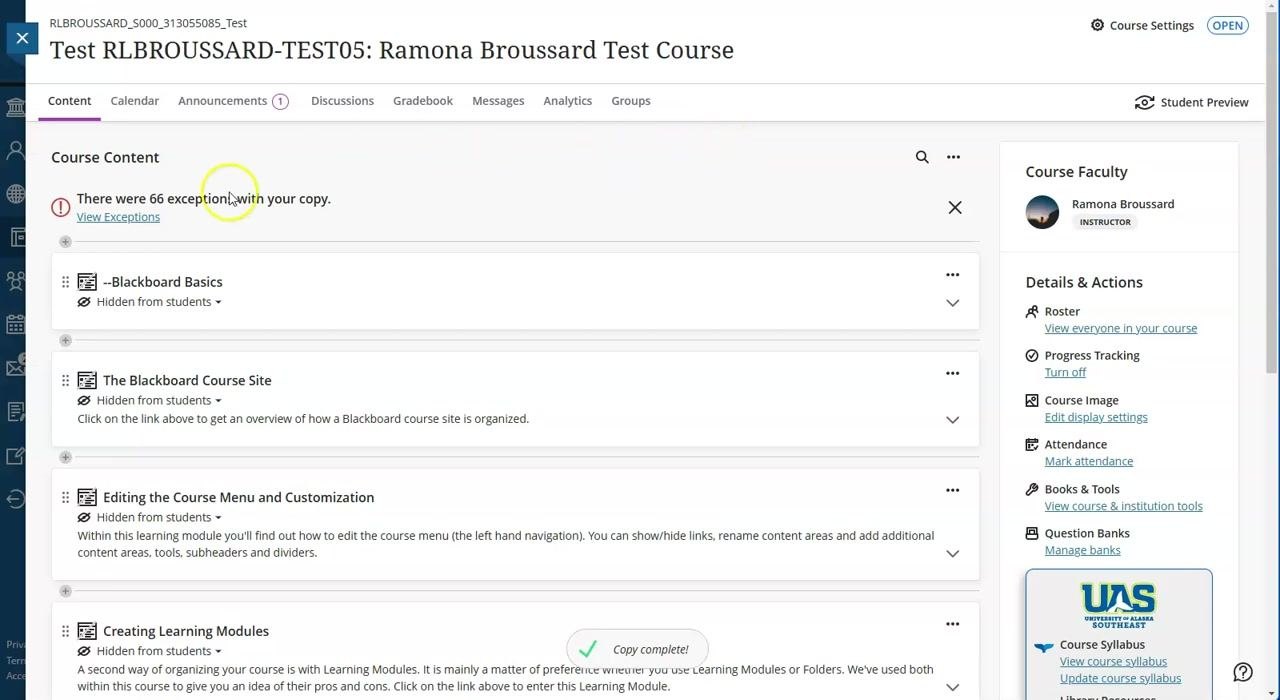
If any issues occurred during the copy, a notification appears at the top of the Course Content page—for example, "There were 66 exceptions with your copy." Click View Exceptions to see details about what didn't copy correctly or what may need attention. Most exceptions involve minor formatting changes and can typically be ignored, but review them to confirm nothing critical was missed.
Once you've reviewed the report, close it to proceed.
Verify copied content for accuracy
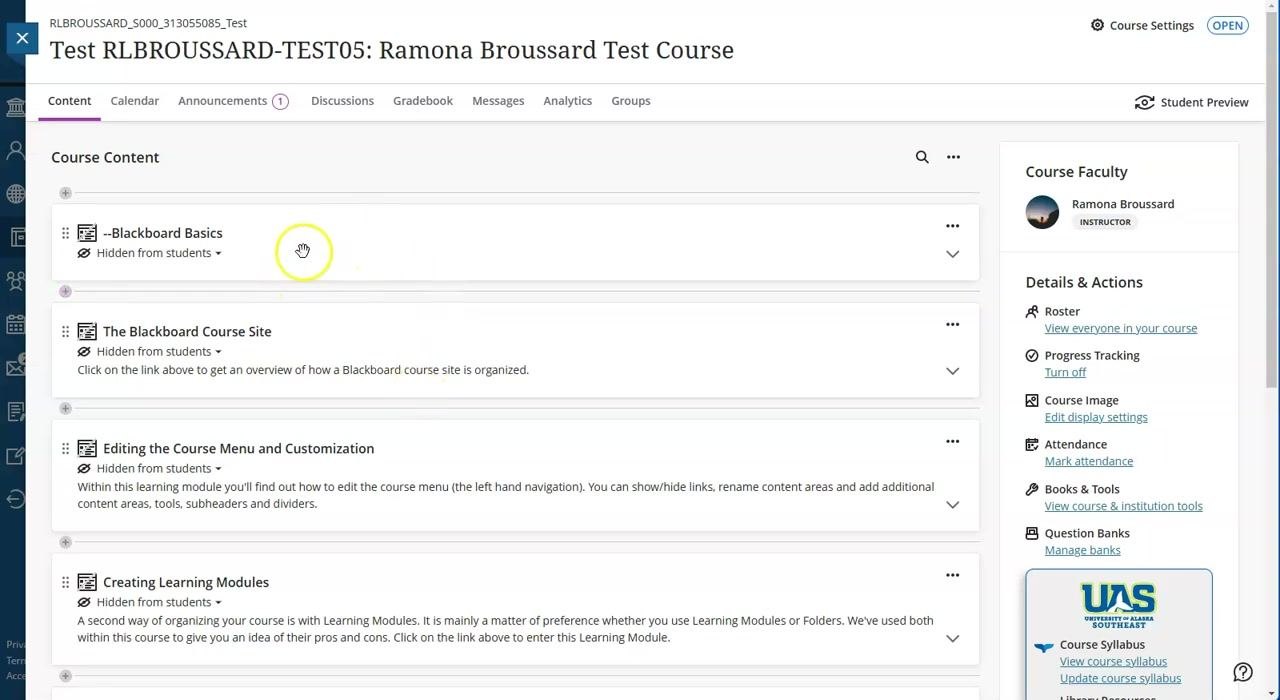
Review all copied materials, especially test questions and links, to confirm they're correct and functional. This check is important across any learning management system, including Blackboard Original, Blackboard Ultra, or other platforms.
Review announcements
Navigate to the Announcements tab at the top of your course. All announcements from the copied course import as drafts and are not automatically posted for students.
Review the list and post any announcement you want students to see, making it visible to them.
Update course settings
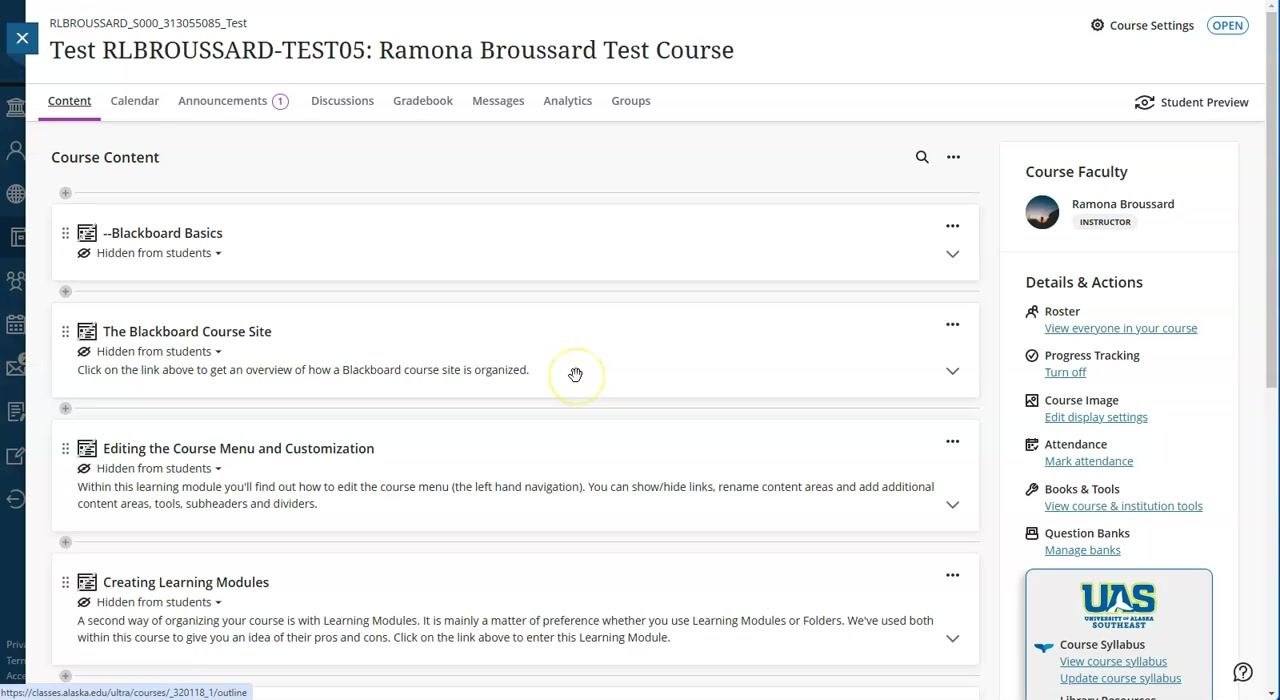
Settings such as due dates, visibility status, and release conditions carry over from the original course. Review these settings for each item and update them as needed to match your current semester or course requirements.
Batch editing course content
Open the Batch Edit tool
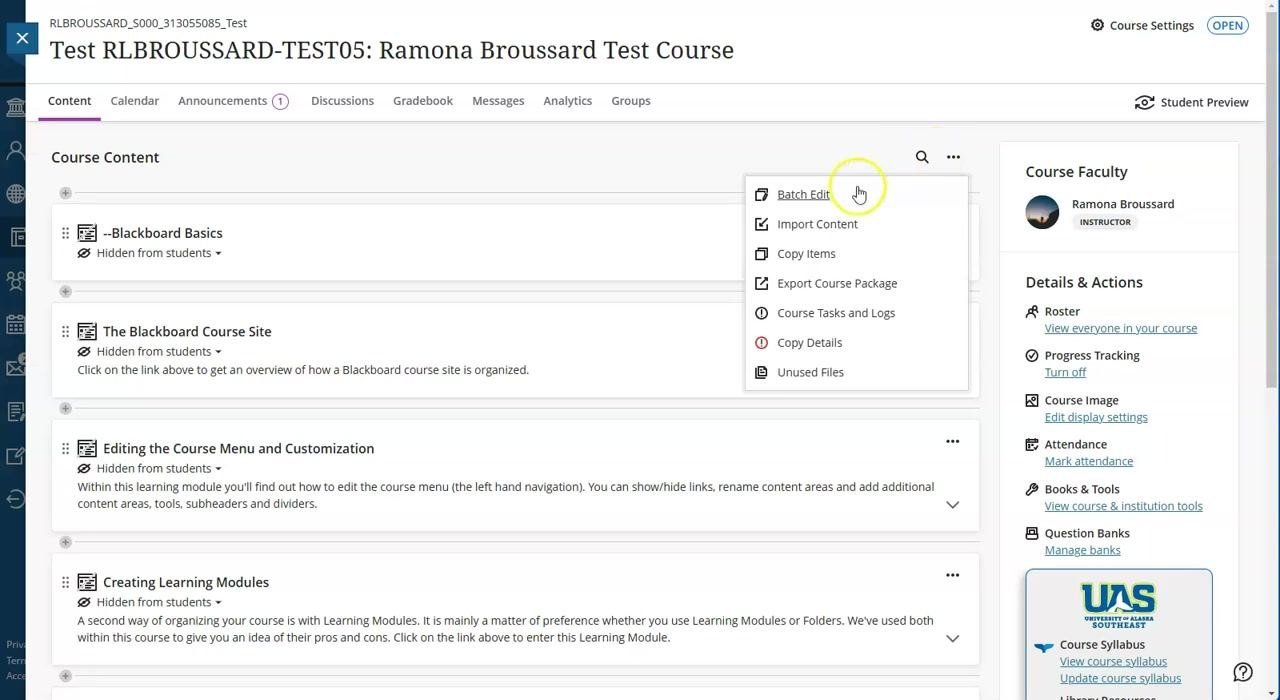
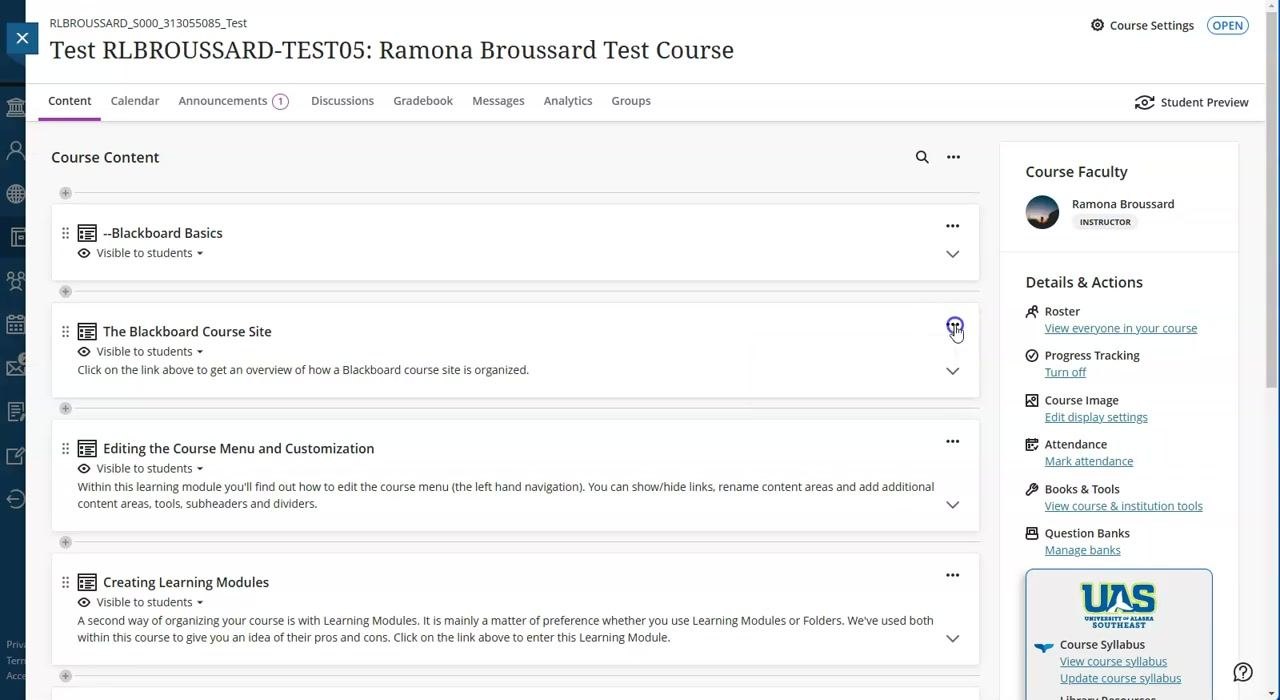
To update due dates, visibility, or other settings for several items at once, click the three-dot menu in the upper right corner of the Course Content area and select Batch Edit from the context menu.
Select items to edit
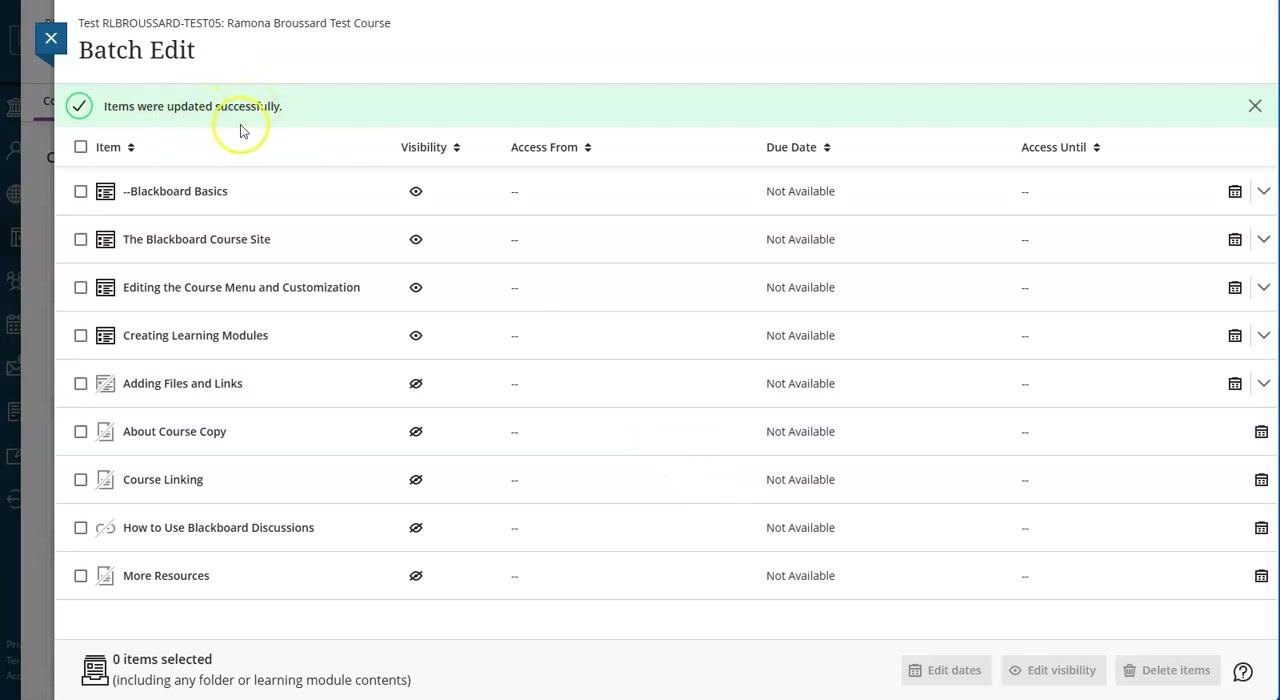
In the Batch Edit window, review the list of course content items and check the boxes next to the ones you want to edit—for example, "Blackboard Basics," "The Blackboard Course Site," "Editing the Course Menu and Customization," and "Creating Learning Modules." The total number of selected items appears at the bottom of the window.
Edit dates for selected items
Click Edit dates at the bottom of the Batch Edit window to open the Edit Dates dialog. Choose your preferred edit type:
- Change to specific date and/or time
- Change dates by number of days
- Change dates based on course start
If you select Change dates by number of days, enter the number of days to shift (for example, 180 days). You can optionally shift dates backward instead. Click Edit Dates to apply the changes.
If none of the selected items have due dates or access dates, a yellow notification appears: "No dates and/or times were updated. Only items with existing values can be modified." Confirm that your intended changes applied, or note if no changes were made due to missing date values.
Return to course content for further edits
After batch editing, return to the main course content page. From here, you can individually edit, add, or organize content as needed, using the three-dot menu next to each item for options such as Edit, Student Progress, or Delete.
What's next
With your content copied and reviewed, continue customizing individual items using each item's own edit options. Confirm that due dates, visibility, and release conditions match your current course requirements, and post any announcements you want students to see before the course goes live.
Generation details: cost, quality tiers
Docsie billed 3,500 credits ($2.45) to analyze this 7-minute video at standard quality. The rewrite, template fill and Word/PDF exports were included. The same video at each quality tier:
| Quality | Frames sampled | Credits | Approx. cost |
|---|---|---|---|
| Draft | every 16-30 s | 1,750 | $1.22 |
| Standard (this guide) | every 8-15 s | 3,500 | $2.45 |
| Detailed | every 4-7 s | 7,000 | $4.90 |
| Ultra | every 1-3 s | 14,000 | $9.80 |
Credits priced at $0.70 per 1,000; plans include a monthly allowance. Enterprise customers on on-premise or bring-your-own-model deployments run this on their own inference and pay no per-video credits.
Generated by Docsie Video-to-Docs on 2026-10-12 from a 6-minute video. Screenshots are frames from the source video and belong to their creator, The Center for Excellence in Learning and Teaching, whose original is embedded above. If you own this video and want the guide removed or credited differently, contact us and we will act within one business day.