
How to Safety Wire a Turnbuckle
This procedure explains how to safety wire a turnbuckle on a cable assembly, covering everything from verifying thread engagement to completing a secure double-wrap wire finish. Following these steps in order ensures the turnbuckle threads are properly engaged before tensioning and that the finished safety wire prevents the turnbuckle from loosening during operation.
Video: General Oral And Practical (Double Wrap Turnbuckle) safety wire by Jonathon Murphy (2020). All credit for the demonstration goes to the creator; watch the original on YouTube. The written guide below was generated from this video by Docsie. Creator? Request a change or removal.
This procedure explains how to safety wire a turnbuckle on a cable assembly, covering everything from verifying thread engagement to completing a secure double-wrap wire finish. Following these steps in order ensures the turnbuckle threads are properly engaged before tensioning and that the finished safety wire prevents the turnbuckle from loosening during operation.
Purpose
This SOP standardizes the process of inspecting, tensioning, and safety wiring a turnbuckle assembly so that the cable remains secure and meets required tension and thread-engagement standards.
Scope
This procedure applies to cable assemblies using brass turnbuckles, cable ends, and clevis fittings, mounted on an assembly jig for inspection and safety wiring. It covers thread inspection, tensioning, safety wire selection, wire installation, and final verification.
Required equipment and materials
- Cable assembly with brass turnbuckle, cable ends, and clevis fittings
- Wooden assembly jig
- Reference manual containing the turnbuckle safetying guide (Table 7-8)
- 0.040" diameter safety wire (copper/brass specification)
- Pliers for bending and wrapping wire
- Diagonal cutting pliers for trimming excess wire
Procedure
Inspect thread engagement and reset the assembly
Inspect the initial thread engagement on both ends of the cable assembly. Observe that one end has only one thread engaged while the other has about three threads engaged. Recognize that this uneven engagement is not acceptable for proper assembly.
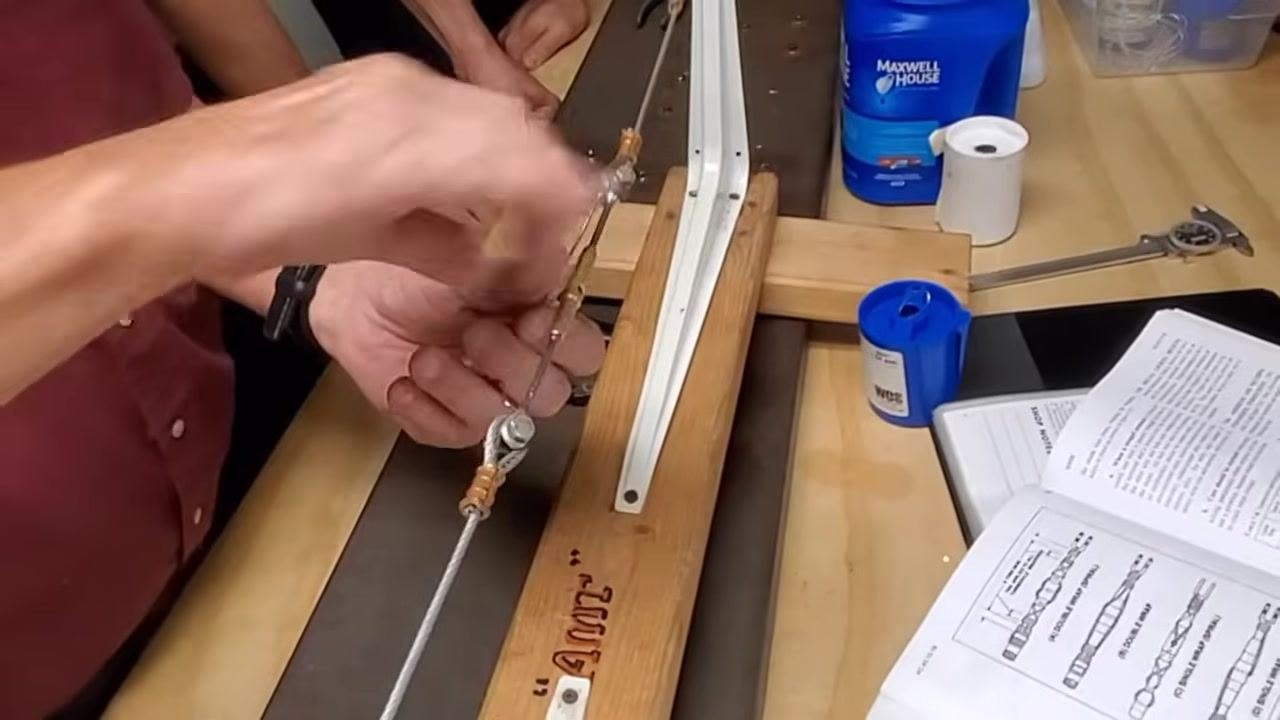
Remove both threaded ends
Unscrew and detach both ends of the turnbuckle to reset the assembly process. Ensure all components are fully removed before proceeding.
Start one end with a single thread
Insert and screw in one threaded end, engaging only a single thread. Confirm that only one thread is engaged at this stage.
Attach the second threaded end
Position the second threaded end and begin screwing it into place. Take care not to twist or turn the cable itself during this process.
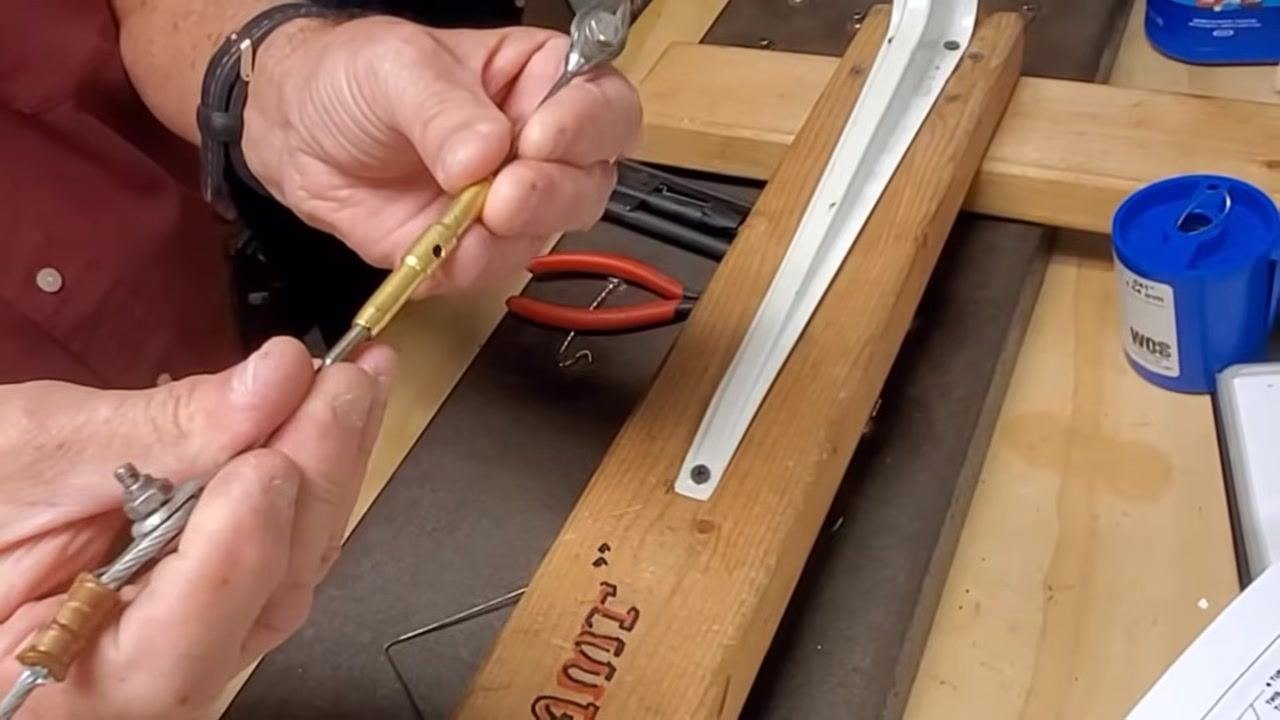
Continue threading for even engagement
Gradually screw in the second end, checking that both ends are engaging threads evenly. Avoid over-tightening at this stage; the goal is simply to get the threads started.
Check thread engagement on both ends
Confirm that both ends have a similar number of threads engaged. If too many threads are visible, note that the assembly is not yet tight.
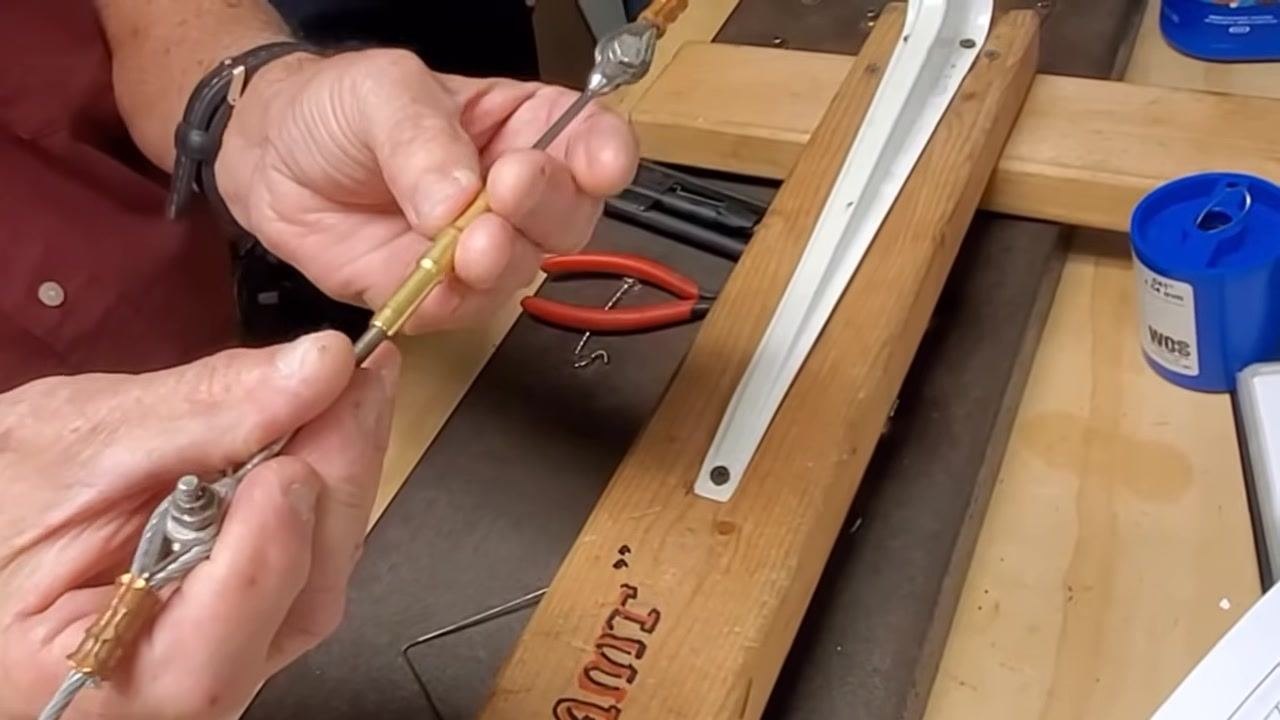
Tighten to the desired tension
Continue tightening the turnbuckle until the desired tension is reached, referencing the target value specified for your assembly (for example, 30 or 45). Periodically check tension and thread engagement for evenness.
Visually inspect the final assembly
Ensure the cable is taut, the threads are evenly engaged, and the assembly appears secure. Confirm that the setup looks correct and meets the required standards.
Note: Always avoid twisting the cable during assembly to prevent internal damage. Use a safety wire if required to secure the turnbuckle after final adjustment. Refer to the manual for specific thread engagement and tension requirements for your application.
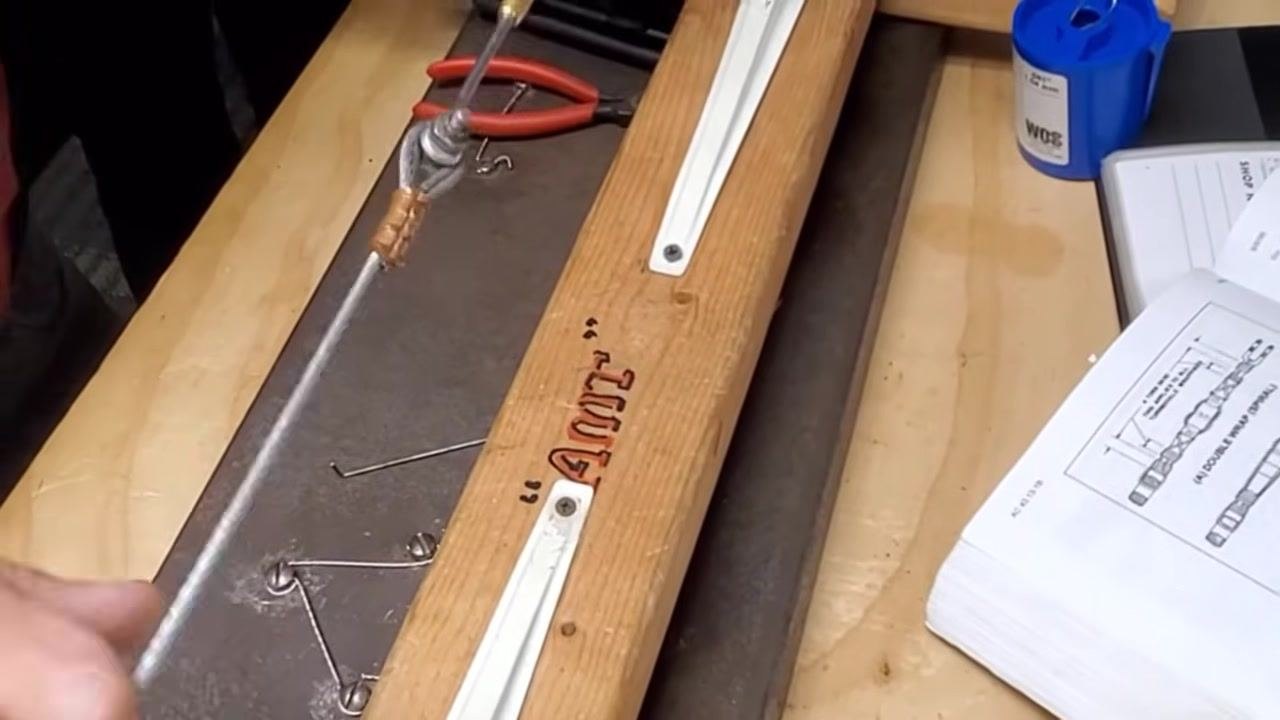
Confirm thread engagement before safety wiring
Visually inspect the turnbuckle assembly to ensure no threads are showing. A maximum of three threads may be visible; if none are showing, the assembly is correct. Prepare to install the safety wire as the next step.
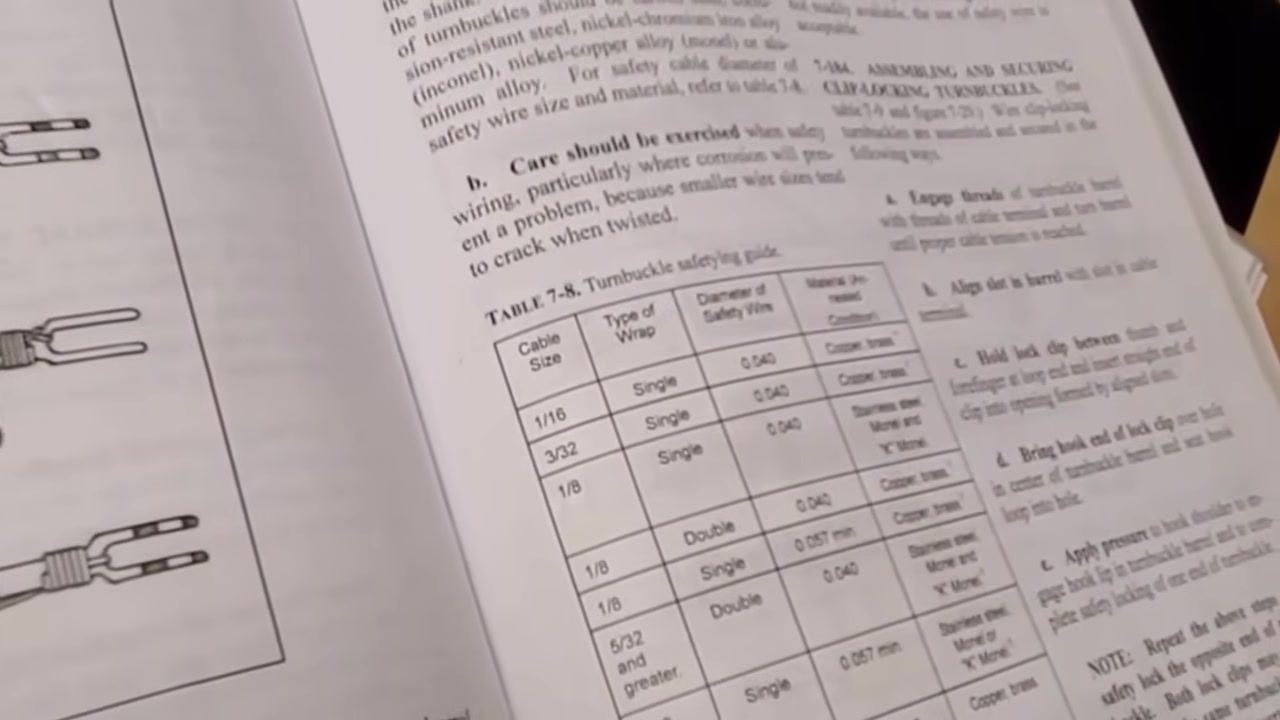
Consult the manual for wire size and type
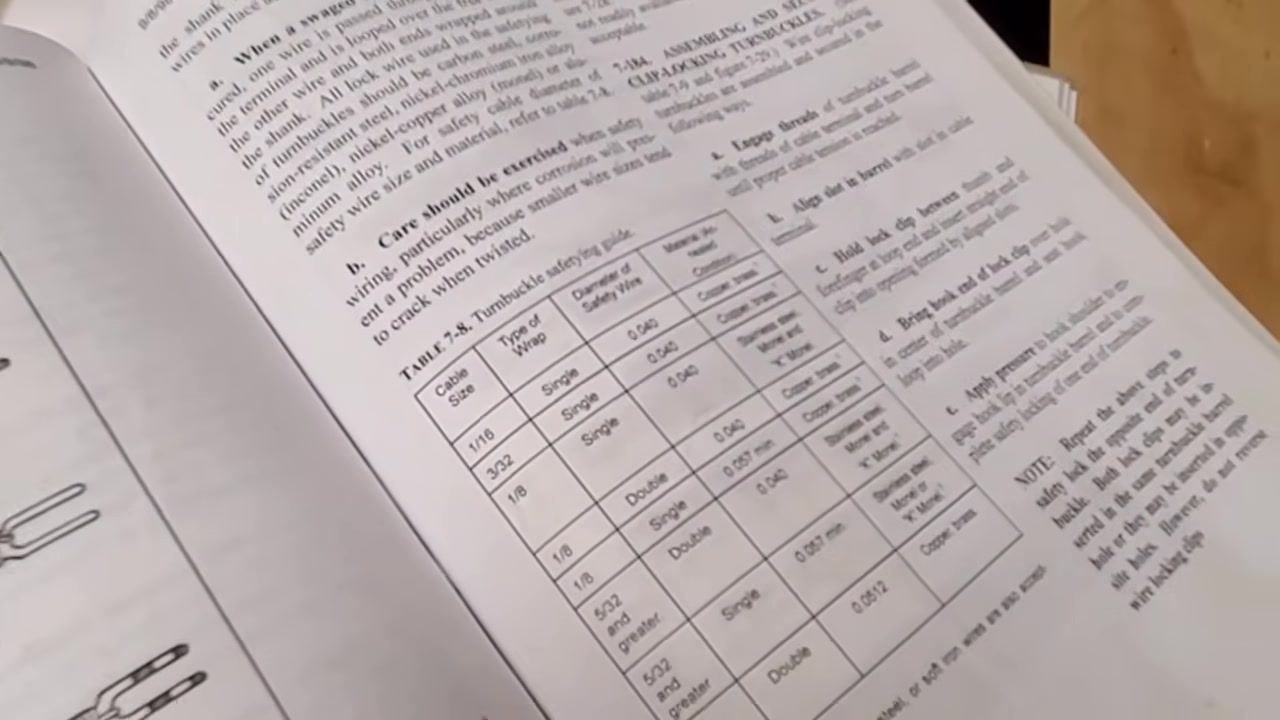
Refer to the turnbuckle safetying guide in the manual. Identify the cable size (1/8") and material (copper/brass). Note that there are multiple 1/8" entries; select the one listed for copper/brass.
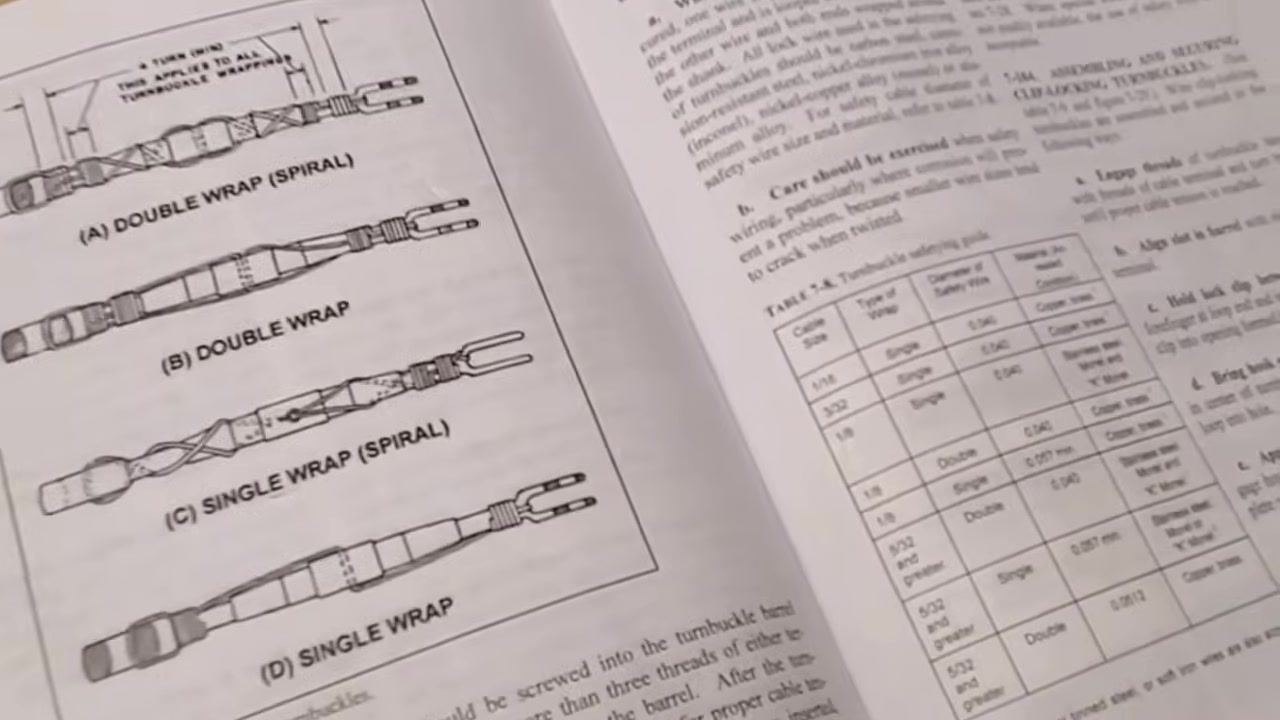
Select the correct safety wire specification
For a 1/8" cable made of copper or brass, use a double wrap with 0.040" diameter safety wire. Disregard the single-wrap option for stainless steel or thicker wire, as it does not apply to copper/brass.
Review the wrapping diagrams
Examine the illustrations for double-wrap and single-wrap methods. Confirm that the double-wrap method is appropriate for this application.
Double-check wire size and wrap type
Ensure you are using 0.040" diameter safety wire for a double wrap on a 1/8" copper/brass cable. Avoid using thicker (0.057") wire unless specified for larger cables.
Prepare the safety wire for installation
Cut two pieces of 0.040" safety wire, each long enough to handle and wrap securely. Straighten both pieces of wire before use.
Begin installing the safety wire
Insert the straightened wires through the appropriate holes in the turnbuckle. Start by bending the wire as if performing a single wrap, then bend in the opposite direction to form a double wrap.
Note: Always use the correct safety wire size and wrap method specified for your cable and material type. Refer to the manual diagrams for the proper wrapping technique. Ensure the safety wire is tight and secure after installation to prevent loosening during operation.
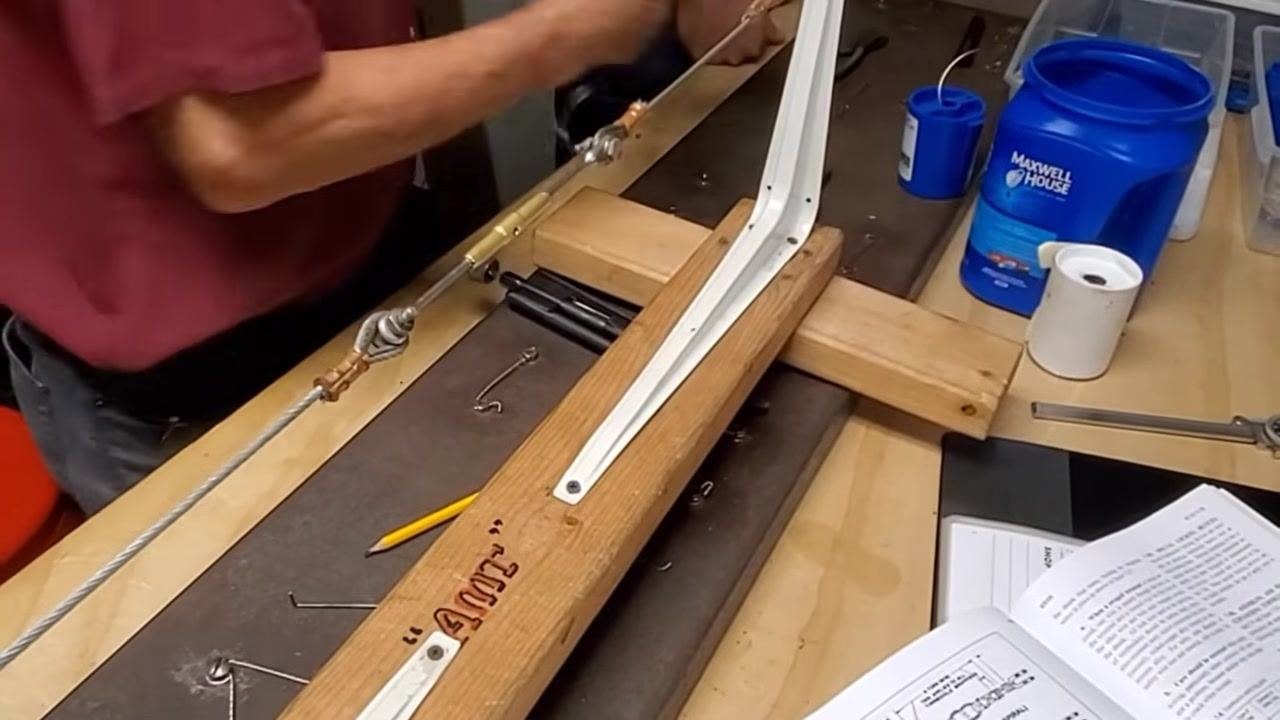
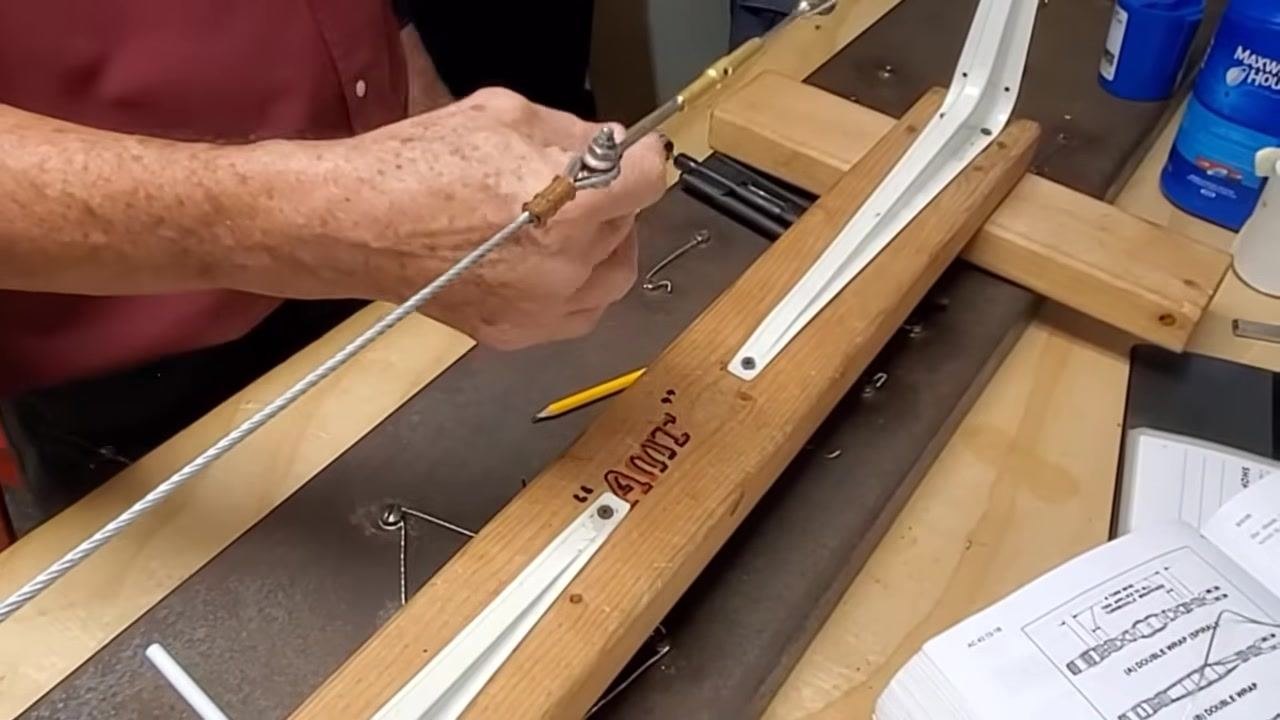
Thread the first wire through the turnbuckle horn
Take one piece of 0.040" safety wire and insert it through the correct hole in the turnbuckle horn — not through the cable eye, but through the horn itself. Pull the wire through so it is snug and tight.
Secure the first wire in one direction
Wrap the wire around the turnbuckle horn, ensuring it is tight and follows the correct path shown in the manual. Make sure the wire is not loose and is pulled firmly.
Wrap the first wire in the opposite direction
Take the same wire and wrap it in the opposite direction through the other horn. Pull the wire tight again, mirroring the first wrap but in the opposite direction, to complete the double wrap.
Prepare the second wire for the opposite side
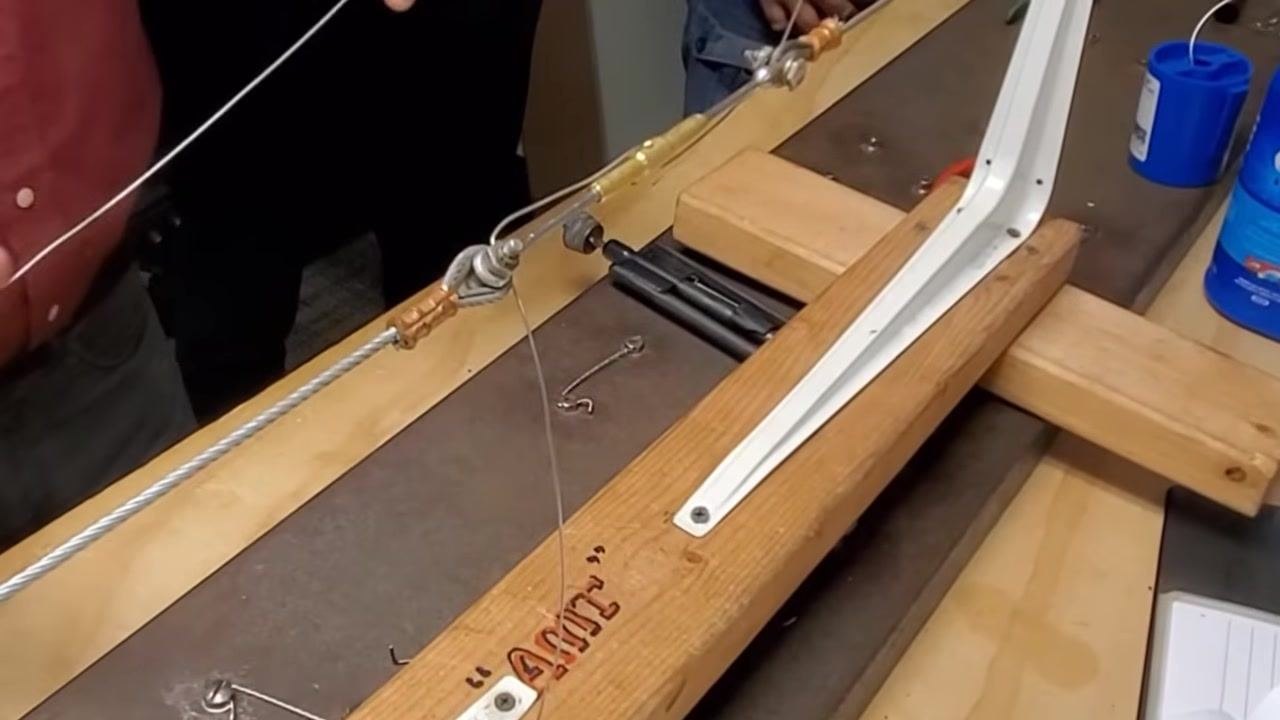
Take the second piece of 0.040" safety wire and insert it through the opposite horn of the turnbuckle, starting the double-wrap process on the other side.
Thread the second wire through the turnbuckle
Guide the wire through the horn, following the correct path shown in the manual diagram. Pull the wire tight to eliminate slack.
Complete the double wrap with the second wire
Pull the second wire through the horn on the opposite side, mirroring the first wire's path but in the opposite direction. Ensure both wires are tight and secure.
Inspect the wire arrangement
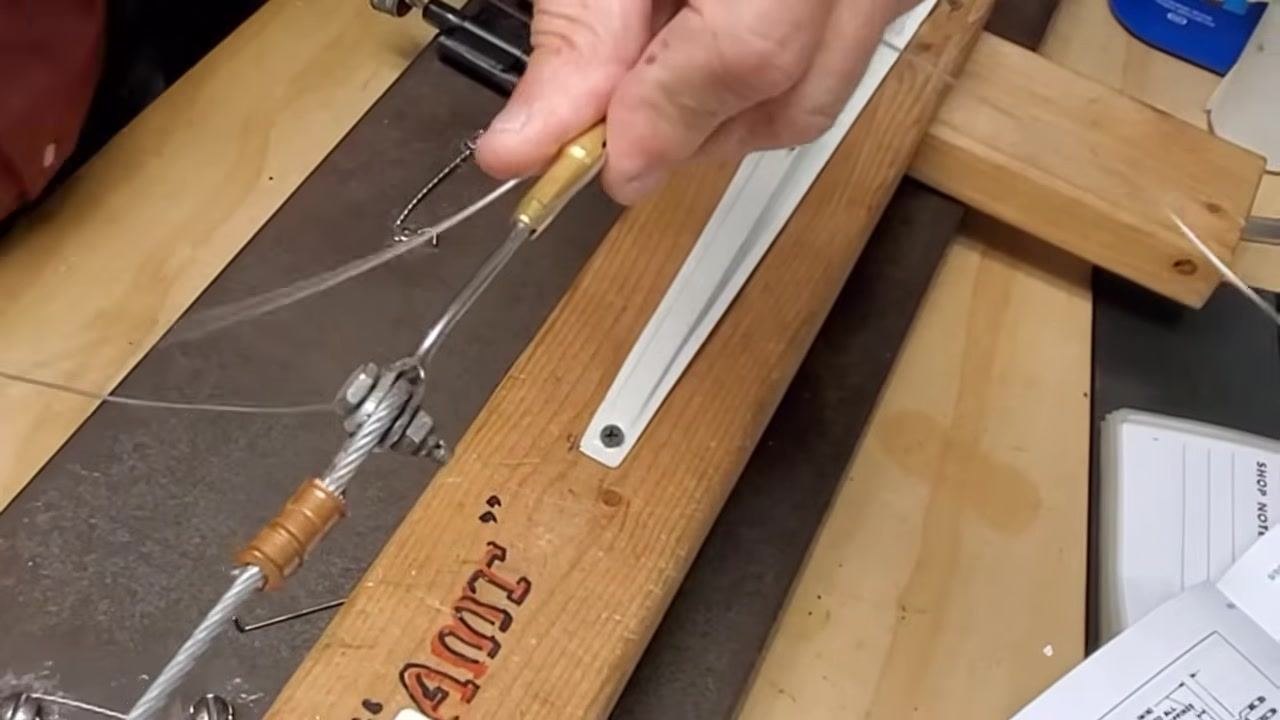
Confirm that one wire runs one way and the other runs the opposite way, forming two singles opposite each other. This check is critical to avoid common mistakes in safety wiring.
Prepare to fold over the wire ends
Hold both wires and ensure they are tight and properly positioned. Get ready to fold one of the wires over as the next step in the safety wiring process.
Double-check the double wrap before final securing
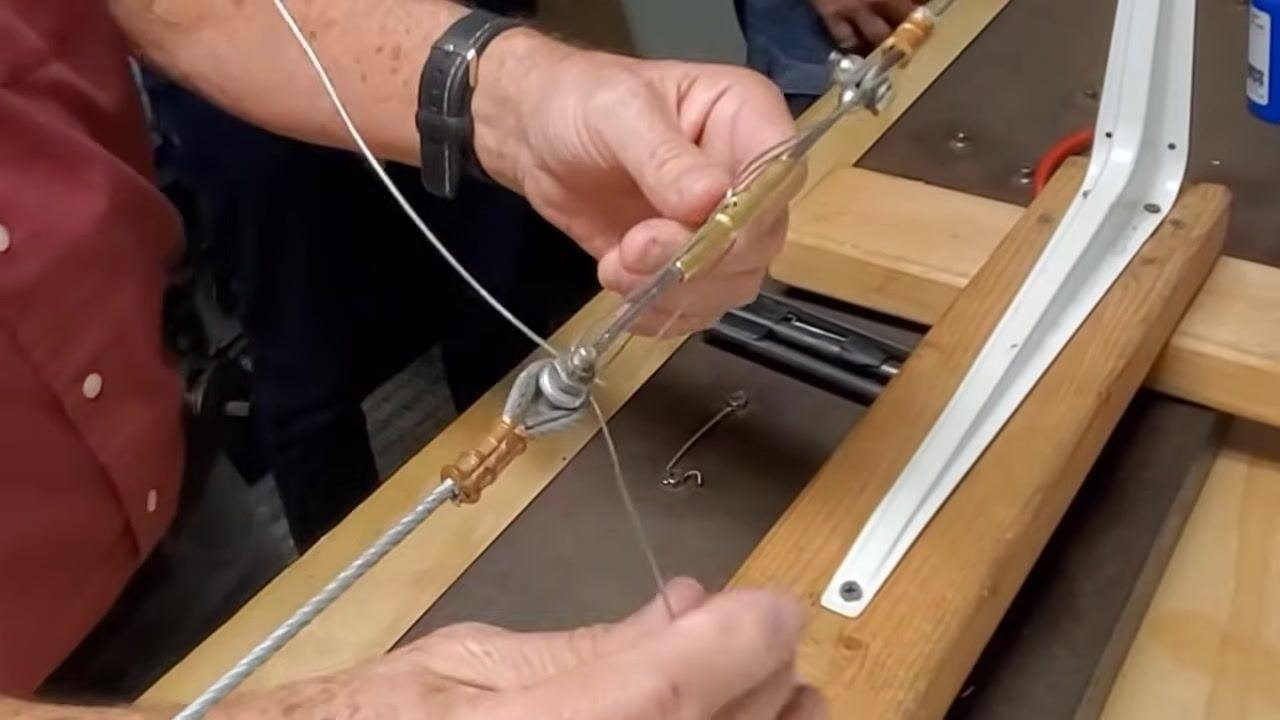
Visually inspect the turnbuckle to ensure both wires are routed correctly and tightly in opposite directions. Confirm that the wires are not crossed or loose.
Note: Always ensure each wire is routed tightly and in the correct direction as shown in the manual. Double wraps must be opposite and must not cross over each other. This step is critical for the safety and security of the turnbuckle assembly.
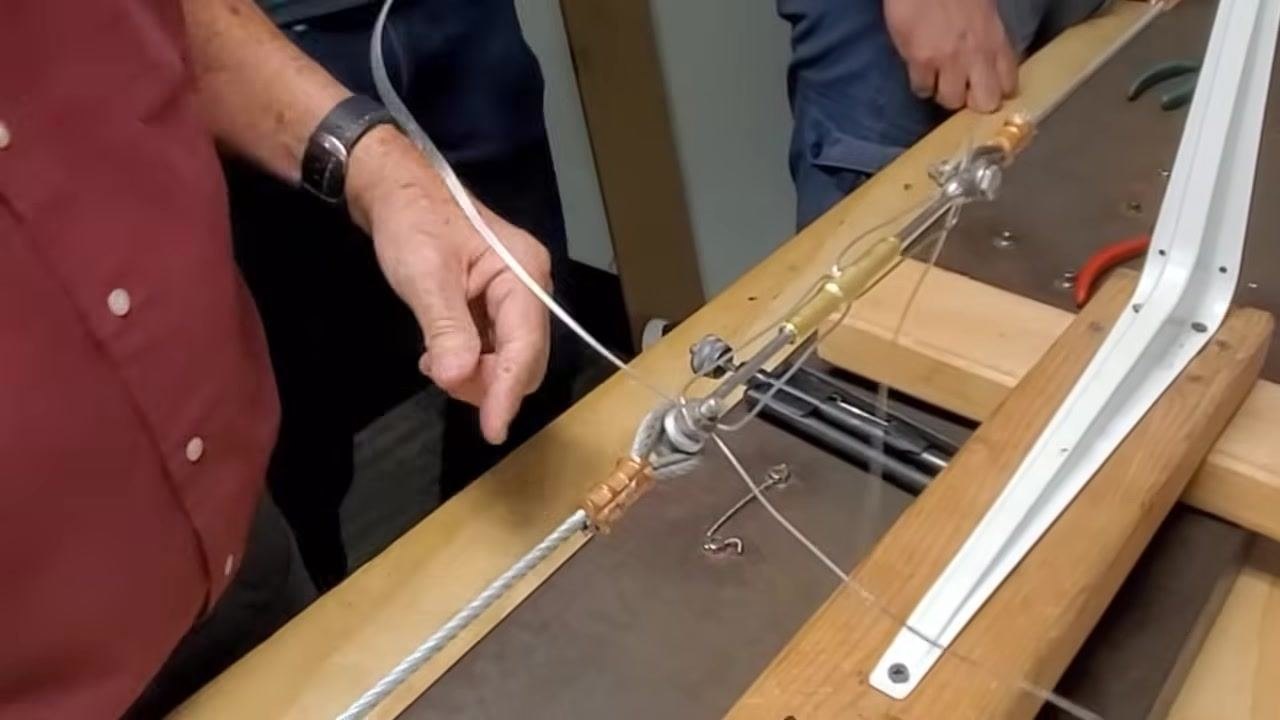
Fold over one end of the safety wire
Hold both wires tightly in place. Take one of the safety wire ends and fold it over the turnbuckle horn as demonstrated. Bend the wire sharply and press it firmly against the horn to prevent it from loosening. Do not skip this fold-over step, as it is critical for proper safety wire installation.
Note: Make sure the folded wire end is snug and does not protrude excessively, which could cause injury or snagging. This step ensures the safety wire remains secure and the turnbuckle cannot loosen unintentionally.
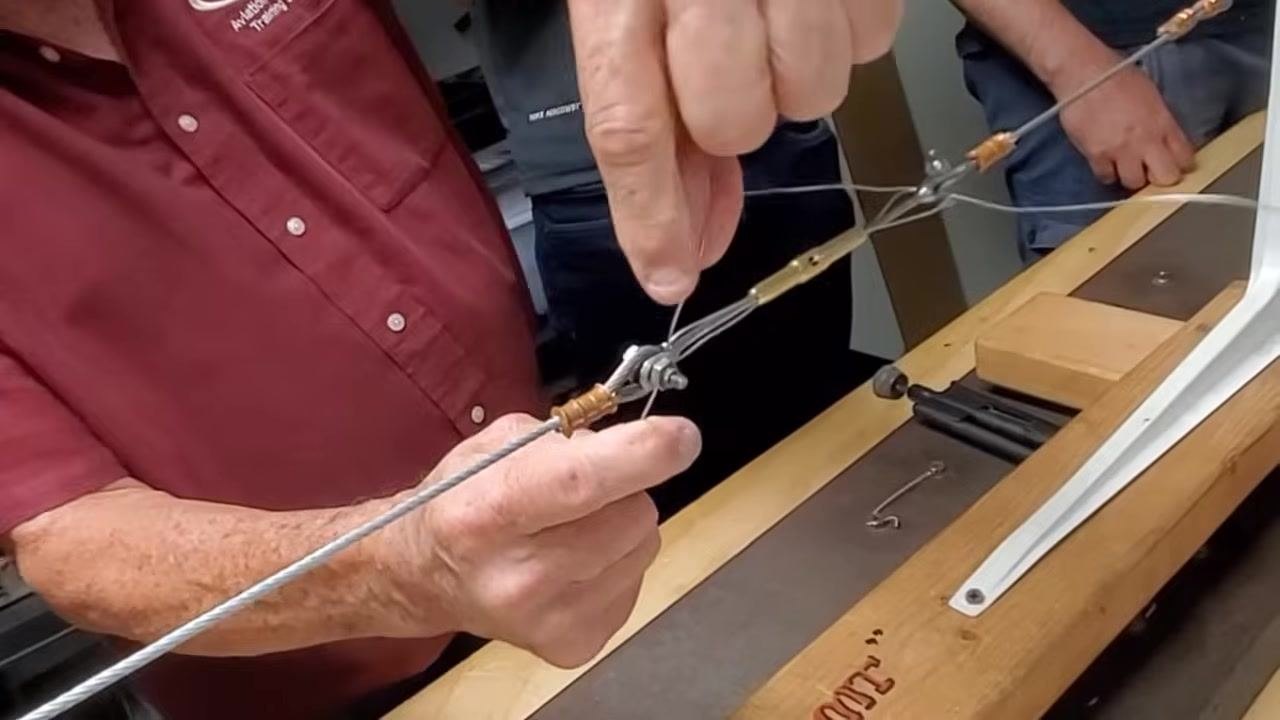
Fold the wire over the cable clamp and begin twisting
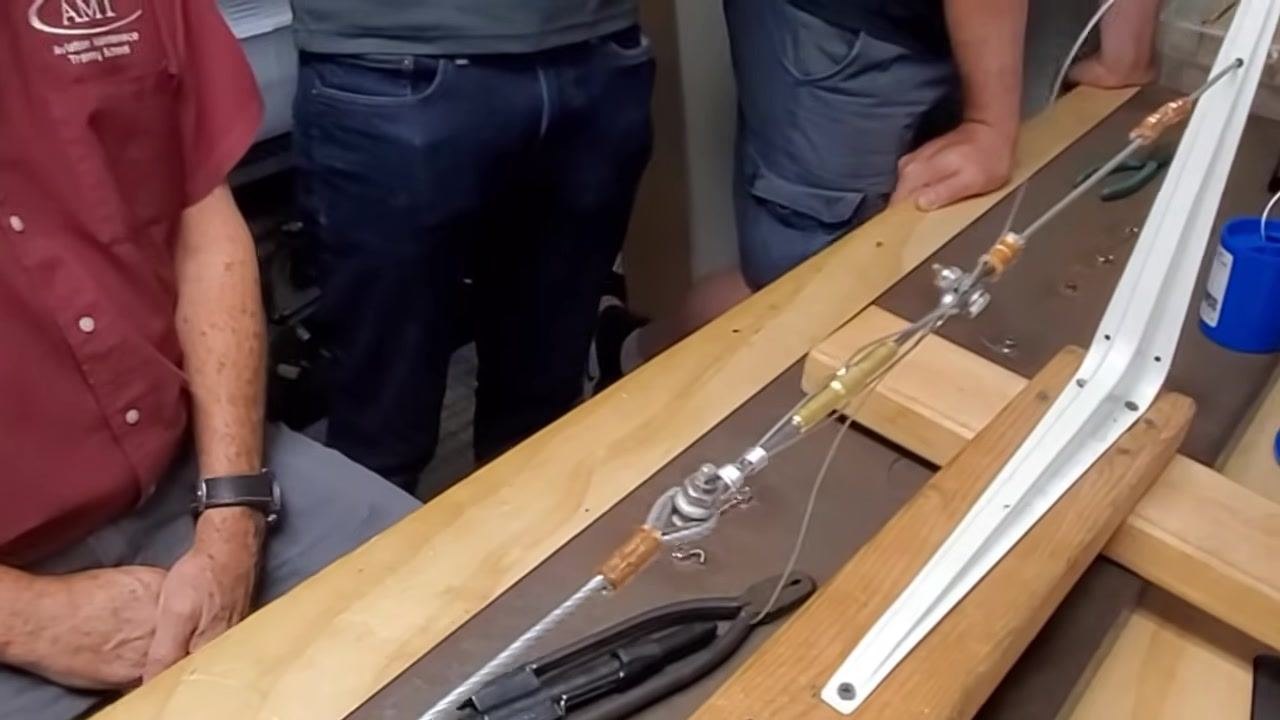
Hold the cable assembly securely on the workbench. Fold the loose end of the safety wire over the cable clamp. Begin twisting the wire around the cable using your fingers to create a tight wrap, keeping the wire positioned neatly and close to the clamp.
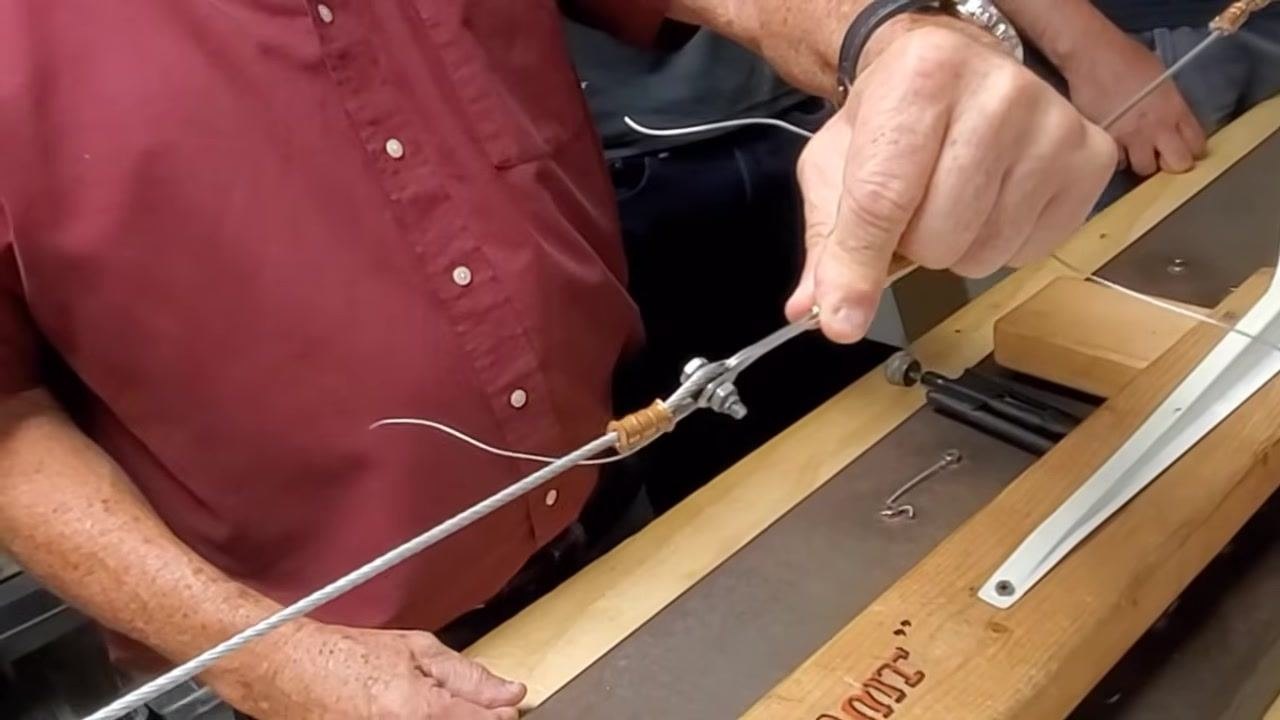
Continue twisting the wire tightly
Twist the wire tightly around the cable, ensuring there are no loose loops. Maintain tension on the wire as you twist to achieve a secure, professional finish. The wire should be snug and should not slip when pulled.
Cut the excess wire
Use diagonal cutting pliers to trim the excess safety wire close to the cable clamp. Ensure no sharp ends protrude, as this could cause injury or snagging. Double-check that the wire remains tightly twisted after cutting.
Twist the opposite end in the opposite direction
If there is another end to secure, twist the safety wire in the opposite direction to match the cable's lay and ensure even tension. Confirm that both ends are twisted securely and symmetrically, so the cable assembly now has both ends of the safety wire properly twisted and secured.
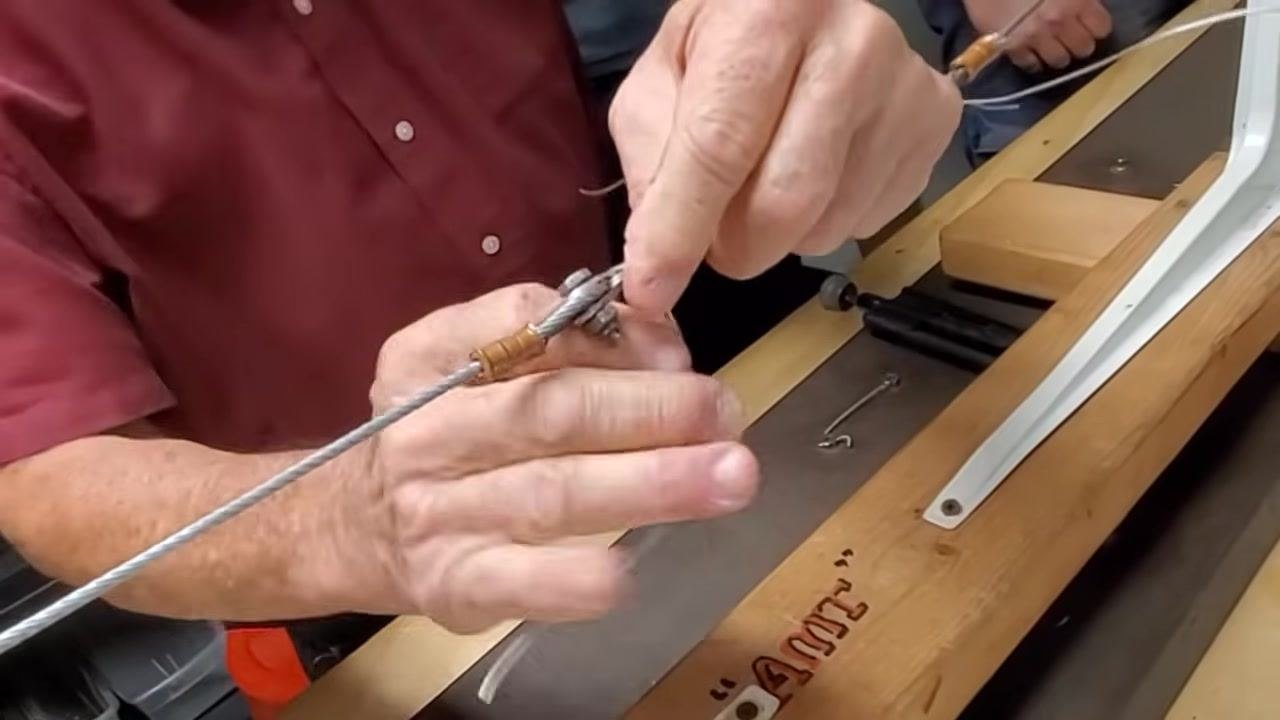
Check the direction and tightness of the twists
Verify that each twist is in the correct direction: if one end was twisted clockwise, the other should be twisted counterclockwise. Inspect the wire for consistent tightness and neatness.
Trim any remaining excess wire
Use diagonal cutting pliers to trim any remaining excess wire for a clean finish. Make sure no sharp ends are left exposed.
Inspect the completed cable assembly
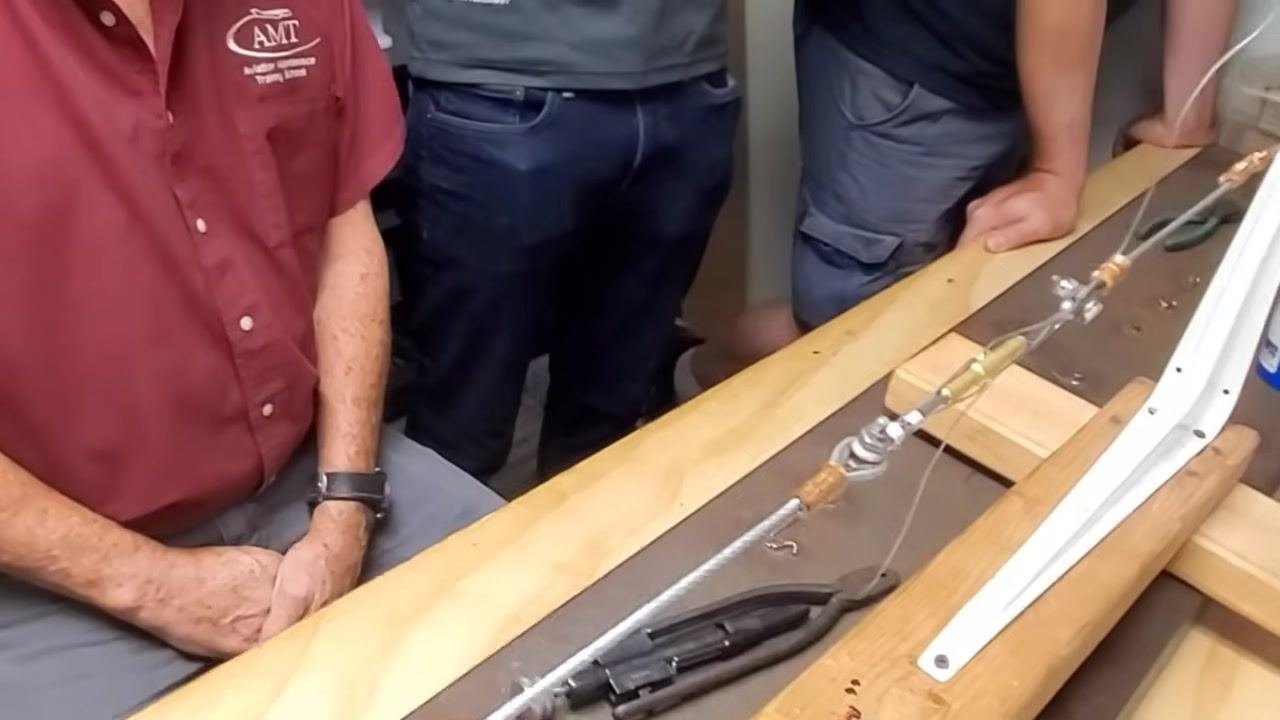
Review the finished cable assembly to confirm that all safety wire is properly twisted, trimmed, and secured. Verify the assembly is neat, with no loose or sharp ends, and that the cable is ready for use or inspection.
Invite others to practice the procedure
If this is a training or instructional setting, invite another person to repeat the process for practice, offering guidance and feedback as needed.
Verification and summary
You have now completed the process of learning how to safety wire a turnbuckle, including inspecting thread engagement, tensioning the assembly, selecting the correct wire specification, folding, twisting, cutting, and inspecting the wire for a professional and safe finish. Always confirm that all ends are trimmed and that no sharp points remain before returning the assembly to service. Invite others to practice the procedure to build proficiency.
Generation details: cost, quality tiers
Docsie billed 3,500 credits ($2.45) to analyze this 7-minute video at standard quality. The rewrite, template fill and Word/PDF exports were included. The same video at each quality tier:
| Quality | Frames sampled | Credits | Approx. cost |
|---|---|---|---|
| Draft | every 16-30 s | 1,750 | $1.22 |
| Standard (this guide) | every 8-15 s | 3,500 | $2.45 |
| Detailed | every 4-7 s | 7,000 | $4.90 |
| Ultra | every 1-3 s | 14,000 | $9.80 |
Credits priced at $0.70 per 1,000; plans include a monthly allowance. Enterprise customers on on-premise or bring-your-own-model deployments run this on their own inference and pay no per-video credits.
Generated by Docsie Video-to-Docs on 2026-09-14 from a 6-minute video. Screenshots are frames from the source video and belong to their creator, Jonathon Murphy, whose original is embedded above. If you own this video and want the guide removed or credited differently, contact us and we will act within one business day.