
How to Run Payroll in ADP
This guide walks you through how to run payroll in ADP using the ADP Workforce Now and RUN Powered by ADP platforms. You'll learn how to sign in or register for a new account, explore payroll service pricing, launch a self-guided demo, enter payroll data, and track employee time and attendance. Whether you're evaluating ADP for the first time or preparing to process your first real payroll, these steps cover the full workflow from account setup to best practices for ongoing payroll accuracy.
Video: ADP Workforce Now Payroll Tutorial | How To Use ADP Payroll For Beginners (2025 Guide) by Shax Finds. All credit for the demonstration goes to the creator; watch the original on YouTube. The written guide below was generated from this video by Docsie. Creator? Request a change or removal.
This guide walks you through how to run payroll in ADP using the ADP Workforce Now and RUN Powered by ADP platforms. You'll learn how to sign in or register for a new account, explore payroll service pricing, launch a self-guided demo, enter payroll data, and track employee time and attendance. Whether you're evaluating ADP for the first time or preparing to process your first real payroll, these steps cover the full workflow from account setup to best practices for ongoing payroll accuracy.
Prerequisites
- A web browser with a stable internet connection.
- An existing ADP User ID, or access to a registration code or the email/mobile number associated with your account if you're a new user.
- Basic company information (business size, number of employees, services of interest) if you plan to request pricing.
Sign in or register for a new account
Step 1: Navigate to the ADP website
Launch your preferred web browser from your desktop or taskbar, and make sure you have a stable internet connection before continuing.
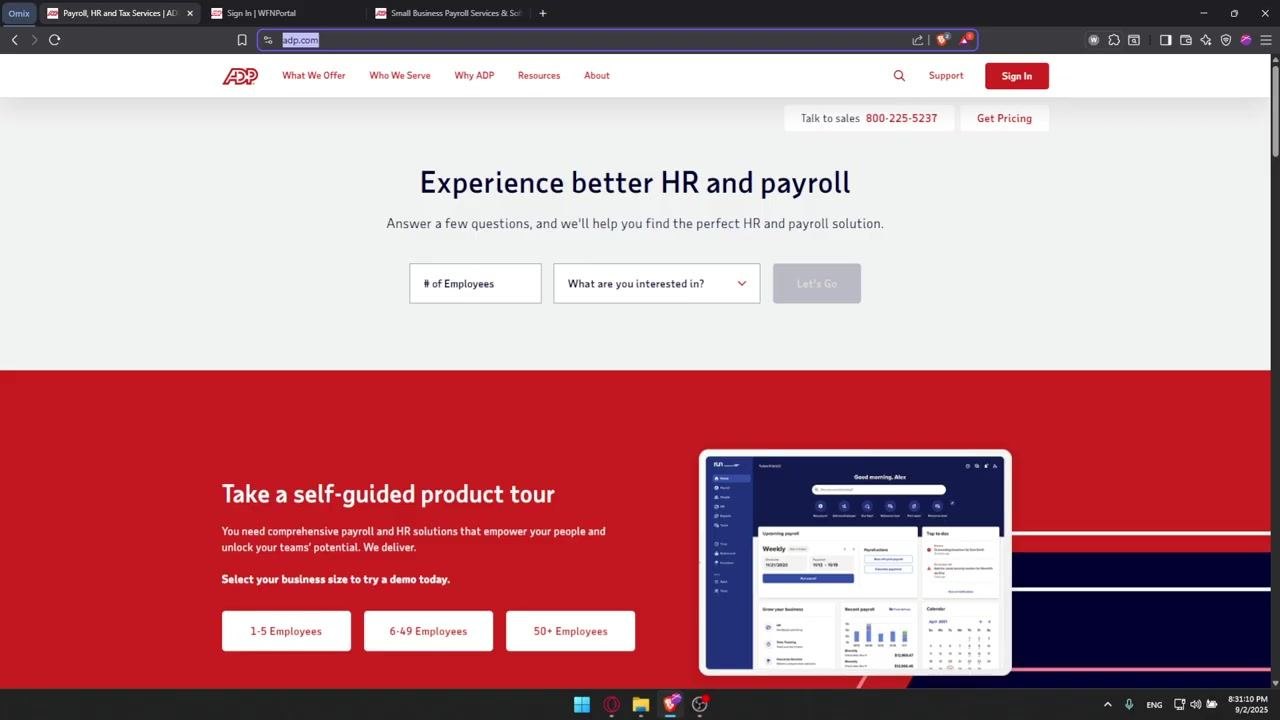
Click on the browser's address bar, type adp.com, and press Enter. Wait for the ADP homepage to load completely.
Step 2: Go directly to ADP Workforce Now
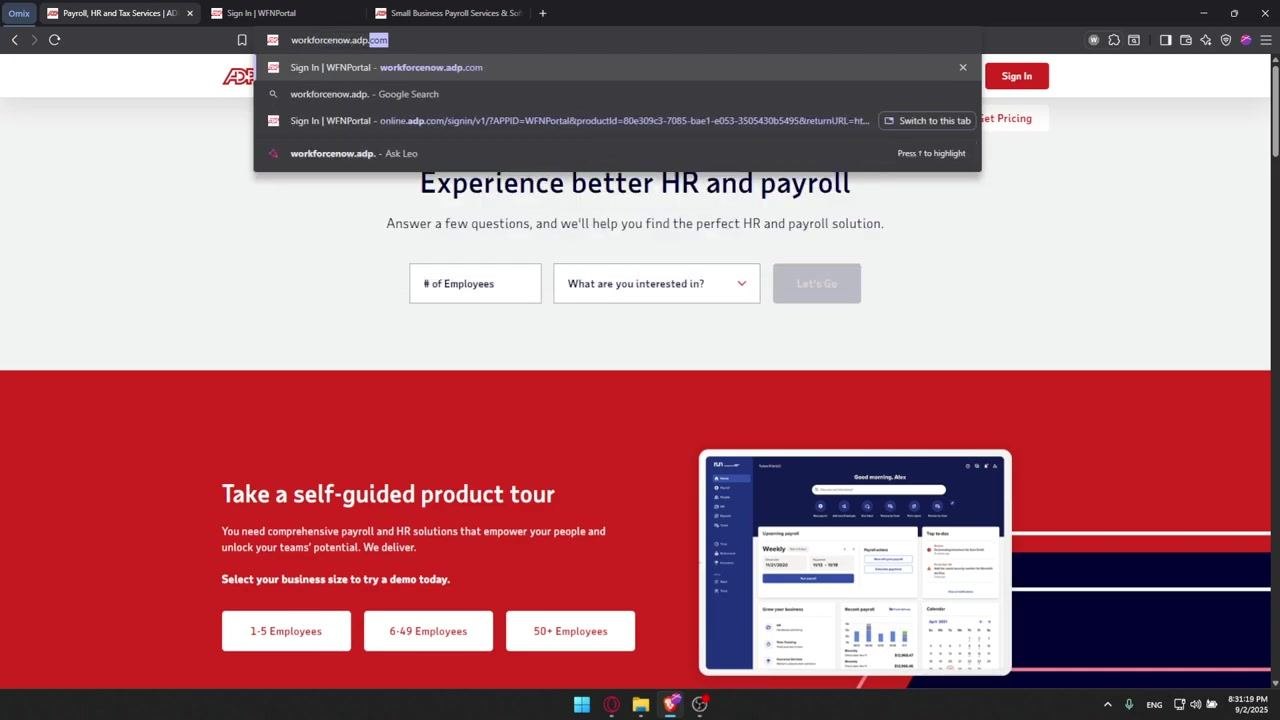
In the address bar, type workforcenow.adp.com and press Enter. This takes you directly to the ADP Workforce Now sign-in page, bypassing the main homepage.
Step 3: Sign in or register for a new account
If you already have a User ID, enter it on the ADP sign-in page to continue. If you're a new user, click the "Get started" link under "New user?" instead.
Step 4: Create your account
On the "Create Your Account" page, choose how you'd like to register:
- Click Find me to search for your account using your email or mobile number.
- Click I have a registration code if your employer has provided one.
Follow the on-screen prompts to complete your registration.
Note: If you run into issues during registration or sign-in, use the Need help signing in? link on the sign-in page for assistance.
Explore payroll services and get pricing
Step 5: Browse payroll services and get pricing
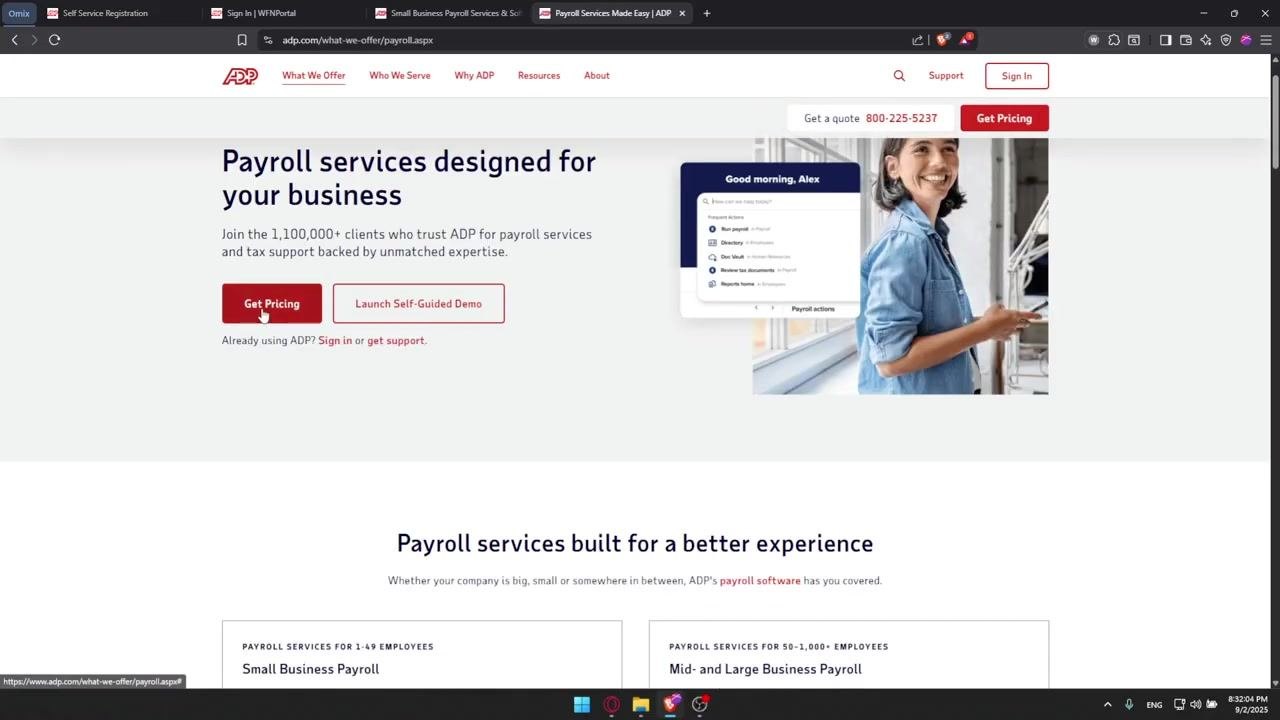
If you want to explore payroll services or purchase access, return to the ADP homepage. Click What We Offer in the top menu, then select Payroll. On the Payroll page, click the red Get Pricing button.
Step 6: Answer business information questions
A pop-up titled "Get pricing specific to your business" appears. Select the services you're interested in, such as Payroll, HR, Workers' Compensation, or Retirement, then click Next to proceed.
Continue following the prompts to enter your company information, number of employees, and any other details needed to complete your setup or request a quote.
Step 7: Enter your contact information for pricing
On the pricing pop-up, fill in the required fields:
- Full Name: enter your name.
- Phone Number: enter your contact number.
- Country: select your country.
Review the privacy statement and terms of use, then click Get Pricing to submit your request. An ADP agent will contact you within one or two business days to discuss features and provide a customized quote based on your number of employees and other business factors.
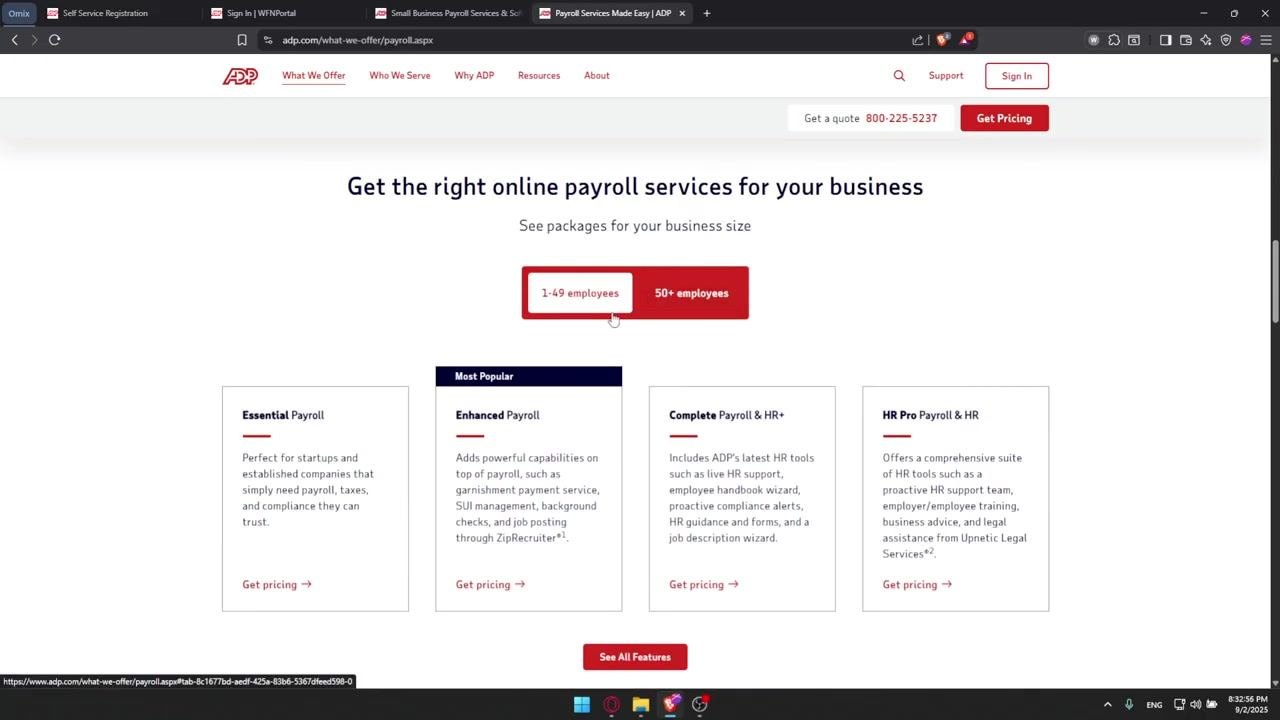
Step 8: Explore payroll packages by employee count
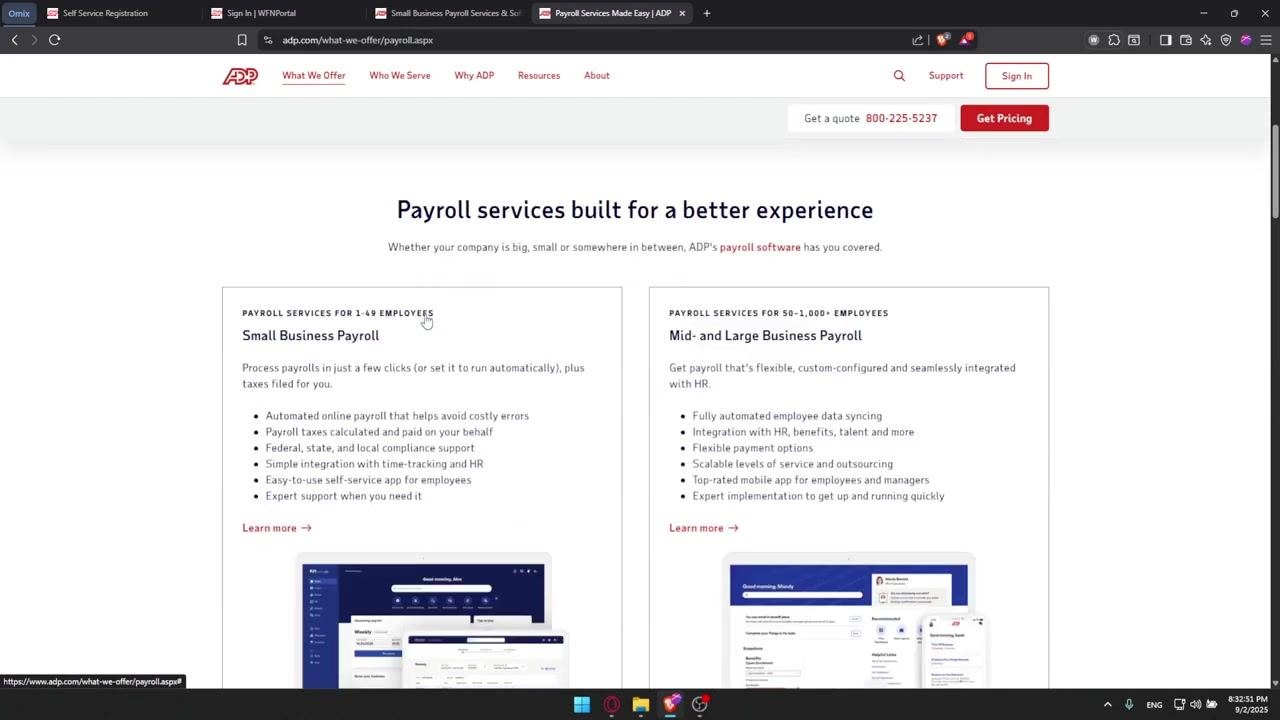
While waiting for an agent, you can review available payroll packages. On the payroll services page, select your business size:
- Click 1-49 employees for small business options.
- Click 50+ employees for mid- and large-business options.
Review package details such as Essential Payroll, Enhanced Payroll, Complete Payroll & HR+, and HR Pro Payroll & HR. Click Get pricing under any package to request more information.
Launch the self-guided demo
Step 9: Launch the self-guided demo
If you'd like to try a demo before purchasing, click the Launch Self-Guided Demo button on the payroll services page. The demo guides you through the same questions as the pricing request, covering company details and business needs.
On the first demo screen, answer whether your company currently uses ADP by clicking Yes or No, then click Next.
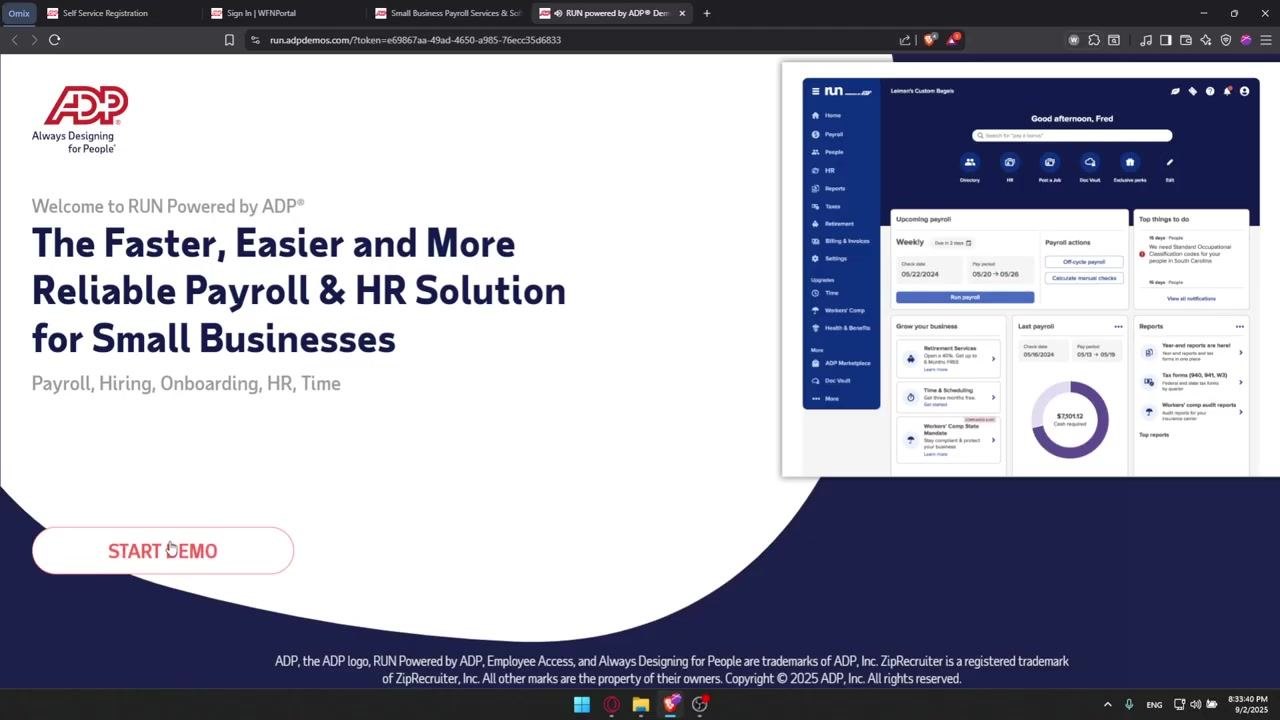
Step 10: Start the ADP RUN demo
After completing the initial questions, the demo welcome screen appears, describing ADP as "The Faster, Easier and More Reliable Payroll & HR Solution for Small Businesses." Click the Start Demo button to begin.
Step 11: Navigate the demo and enable autoplay
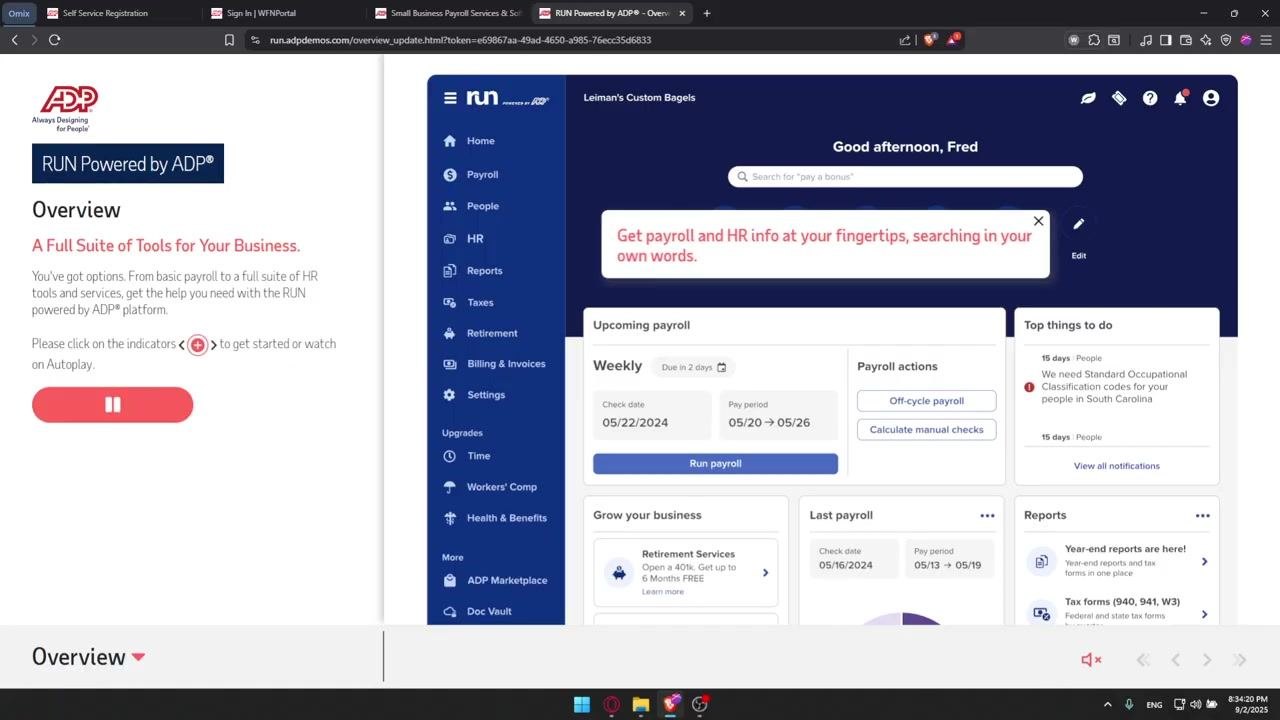
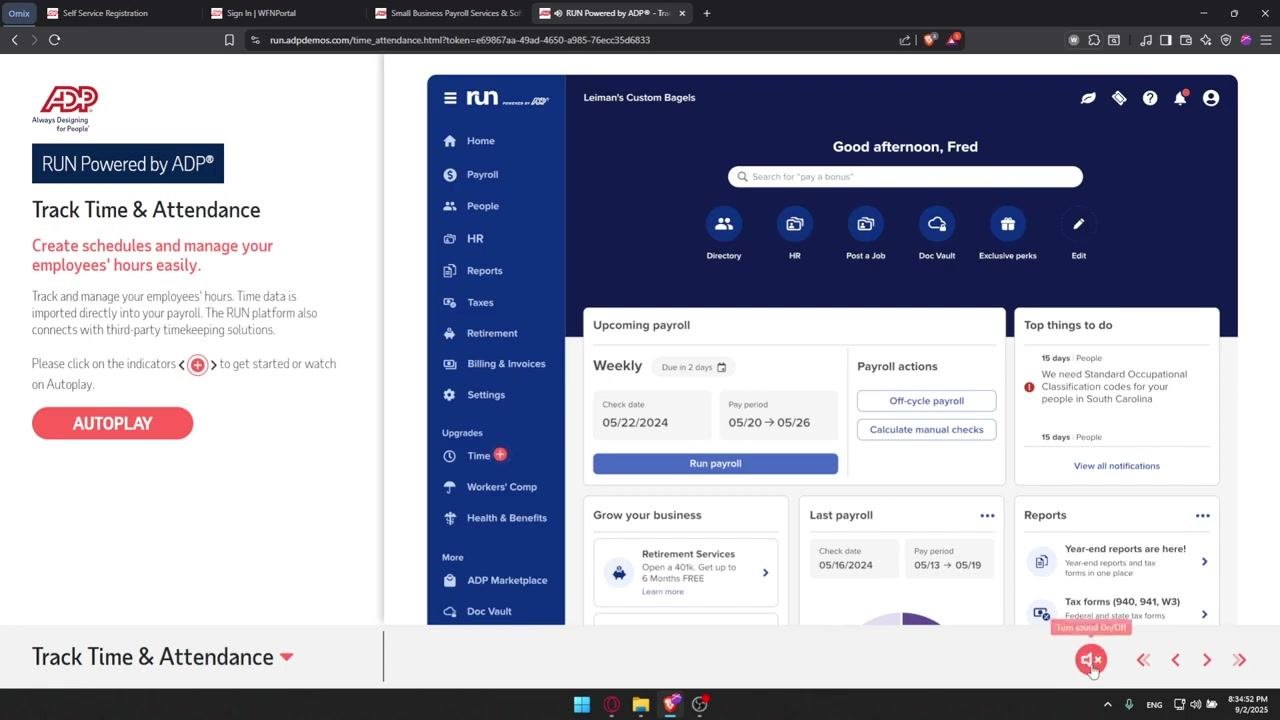
The demo provides an overview of the RUN Powered by ADP platform. The left menu includes options such as Home, Payroll, People, HR, Reports, Taxes, Retirement, Billing & Invoices, and Settings. The main dashboard shows upcoming payroll, payroll actions, top things to do, and business growth tools.
To get a guided walkthrough, click the Autoplay button (the red play/pause icon) to have the demo automatically explain features, including how to access the payroll section and enter employee hours.
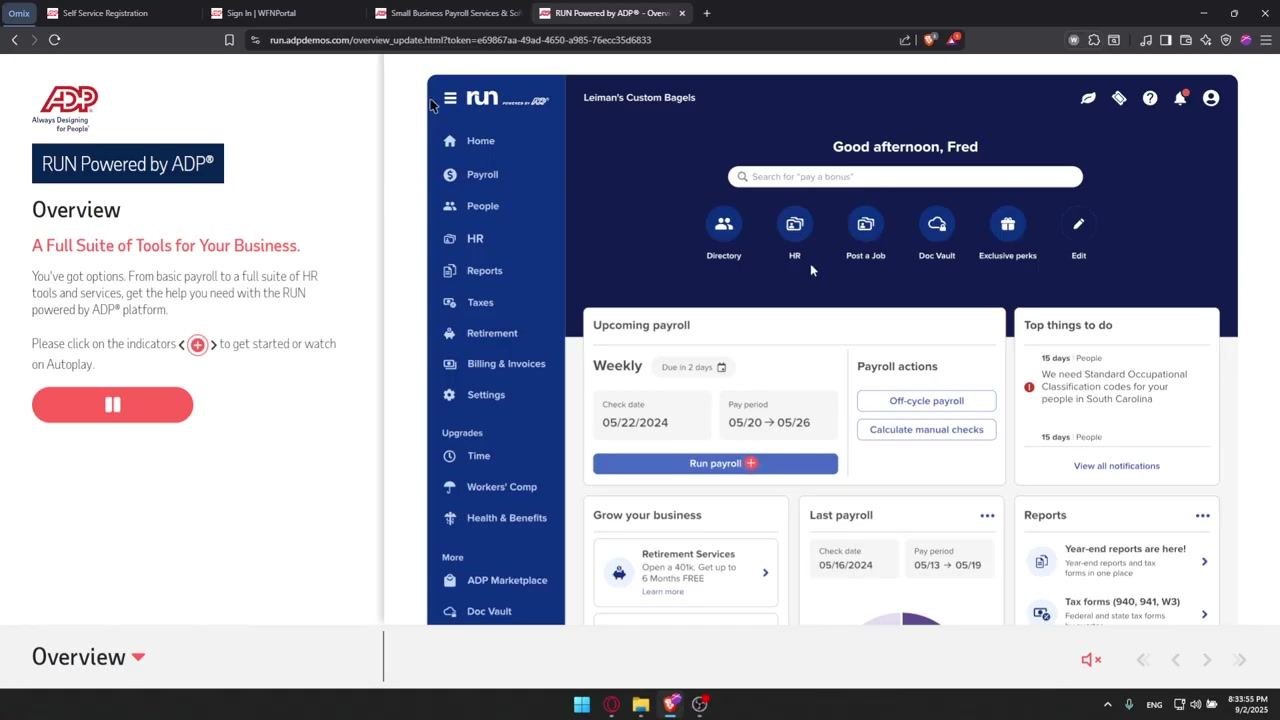
Tip: Use the left navigation menu in the demo to explore specific features such as Payroll, HR, Reports, and Settings. The demo provides step-by-step instructions and explanations for each section.
Step 12: Explore payroll entry and review features
Use the demo to practice entering employee hours:
- Enter hours for hourly employees, including overtime if applicable.
- Enter hours or salary details for salaried employees.
Review deductions and taxes for each payroll run, then access payroll reports to review payroll before submission. Submit payroll when ready, and use the left navigation menu to access additional features such as Reports, Taxes, and Billing & Invoices.
Step 13: Use the search and compliance tools
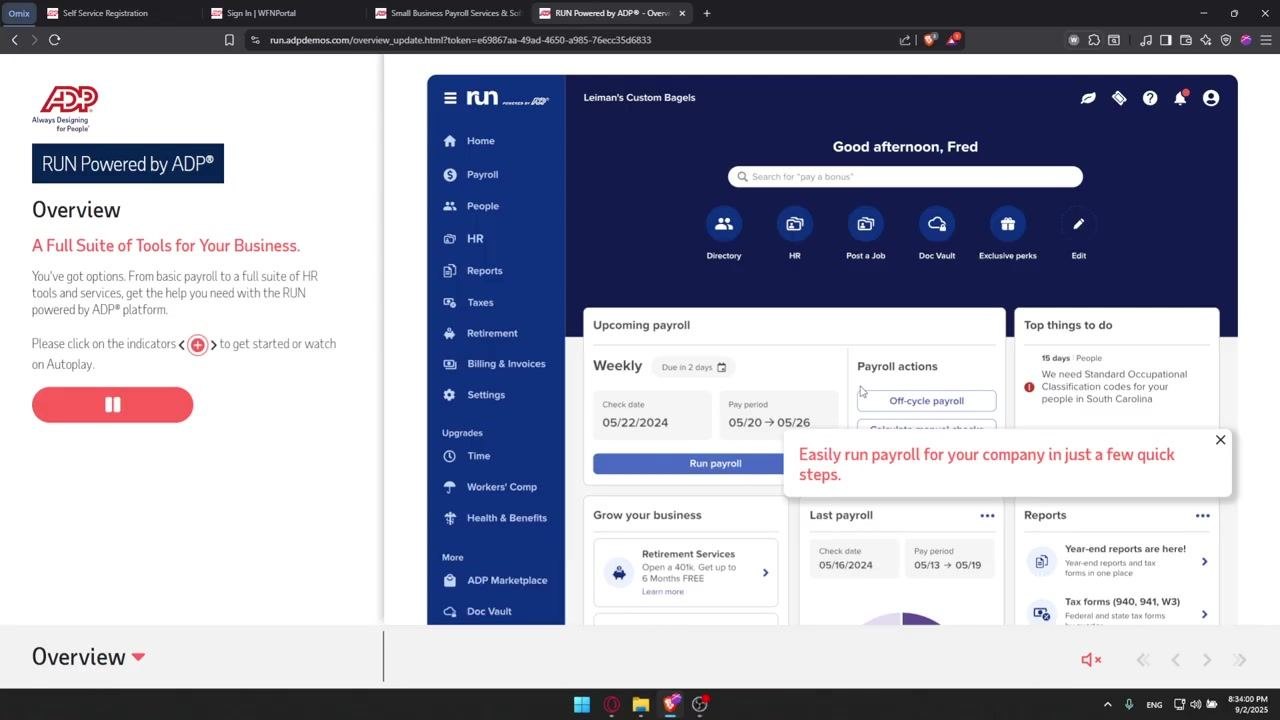
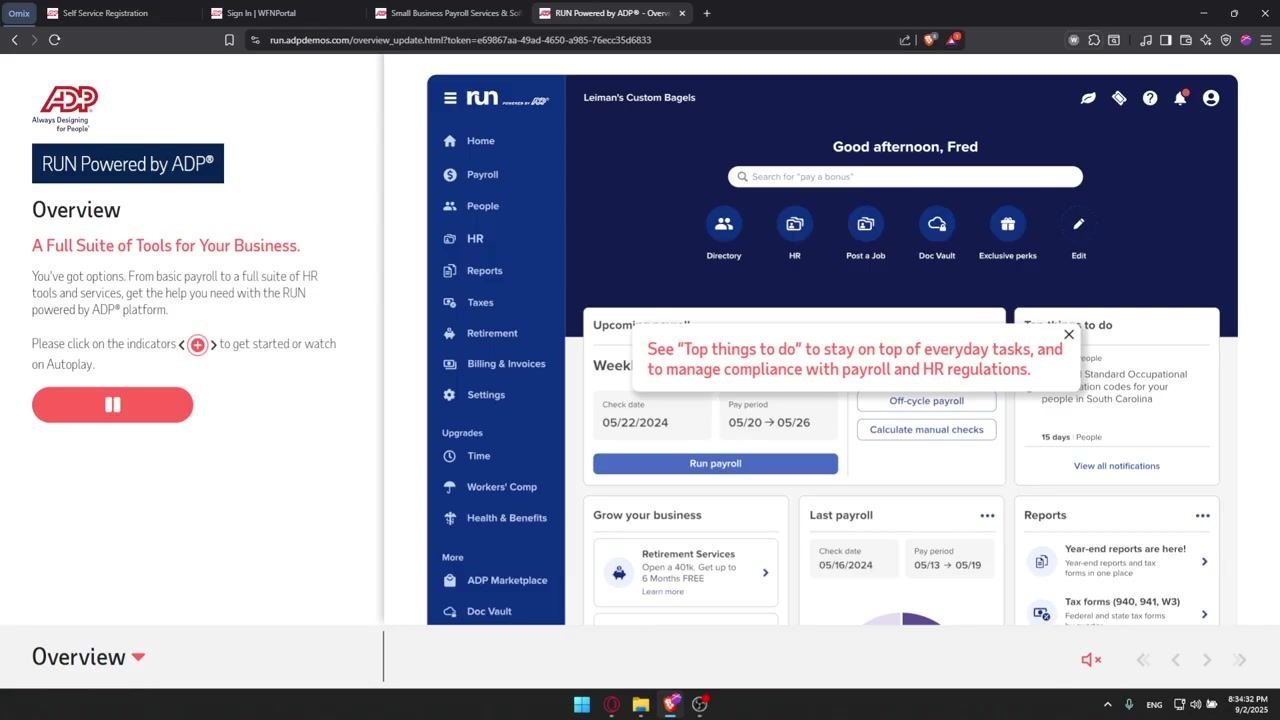
Use the search bar at the top to quickly find payroll or HR information — for example, searching for "pay a bonus." Refer to the "Top things to do" panel for compliance reminders and important tasks, such as updating classification codes. Click any compliance alert to view more details or take action.
Step 14: Stay on top of tasks and reports
Monitor the "Top things to do" section to stay updated on everyday tasks and compliance requirements. Use the Reports panel to access year-end reports, tax forms, and other payroll documentation.
Track time & attendance
Step 15: Explore the time & attendance section
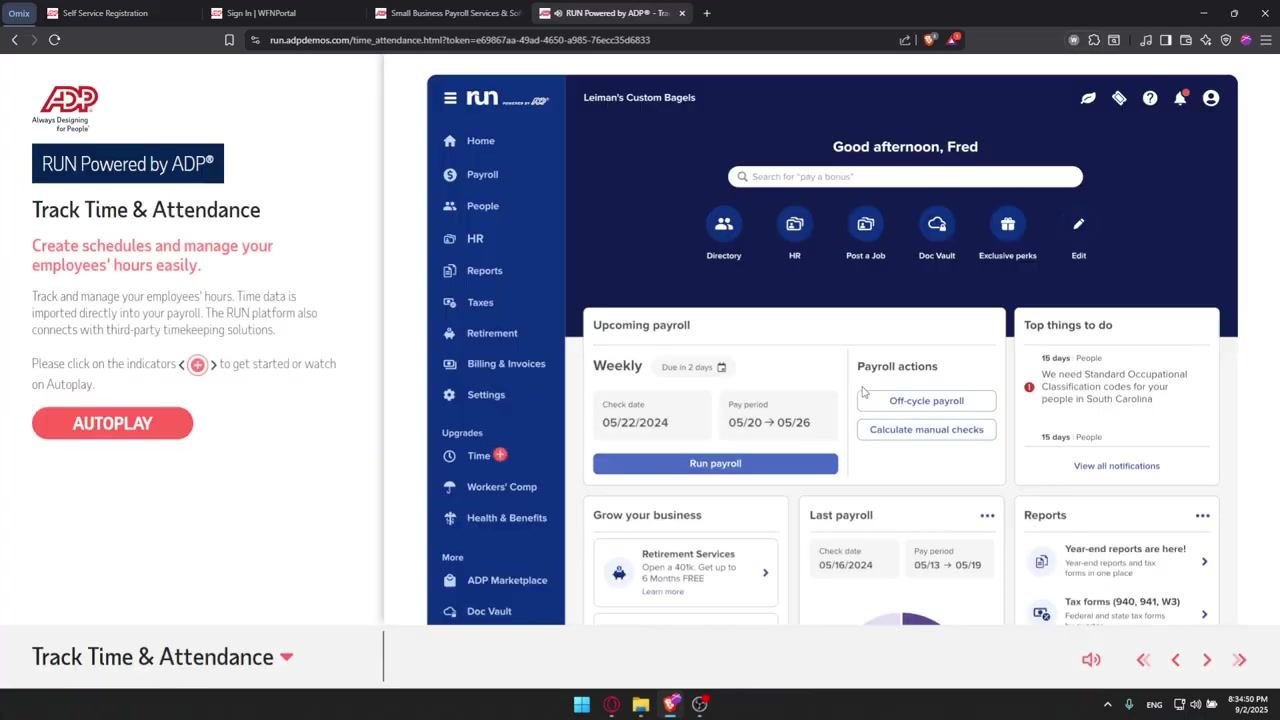
Navigate to the Track Time & Attendance section using the left menu or demo navigation. Click the Autoplay button to watch a guided walkthrough of the time and attendance features, which cover how to:
- Create employee schedules.
- Manage and track employee hours.
- Import time data directly into payroll.
- Connect with third-party timekeeping solutions if needed.
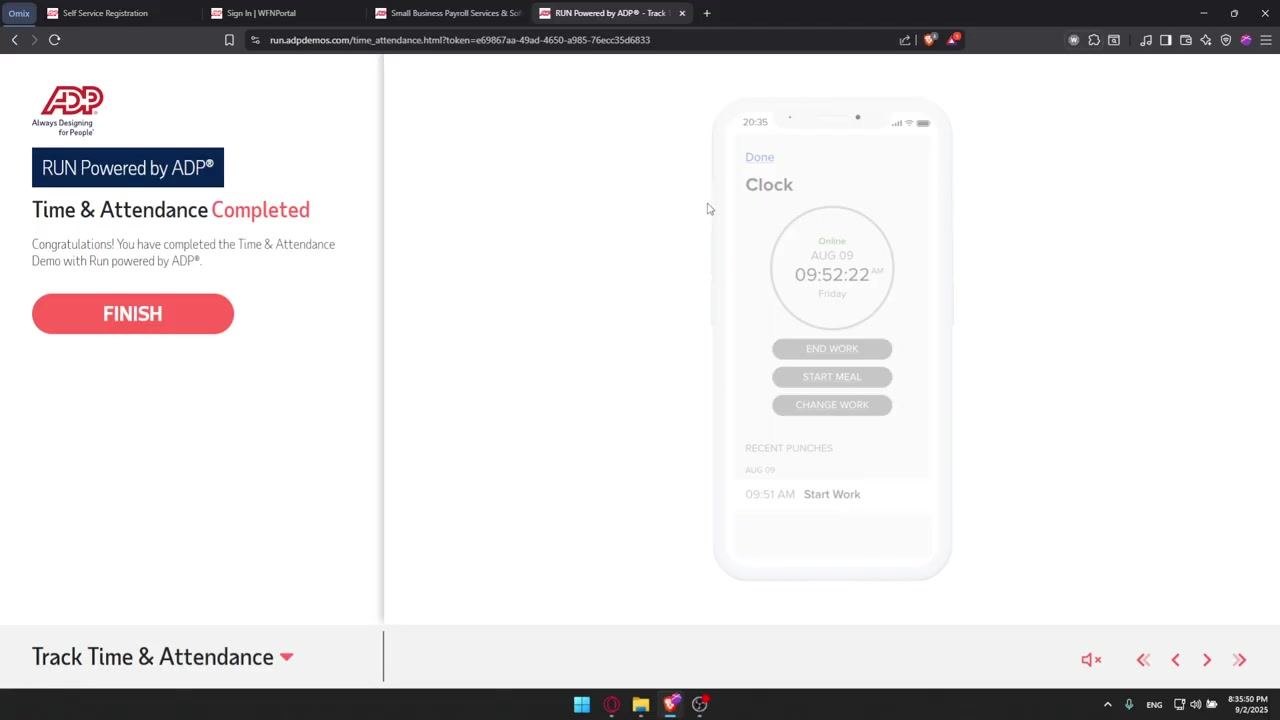
Employees can clock in and out easily, including from their mobile devices. The clock interface allows employees to end work, start meal breaks, change work tasks, and view recent punches, such as "09:51 AM Start Work."
Step 16: Review the time management dashboard
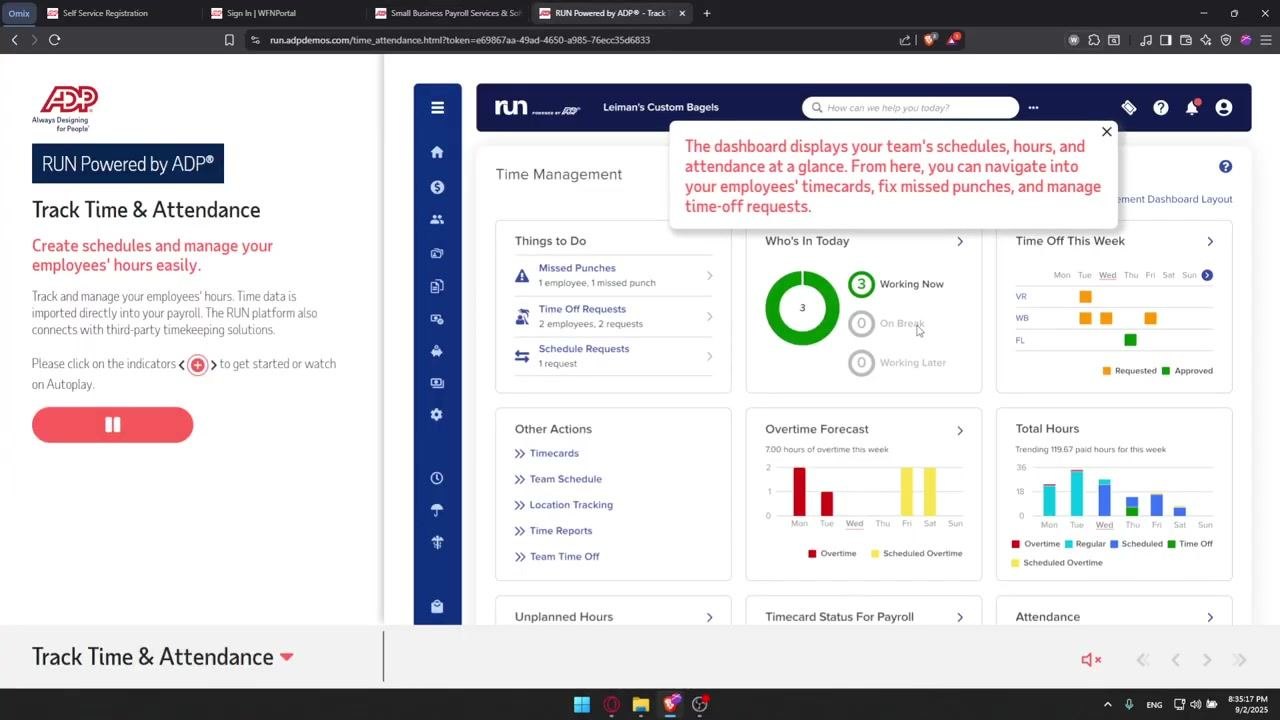
The Time Management dashboard provides an overview of:
- Things to Do (missed punches, time off requests, schedule requests).
- Who's In Today (current working status).
- Time Off This Week (requested and approved time off).
- Overtime Forecast (a visual graph of overtime hours).
- Total Hours (a breakdown of overtime, regular, scheduled, and time off hours).
Use the dashboard to navigate into employee timecards, fix missed punches, and manage time-off requests.
Step 17: Complete the time & attendance demo and try a practice run
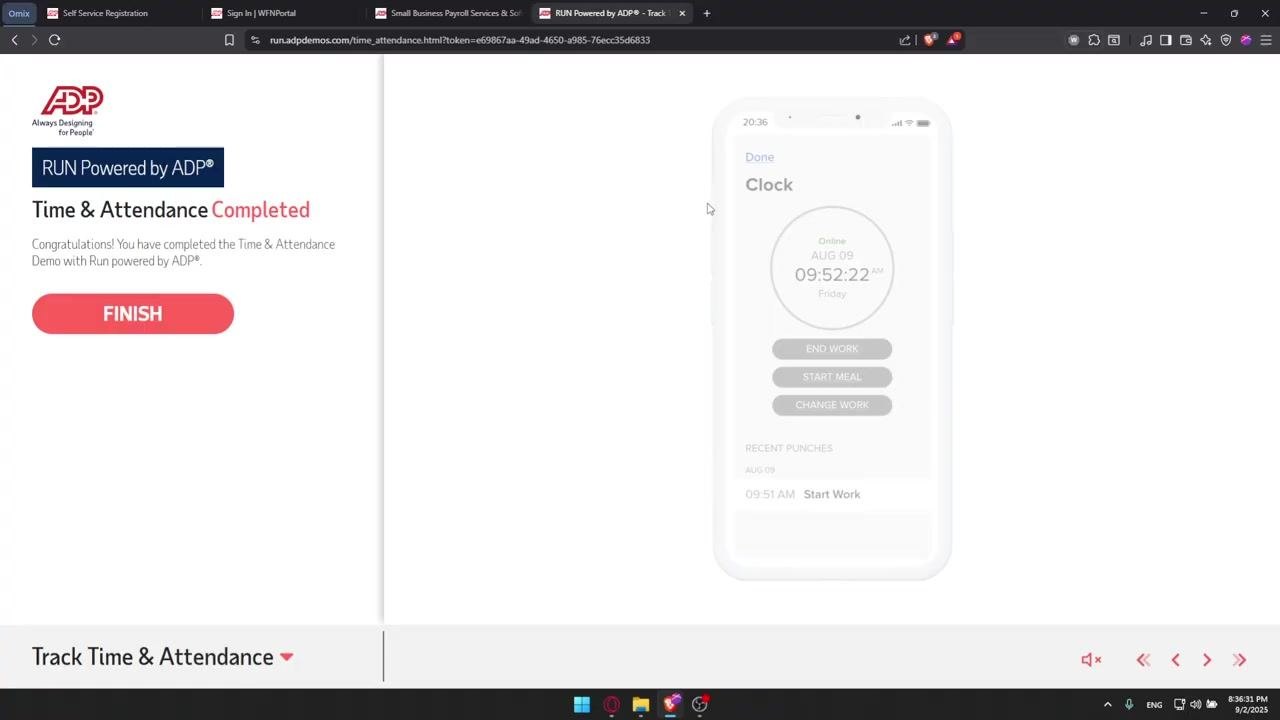
The completion screen displays the ADP logo alongside the message "Time & Attendance Completed — Congratulations! You have completed the Time & Attendance Demo with Run powered by ADP®." A large red FINISH button appears for you to exit the demo.
On the right side, a simulated mobile interface shows the employee clock-in/out screen, including current status ("Online"), the date and time, action buttons (END WORK, START MEAL, CHANGE WORK), and a recent punches log ("09:51 AM Start Work").
If you're new to the system, consider using the practice run feature to familiarize yourself with the clock-in/out process and other time tracking actions before using the system live. Click FINISH to exit the demo and return to the main dashboard or next steps.
Tip: Using the practice run option is highly recommended for new users to gain confidence and ensure accuracy when managing employee time and attendance.
Before your real payroll date
Step 18: Correct errors immediately
If you notice any error after submitting payroll, take immediate action to correct it. Review your submission for discrepancies or mistakes, and contact your payroll provider or use the correction features in your payroll system as soon as possible.
Step 19: Keep employee data updated
Regularly verify and update employee information such as addresses, tax details, and pay rates. Ensure all new hires and terminations are accurately reflected in the system at all times.
Step 20: Follow best practices to avoid common payroll issues
- Set reminders for important payroll deadlines and tasks.
- Run a test payroll before the actual payroll date to catch any errors.
- Fix any mistakes as soon as you see them.
- Continuously keep employee data updated to prevent future issues.
These practices help you avoid delays, incorrect payments, and compliance problems.
Step 21: Apply pro tips for smooth, ongoing payroll runs
- Double-check all entries before final submission.
- Use available demo or test features to simulate payroll runs.
- Stay informed about updates or changes in payroll regulations.
Step 22: Get familiar with ADP resources
If you're new to using ADP for payroll, take time to familiarize yourself with the platform's features and resources. Explore the help guides, tutorials, and support options provided by ADP.
What's next
Now that you know how to run payroll in ADP, continue through the self-guided demo or wait for an ADP agent to contact you with personalized pricing and a feature overview. Use the demo to get comfortable with the platform's payroll and time & attendance capabilities before making a purchasing decision or processing your first live payroll run.
Generation details: cost, quality tiers
Docsie billed 3,500 credits ($2.45) to analyze this 7-minute video at standard quality. The rewrite, template fill and Word/PDF exports were included. The same video at each quality tier:
| Quality | Frames sampled | Credits | Approx. cost |
|---|---|---|---|
| Draft | every 16-30 s | 1,750 | $1.22 |
| Standard (this guide) | every 8-15 s | 3,500 | $2.45 |
| Detailed | every 4-7 s | 7,000 | $4.90 |
| Ultra | every 1-3 s | 14,000 | $9.80 |
Credits priced at $0.70 per 1,000; plans include a monthly allowance. Enterprise customers on on-premise or bring-your-own-model deployments run this on their own inference and pay no per-video credits.
Generated by Docsie Video-to-Docs on 2026-10-12 from a 6-minute video. Screenshots are frames from the source video and belong to their creator, Shax Finds, whose original is embedded above. If you own this video and want the guide removed or credited differently, contact us and we will act within one business day.