
How to Set Up Direct Deposit in Workday
This guide walks you through how to set up direct deposit in Workday, along with submitting your federal W-4 withholding elections. Workday lets you electronically submit your direct deposit (payment elections) and W-4 (federal withholdings) forms to payroll staff, replacing the need for paper forms such as a voided check or a printed W-4.
Video: =Fast15: Workday Payment Elections(Direct Deposit, W-4) by ODE HelpDesk. All credit for the demonstration goes to the creator; watch the original on YouTube. The written guide below was generated from this video by Docsie. Creator? Request a change or removal.
This guide walks you through how to set up direct deposit in Workday, along with submitting your federal W-4 withholding elections. Workday lets you electronically submit your direct deposit (payment elections) and W-4 (federal withholdings) forms to payroll staff, replacing the need for paper forms such as a voided check or a printed W-4.
Prerequisites
- Workday does not replace the state payroll system; it is used only to submit your direct deposit and federal withholding information electronically.
- The online process in Workday mirrors the current paper-based process — instead of mailing or dropping off forms, you complete and submit them online.
- You need valid Workday login credentials.
- Have your bank's 9-digit routing number and your account number ready before you begin.
Log in to Workday
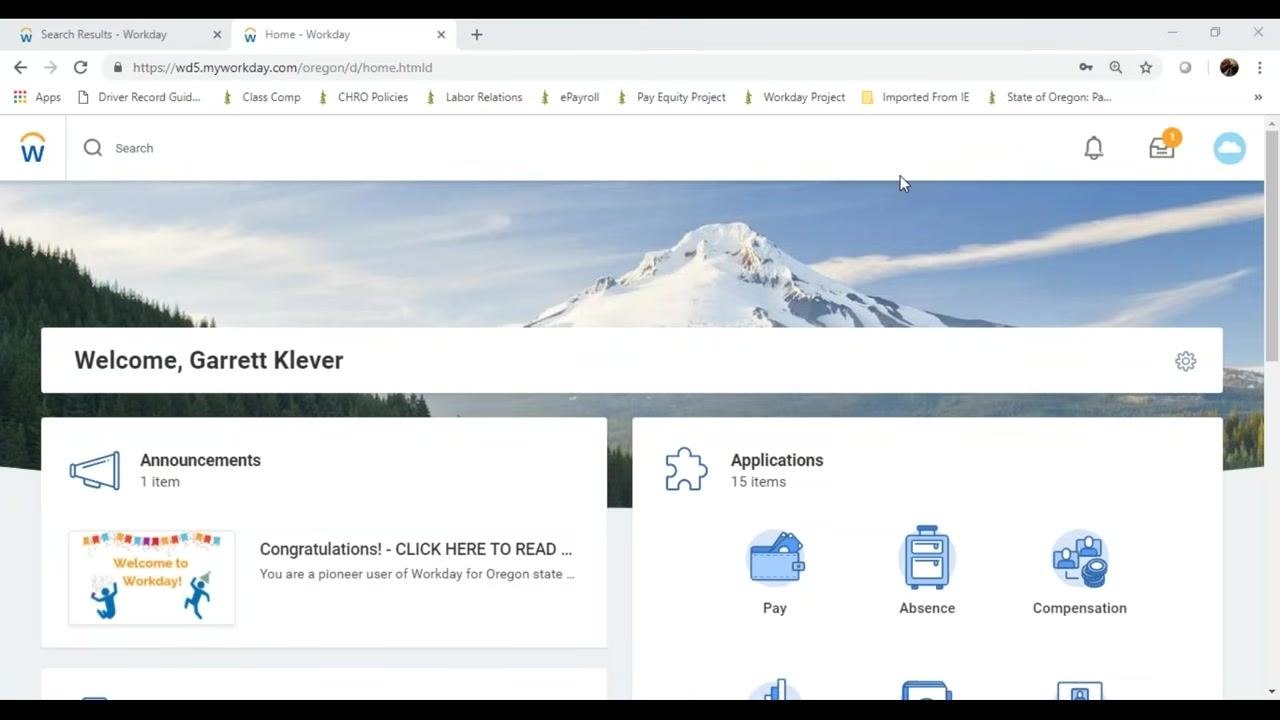
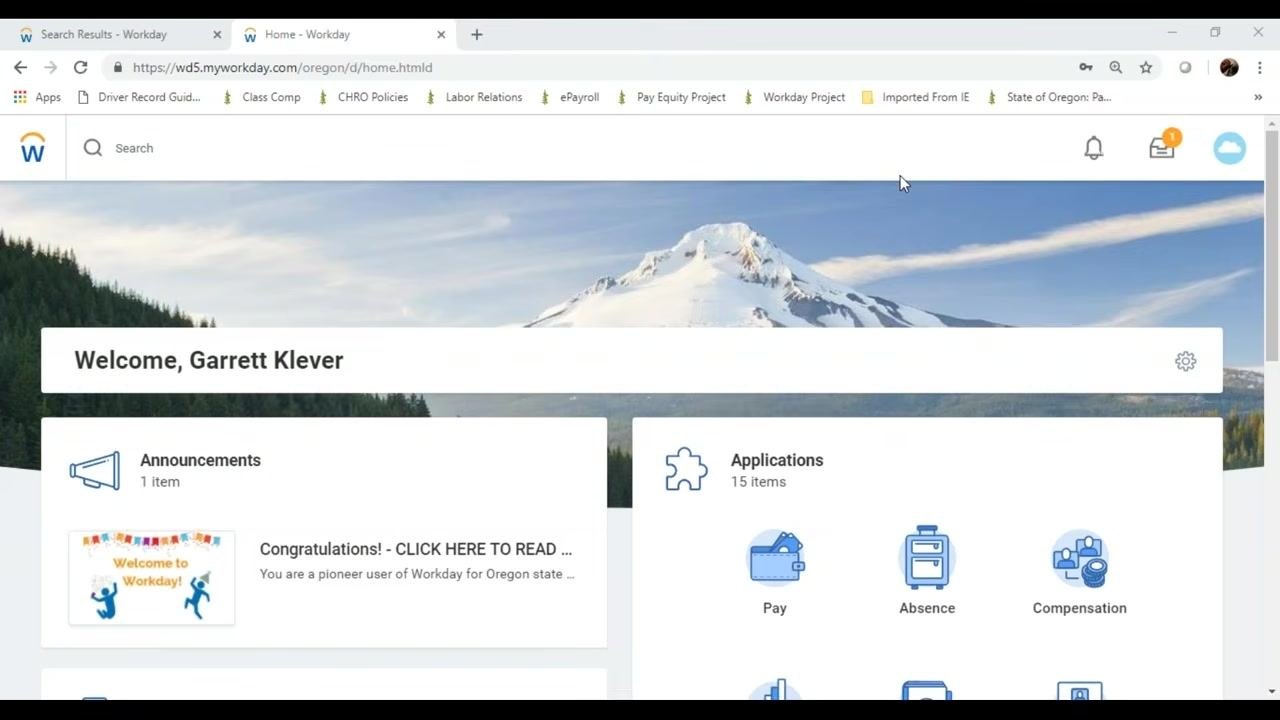
Log in to Workday using your credentials. Once logged in, you land on the home page.
Open the Pay application
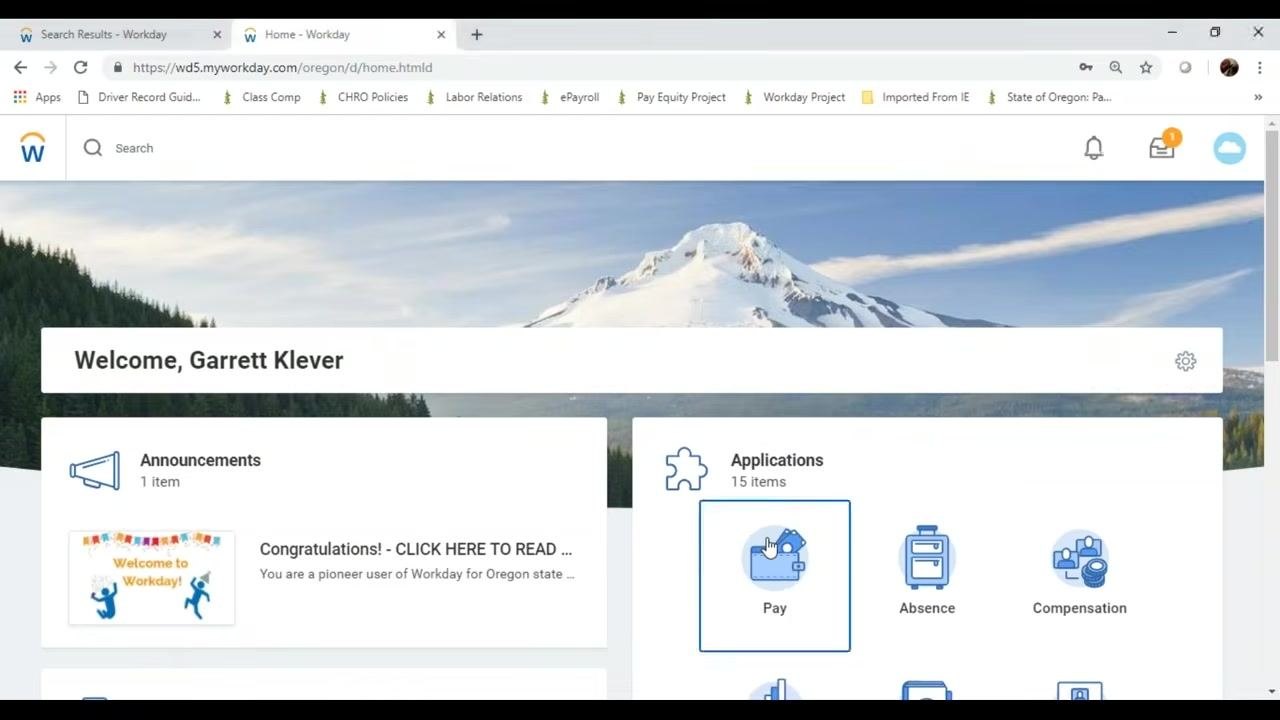
The home page displays a welcome message, an Applications section with icons such as Pay, Absence, and Compensation, and any current announcements or notifications.
Locate the Pay application, typically shown with a wallet or payment icon, and click it to proceed.
Access the federal withholding elections process
On the Pay page, you see two main actions: Withholding Elections, which corresponds to your W-4 form (federal tax withholdings), and Payment Elections, which corresponds to your direct deposit setup.
You can also use the search box at the top of the Workday home page. Enter "federal" and select Add Federal Withholding Elections from the search results.
Complete the W-4 Data form
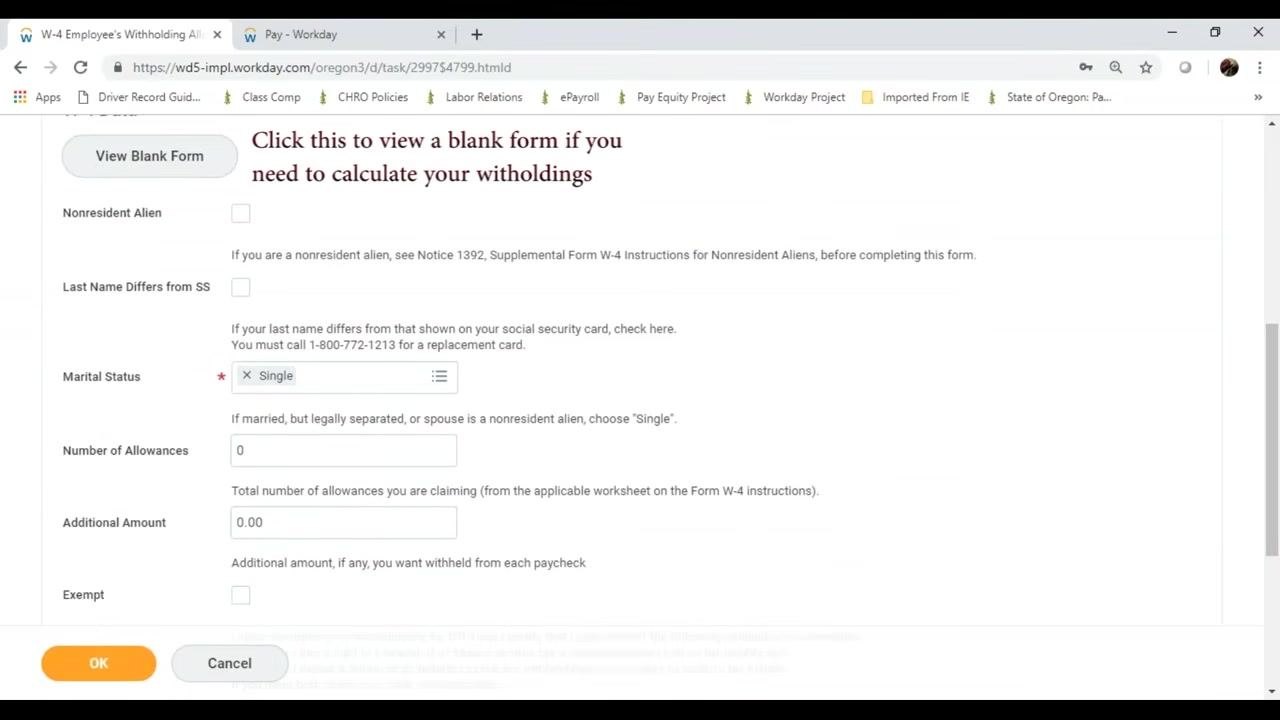
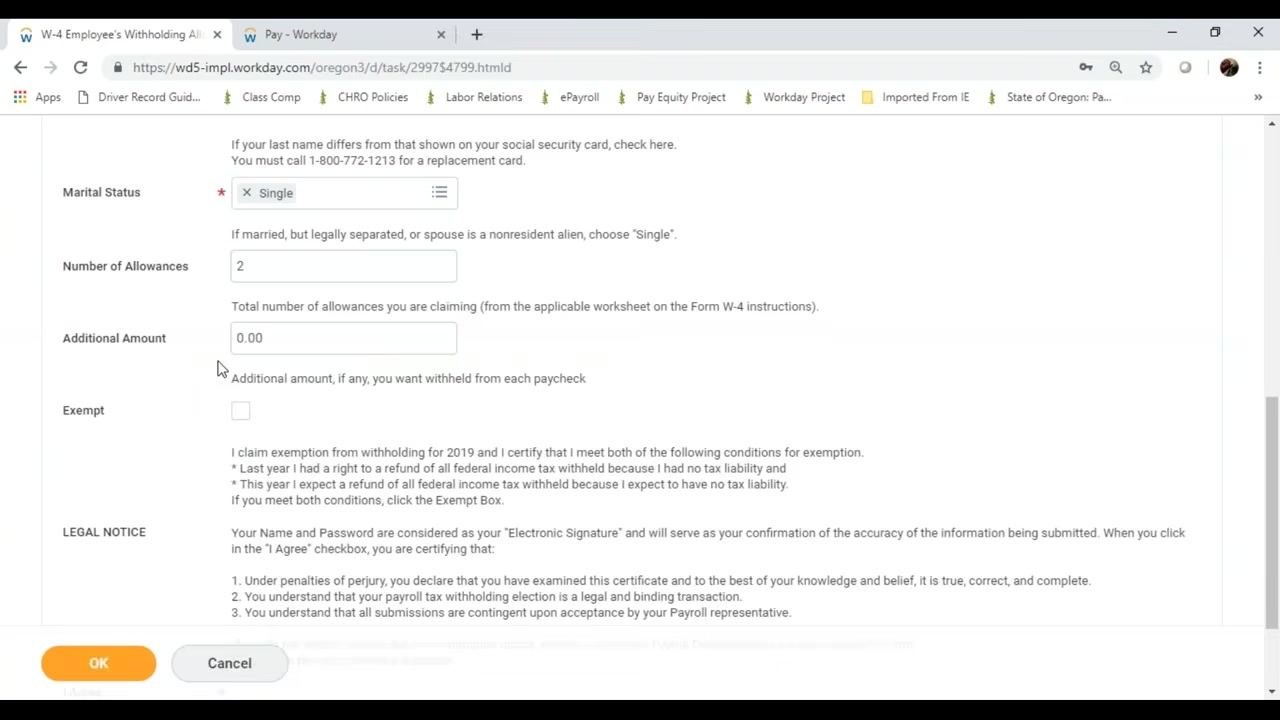
The W-4 Data form is the electronic version of the IRS W-4. It includes the following fields and checkboxes:
- Nonresident Alien checkbox
- Last Name Differs from SS checkbox
- Marital Status dropdown (Single, Married, or Married but withhold at higher Single rate)
- Number of Allowances field
- Additional Amount field
- Exempt checkbox
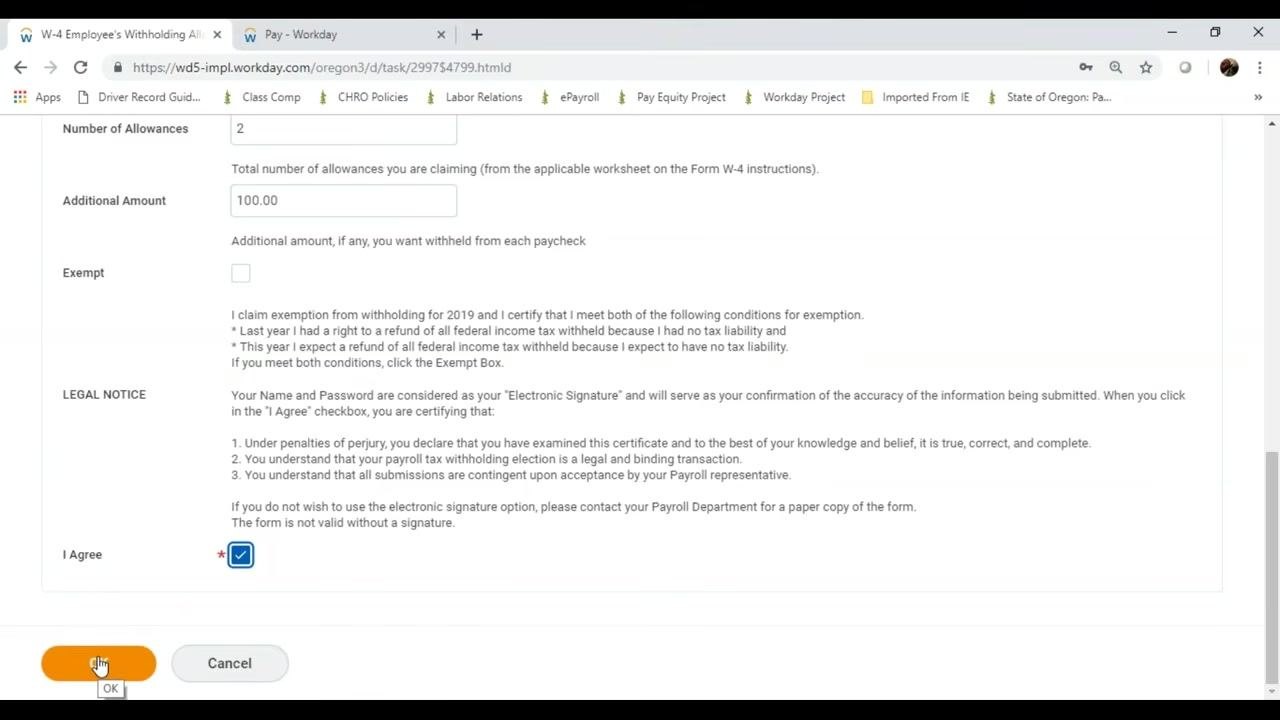
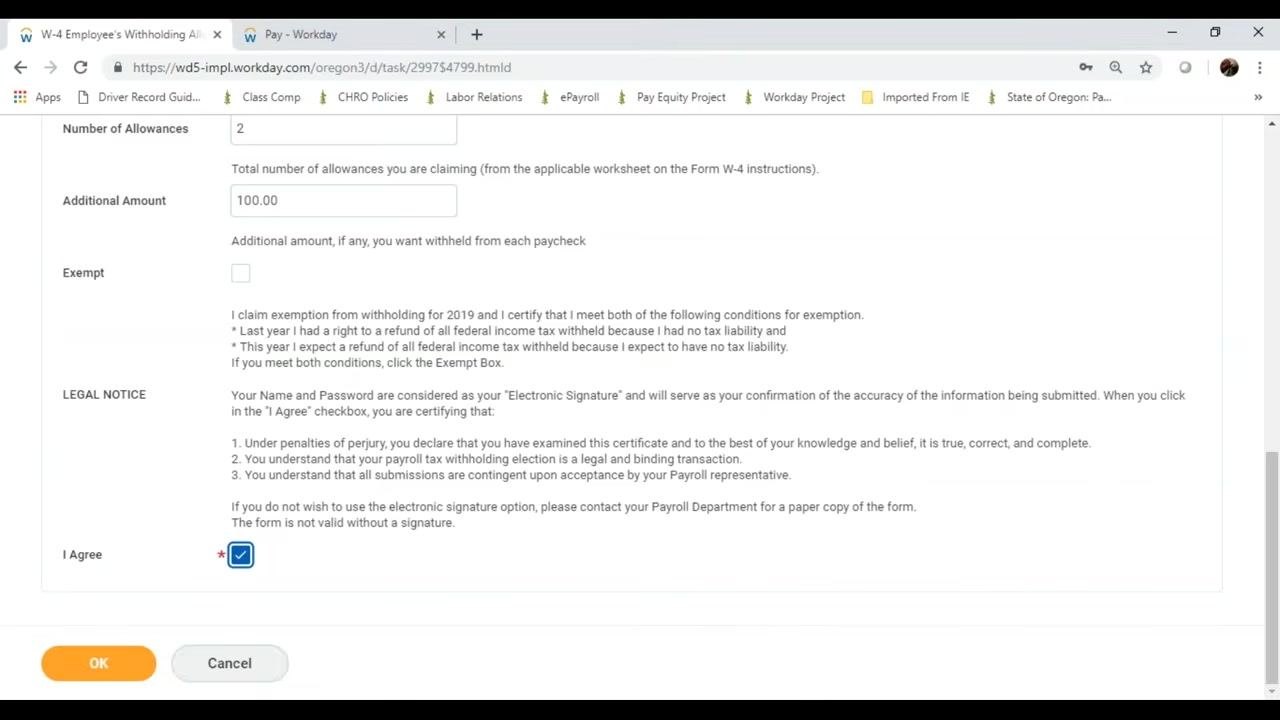
- Legal Notice section explaining the electronic signature
Complete the form as follows:
- Check Nonresident Alien if it applies to you.
- Check Last Name Differs from SS if your last name differs from your Social Security card.
- Select your Marital Status from the dropdown menu.
- Enter the Number of Allowances you are claiming (for example, 2).
- Enter any Additional Amount you want withheld from each paycheck (for example, 100.00).
- Check Exempt if you are exempt from withholding.
- Read the Legal Notice section, which outlines the terms of your electronic signature.
Provide your electronic signature
At the bottom of the form, check the I Agree box to certify your entries and provide your electronic signature. Click OK to submit your federal tax election form.
After submitting, a confirmation screen appears stating "You have submitted Federal Tax Election: [Your Name]," along with a green checkmark and the message "Process Successfully Completed." From this screen, you can choose to add or complete another federal withholding election.
Start your payment elections (direct deposit) setup
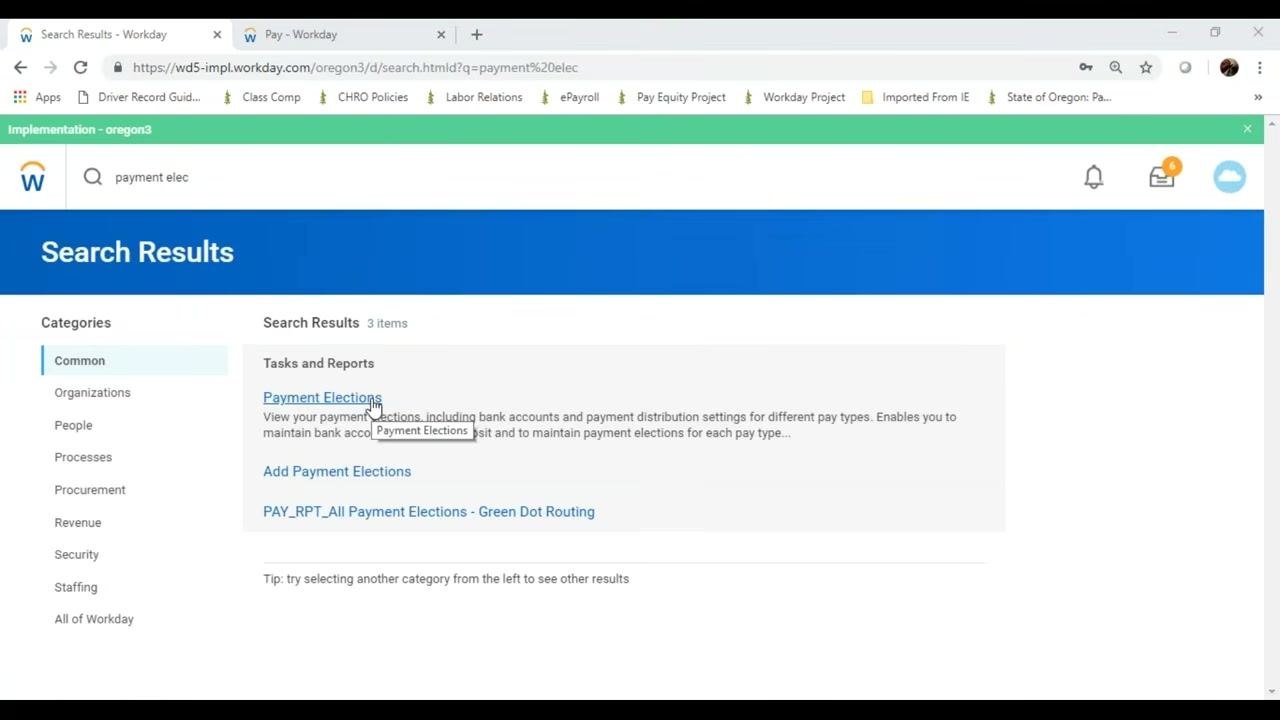
From the Workday home page, use the search box and enter a partial phrase such as "payment elec." Workday displays relevant options — select Payment Elections or Add Payment Elections from the search results.
Add a new direct deposit account
On the Payment Elections screen, confirm that no payment elections are currently specified for your profile. Click Add to start entering your direct deposit information.
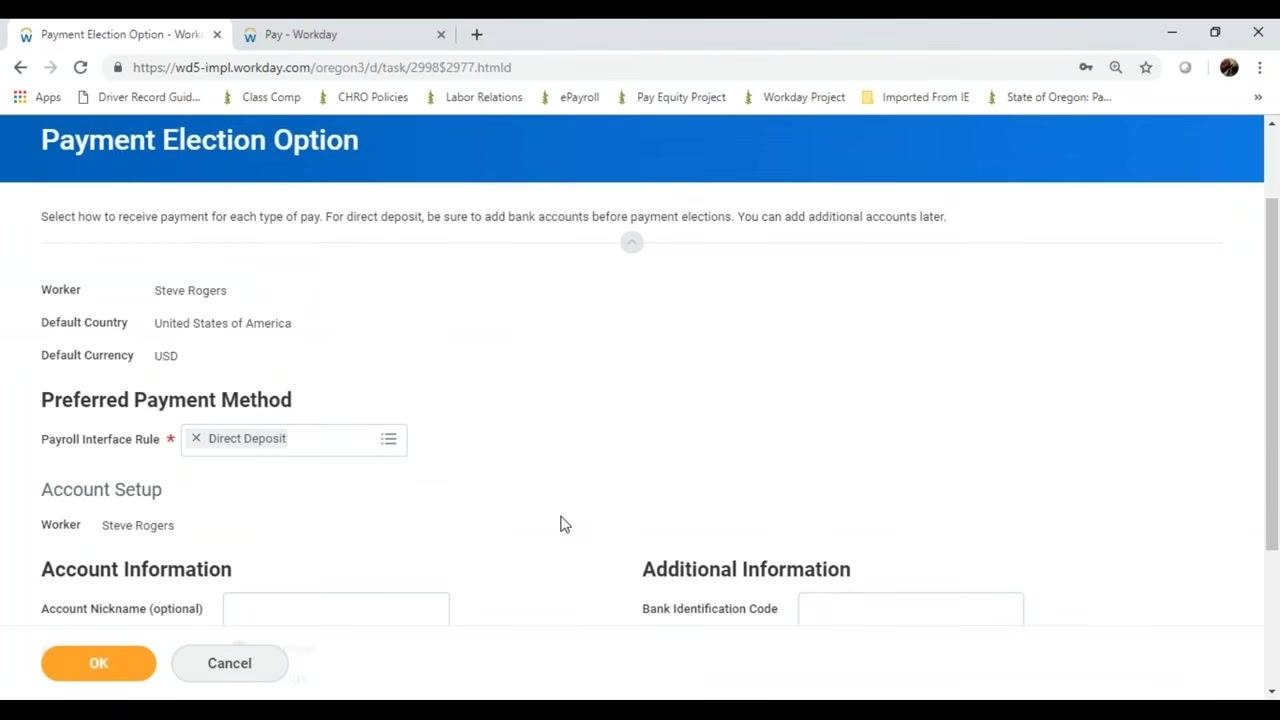
Fill out the Payment Election Option form
Confirm that the Payroll Interface Rule is set to Direct Deposit (selected by default). Under Account Information, enter the following:
- Account Nickname (optional): leave blank or enter a nickname for your account.
- Account Type: select Checking or Savings.
- Bank Name: enter your bank's name.
- Routing Transit Number: enter your bank's 9-digit routing number.
- Account Number: enter your bank account number.
Resolve any errors flagged by Workday
If you enter a routing number that is not exactly 9 digits, Workday flags an error. Click the red 2 Errors box to view the details — the message states: "Routing transit number must be nine digits." Correct the entry so it contains exactly 9 digits.
Validate and save your direct deposit information
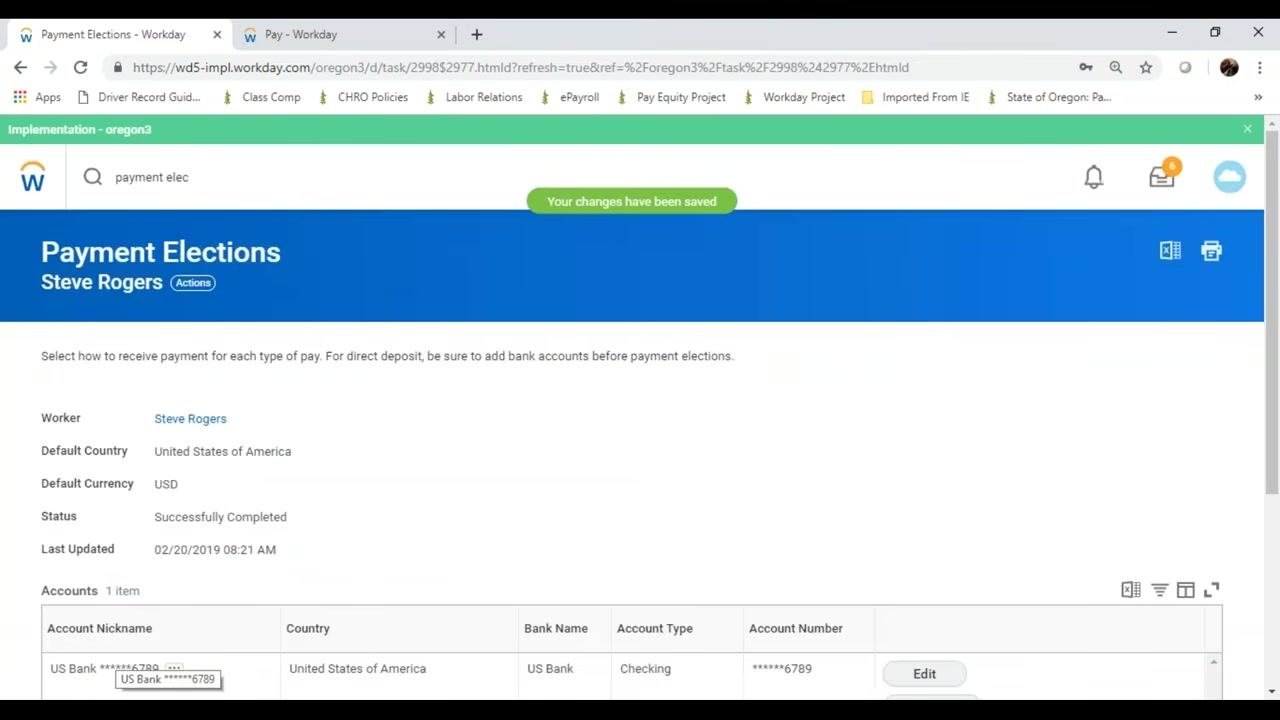
After correcting the routing number, verify that Workday recognizes your bank. Double-check that your account number is accurate, since Workday does not validate this field. Click OK to save your payment election.
Review your accounts and payment elections
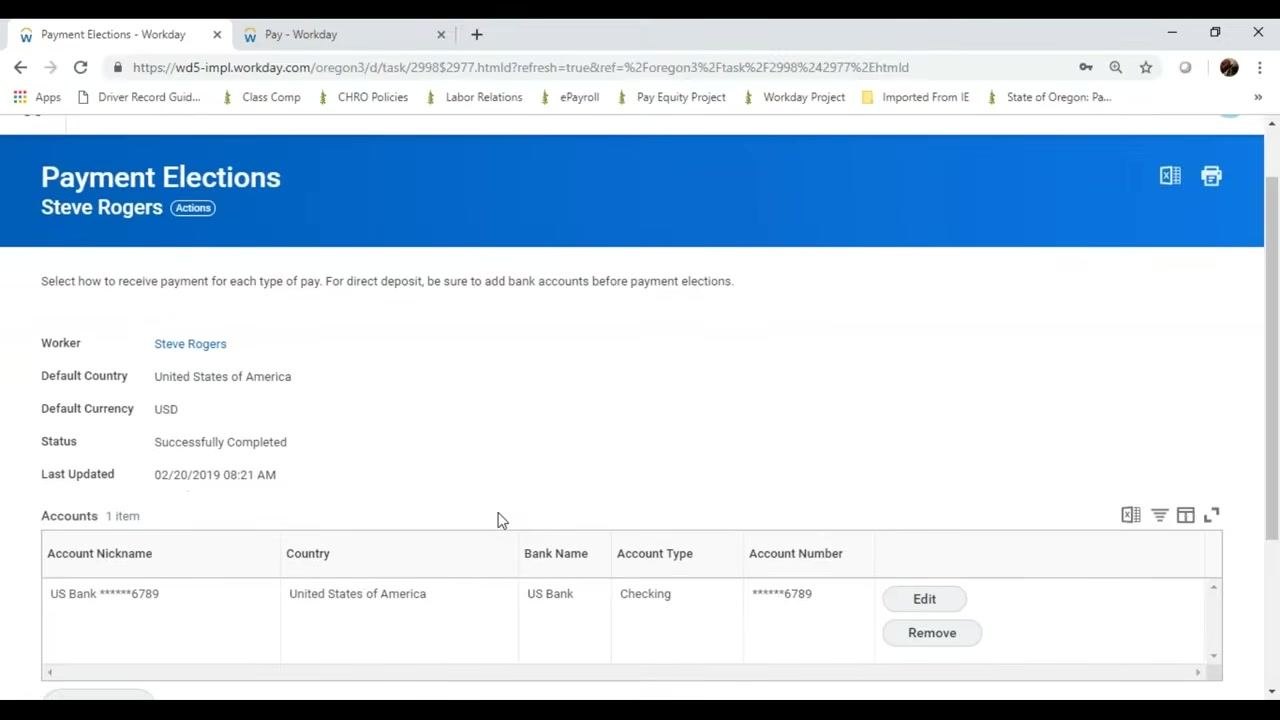
On the Payment Elections screen, verify the worker details, including the Default Country, Default Currency, Status, and Last Updated date. In the Accounts section, confirm your added bank account details, including the account nickname, bank name, account type, and masked account number.
Use Edit to make changes to the account, or Remove to delete it if it is no longer needed. Scroll down to view all accounts and payment elections listed on the page.
Access the Payment Election setup
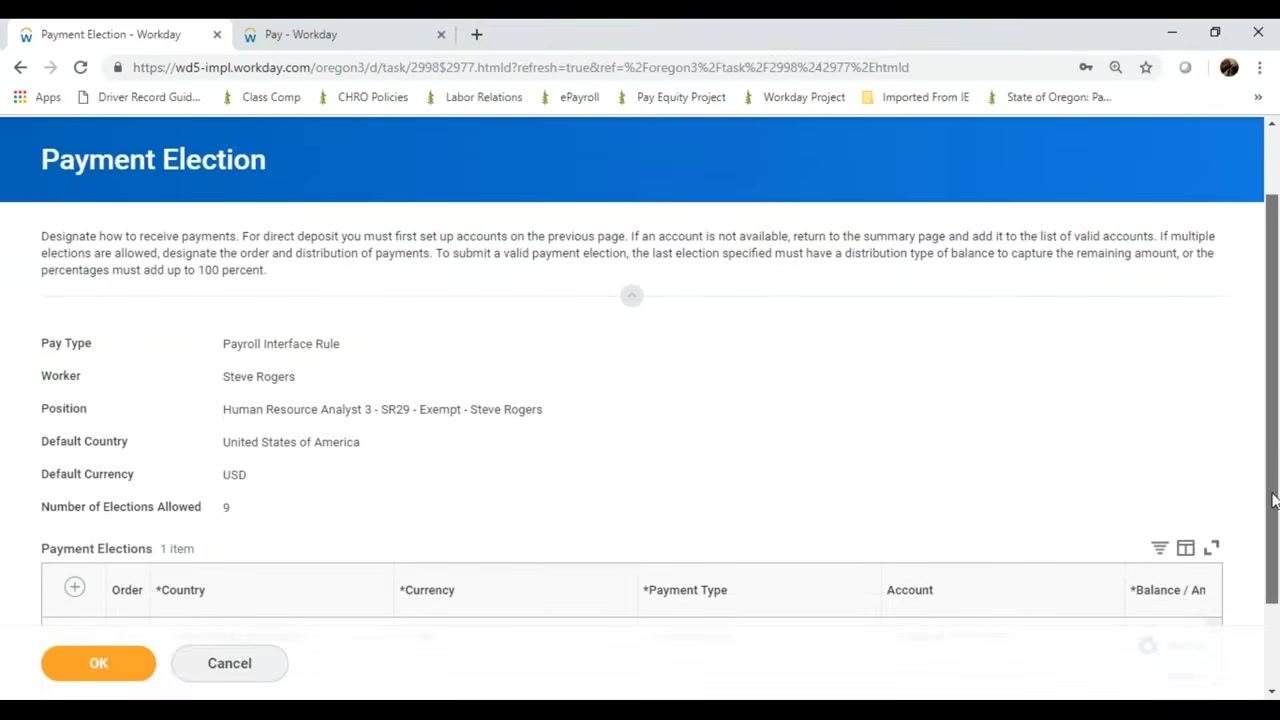
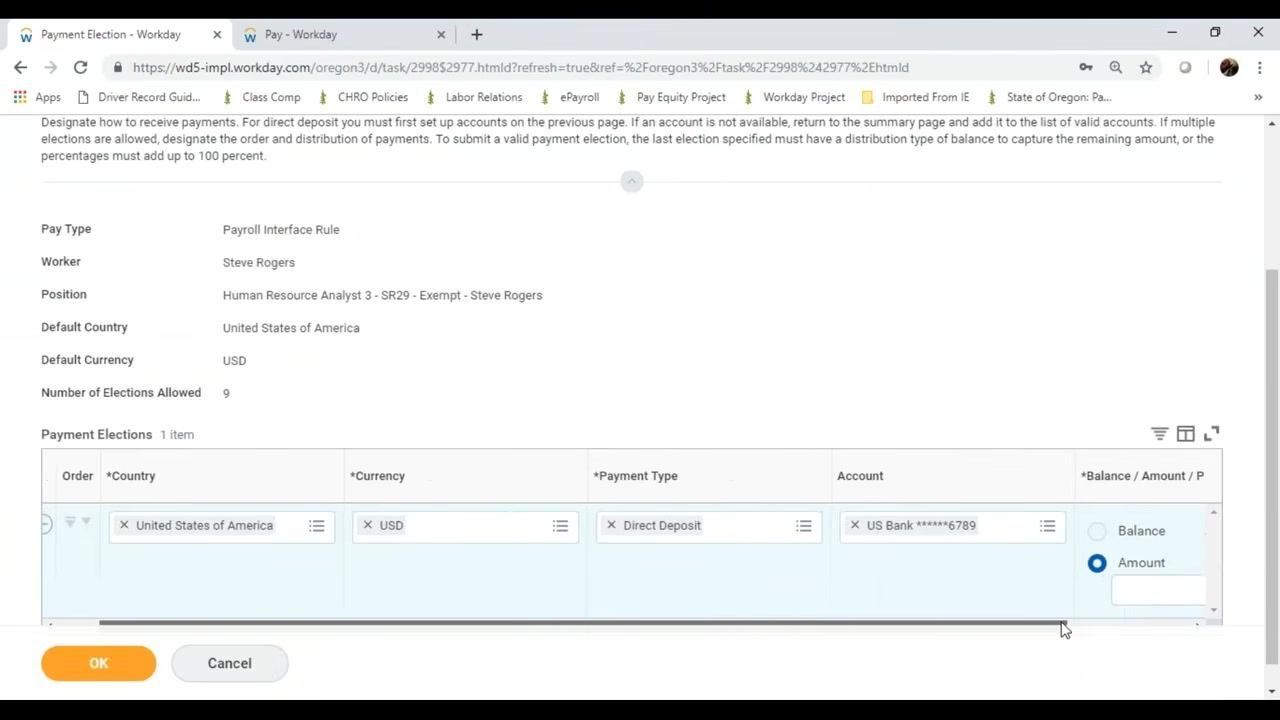
Open the Payment Election configuration page. Review the instructions at the top, which state that you must set up accounts before configuring direct deposit, and that the last election must have a distribution type of "Balance" or that all percentages must total 100%.
Review your worker details, including position, default country, default currency, and the number of elections allowed. The Payment Elections table then appears for configuration.
Configure a payment election
In the Payment Elections table, enter the Country, Currency, Payment Type (Direct Deposit), and Account. For Distribution, select either Balance or Amount. If you want to specify a particular amount, select Amount and enter the value.
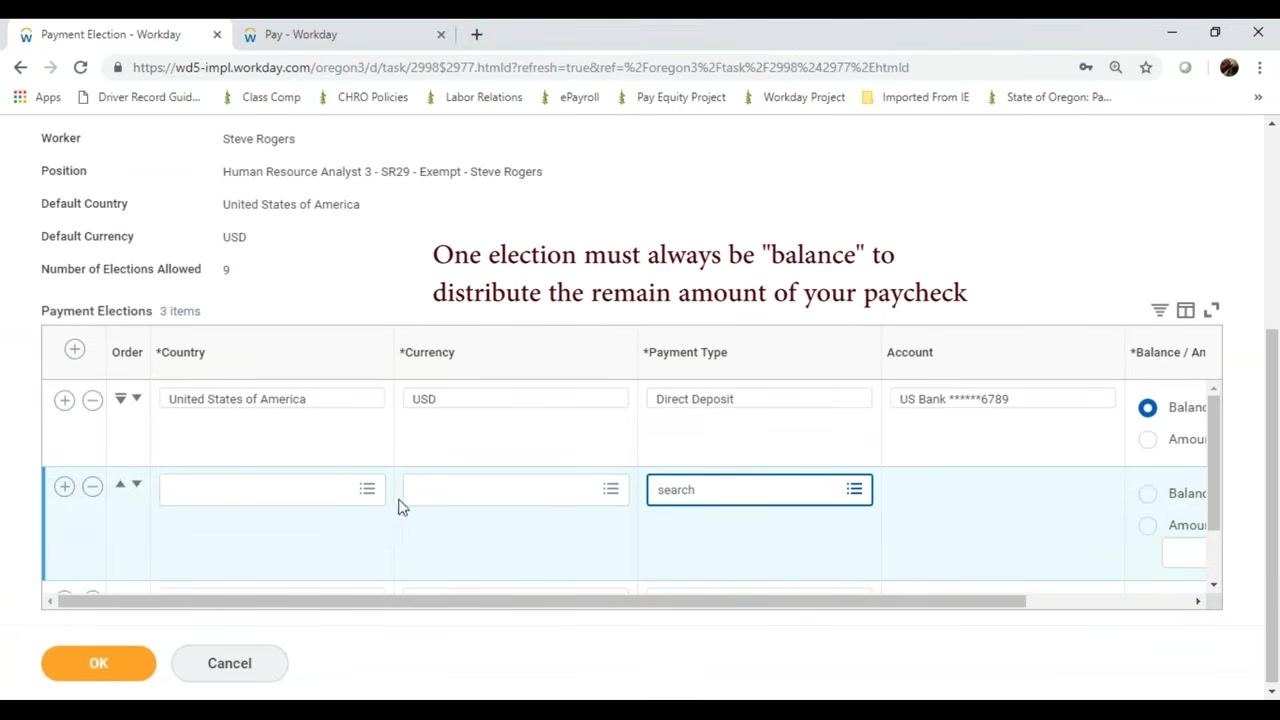
Workday allows multiple payment elections, letting you split your paycheck across different accounts by specifying amounts or percentages. The last payment election must always be set to Balance to capture any remaining funds.
Resolve distribution errors
If you try to save with only one payment election set to Amount instead of Balance, Workday displays an error: "You must select the Balance option for the last election or the percentages must add up to 100%." To resolve this, change the distribution type to Balance for the last (or only) payment election.
Add additional payment elections (optional)
To split your paycheck, click the + button to add more payment elections. For each additional election, specify the Country, Currency, Payment Type, Account, and Distribution (Amount or Percentage for earlier elections, and Balance for the last one). Ensure the total distribution adds up to 100% or that the last election is set to Balance.
Finalize and save your payment elections
Review all your entries, then click OK to save your changes. You can return to this section at any time to edit or update your payment elections or accounts.
Review your payment elections summary
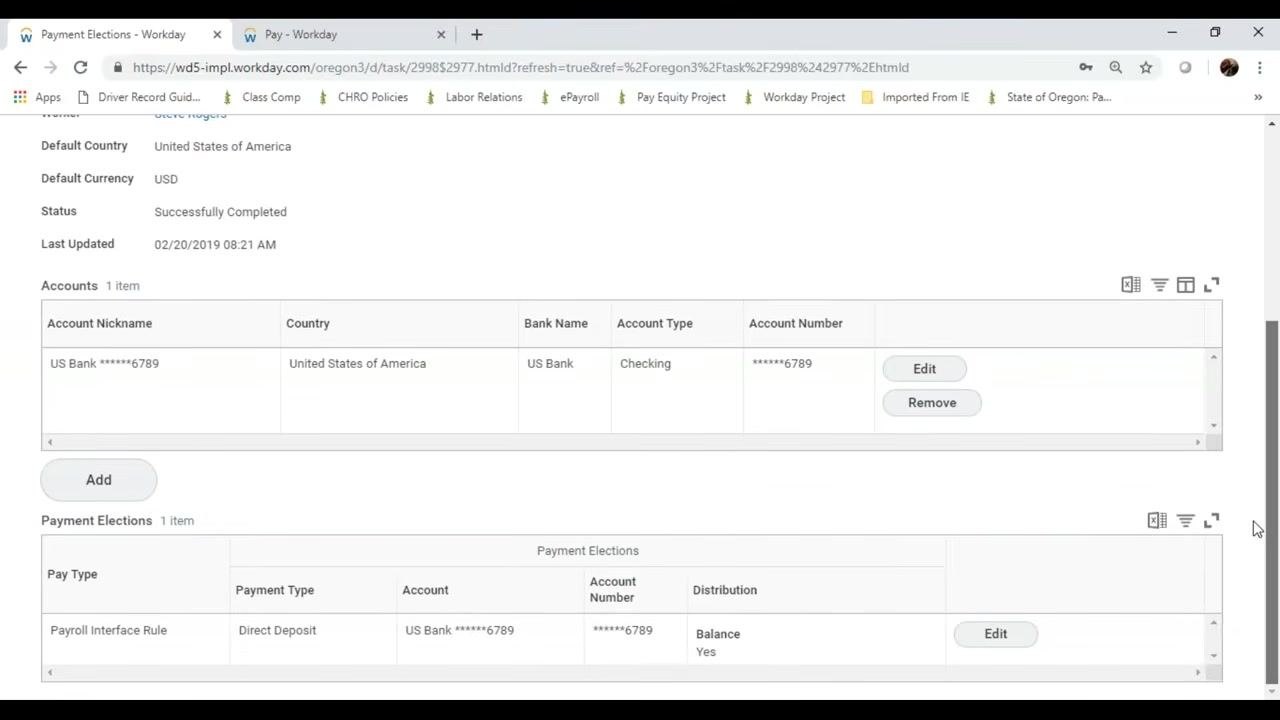
After saving, review the summary screen to confirm your setup. Under Accounts, verify the account nickname, country, bank name, account type, and account number. Under Payment Elections, confirm the pay type, payment type, account, account number, and that Distribution: Balance is set to Yes.
Use Edit or Remove if you need to make further changes.
Review critical deadlines and system limitations
Before you finish, keep the following in mind:
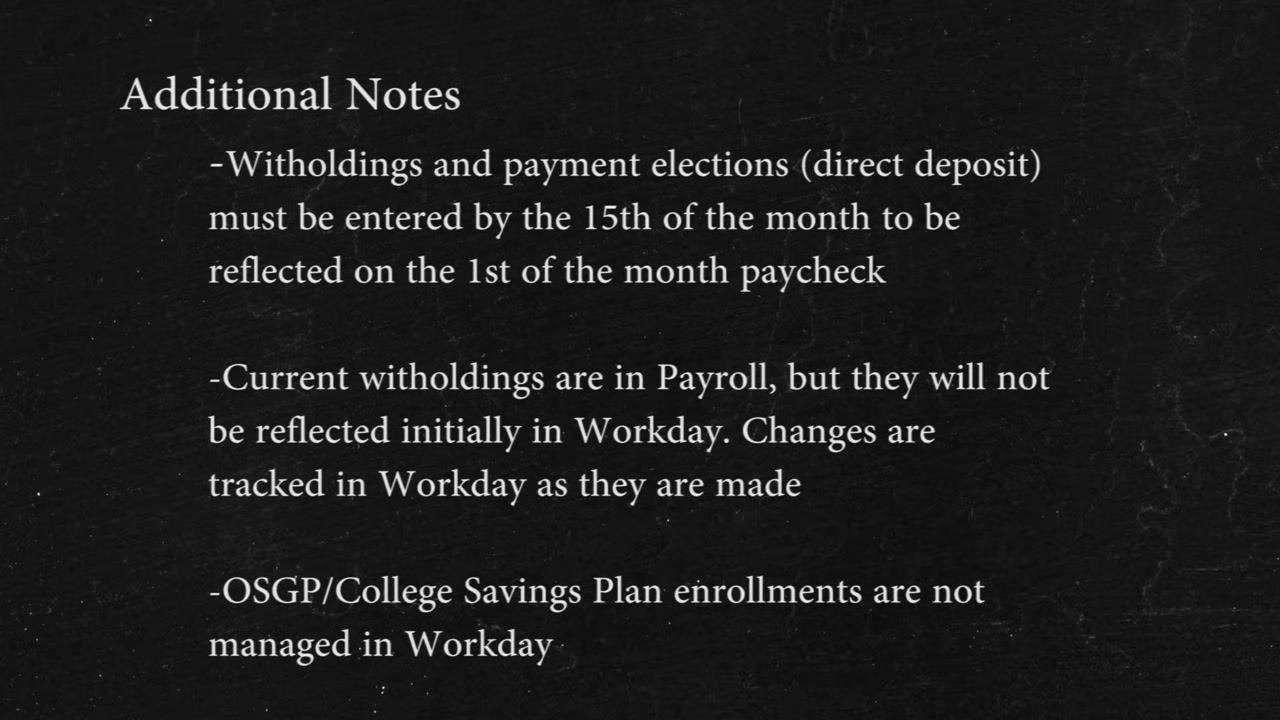
- Withholdings and payment elections (direct deposit) must be entered by the 15th of the month to be reflected on the 1st of the following month's paycheck.
- Current withholdings are managed in Payroll and will not be reflected initially in Workday; changes are tracked in Workday as they are made going forward.
- OSGP and College Savings Plan enrollments are not managed in Workday.
What's next
With your federal withholding elections and direct deposit set up, your payroll information is ready for processing according to the Workday schedule. You can return to the Payment Elections or Withholding Elections pages at any time to add, edit, or remove accounts and elections as your needs change. Remember that OSGP and College Savings Plan enrollments must still be managed outside of Workday, and contact your HR or payroll department if you have further questions.
Generation details: cost, quality tiers
Docsie billed 4,000 credits ($2.80) to analyze this 8-minute video at standard quality. The rewrite, template fill and Word/PDF exports were included. The same video at each quality tier:
| Quality | Frames sampled | Credits | Approx. cost |
|---|---|---|---|
| Draft | every 16-30 s | 2,000 | $1.40 |
| Standard (this guide) | every 8-15 s | 4,000 | $2.80 |
| Detailed | every 4-7 s | 8,000 | $5.60 |
| Ultra | every 1-3 s | 16,000 | $11.20 |
Credits priced at $0.70 per 1,000; plans include a monthly allowance. Enterprise customers on on-premise or bring-your-own-model deployments run this on their own inference and pay no per-video credits.
Generated by Docsie Video-to-Docs on 2026-10-11 from a 7-minute video. Screenshots are frames from the source video and belong to their creator, ODE HelpDesk, whose original is embedded above. If you own this video and want the guide removed or credited differently, contact us and we will act within one business day.