
How to Create an Estimate in ServiceTitan
This guide walks you through how to create an estimate in ServiceTitan using the redesigned Office Estimates interface. You'll learn how to launch the estimate builder from a job record, choose a proposal template or start from scratch, add tasks, equipment, and materials, and use advanced tools like keyboard shortcuts and inline editing to manage your estimate efficiently.
Video: How To Use The Redesigned Office Estimates Builder by ServiceTitan (2022). All credit for the demonstration goes to the creator; watch the original on YouTube. The written guide below was generated from this video by Docsie. Creator? Request a change or removal.
This guide walks you through how to create an estimate in ServiceTitan using the redesigned Office Estimates interface. You'll learn how to launch the estimate builder from a job record, choose a proposal template or start from scratch, add tasks, equipment, and materials, and use advanced tools like keyboard shortcuts and inline editing to manage your estimate efficiently.
Prerequisites
- Access to the ServiceTitan platform with permission to create estimates on a job.
- An existing job record to attach the estimate to.
- If testing, confirm you are working in a sandbox environment (indicated by a red banner at the top of the screen) rather than in production.
Open the job record
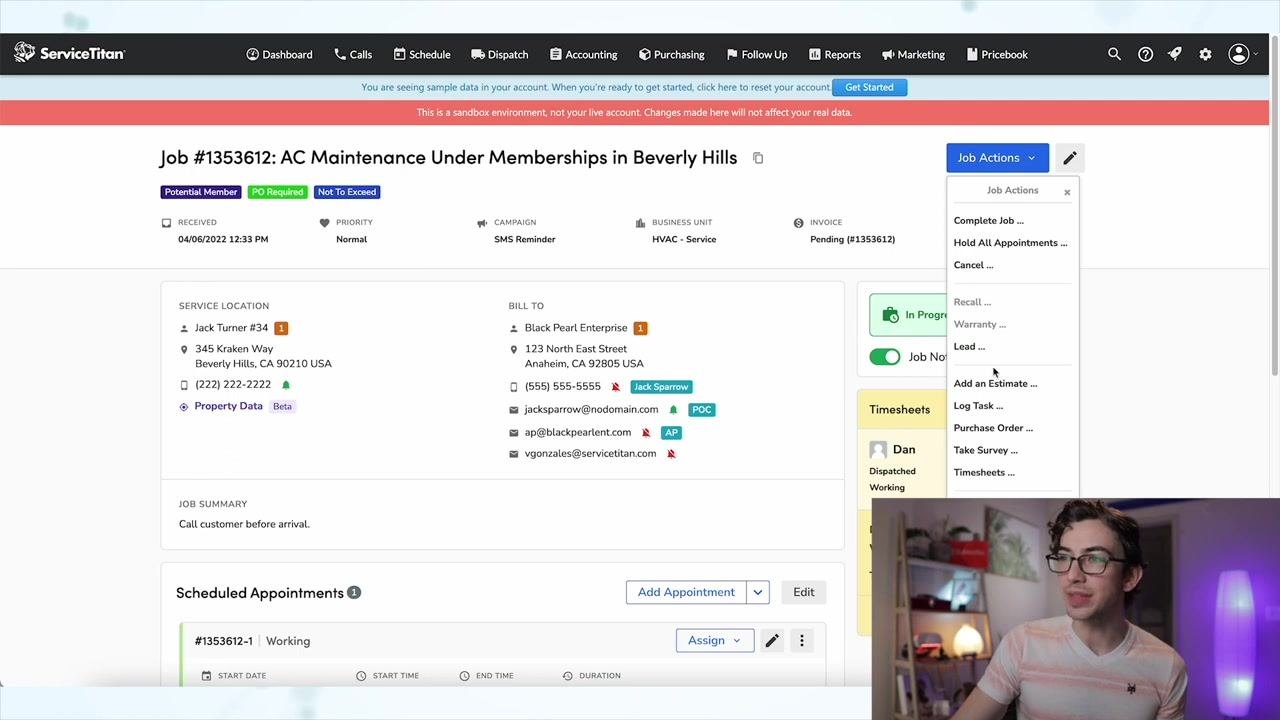
Navigate to the job for which you want to create an estimate and confirm you are in the correct job record. For example, you might be working on a job such as AC Maintenance Under Memberships in Beverly Hills.
Start the estimate creation process
Click the Job Actions dropdown menu in the upper right section of the job record, then select Add an Estimate from the list.
Choose a proposal template or build from scratch
A Build Estimate(s) modal window appears. Select the appropriate business unit (for example, HVAC - Service) from the dropdown, then search for and select a pre-built proposal template if you want to use one.
Hover over the number of estimates to see a breakdown of what each template includes, such as Bronze, Silver, Gold, and Platinum options with their associated system types and prices. If you prefer not to use a template, click Build Estimate to start from scratch.
Enter estimate details
On the Create Estimate page, fill in the following fields:
- Name: Enter a name for your estimate.
- Approximate Start Date and Approximate End Date: Enter the relevant dates.
- Summary: Provide a summary of the estimate.
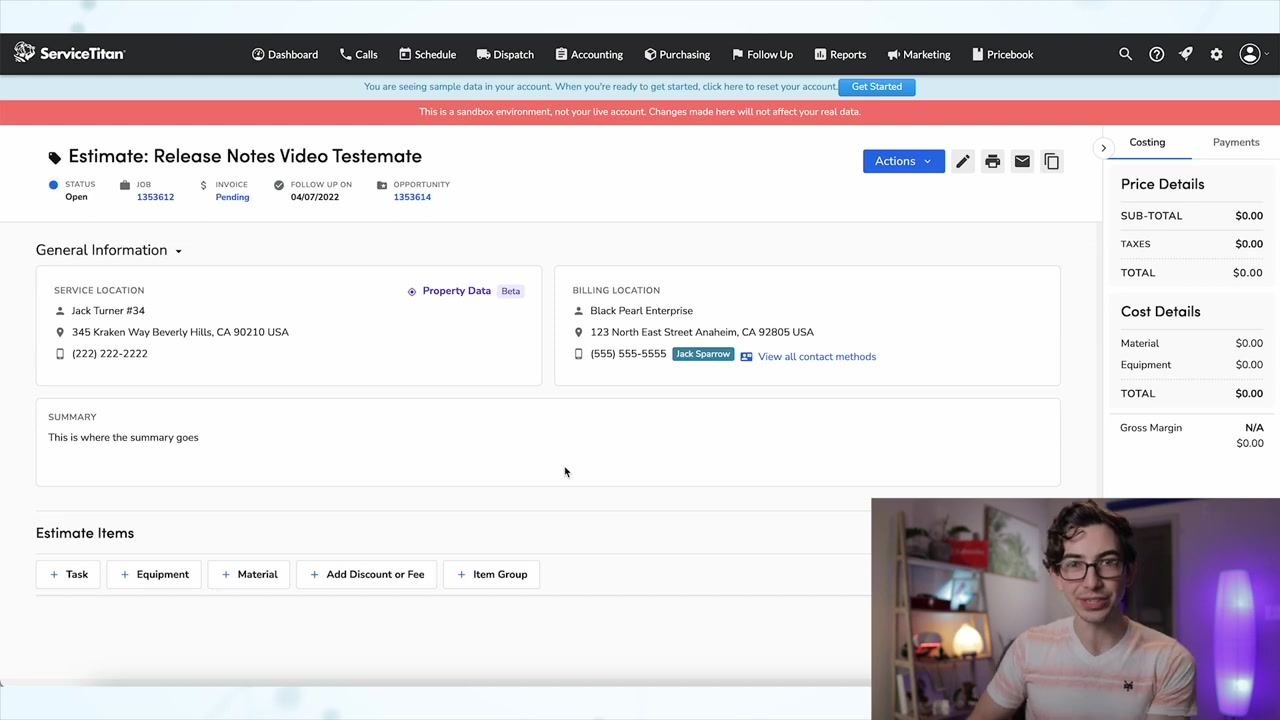
Review the customer and location information shown on the page to confirm it's accurate.
Configure pricing and sales information
In the Price Details section, set your Follow Up On date and select a Rate Sheet if you're using customer-specific pricing. This field may not appear depending on your account configuration. The Subtotal, Tax, and Total fields auto-calculate based on the items you add later.
In the Sale Information section, choose the employee to mark as Sold By.
Create the estimate
After entering all required information, click Create to proceed to the estimate building screen.
Add estimate items
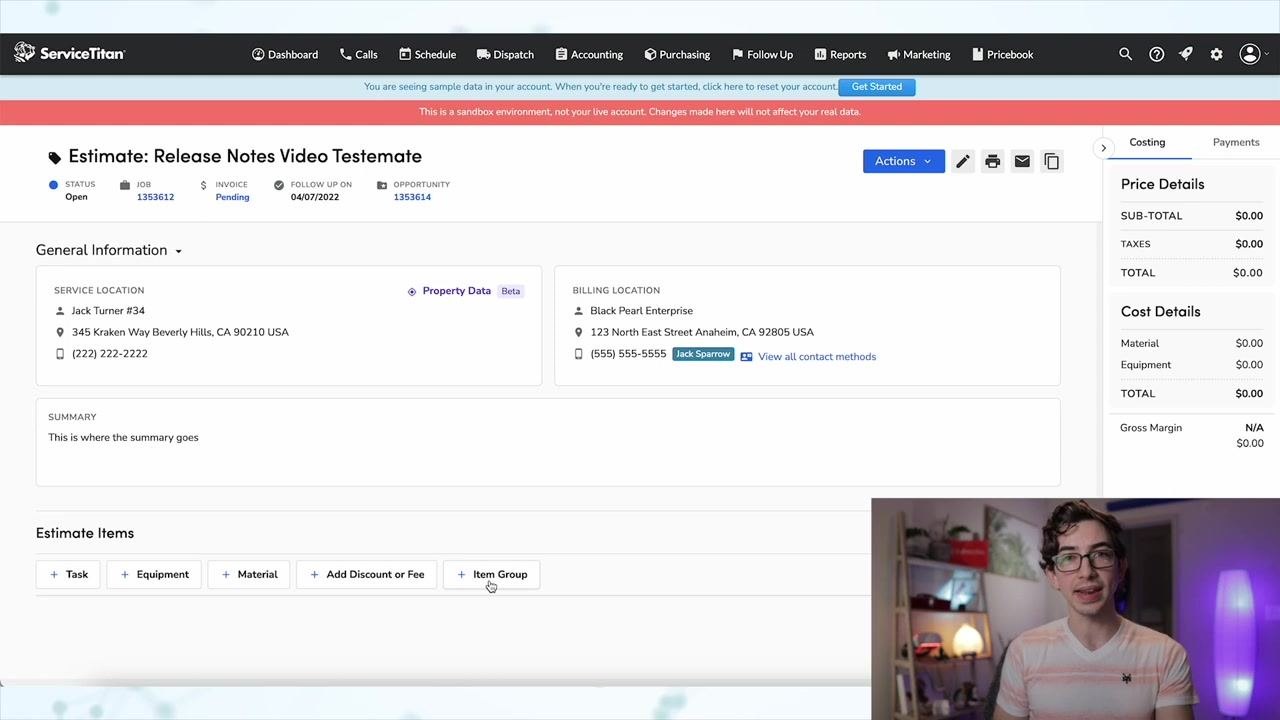
On the estimate building screen, use the available buttons to add different item types:
- Task
- Equipment
- Material
- Add Discount or Fee (if enabled)
- Item Group (if enabled)
Item groups were previously only available on mobile or through estimate templates. Now you can build item groups directly from the office interface.
Build item groups (if enabled)
Click + Item Group to create a new item group directly from the office interface. This feature may or may not be enabled for your account.
Review and organize estimate items
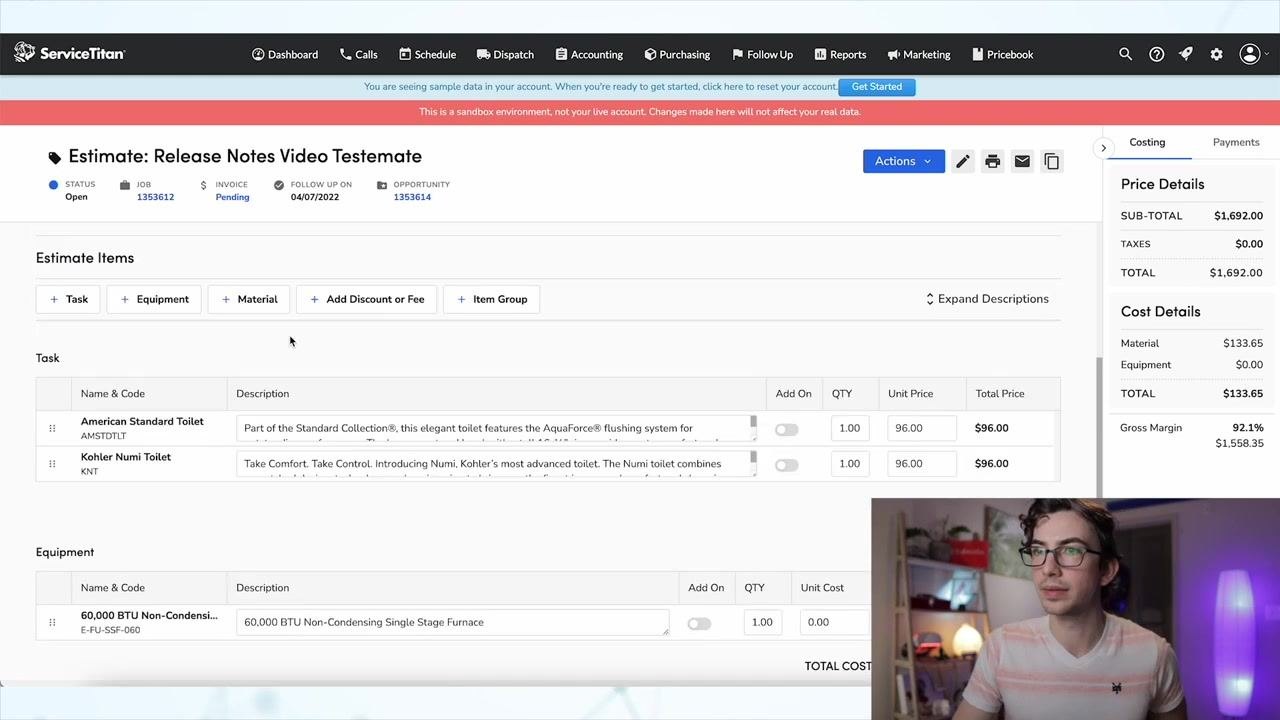
Add and organize items as needed. Items are automatically separated by type, such as Tasks, Equipment, and Material. For example, you might add Task items like an American Standard Toilet (AMSTDTLT) or a Kohler Numii Toilet (KNT), and Equipment items like a 60,000 BTU Non-Condensing Single Stage Furnace (E-FU-SSF-060).
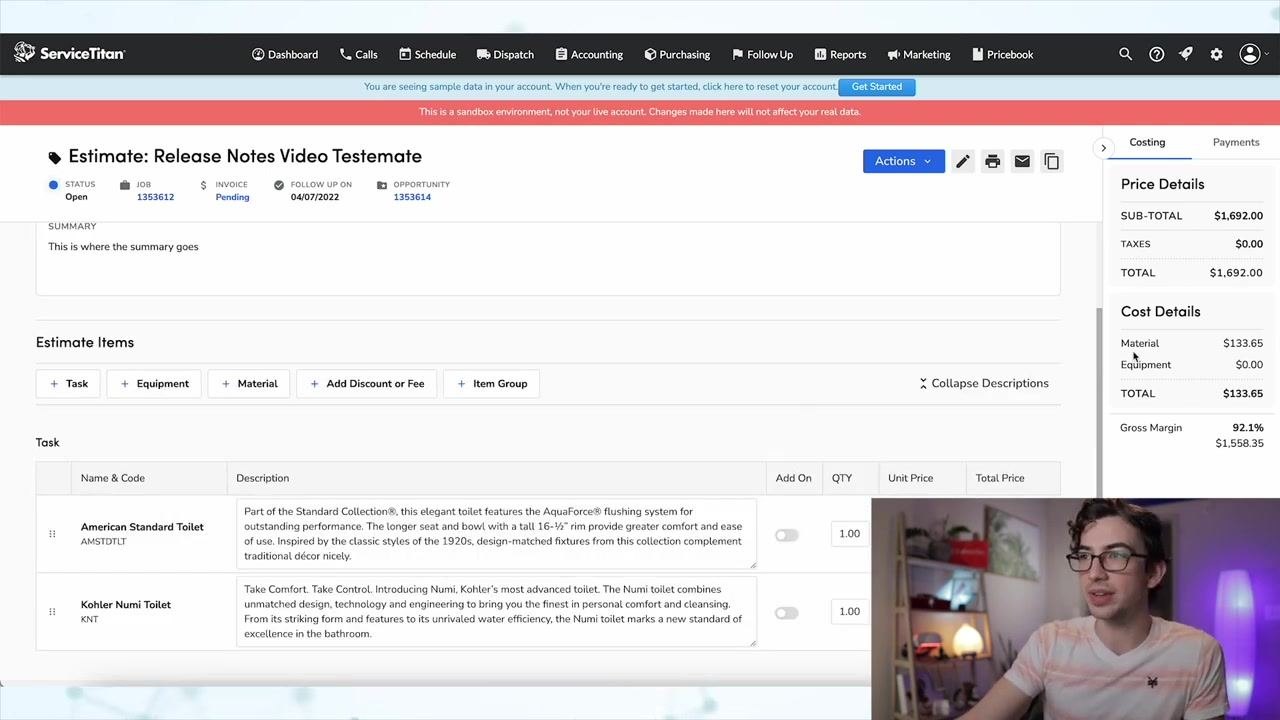
Review the cost and price details on the right side of the screen, including subtotal, taxes, total, material cost, equipment cost, and gross margin.
Monitor price and cost details in the side panel
The right-side panel updates in real time as you build your estimate, showing:
- Price Details: Sub-total, Taxes, and Total.
- Cost Details: Material cost, Equipment cost, and Total cost.
- Gross Margin: Shown as both a percentage and a dollar amount.
Use this panel to track profitability as you add items to the estimate.
Use keyboard shortcuts for line items
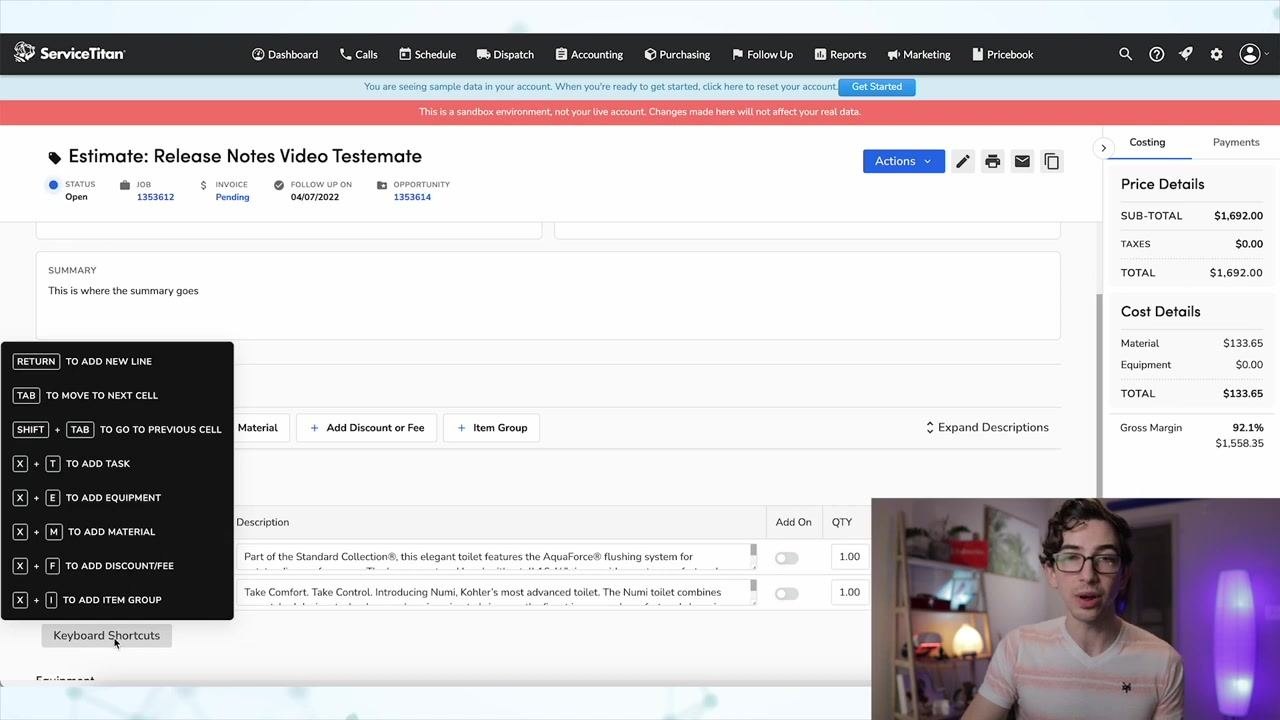
Click into any line item within the estimate to reveal the keyboard shortcuts panel. Available shortcuts include:
- RETURN: Add new line
- TAB: Move to next cell
- SHIFT + TAB: Move to previous cell
- X + T: Add Task
- X + E: Add Equipment
- X + M: Add Material
- X + F: Add Discount/Fee
- X + I: Add Item Group
Use these shortcuts to streamline your workflow and keep your hands on the keyboard.
View the Payments tab
Click the Payments tab in the side panel to view payment information. If the estimate hasn't been sold yet, this tab will be empty.
Expand or collapse line item descriptions
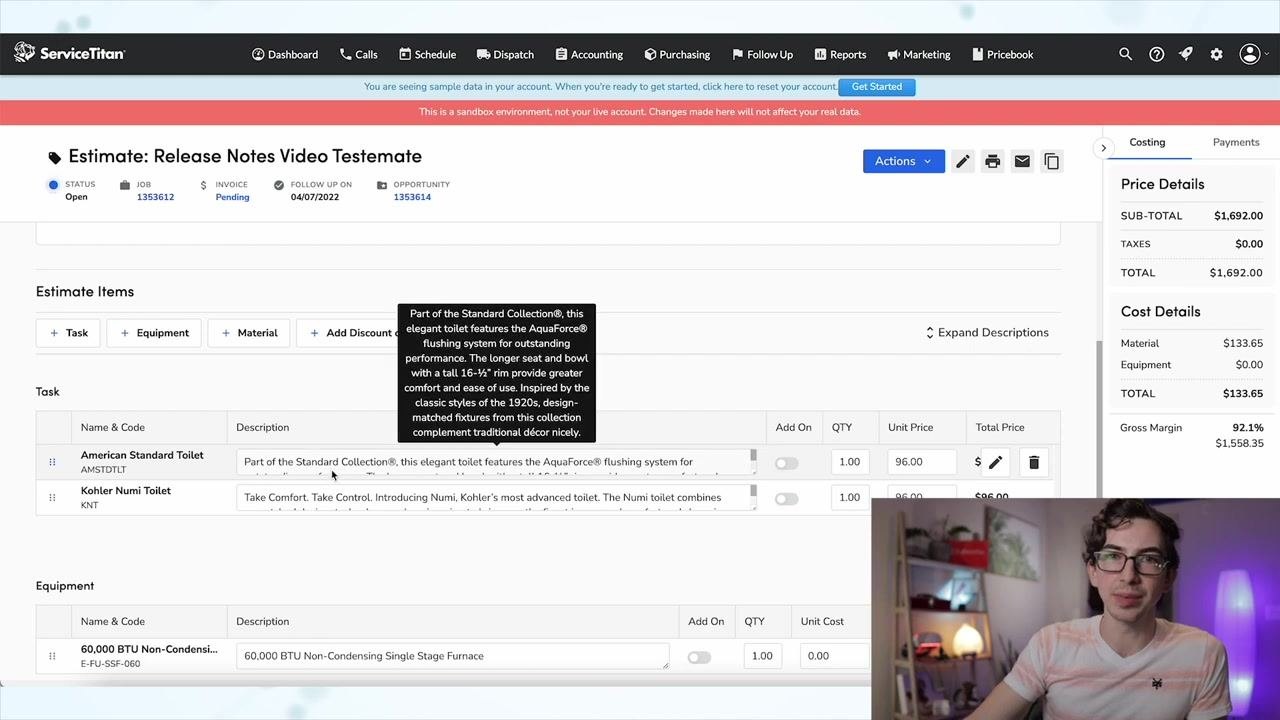
By default, long descriptions are truncated so more items fit on the page. Hover over a truncated description to view the full text in a tooltip.
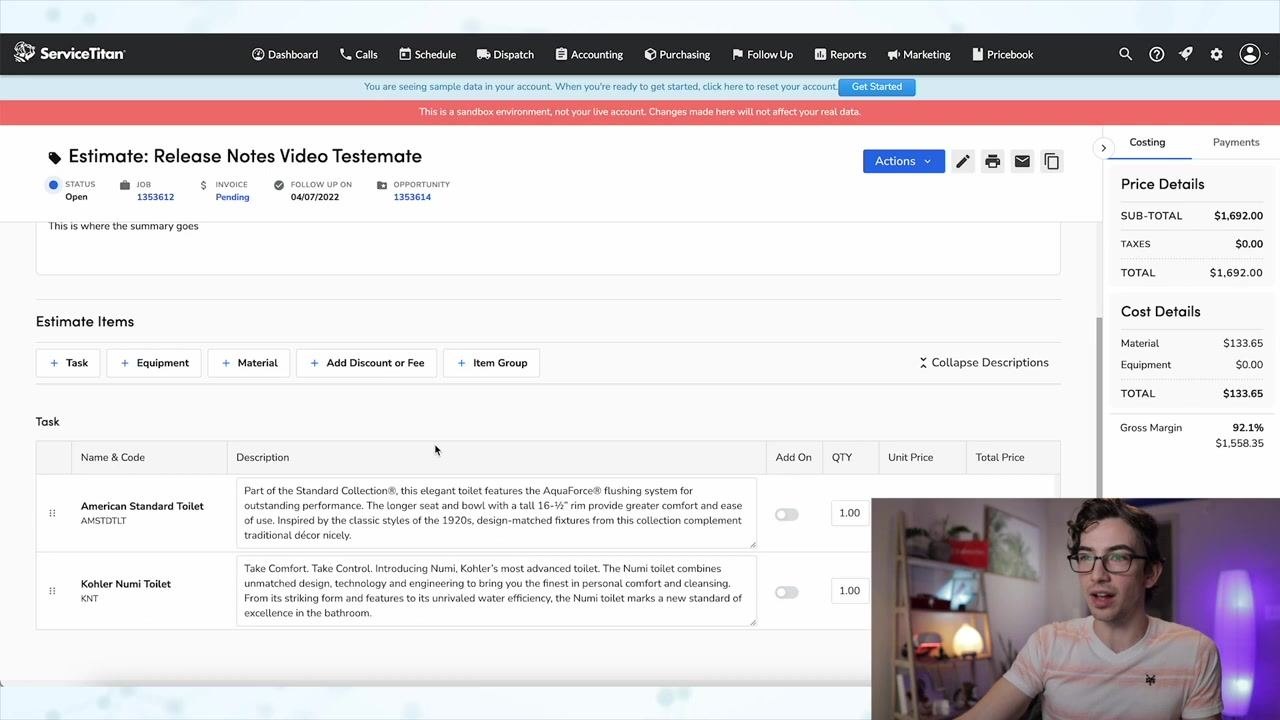
Click Expand Descriptions to automatically resize all description boxes to fit their content.
Click Collapse Descriptions to return to the compact view.
Use the estimate action buttons
In the top right corner of the estimate screen, use the following buttons as needed:
- Duplicate: Create a copy of the current estimate.
- Email: Send the estimate to the customer.
- Print: Print a hard copy of the estimate.
- Edit: Return to the editing screen to modify the estimate name or other details.
Navigate and manage estimate information
Click the Opportunity link at the top of the estimate to view or sell it. Review the Follow Up On date, Invoice link, Job Number, and Status displayed at the top of the page.
Collapse the General Information section by clicking its header if you want a cleaner workspace.
Drag and drop estimate items
Rearrange line items within the estimate by dragging and dropping them into the desired order.
Edit line item quantities inline
Click directly into the QTY field of any estimate line item to edit its value. Type the new quantity (for example, changing it from 1 to 3) and press Enter to update it. The system automatically recalculates totals based on the new quantity.
Use this method for quick, in-line adjustments to quantities or other editable fields.
Open the edit item flyout for detailed changes
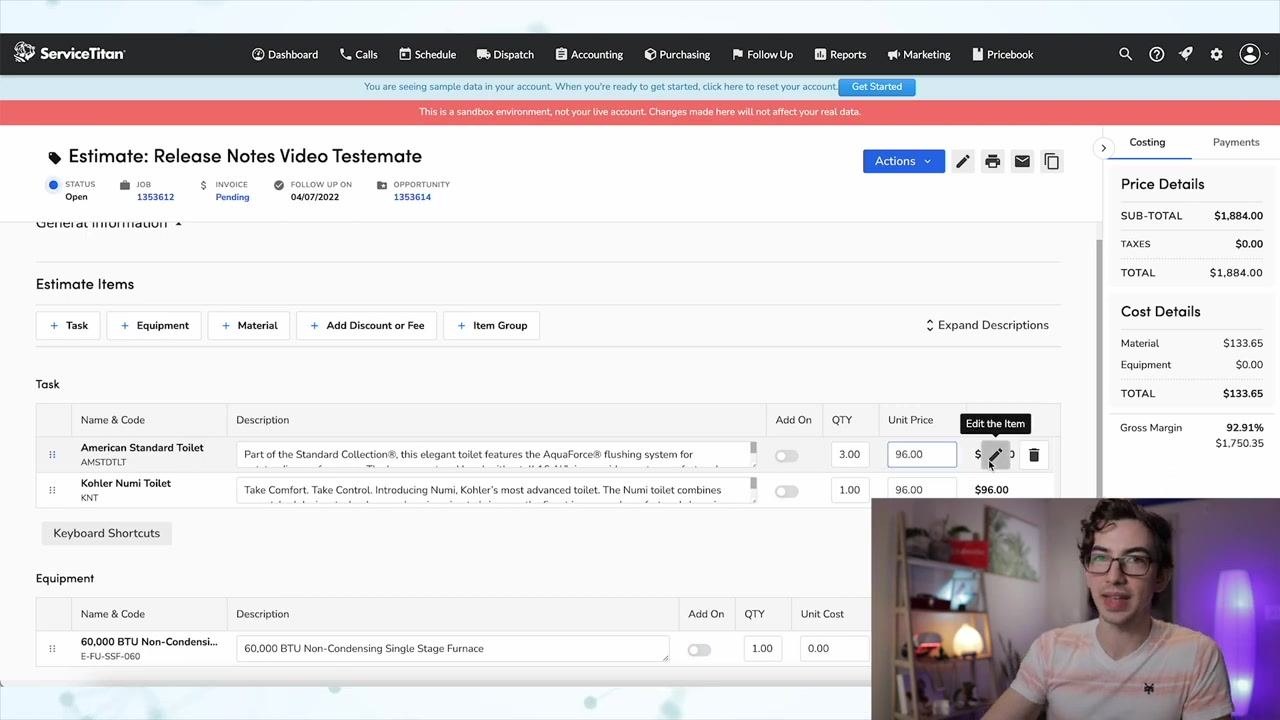
Hover over a line item and click the edit pencil icon labeled Edit the Item. A flyout panel titled View/Edit Task Details appears on the right side of the screen.
In the flyout, you can:
- Edit the Name and Code of the item.
- Update the Description field.
- Select associated Equipment from a dropdown.
- Adjust Usage Details, including Qty, Unit Price, and Total Price (calculated automatically).
- Toggle the Is Add On option if applicable.
Click Save to apply your changes, or Cancel to discard them.
Summary
By following these steps, you can efficiently create and customize estimates using the redesigned Office Estimates interface in ServiceTitan. The workflow gives you the flexibility to build item groups directly from the office, monitor price and cost details in real time, use keyboard shortcuts for faster data entry, and fine-tune line items through inline editing or the detailed edit flyout—all within a cleaner, more intuitive interface.
Generation details: cost, quality tiers
Docsie billed 2,000 credits ($1.40) to analyze this 4-minute video at standard quality. The rewrite, template fill and Word/PDF exports were included. The same video at each quality tier:
| Quality | Frames sampled | Credits | Approx. cost |
|---|---|---|---|
| Draft | every 16-30 s | 1,000 | $0.70 |
| Standard (this guide) | every 8-15 s | 2,000 | $1.40 |
| Detailed | every 4-7 s | 4,000 | $2.80 |
| Ultra | every 1-3 s | 8,000 | $5.60 |
Credits priced at $0.70 per 1,000; plans include a monthly allowance. Enterprise customers on on-premise or bring-your-own-model deployments run this on their own inference and pay no per-video credits.
Generated by Docsie Video-to-Docs on 2026-10-11 from a 4-minute video. Screenshots are frames from the source video and belong to their creator, ServiceTitan, whose original is embedded above. If you own this video and want the guide removed or credited differently, contact us and we will act within one business day.