
How to Create a Knowledge Article Template in ServiceNow
This tutorial walks you through creating a custom article template in ServiceNow and then using that template to build a new knowledge article. Article templates let you standardize the structure of your knowledge base articles by defining reusable fields—such as custom text, date, or HTML fields—that appear whenever someone creates a new article from that template. By the end of this guide, you'll know how to create a template, add custom fields to it, and apply those fields to a knowledge article using the form layout editor.
Video: How to create a knowledge article template in ServiceNow by The Now Wizard (2025). All credit for the demonstration goes to the creator; watch the original on YouTube. The written guide below was generated from this video by Docsie. Creator? Request a change or removal.
This tutorial walks you through creating a custom article template in ServiceNow and then using that template to build a new knowledge article. Article templates let you standardize the structure of your knowledge base articles by defining reusable fields—such as custom text, date, or HTML fields—that appear whenever someone creates a new article from that template. By the end of this guide, you'll know how to create a template, add custom fields to it, and apply those fields to a knowledge article using the form layout editor.
Prerequisites
- Access to a ServiceNow instance with permissions to open ServiceNow Studio
- Access to the Knowledge > Administration > Article Templates module
- Permission to create knowledge articles and edit form layouts
Part 1: Creating the article template
Access the ServiceNow dashboard
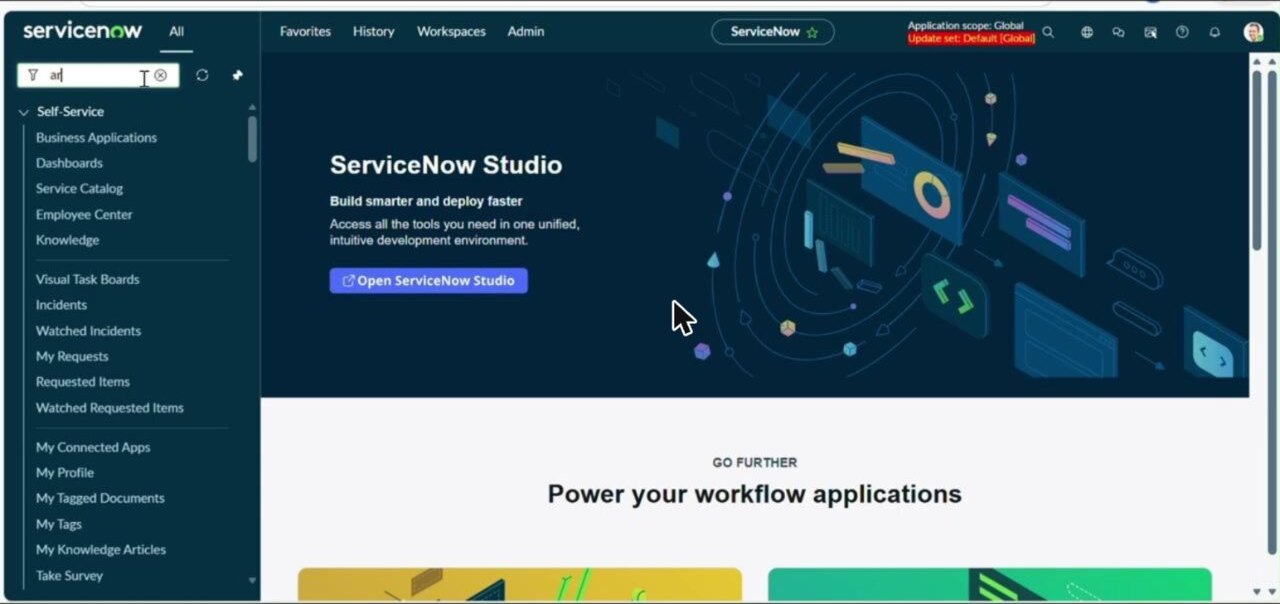
Open your ServiceNow instance. You'll land on the ServiceNow Studio welcome screen, which displays navigation options on the left—including Self-Service, Business Applications, Dashboards, and more. At the top of the screen, you'll see navigation tabs such as Favorites, History, Workspaces, and Admin.
Use the search/filter bar on the left to begin narrowing down to the module you need. The main panel shows a button labeled Open ServiceNow Studio.
Navigate to article templates
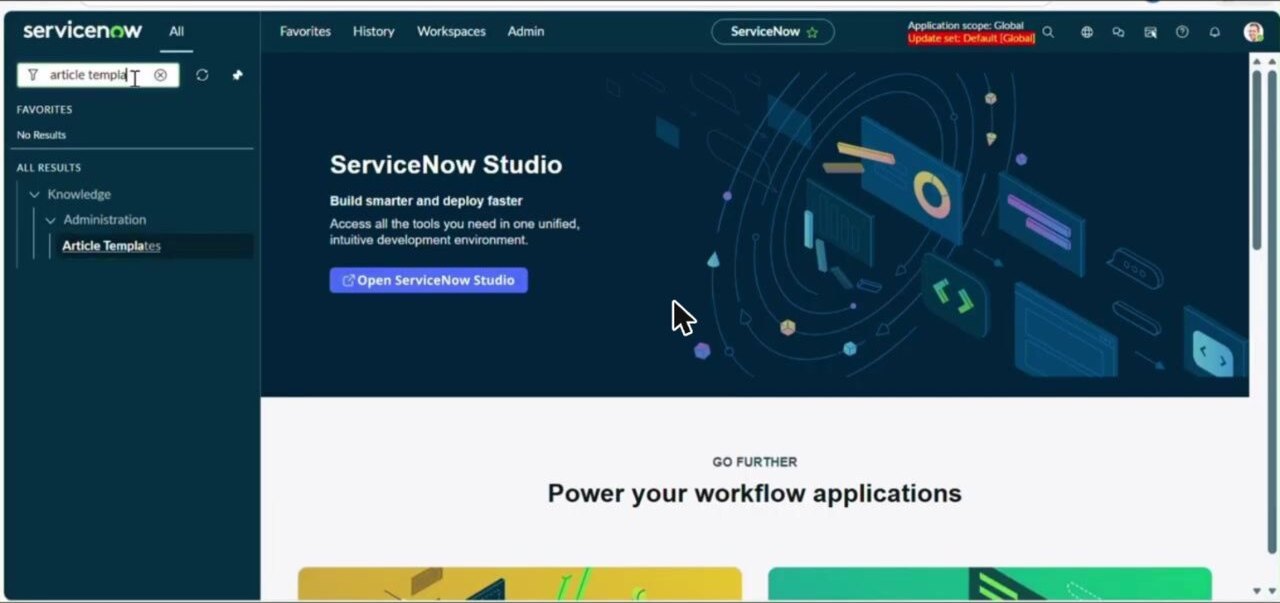
In the left navigation filter, type "article templat" to search for the module you need. Under Knowledge > Administration, select Article Templates. The main panel stays on the ServiceNow Studio welcome screen until you select the module.
View existing article templates
Once you select the module, the Article Templates list view appears, showing columns for Name, Template Table, Description, and Active status. You'll see existing templates already in the system, such as:
- Second Test template - MZ
- How To
- What Is
- Known Error article
- KCS Article
- FAQ
- Test template - MZ
Use the search bar at the top to filter templates if you need to find a specific one. When you're ready to create a new template, click the New button in the top right.
Create a new article template
The Article Template - New record form appears. Enter the following details:
- Name: Test article template
- Description: (leave blank or enter a description as needed)
- Active: ensure the checkbox is selected
- Application: Global (default)
Click Submit to save the new template. You're ready to start adding fields to it.
Configure the article template
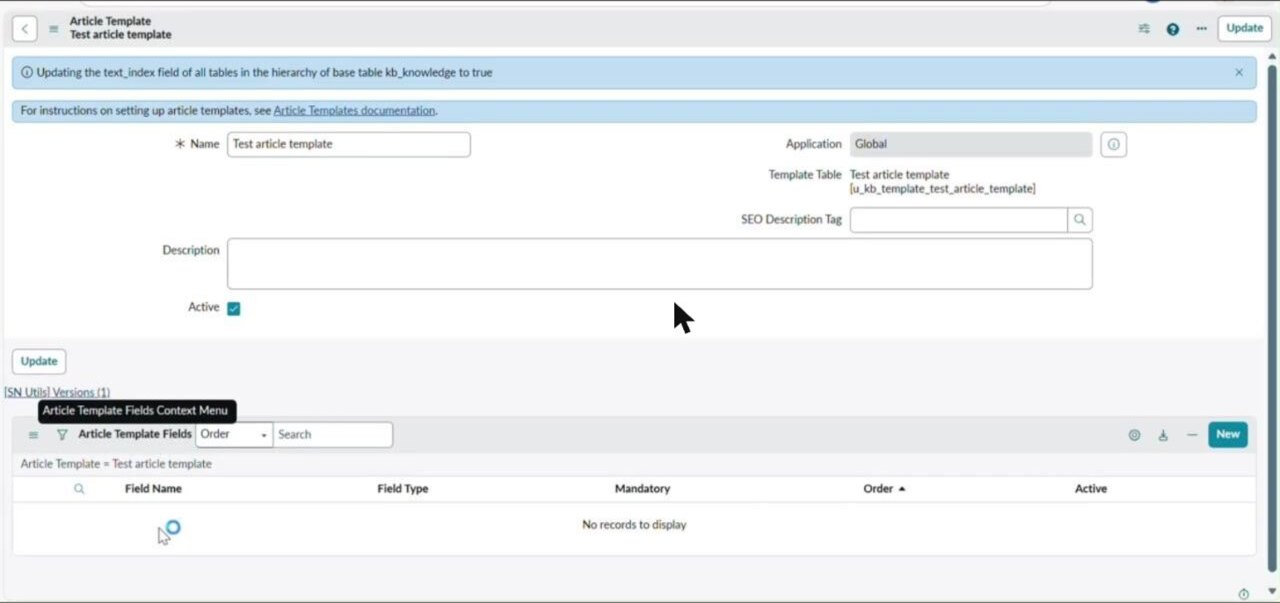
After you submit the form, the template details page appears, showing the template name, application, template table, and other fields. Below that, the Article Template Fields section is displayed—currently empty, since no fields have been added yet.
Click the New button in the Article Template Fields section to add your first field to the template.
Add a new field to the template
The Article Template Field - New record form appears. Enter the following details:
- Field Name: Test field 1
- Field Type: select from the dropdown (options include HTML, String, Integer, Date, Date Time)
- Order: (leave blank or enter a value as needed)
- Mandatory: check if the field should be required
- Active: ensure the checkbox is selected
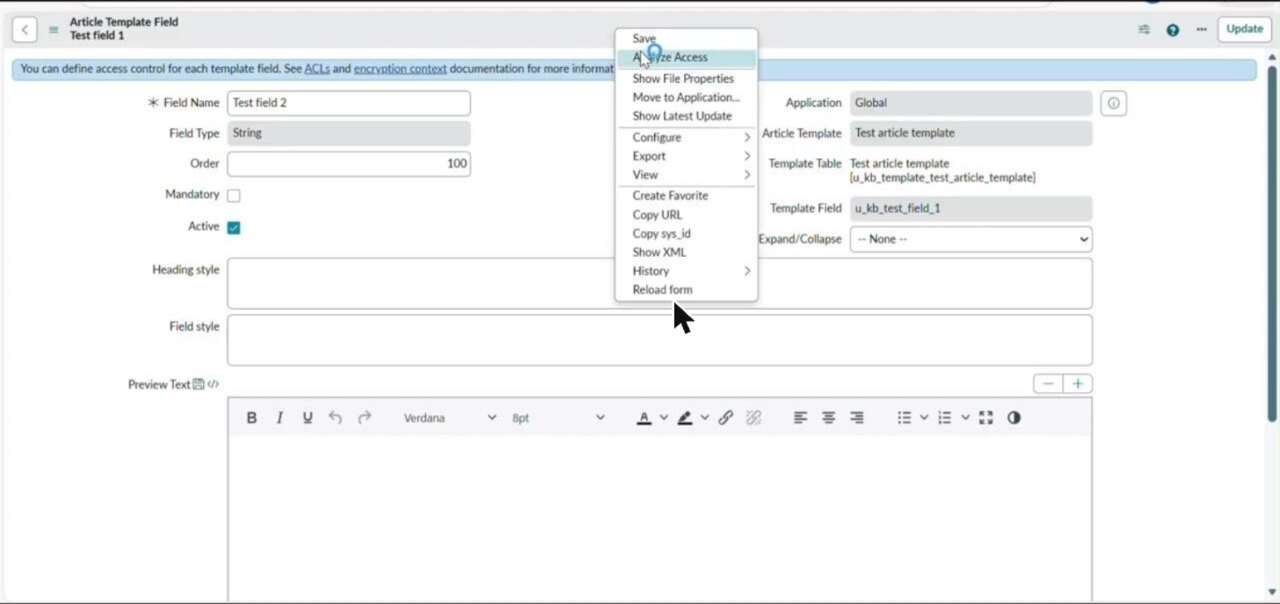
The form also includes options for Heading style, Field style, and Preview Text, which let you control how the field appears in the article.
Save the new field
After entering the field details, click the menu icon at the top and select Save from the dropdown menu. The field is now added to your template.
Tip: You can add as many fields as your article template needs—just repeat this process for each one.
Add additional fields (optional)
To add another field to the template, repeat the same process:
- Click New in the Article Template Fields section.
- Enter the new field details—for example, Field Name: Test field 2.
- Select the appropriate Field Type from the dropdown.
- Click Save from the menu.
That's all you need to build out a fully configured article template with custom fields.
Part 2: Using the article template in a knowledge article
Now that your template is set up, let's apply it to a new knowledge article and confirm that its fields carry through correctly.
Return to the ServiceNow Studio dashboard
Head back to the ServiceNow Studio dashboard. In the left navigation menu, type "knowledge" into the filter bar. The navigation tree shows modules such as Knowledge Templates, Service Desk, System Mobile, and Knowledge.
The main panel still displays the ServiceNow Studio welcome screen with the Open ServiceNow Studio button. The top bar shows the same navigation tabs—Favorites, History, Workspaces, and Admin—and the application scope is set to Global, with the update set showing Default [Global].
Start creating a new knowledge article
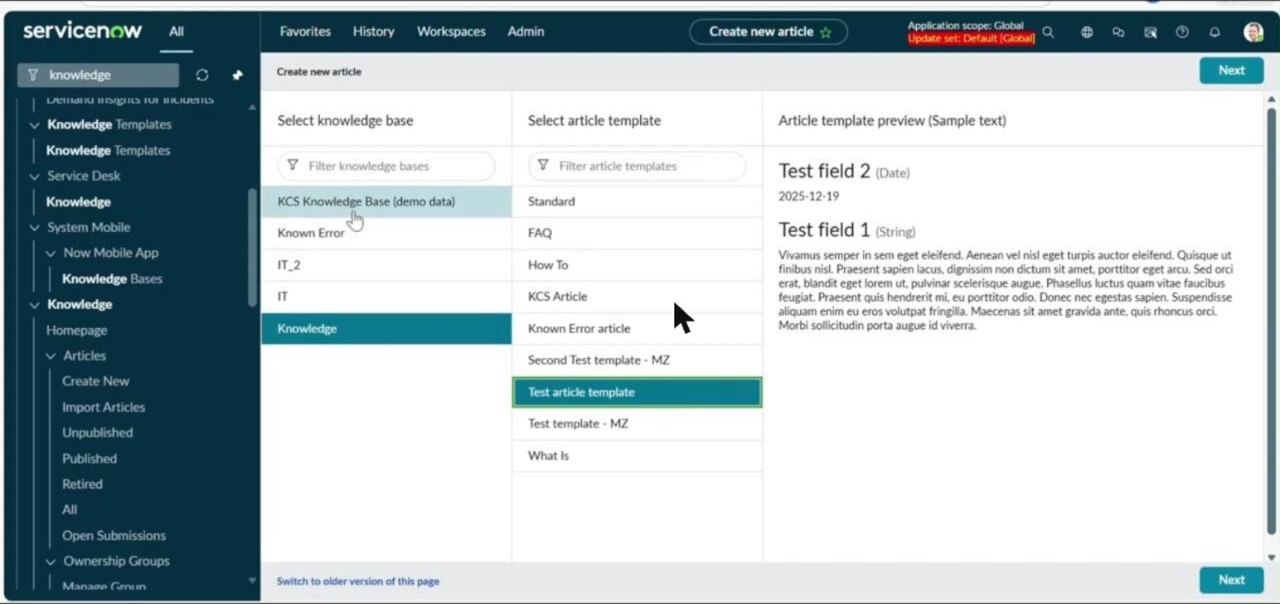
The Create new article screen is divided into three columns:
- Select knowledge base: options include KCS Knowledge Base (demo data), Known Error, IT_2, IT, and Knowledge. Select Knowledge.
- Select article template: options include Standard, FAQ, How To, KCS Article, Known Error article, Second Test template - MZ, Test article template, Test template - MZ, and What Is. Select Test article template.
- Article template preview (Sample text): shows the fields defined in your template:
- Test field 2 (Date): 2025-12-19
- Test field 1 (String): contains placeholder/sample text
Once you've selected your knowledge base and template, click Next in the top right to continue.
Preview and confirm article template fields
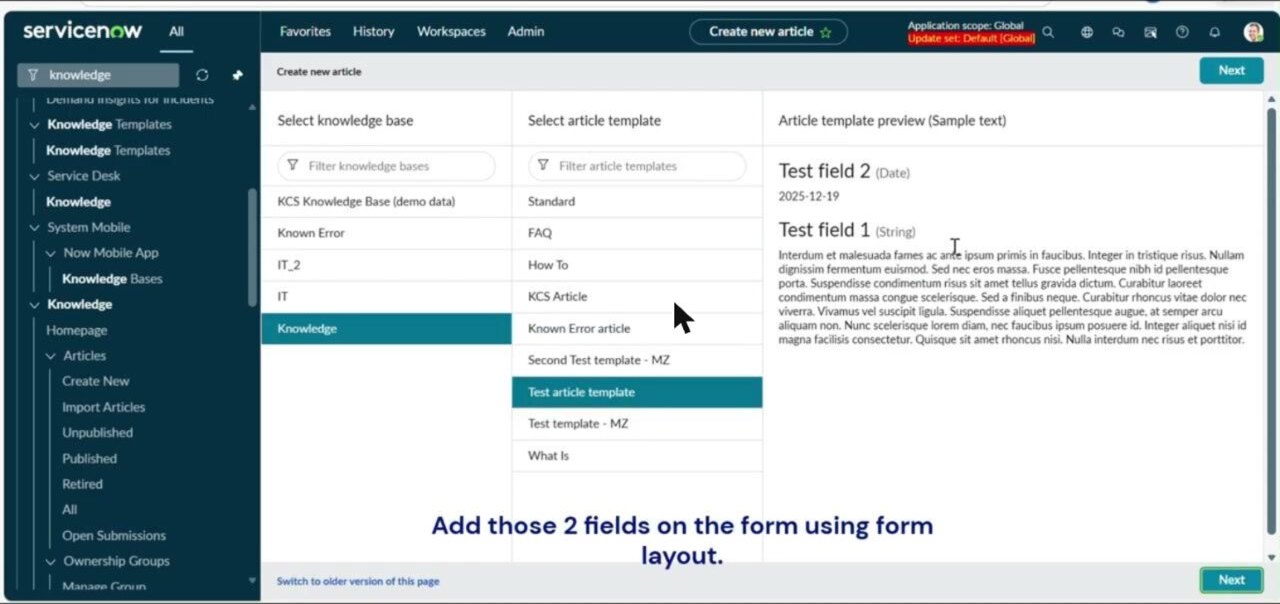
The Create new article screen remains open, with Test article template still selected. The preview panel displays:
- Test field 2 (Date): 2025-12-19
- Test field 1 (String): contains a paragraph of sample text
At this stage, no changes are made—this step simply confirms that your template's fields look correct before you proceed. The Next button remains available in the lower right.
Add the fields using form layout
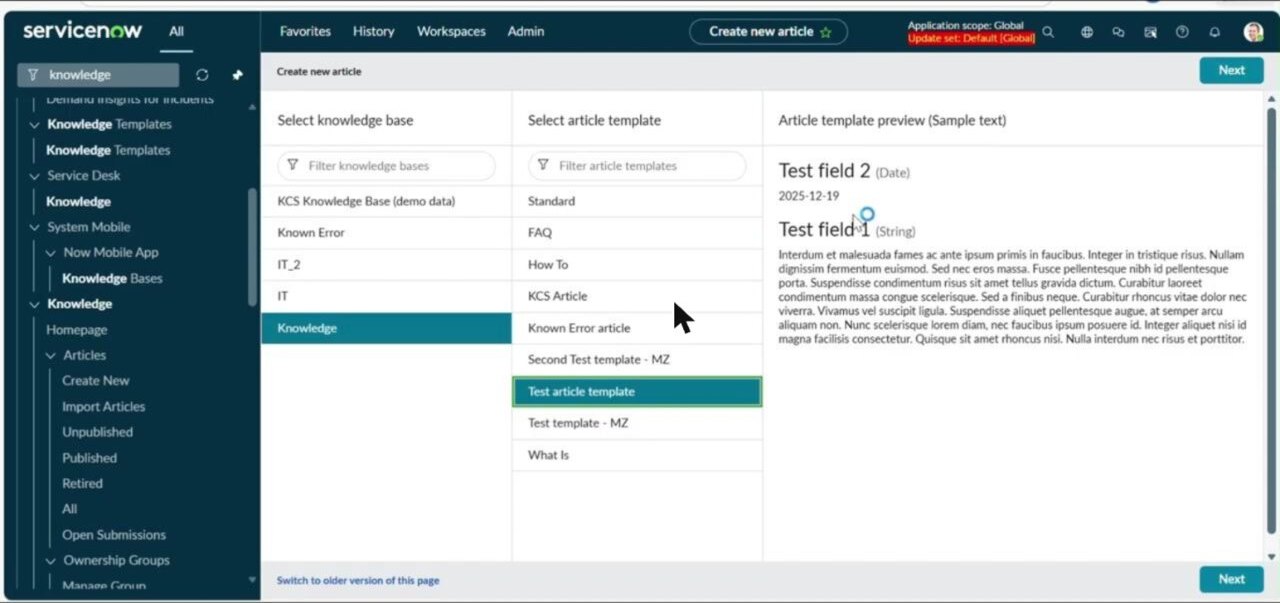
On the same Create new article screen, a blue instruction appears at the bottom: "Add those 2 fields on the form using form layout." This tells you that your next step is to use the form layout editor to add Test field 1 and Test field 2 to the article form. The Next button remains available when you're ready to continue.
Note: The template preview alone doesn't add the fields to your article form—you still need to use the form layout editor to make them appear.
View the knowledge article list
The screen changes to the Knowledge article list view, showing columns for Number, Version, Display attachments, Short description, Helpful count, Introduction, Author, Revised By, and Knowledge base. You'll see several existing articles listed, such as KB0010023, KB0010020, KB0010018, KB0010019, KB0010017, KB0000016, KB0010013, and KB0010011.
The Test article template - New Record tab is open at the top, indicating that a new article is currently being created. The New button remains available in the top right if you want to start another article.
Summary of actions
- You selected Test article template when creating a new knowledge article.
- The template preview confirmed the fields Test field 1 (String) and Test field 2 (Date).
- An on-screen instruction directed you to add these fields to the article form using the form layout editor.
What's next
- Click Next to proceed to the article form.
- Use the form layout editor to add Test field 1 and Test field 2 to the form, as instructed on screen.
By following these steps, you ensure that your custom fields from the article template are available and visible whenever you create or edit knowledge articles in ServiceNow. You're all set to build consistent, well-structured knowledge content going forward.
Generated by Docsie Video-to-Docs on 2026-09-07 from a 2-minute video. Screenshots are frames from the source video and belong to their creator, The Now Wizard, whose original is embedded above. If you own this video and want the guide removed or credited differently, contact us and we will act within one business day.