
How to Post a Non-PO Vendor Invoice with FB60 in SAP S/4HANA
This guide walks you through how to post a non-PO vendor invoice with FB60 in SAP, covering everything from launching the transaction to entering vendor details, amounts, tax information, and finalizing the posting. Follow each step carefully and verify your entries against the vendor invoice before posting.
Video: Non PO invoice posting in SAP #FB60 #SAP #sapclasses #businessprocess by SAP FICO Guide 910K (2022). All credit for the demonstration goes to the creator; watch the original on YouTube. The written guide below was generated from this video by Docsie. Creator? Request a change or removal.
This guide walks you through how to post a non-PO vendor invoice with FB60 in SAP, covering everything from launching the transaction to entering vendor details, amounts, tax information, and finalizing the posting. Follow each step carefully and verify your entries against the vendor invoice before posting.
Prerequisites
- You must be logged into your SAP environment.
- You need the vendor invoice copy on hand, including the invoice number, invoice date, and amount.
- You should know the relevant company code, G/L account, and cost center for the expense being recorded.
Launch SAP and prepare for invoice entry
Open the SAP Logon application from your desktop and log into your SAP environment.
Access the FB60 transaction
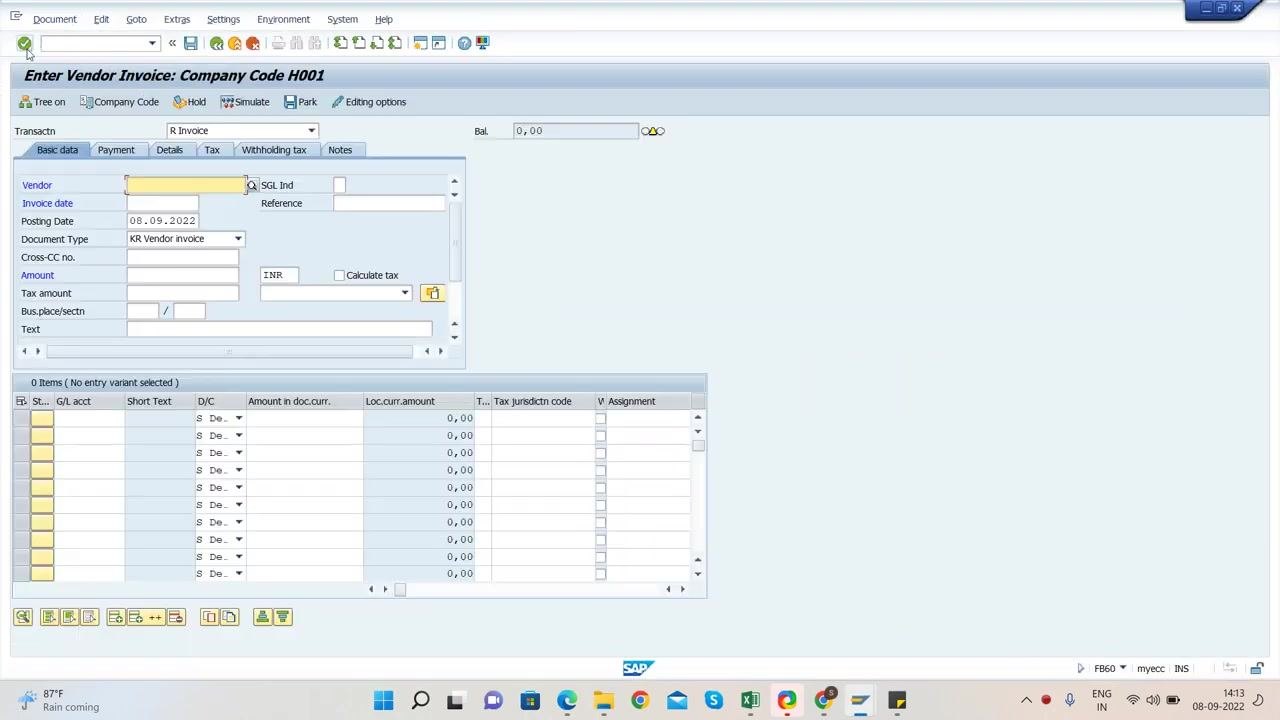
Enter transaction code FB60 in the command field and press Enter. The Enter Vendor Invoice: Company Code H001 screen appears, ready for data entry.
Select the vendor
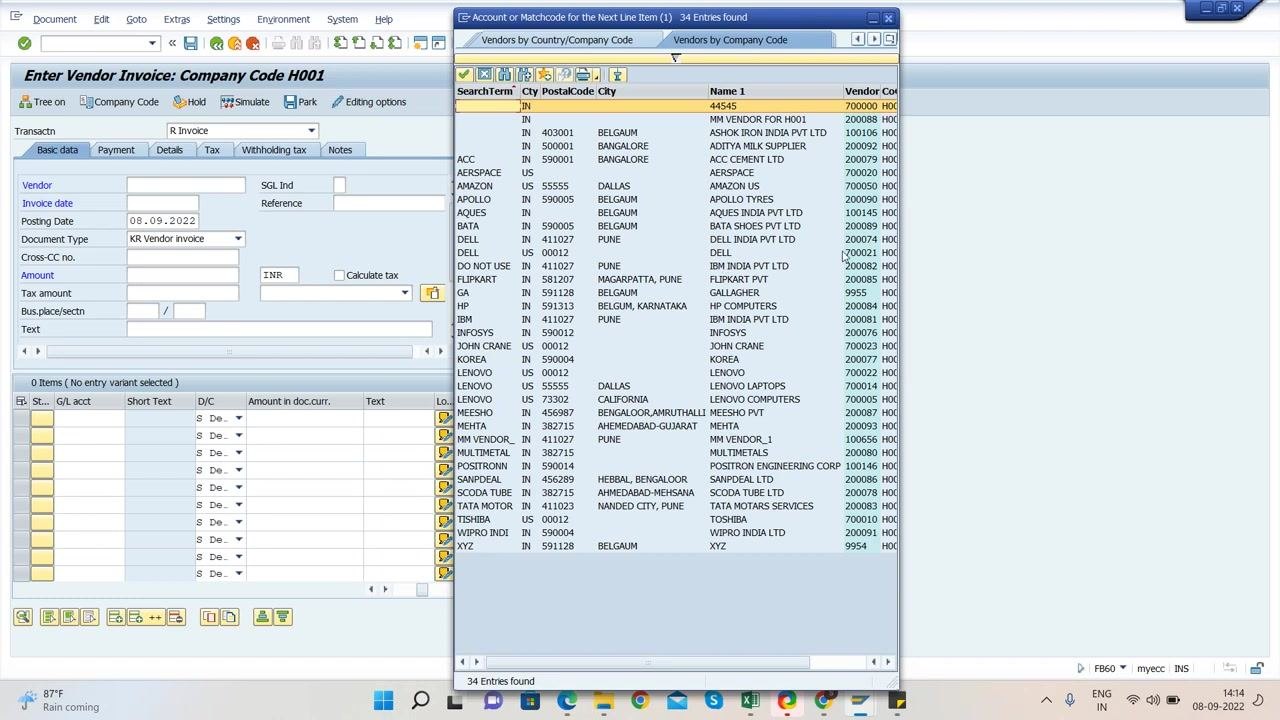
Click the search icon next to the Vendor field to open the vendor selection window. Enter your company code (for example, H001) and press Enter to display the list of vendors.
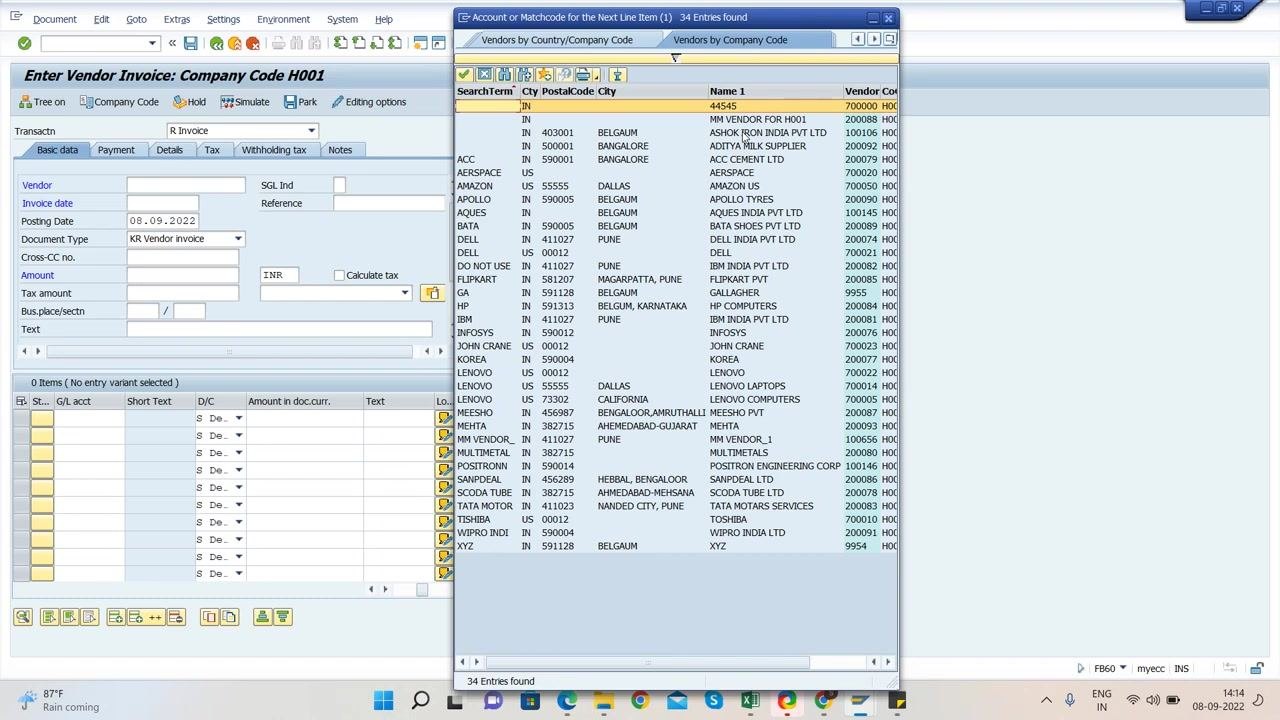
Locate the vendor that matches your invoice copy. For example, select ASHOK IRON INDIA PVT LTD with vendor code 100106.
Enter invoice and posting dates
In the Invoice Date field, enter the date shown on the vendor's invoice (for example, 05.09.2022).
In the Posting Date field, enter the date you are posting the invoice (for example, 08.09.2022), then enter the invoice number as it appears on the vendor's invoice (for example, "XYZ12345").
Enter invoice amounts, tax, and select tax code
In the Amount field, enter the total invoice amount including tax. For example, enter 5500.
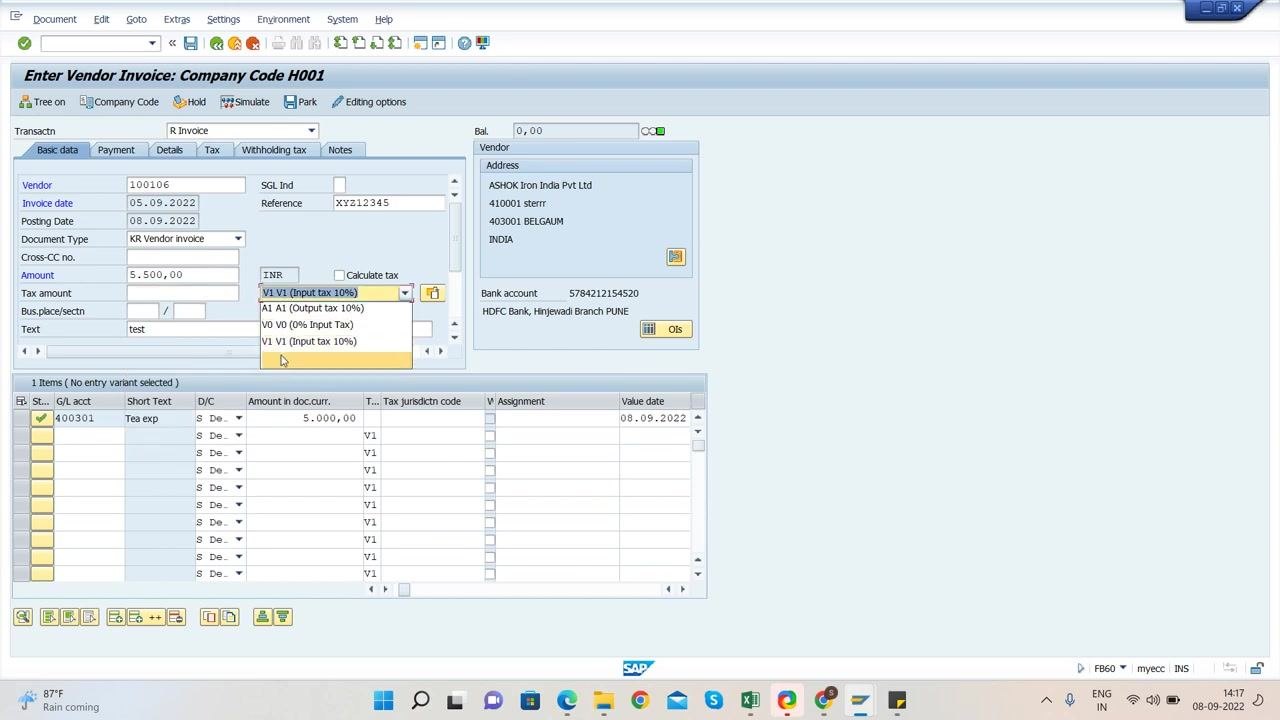
In the Tax amount field, enter the tax portion of the invoice — for example, 500 (representing a 10% tax rate). In the Tax code field, select the appropriate tax code from the dropdown, such as V1 (Input tax 10%).
Enter the G/L account for the expense
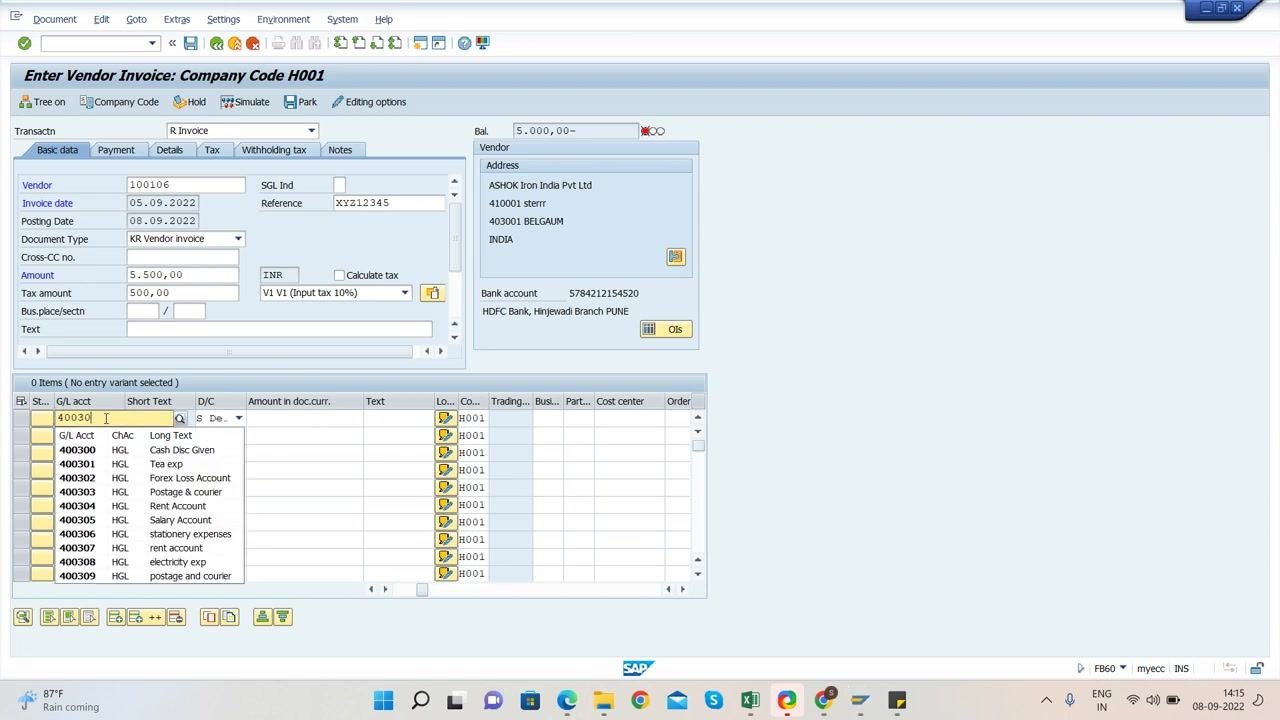
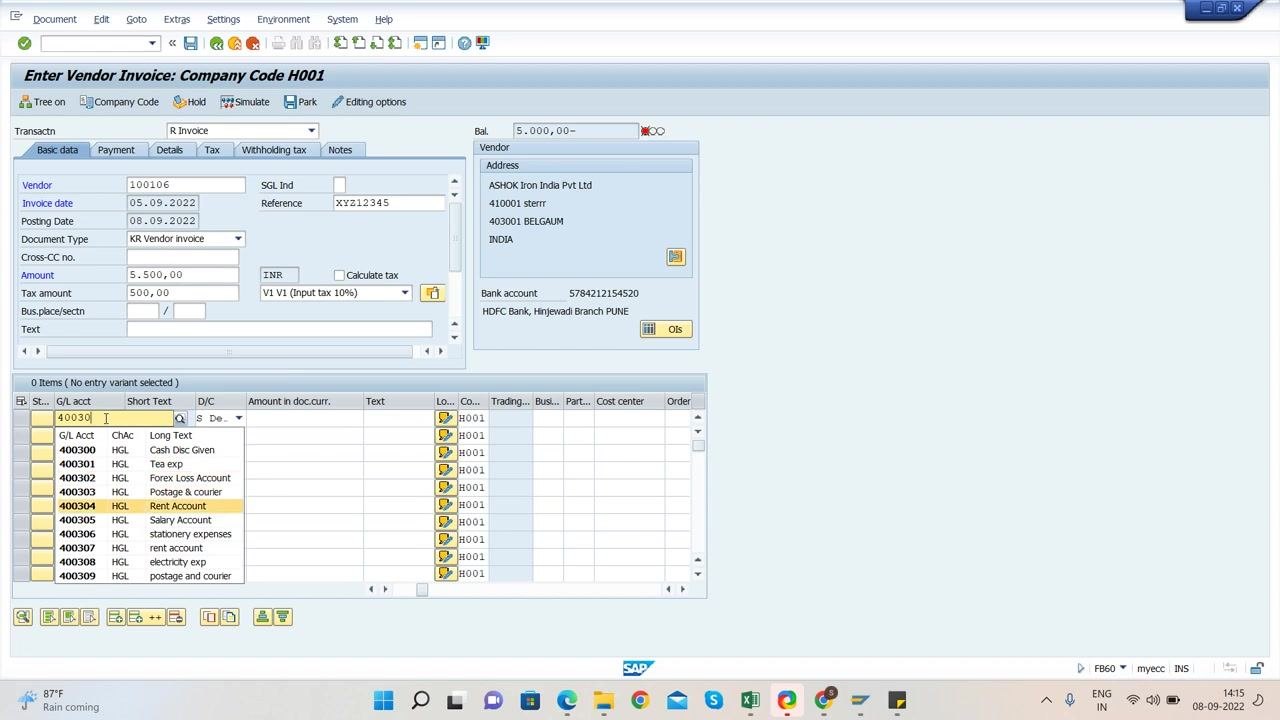
In the G/L acct field, enter the General Ledger account that corresponds to the nature of the expense. For example, enter 400301 for "TA expenses".
If needed, use the dropdown to search and select from available accounts, such as:
- Cash Disc Given
- Tax exp
- Forex Loss Account
- Postage & courier
- Rent Account
- Salary Account
- Stationery expenses
- Electricity exp
In the Amount in doc.curr. field, enter the base amount excluding tax — for example, 5000.
Enter value date, text, and cost center
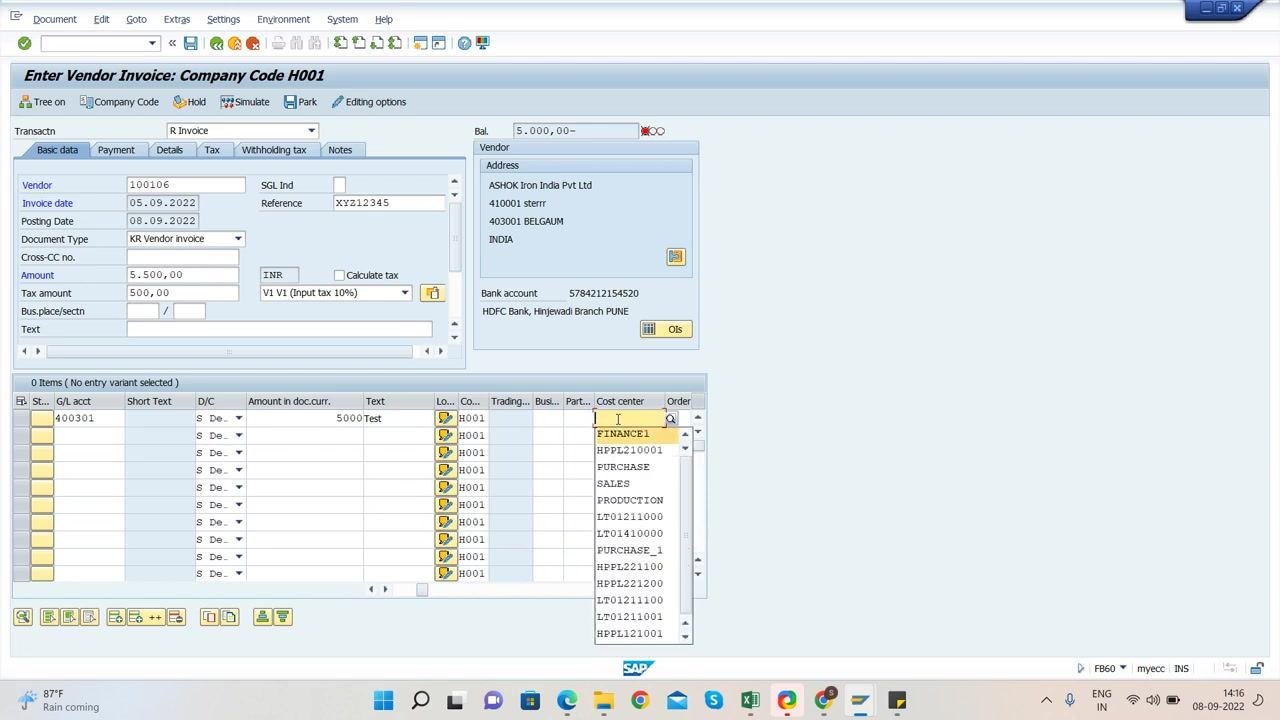
In the Value date field, enter the date for value posting — for example, 08.09.2022 (today's date).
In the Text field, enter a mandatory description or note for the entry, such as "Test" or another relevant description. In the Cost center field, enter the appropriate cost center code for the department or project, then press Enter to confirm your entries.
Double-check all the values entered so far against the vendor invoice and your company's accounting guidelines before proceeding.
Adjust for non-tax-relevant G/L accounts and finalize posting
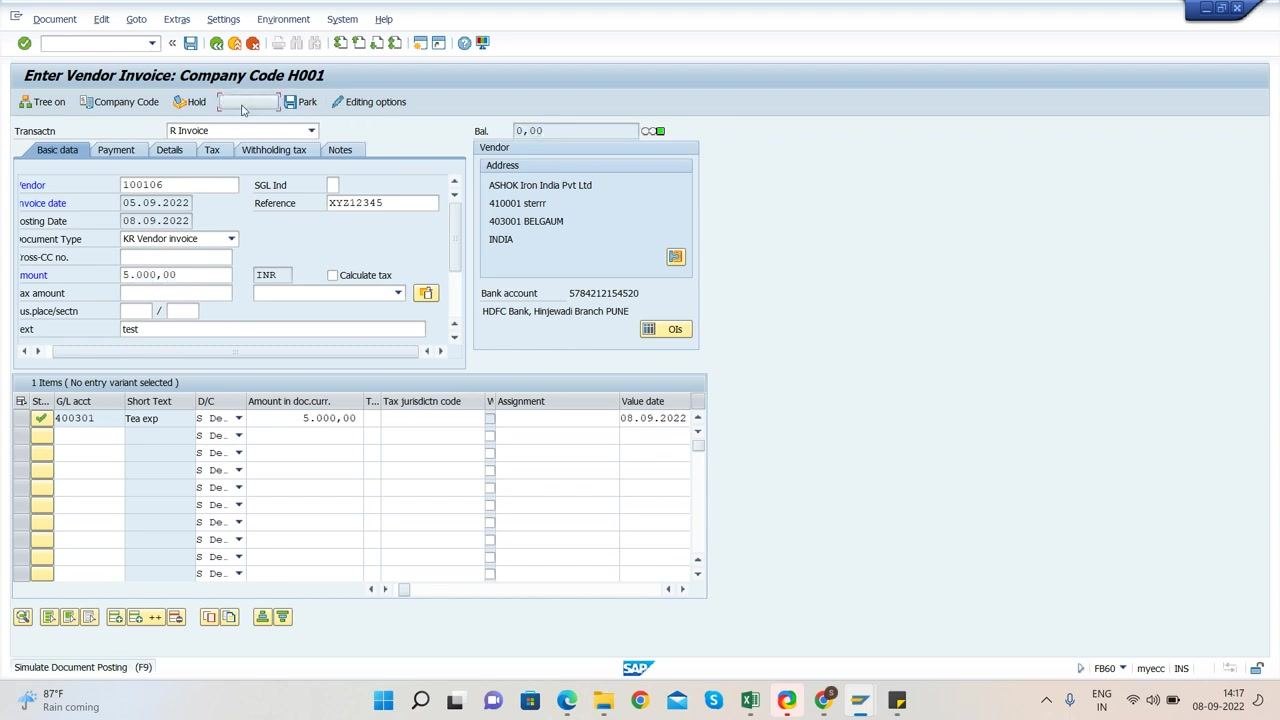
If the selected G/L account is not tax-relevant, remove the tax code from the Tax code field. SAP displays a message such as "Account is not tax-relevant, tax code will be ignored." Remove the tax code from both the header and line item sections if present.
Since the tax code is no longer required, clear the Tax amount field as well. Then update the Amount field with the total invoice amount, including any tax — for example, enter 5000 as the total if there is no tax split.
In the Text field, enter a description such as "Test" to satisfy SAP's validation requirements.
Before posting, confirm the following:
- The Amount field matches the invoice total.
- The Tax amount and Tax code fields are empty if not required.
- The Cost center and Text fields are filled in as required.
- The Bal. (balance) field at the top of the screen shows 0,00, confirming the entry is balanced and ready for posting.
Click the Simulate button (or press F9) to preview the posting and verify that all entries are correct. Once confirmed, click the Post button to finalize the entry.
A confirmation message appears at the bottom of the screen, such as "Document 2200023 was posted in company code H001."
Summary
By following these steps, you can post a non-PO vendor invoice with FB60 in SAP, ensuring all required financial and accounting details are entered correctly — including vendor information, invoice dates, amounts, tax details, and G/L account assignments. For non-tax-relevant invoices, remember to clear the tax code and tax amount, confirm the balance shows 0,00, and simulate the document before posting. Always verify your entries against the vendor invoice and your company's accounting guidelines prior to finalizing the posting.
Generation details: cost, quality tiers
Docsie billed 2,500 credits ($1.75) to analyze this 5-minute video at standard quality. The rewrite, template fill and Word/PDF exports were included. The same video at each quality tier:
| Quality | Frames sampled | Credits | Approx. cost |
|---|---|---|---|
| Draft | every 16-30 s | 1,250 | $0.88 |
| Standard (this guide) | every 8-15 s | 2,500 | $1.75 |
| Detailed | every 4-7 s | 5,000 | $3.50 |
| Ultra | every 1-3 s | 10,000 | $7.00 |
Credits priced at $0.70 per 1,000; plans include a monthly allowance. Enterprise customers on on-premise or bring-your-own-model deployments run this on their own inference and pay no per-video credits.
Generated by Docsie Video-to-Docs on 2026-10-11 from a 4-minute video. Screenshots are frames from the source video and belong to their creator, SAP FICO Guide 910K, whose original is embedded above. If you own this video and want the guide removed or credited differently, contact us and we will act within one business day.