
How to Display Vendor Line Items with FBL1N in SAP S/4HANA
This guide explains how to display vendor line items with FBL1N in SAP to check both payments made and outstanding (non-payment) items for any vendor. You will also learn how to interpret document types, trace clearing documents, customize the report layout, and drill into individual documents for a detailed breakdown of amounts and tax deductions.
Video: How to use T code FBL1N vendor payment line item display in SAP FICO by ERP SAP Team (2020). All credit for the demonstration goes to the creator; watch the original on YouTube. The written guide below was generated from this video by Docsie. Creator? Request a change or removal.
This guide explains how to display vendor line items with FBL1N in SAP to check both payments made and outstanding (non-payment) items for any vendor. You will also learn how to interpret document types, trace clearing documents, customize the report layout, and drill into individual documents for a detailed breakdown of amounts and tax deductions.
Prerequisites
- Access to SAP with permissions to run the FBL1N transaction.
- The vendor account number you want to review.
- The relevant company code.
- Optional: business area, circle code, or document type if you want to narrow the selection.
Displaying vendor line items
Log in to SAP
Start by logging in to your SAP system with your user credentials.
Open the Vendor Line Item Display
Enter the transaction code FBL1N in the SAP command field and press Enter. This opens the Vendor Line Item Display screen.
Fill in the required fields
Enter the following details to define your selection:
- Vendor account: enter the vendor number (example:
1193178) - Company code: enter your company code (example:
1100) - In the dynamic selection area, fill in additional details as needed:
- Business Area (if required)
- Circle Code (if required) — example:
1017 - Document Type (if required)
Specify the line item selection
Choose which items you want to see:
- To check open items as of a specific date, select Open items and enter the key date (example:
30.03.2020). - To check cleared items, select Cleared items and specify the period.
- To check all items, select All items and specify the posting date range.
Execute the report
Click the Execute button (green checkmark or F8) to display the vendor line items.
Review the vendor line item results
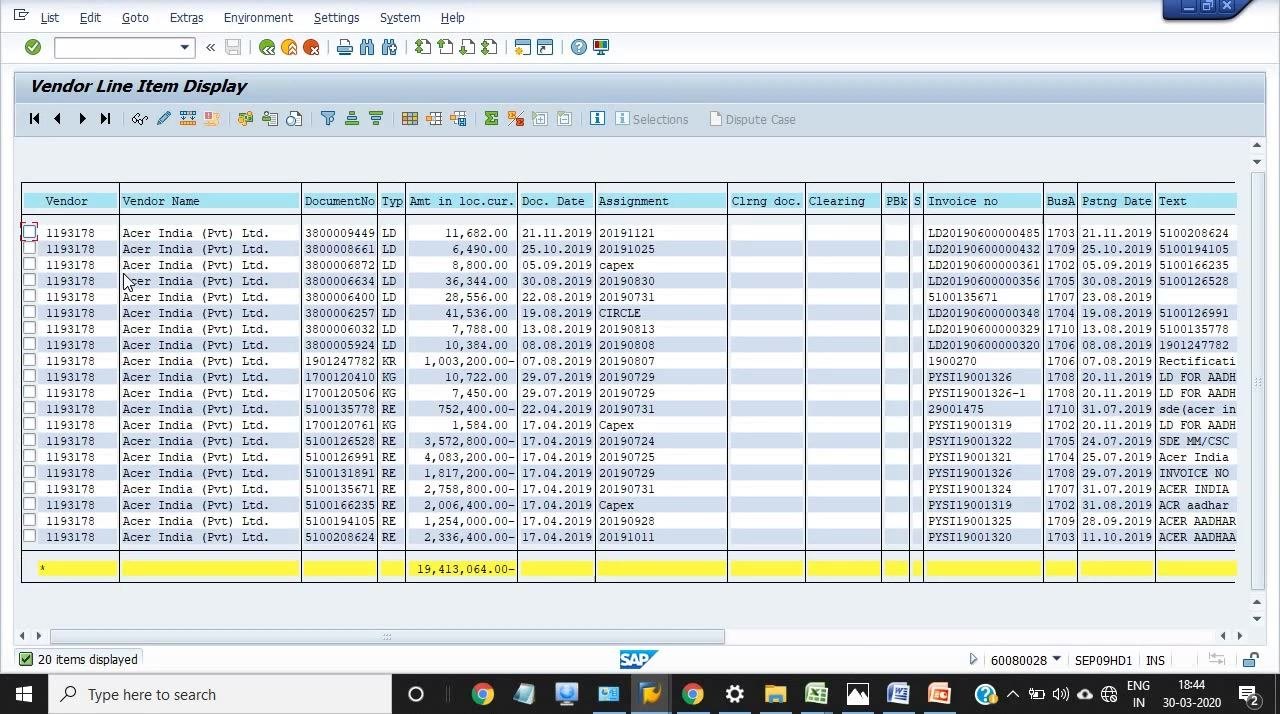
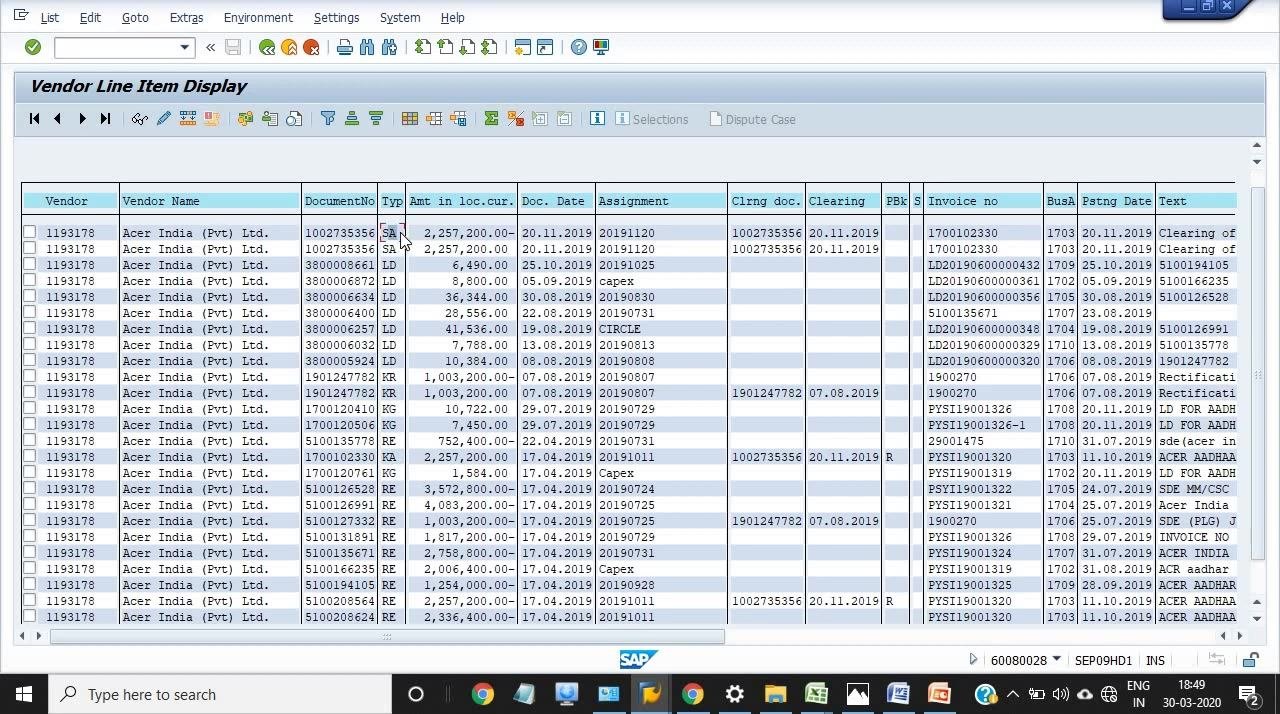
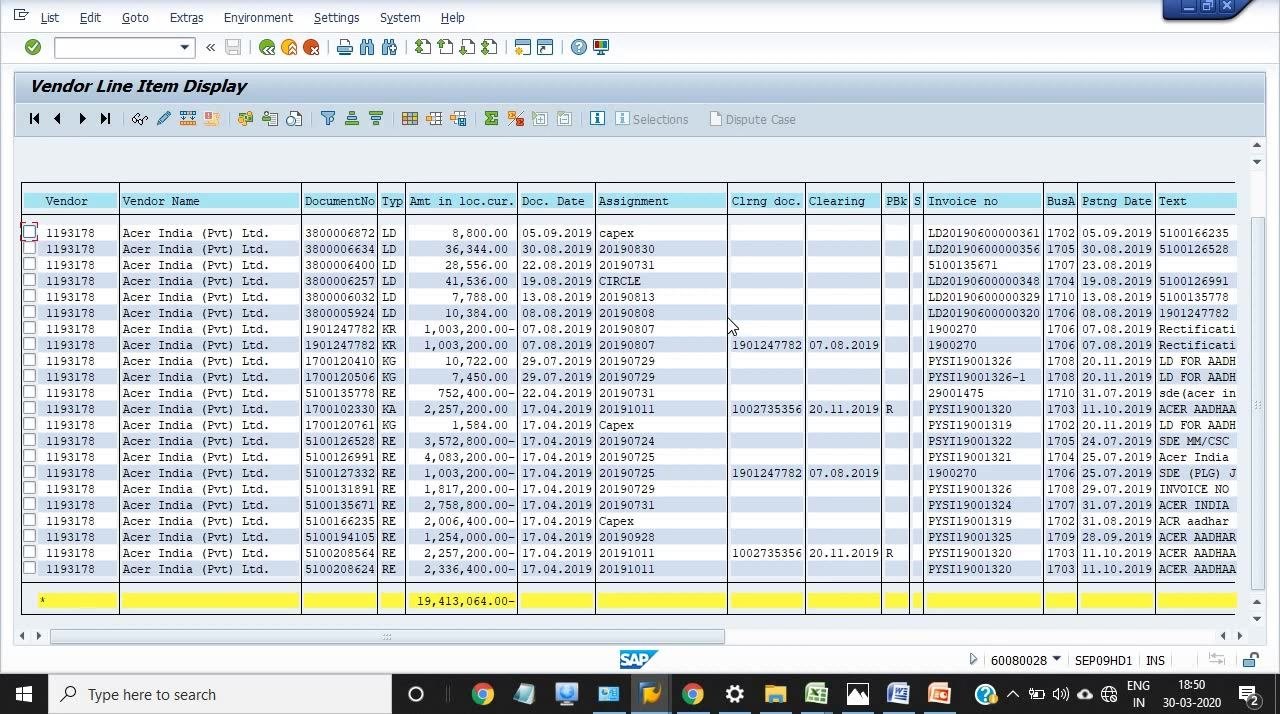
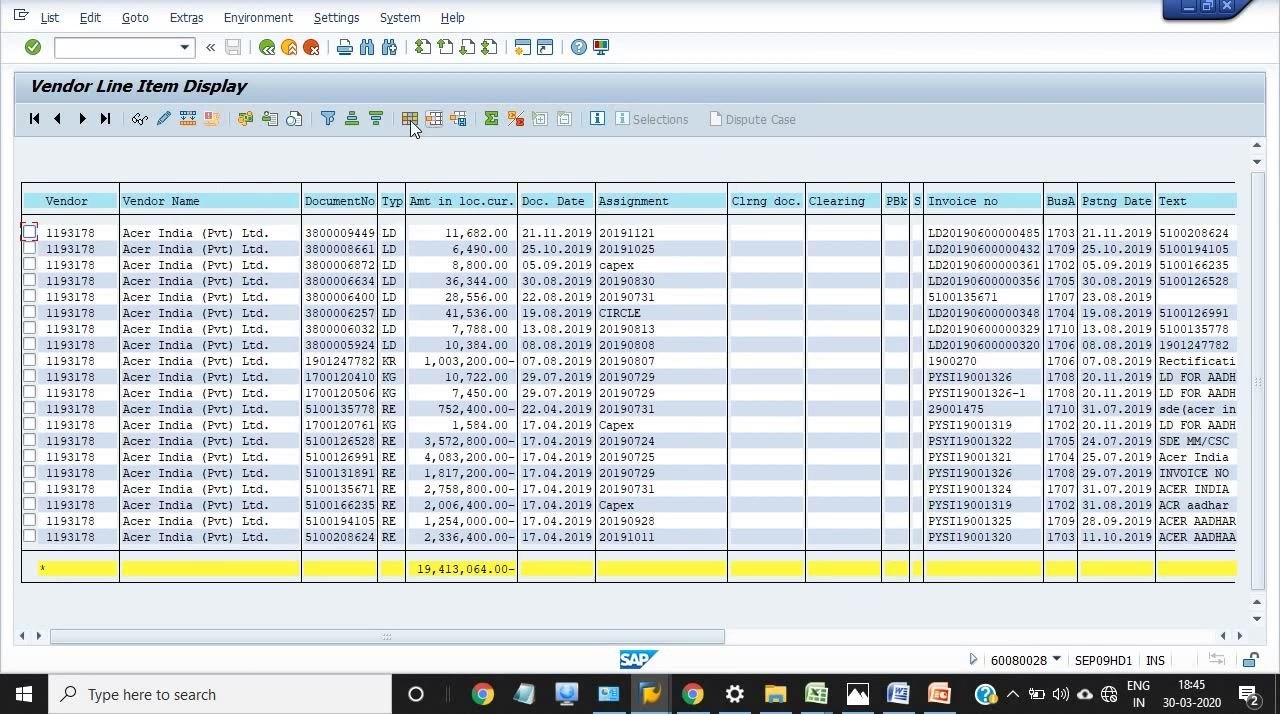
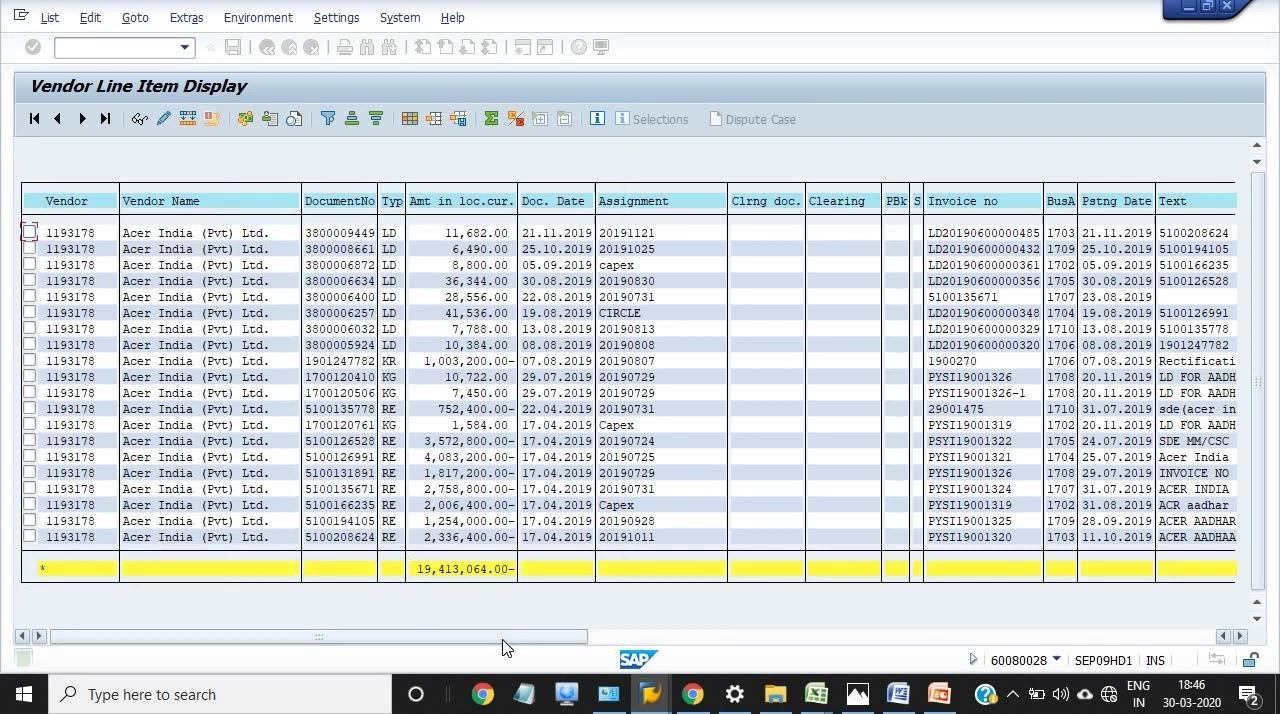
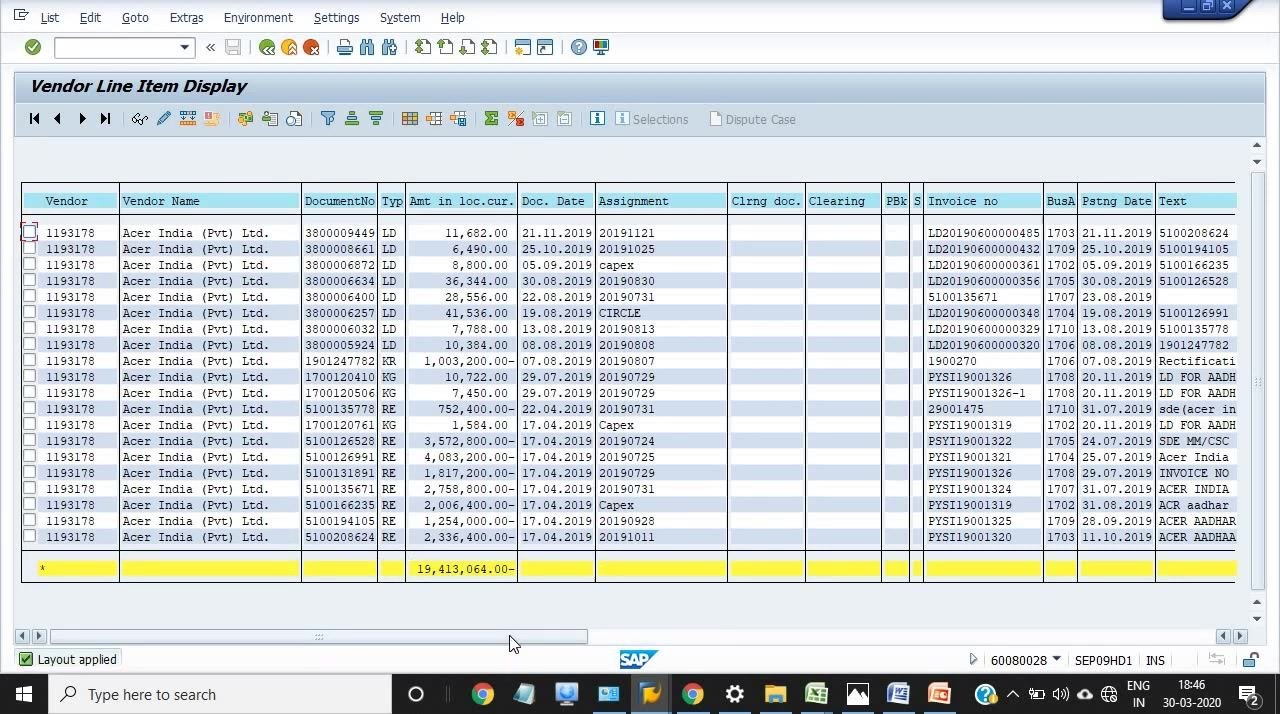
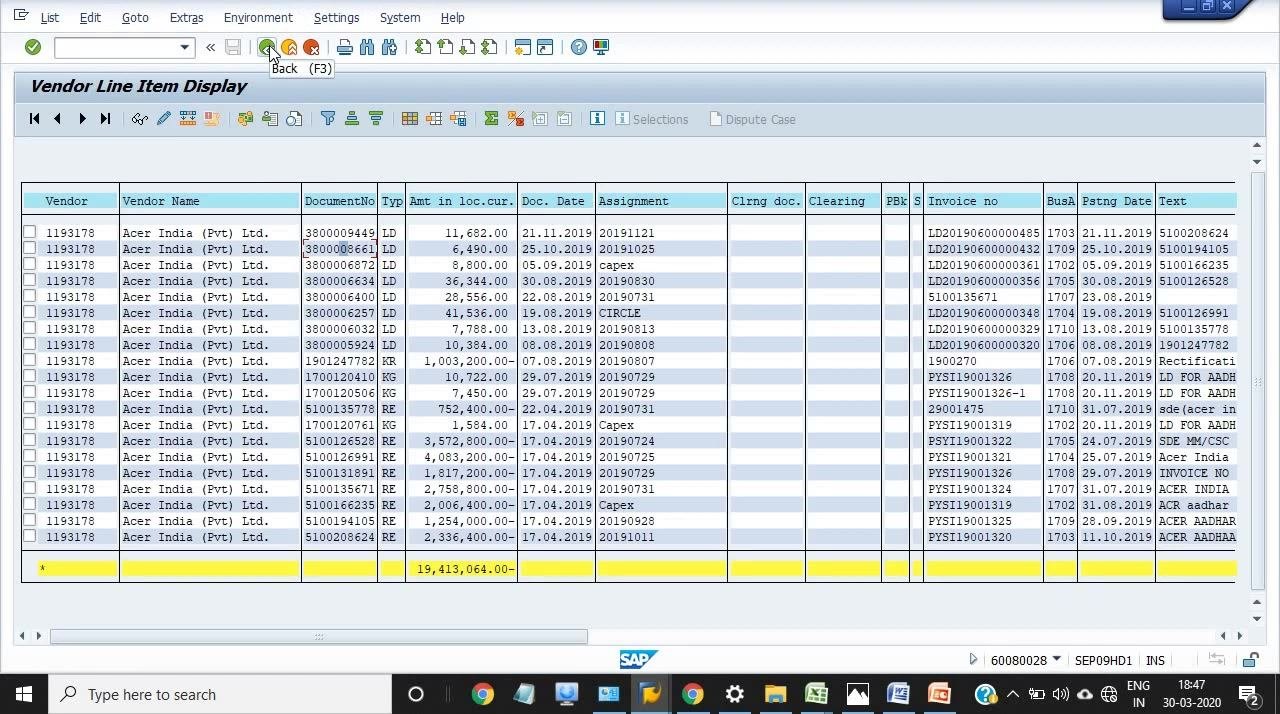
The results show all relevant line items for the specified vendor, including:
- Vendor number and name (e.g., Acer India (Pvt) Ltd.)
- Document numbers and types
- Amounts in local currency
- Document dates and assignments
- Business area, invoice numbers, posting dates, and additional text
The total amount for the displayed items appears at the bottom of the report.
Analyzing the displayed line items
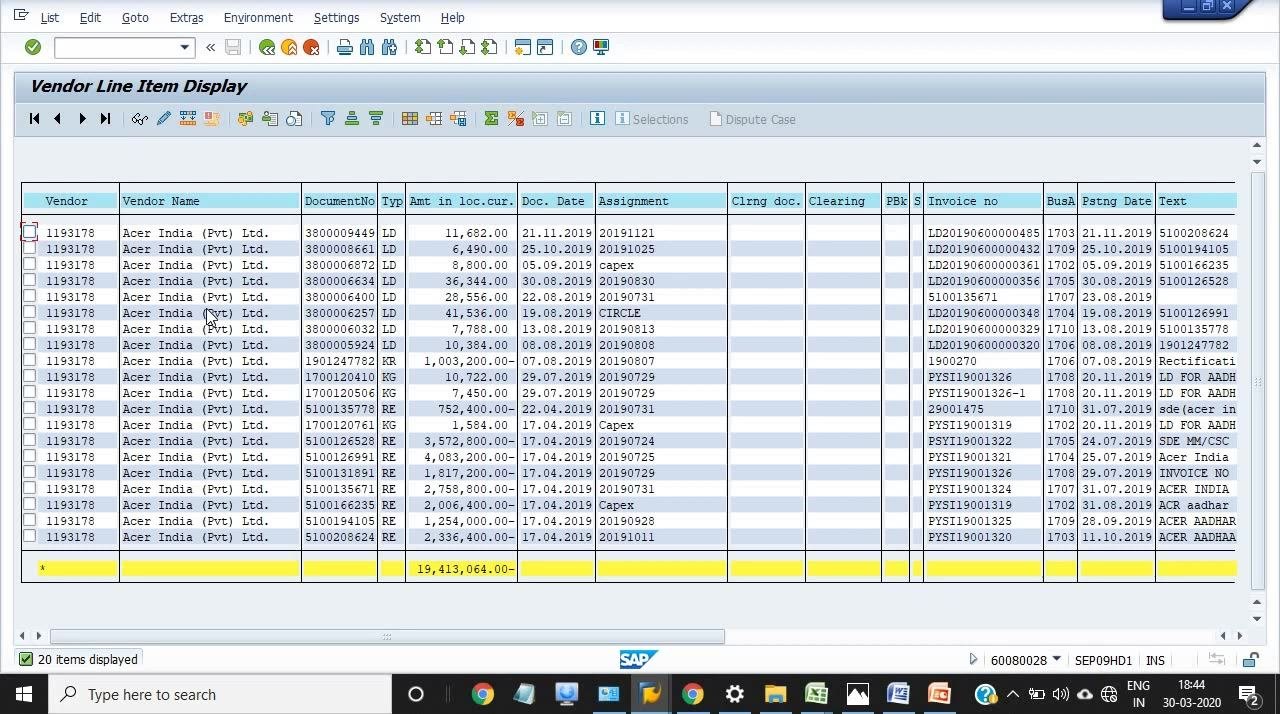
Once the report is on screen, review the columns such as Vendor, Vendor Name, Document Number, Type, Amount in Local Currency, Document Date, Assignment, Invoice Number, Business Area, Posting Date, and Text. Note the total amount at the bottom of the report.
Use the scroll bar to view additional columns like User Name, Offset Account, Period, Year/Month, and Document Header Text for more details.
Checking clearing documents and payment status
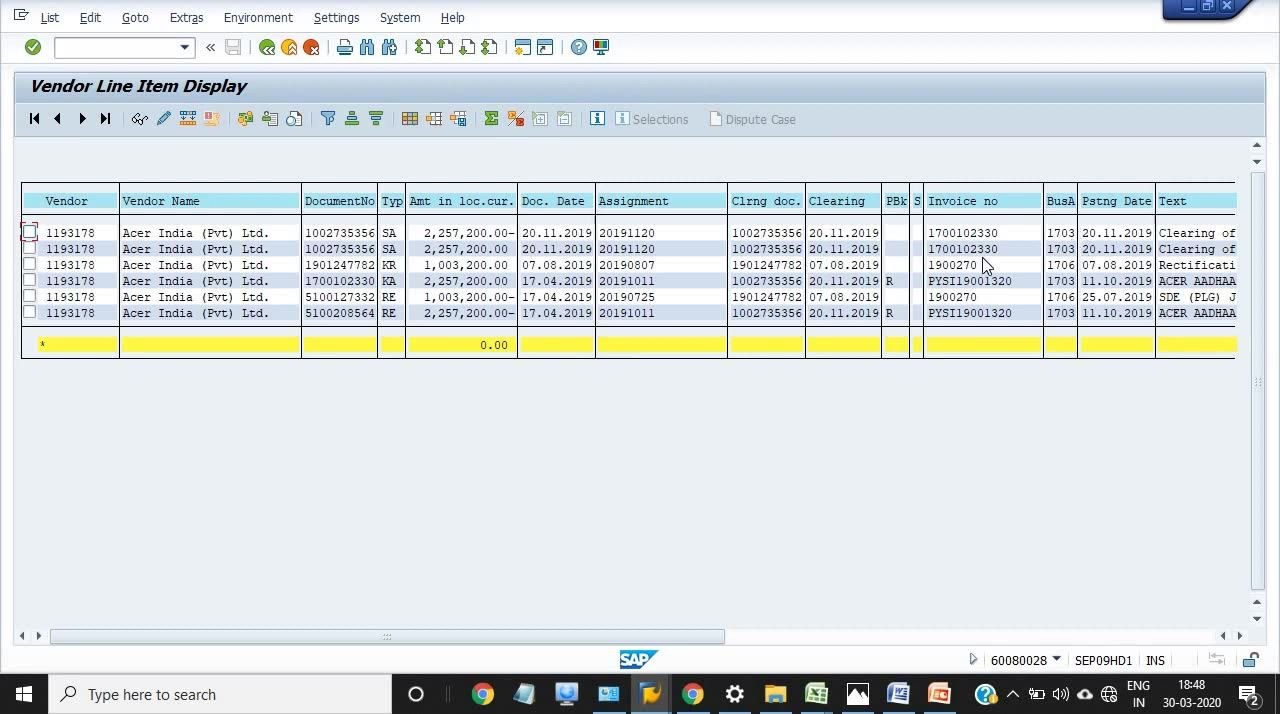
Identify clearing documents
Locate the Clrng doc. and BusA columns. Clearing documents belonging to a specific business area (for example, business area 1703) can be identified this way. In this example, document numbers 1002735336 and 1700102330 both carry BusA 1703.
Understand document status and the R block
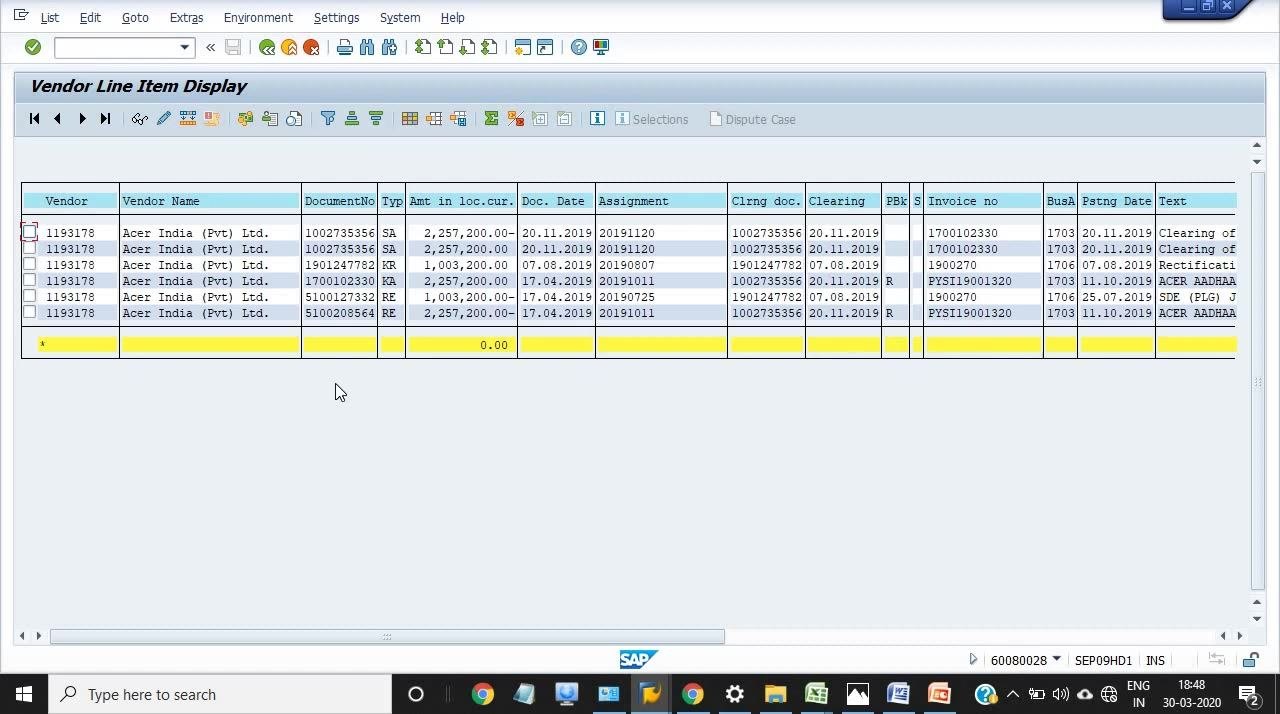
Observe the S column, which indicates status or block information (for example, "R" for retention or blocked status). Identify which documents are marked with "R" in the S column — these are flagged for review as being in the R block.
Check payment status
Review the clearing and posting dates to determine whether payment has been processed. If the Clearing date is filled in, payment is likely completed for that document.
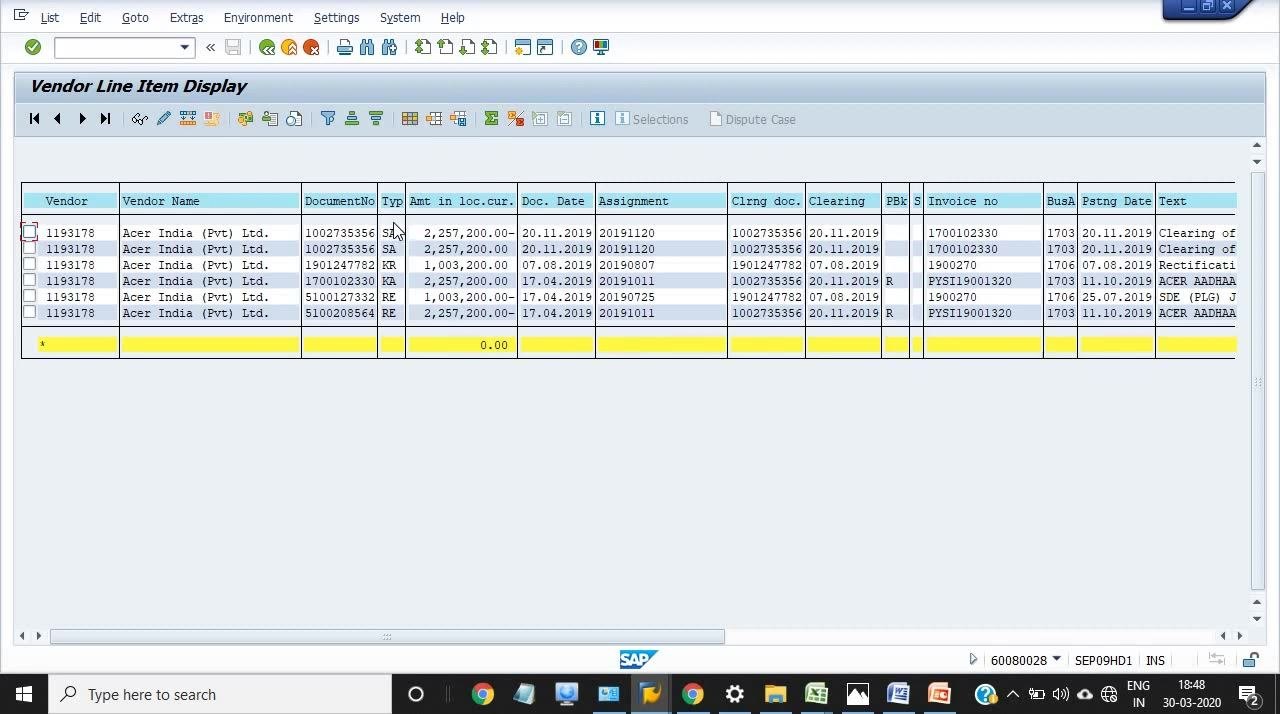
Review document types and their meanings
Observe the Typ column in the Vendor Line Item Display. Common document types include:
LD: Liquidity Damage documents (e.g., for hardware kits and desktops)KR: Vendor InvoiceRE: Restitution documents
Each document type represents a specific transaction category. For example, LD documents relate to penalties or damages, while RE documents are restitution-related.
Review field officer entries and document metadata
Scroll to the right in the Vendor Line Item Display to view additional columns such as User Name, PM, Offset account, Period, Pre SLO Do, Year/month, and Document Header Text. These fields provide metadata about who entered the data, the relevant period, and any special notes.
For example: User Name 98705726, Offset account 1311206, Period 6, Year/month 2019/06, Document Header Text "LD CHARGES 1% FOR DELAY". Use this information to trace entries made by field officers and to understand the context of each transaction.
Identify liquidity damage charges
Review the Document Header Text column for entries such as "LD CHARGES 1% FOR DELAY". These entries indicate liquidity damage charges applied to specific documents due to delays. Check this field for each relevant line item to identify any penalties or special charges associated with the vendor.
Customizing the layout
Add or remove columns
Click the Change Layout button (grid icon) in the toolbar to open the layout customization window. The dialog shows two lists:
- Displayed Columns (left): columns currently shown in the report
- Hidden Fields (right): columns available to add
To add a new field, such as G/L Account, locate it in the Hidden Fields list, select it, and click the left arrow button to move it to the Displayed Columns list. To remove a field, select it in the Displayed Columns list and click the right arrow button.
Add withholding tax fields
In the Change Layout dialog, use the search function to find fields related to withholding tax. Look for and select the following fields if available:
- Withholding Tax Base Amount
- Withholding Tax Exempt Amount
- Withholding Tax Amount
Move these fields to the Displayed Columns list as needed.
Apply the layout changes
After selecting the desired fields, click the Copy button at the bottom of the Change Layout dialog to apply the changes. The Vendor Line Item Display now includes the newly added columns, such as G/L Account and withholding tax fields.
Displaying a specific document
Identify documents with tax base amounts
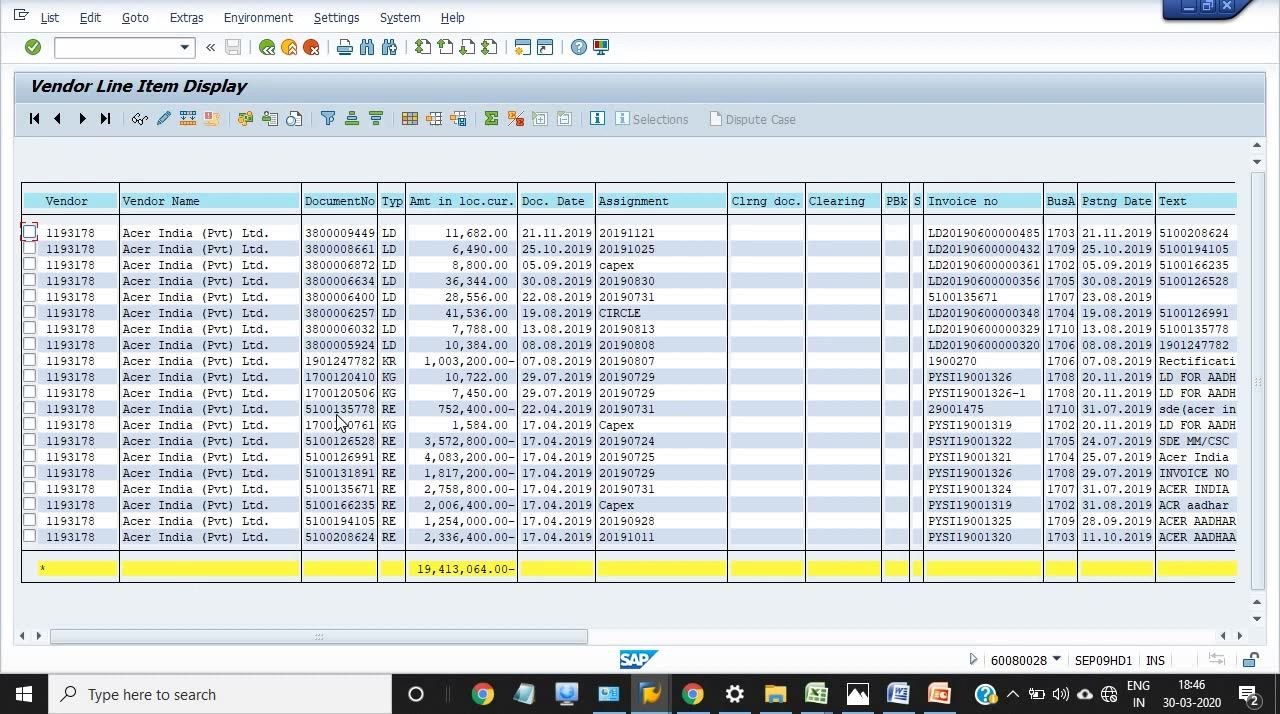
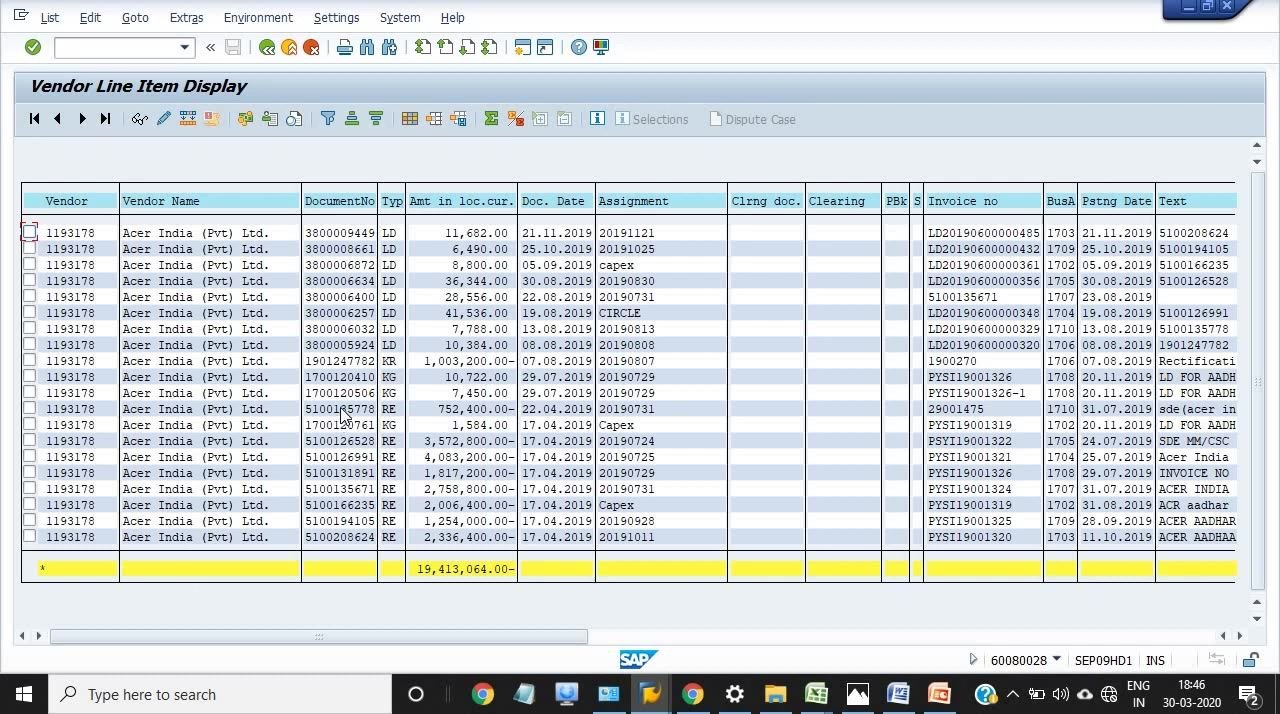
If only the tax base amount has been mentioned for an account, these values appear directly in the Vendor Line Item Display. For example, locate document number 13200000 in the list to review its details.
To view the details of a particular document, select it (for example, by clicking the checkbox next to the document number), then click the Display button in the toolbar to open the document details.
Review the document breakdown
In the Display Document: Data Entry View window, review the breakdown of the selected document. Key fields to observe:
- Amount Payable to Vendor: the main payable amount (e.g., 752,400.00 INR to Acer India (Pvt) Ltd.)
- TDS Payable: amounts deducted as TDS (e.g., 13,200.00 INR)
- TDS IGST Payable: IGST-related TDS deductions (e.g., 13,200.00 INR)
- Other G/L Accounts: additional lines may show further breakdowns, such as computer expenses or input tax credits
Scroll through the document lines to see all related entries, including sundry creditors, TDS Payable - Contra, TDS - IGST Payable, computer expenses, and IGST Input Tax Credit. Use this breakdown to understand how much is payable to the vendor, what has been retained, and the tax deductions applied.
Return to the Vendor Line Item Display
After reviewing the document details, click the Back button (green arrow or F3) to return to the main Vendor Line Item Display screen.
Summary
By following these steps, you can display vendor line items with FBL1N in SAP to check both payments made and outstanding items for any vendor. You can also analyze document types, trace clearing documents and their status, customize the report layout with additional fields like G/L Account and Withholding Tax, and drill into individual documents to review detailed payable and tax breakdowns.
Generation details: cost, quality tiers
Docsie billed 4,000 credits ($2.80) to analyze this 8-minute video at standard quality. The rewrite, template fill and Word/PDF exports were included. The same video at each quality tier:
| Quality | Frames sampled | Credits | Approx. cost |
|---|---|---|---|
| Draft | every 16-30 s | 2,000 | $1.40 |
| Standard (this guide) | every 8-15 s | 4,000 | $2.80 |
| Detailed | every 4-7 s | 8,000 | $5.60 |
| Ultra | every 1-3 s | 16,000 | $11.20 |
Credits priced at $0.70 per 1,000; plans include a monthly allowance. Enterprise customers on on-premise or bring-your-own-model deployments run this on their own inference and pay no per-video credits.
Generated by Docsie Video-to-Docs on 2026-10-11 from a 7-minute video. Screenshots are frames from the source video and belong to their creator, ERP SAP Team , whose original is embedded above. If you own this video and want the guide removed or credited differently, contact us and we will act within one business day.