
How to Create a User with SU01 in SAP S/4HANA
Creating a user in SAP involves more than filling in a name and password. This guide walks you through how to create a user with SU01 in SAP, from logging into the system and setting up the user's logon data, to assigning roles and authorization profiles, and finally verifying that the new user can access the transactions they need. Follow the steps in order for a complete setup, from initial creation through testing.
Video: SU01 - PFCG - How to create a new user in SAP system and Authorize it to execute transactions #SAP by The SAP Basis (2021). All credit for the demonstration goes to the creator; watch the original on YouTube. The written guide below was generated from this video by Docsie. Creator? Request a change or removal.
Creating a user in SAP involves more than filling in a name and password. This guide walks you through how to create a user with SU01 in SAP, from logging into the system and setting up the user's logon data, to assigning roles and authorization profiles, and finally verifying that the new user can access the transactions they need. Follow the steps in order for a complete setup, from initial creation through testing.
Prerequisites
- Access to an SAP client (this guide uses client 800).
- An existing SAP user account with authorization to run transaction SU01 (user maintenance) and PFCG (role maintenance).
- Knowledge of the company or organizational data required for the new user (e.g., company code).
Log in to the SAP system
Log in to the SAP system
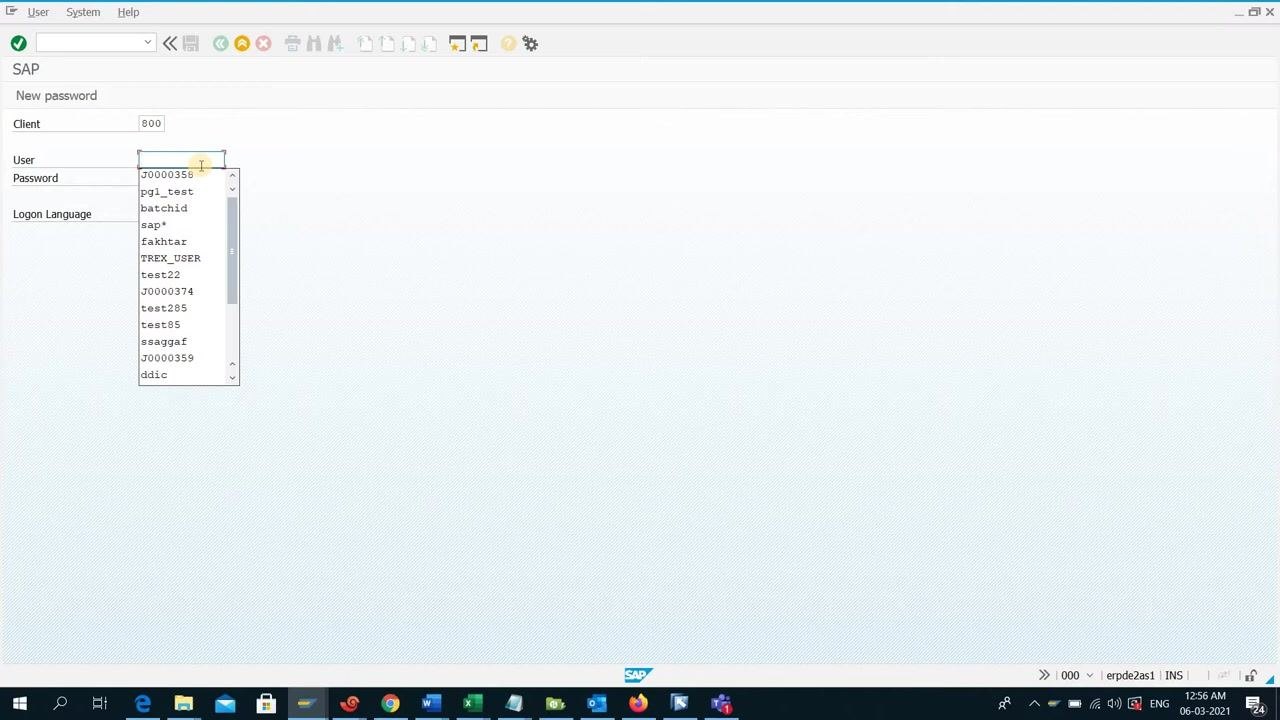
On the SAP logon screen, enter the following details:
- Client: 800
- User: Select your existing user account from the dropdown list.
- Password: Enter your password.
- Logon Language: EN
Click the green checkmark or press Enter to log in.
Access the user creation transaction
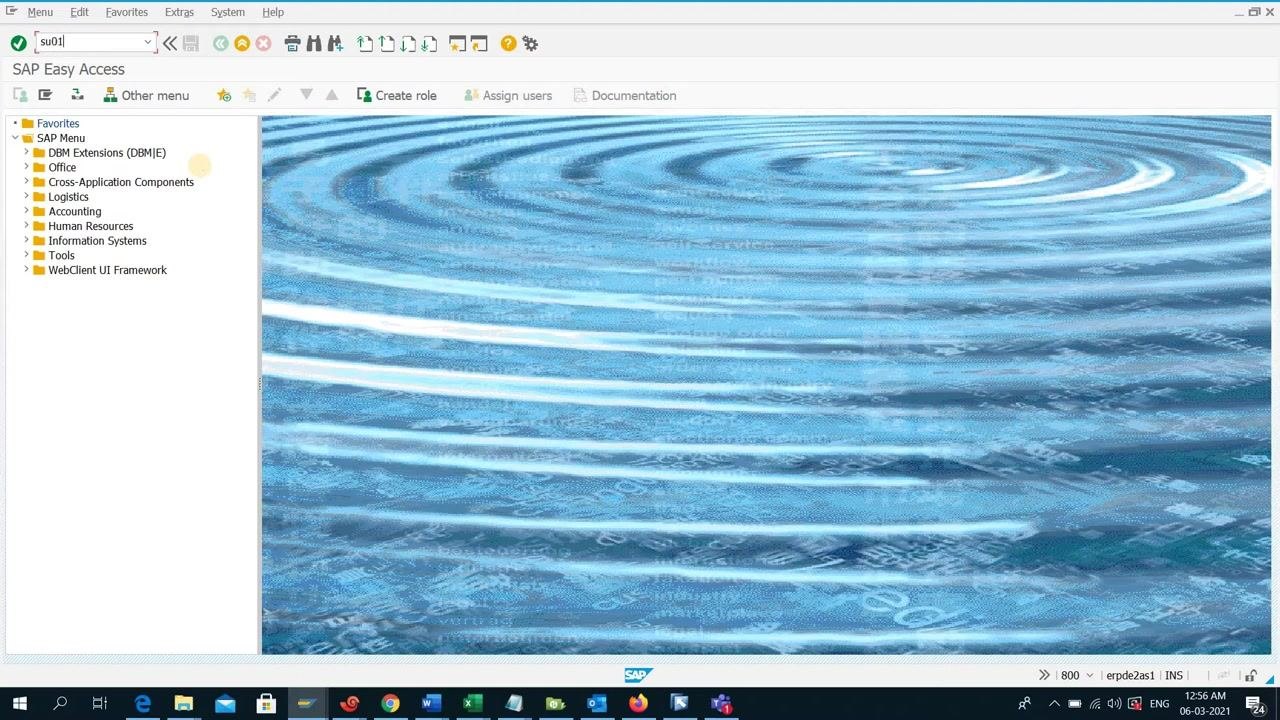
Once logged in, you see the SAP Easy Access screen. In the command field at the top, enter the transaction code SU01 and press Enter to proceed to the User Maintenance screen.
Create the user
Enter the new user ID
In the User Maintenance: Initial Screen, locate the User field and type the desired username for the new user — for example, test123. Make sure the username does not already exist in the system.
Create the user
The User Maintenance screen offers several buttons:
- Create: To create a new user.
- Change: To modify an existing user.
- Display: To view user details.
- Delete: To remove a user.
- Copy: To duplicate an existing user.
- Lock: To lock a user account.
- Change Password: To reset a user's password.
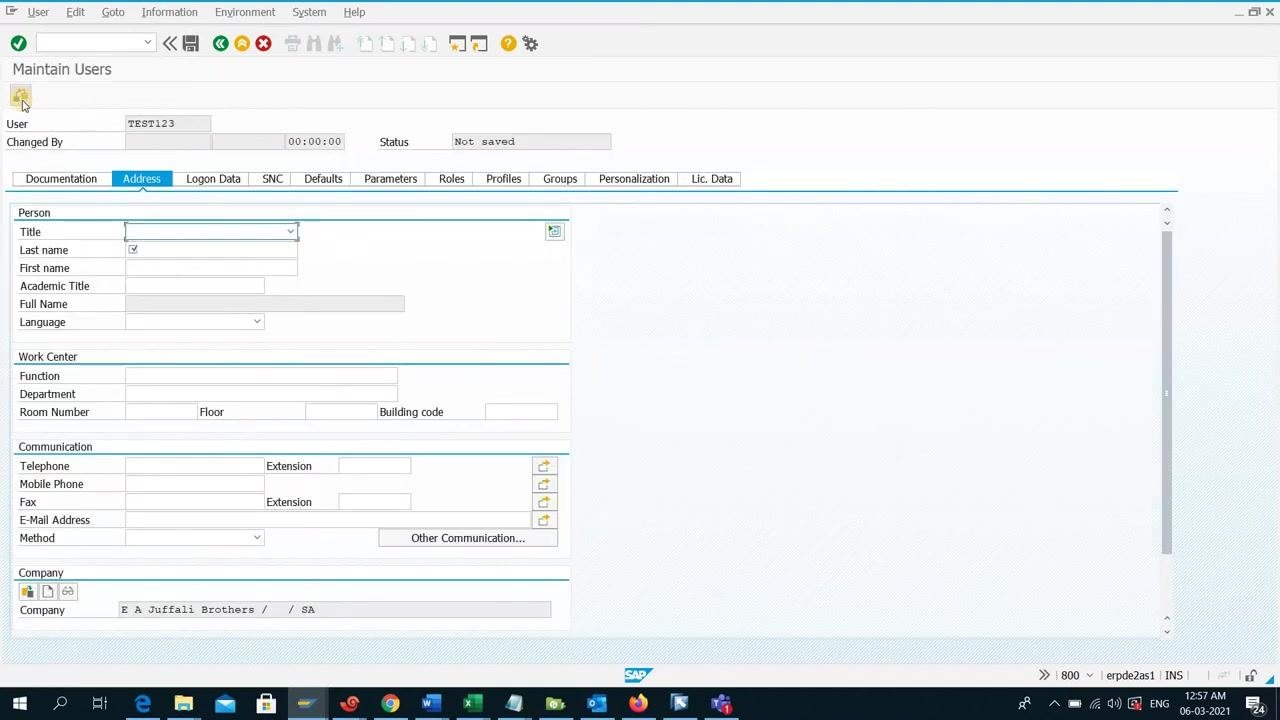
Click the Create button (the icon with a blank sheet). The Maintain Users screen appears, displaying multiple tabs and fields for user details.
Fill in mandatory and relevant fields
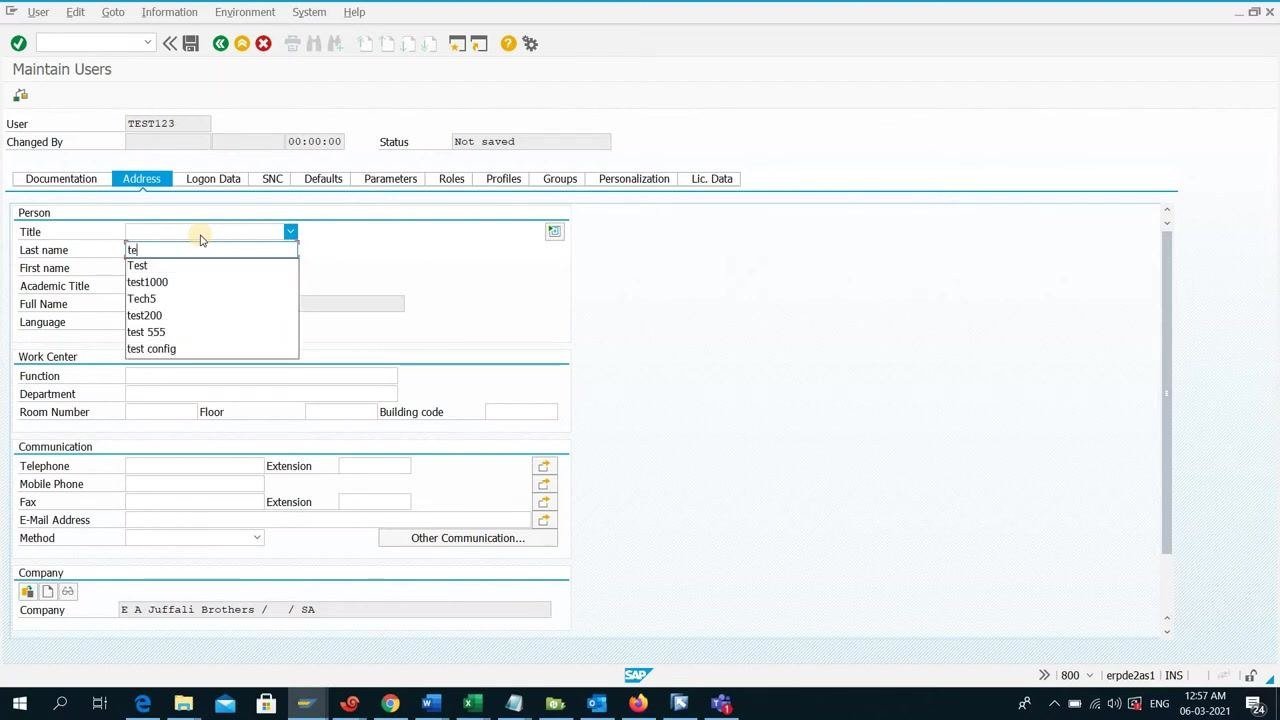
Under the Address tab, fill in the following:
- Last name: Enter
test(this field is mandatory). - First name: Enter
Test. - Company: If not already defined, select or enter the appropriate company (for example,
E A Juffali Brothers / SA).
You can also fill in additional fields as needed, such as Title, Academic Title, Language, Function, Department, Room Number, Telephone, Mobile Phone, Fax, and E-Mail Address.
Navigate to the Logon Data tab
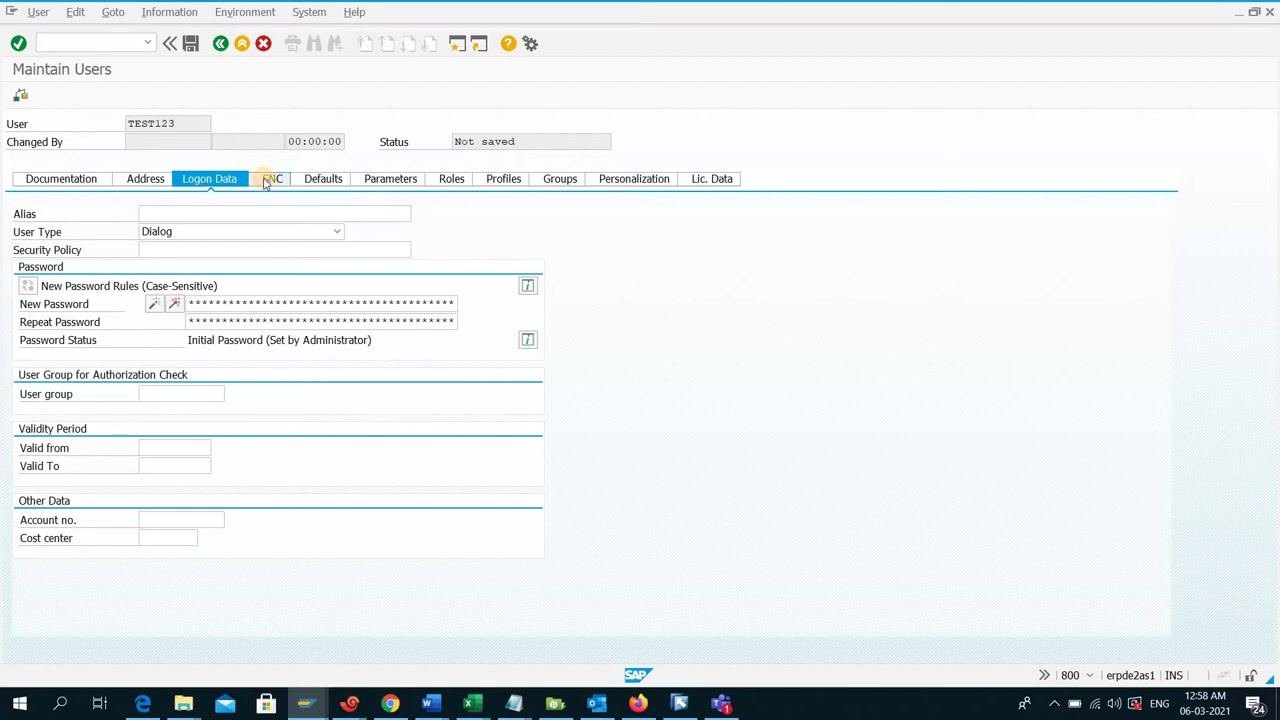
Click the Logon Data tab to configure authentication and access settings.
- In the User Type dropdown, select Dialog (the standard type for interactive users).
- Enter a password for the new user in the New Password and Repeat Password fields. The password must be at least 8 characters long, as required by SAP.
If the password is too short, a message appears: "Password is not long enough (minimum length: 8 characters)." Once a valid password is entered, the Password Status displays "Initial Password (Set by Administrator)."
Review SNC settings (optional)
The SNC tab lets you configure Secure Network Communications for single sign-on. Enter the SNC name if your organization uses SNC for authentication. This step is optional and can be configured later if not required immediately.
Set user defaults
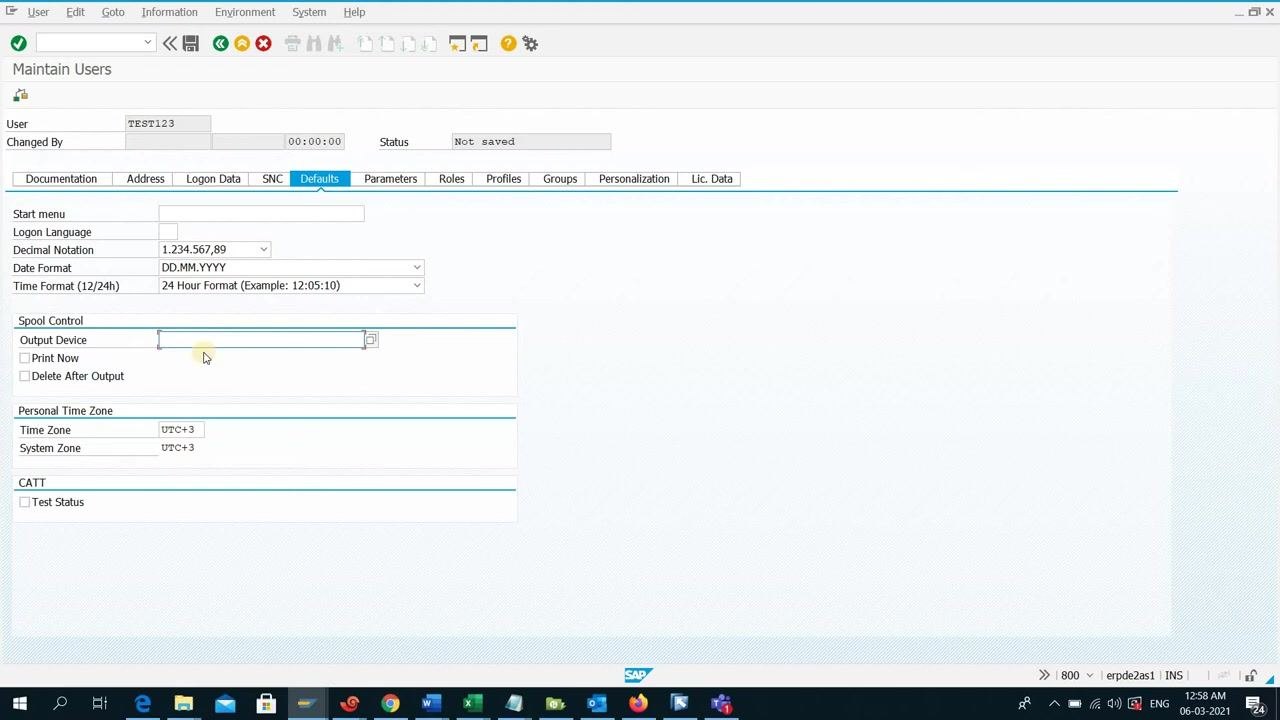
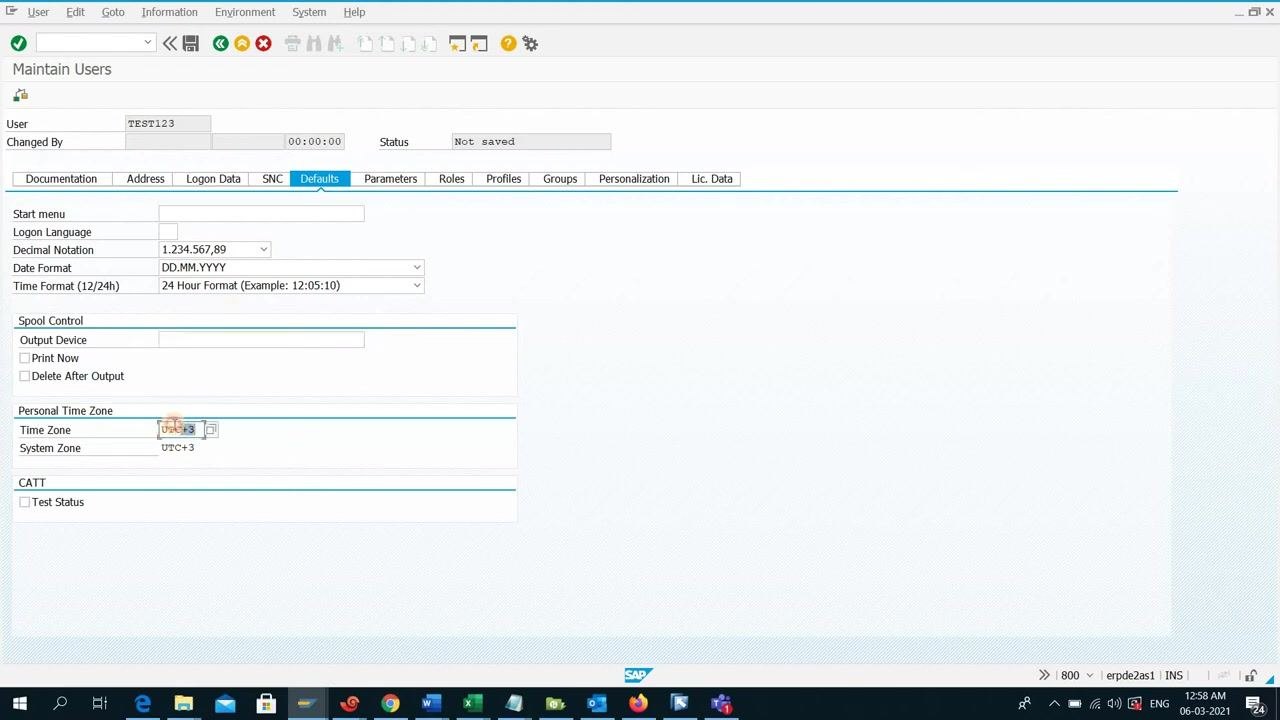
Click the Defaults tab to configure user-specific default settings. Fill in the following fields as needed:
- Logon Language: Set the default interface language (e.g., EN).
- Decimal Notation: Choose the preferred number format (e.g., 1.234.567,89).
- Date Format: Select the date format (e.g., DD.MM.YYYY).
- Time Format (12/24h): Choose between 24 Hour Format or 12 Hour Format.
- Output Device: Specify a default printer if required.
- Time Zone: Set the user's personal time zone (e.g., UTC+3).
- System Zone: Confirm or adjust the system time zone as needed.
These settings can be changed later if necessary.
Assign parameters (optional)
Click the Parameters tab if you need to assign specific parameters to the user. Enter parameter IDs and their corresponding values as required for the user's role or department. This step is optional and can be skipped if no parameters are needed.
Assign roles to the user
Click the Roles tab to assign one or more roles to the user. In the Role field, enter the appropriate role(s) that define the user's permissions and accessible transaction codes.
Roles are critical because they determine what the user can do in the SAP system. If no role is assigned, the user has no access to any transactions. You can also specify start and end dates for each role assignment if needed.
Note: Always complete all mandatory fields before saving the user. Assign at least one role to give the user the necessary access rights. Default and parameter settings can be updated later if requirements change.
Assign predefined profiles (optional)
Click the Profiles tab to view or assign predefined authorization profiles. You can assign a profile instead of a role if required. This step is optional and can be skipped if not needed.
Assign user groups (optional)
Click the Groups tab if you want to maintain user groups. Assign the user to one or more groups according to your organization's structure. This step is optional.
Configure personalization settings (optional)
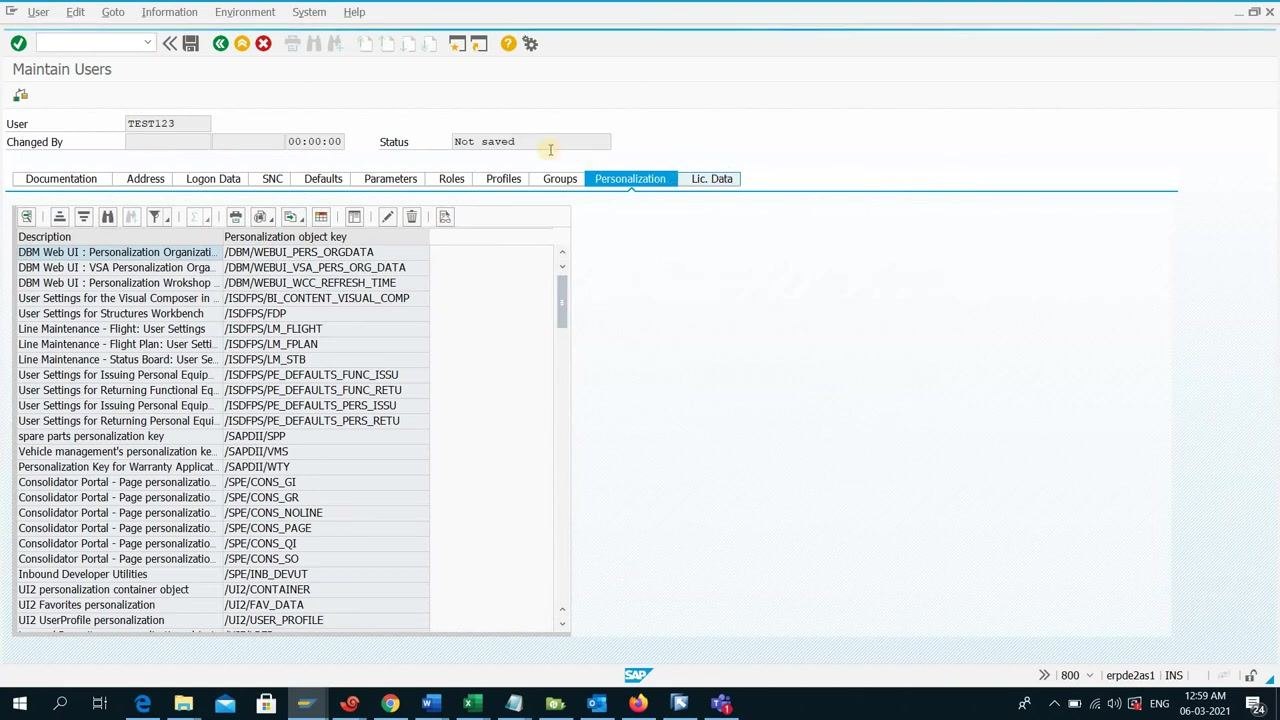
Click the Personalization tab to assign personalization objects. Select from the list of available personalization object keys (e.g., /DBM/WEBUI_PERS_ORGDATA, /ISDFPS/LM_FLIGHT). This is typically used for advanced user interface or workflow personalization.
Review license data (optional)
Click the Lic. Data tab if you need to enter or review license information for the user. This step is optional and can be configured later.
Save the new user
Once all required and desired information is entered, click the Save icon (diskette) in the toolbar. The Status field updates to "Saved," confirming the user has been created in the system.
Display the created user
After saving, you can display the user to review all entered details. The Display Users screen shows all tabs (Address, Logon Data, SNC, Defaults, etc.) with the saved information. Confirm that the user ID (e.g., TEST123), name, and other details are correct.
Log on with the new user
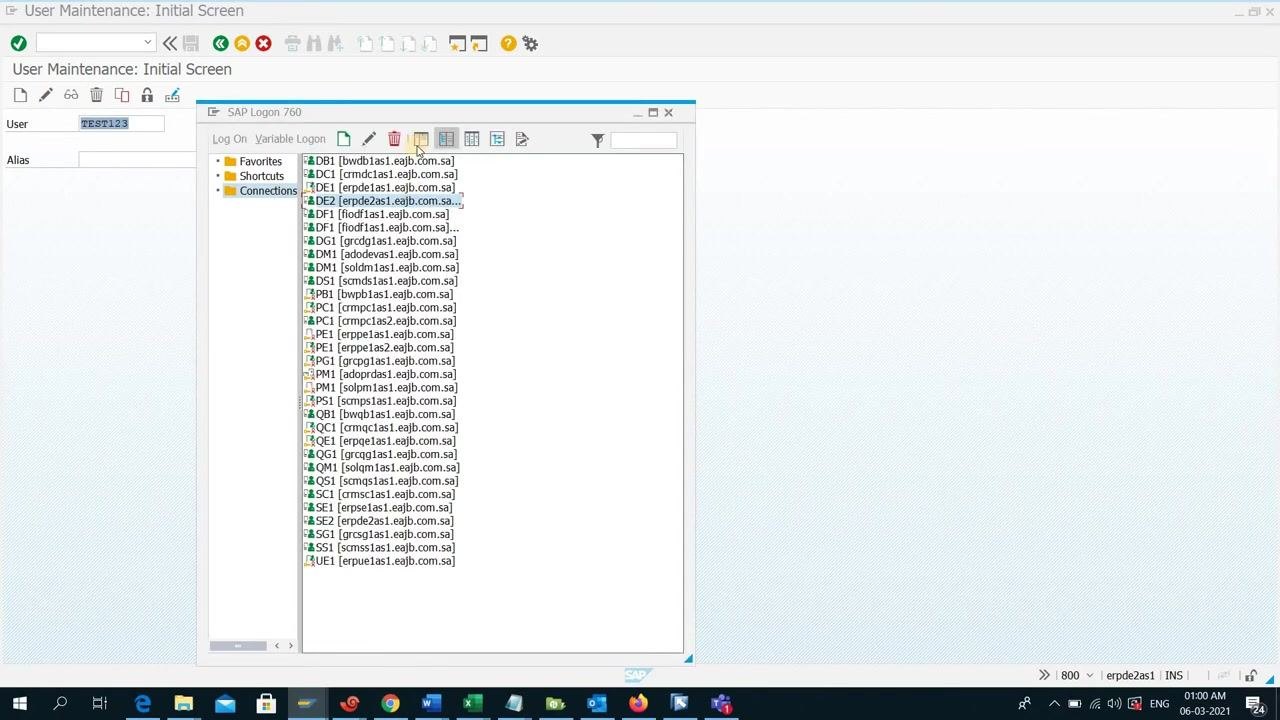
Open the SAP Logon pad or the user maintenance initial screen. Enter the new user ID (e.g., TEST123) in the User field. Select the appropriate SAP system connection from the list and proceed to log on.
On the first logon, SAP prompts the user to change their password:
- Enter a new password in the New Password and Repeat Password fields.
- Note that passwords are case-sensitive.
- Click the green checkmark to confirm and complete the password change.
Create a new role
Open the Role Maintenance transaction
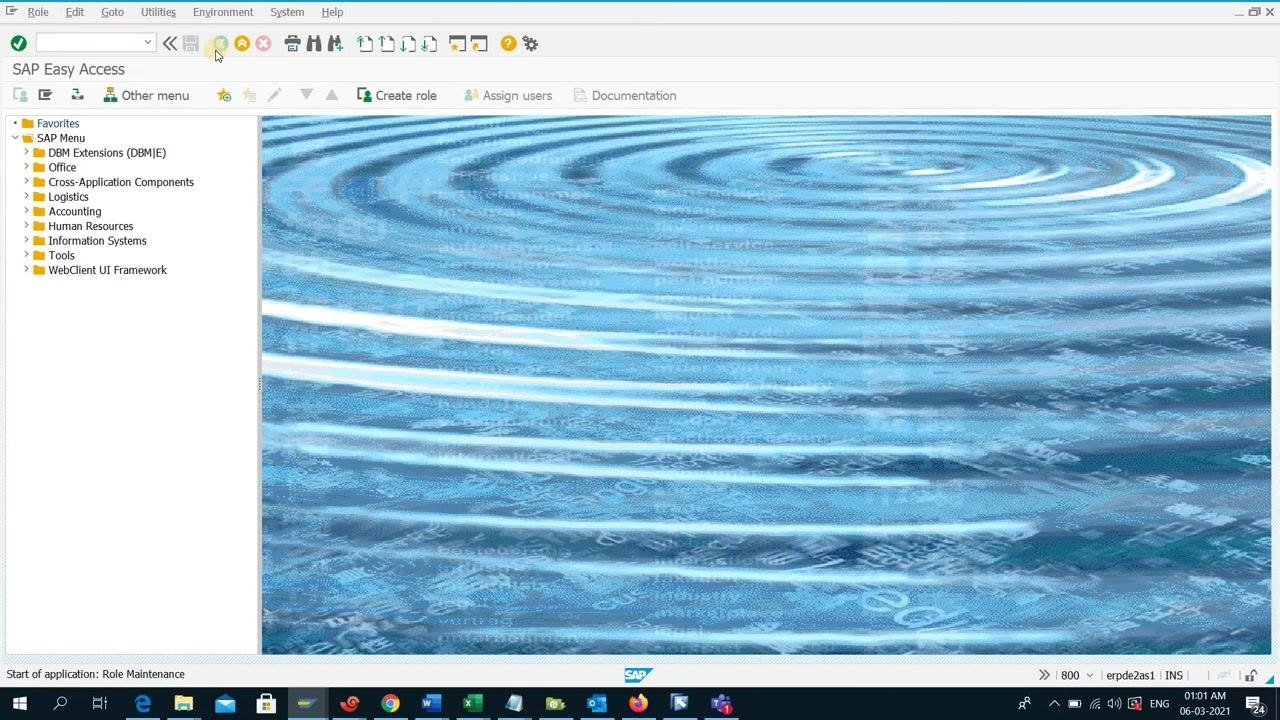
Enter the transaction code PFCG in the command field and press Enter. The Role Maintenance screen opens, with options to create a role, assign users, and view documentation.
Create a new role
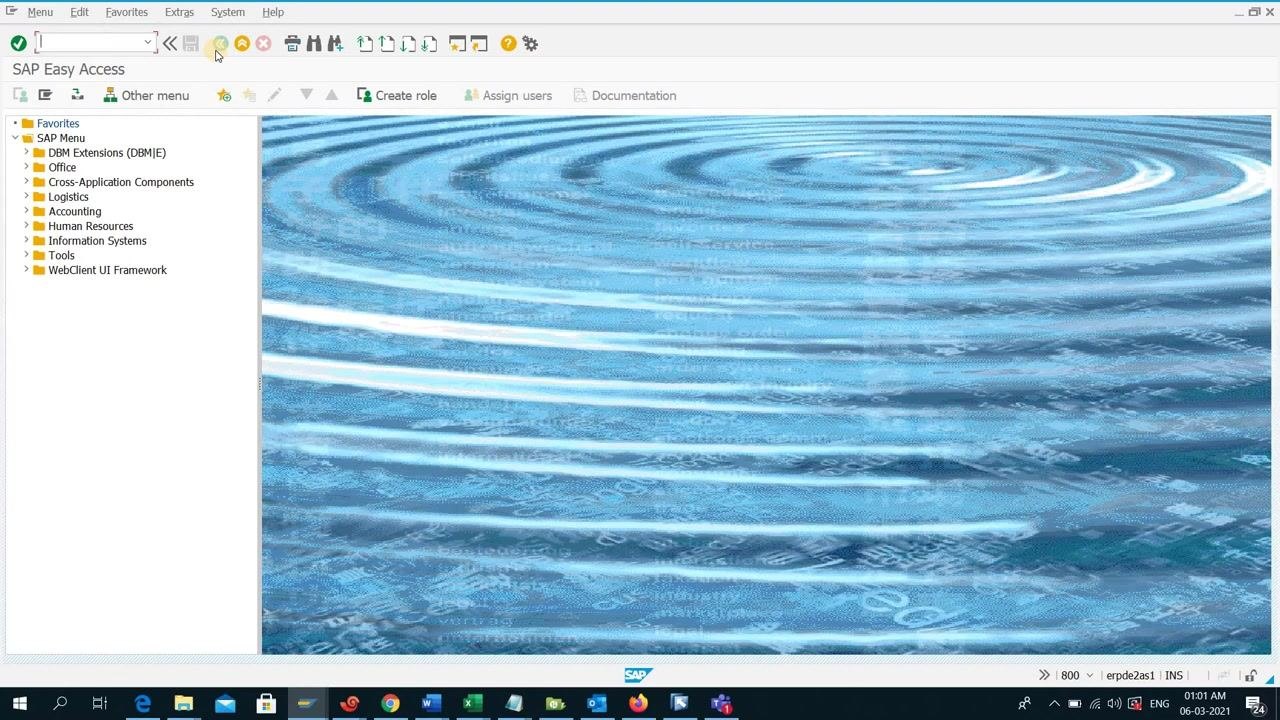
In the Role field, enter the role name Z_test123. Note that the role name is limited to 30 characters. The screen displays fields for Role, Short Description, and options for Single Role or Composite Role. The lower section shows that no favorites exist yet.
Create a single role and save it
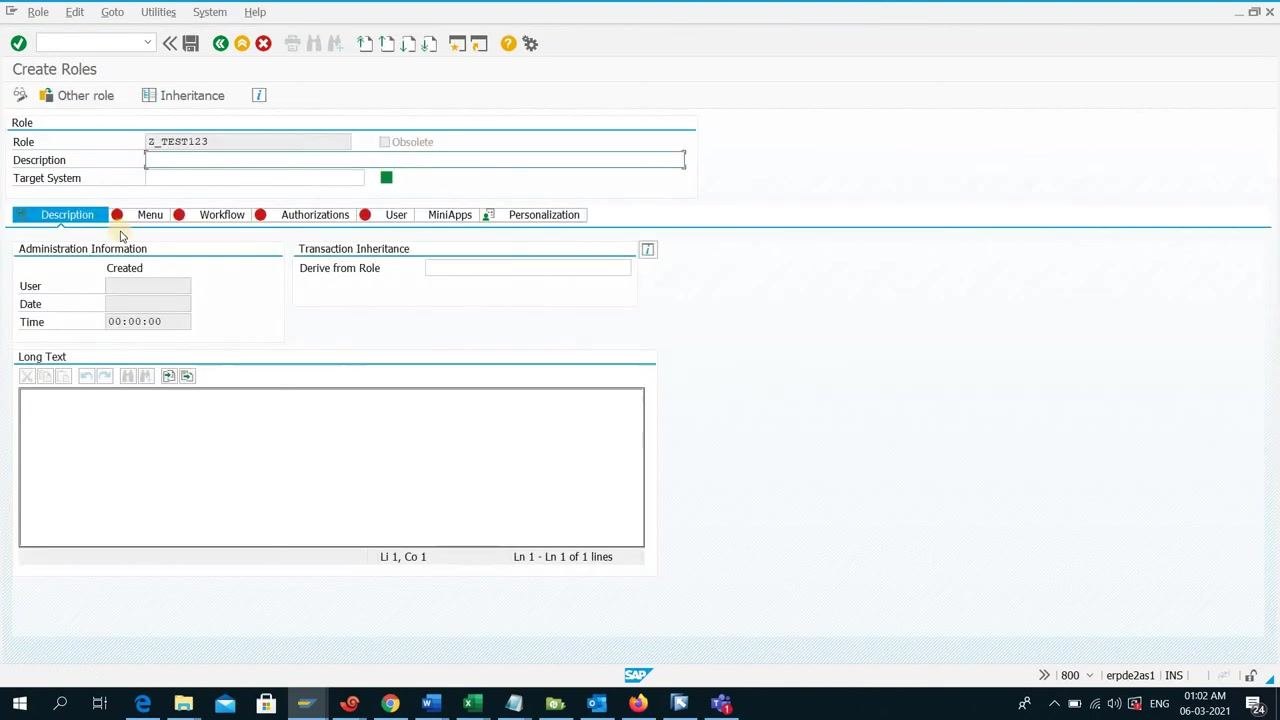
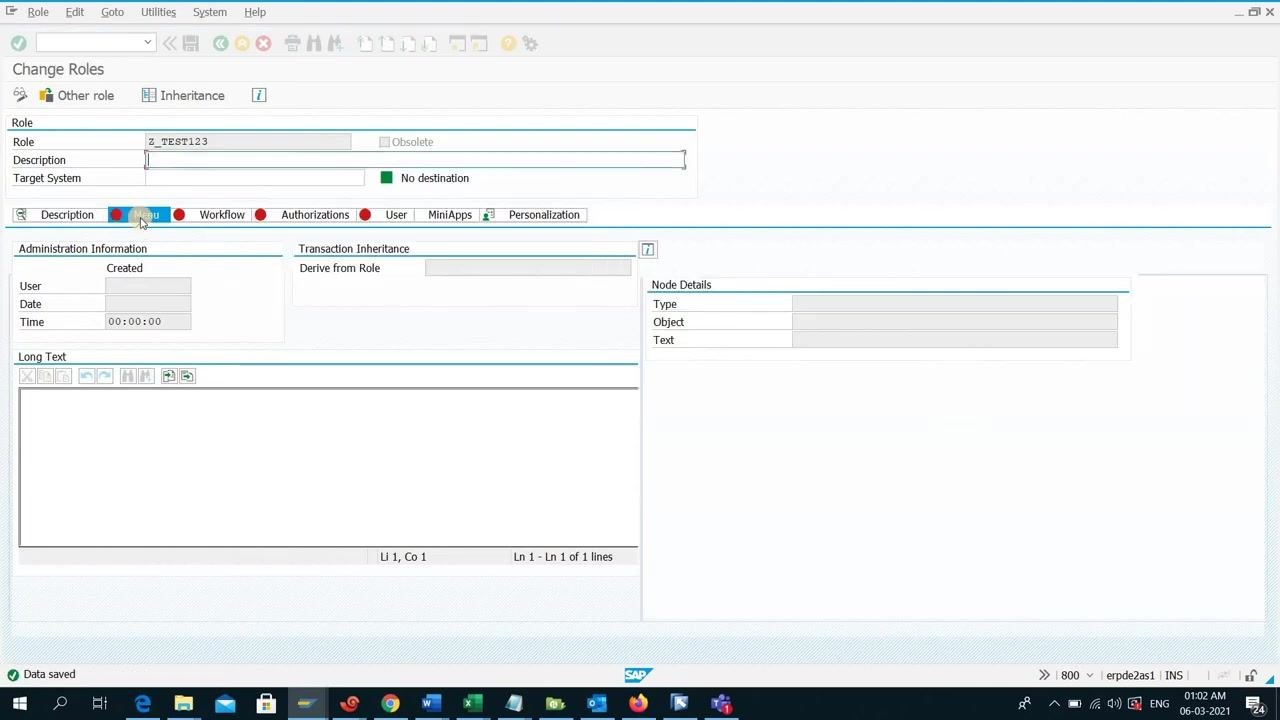
In the Create Roles screen, make sure the Role field is set to Z_TEST123. Leave the Description and Target System fields blank or fill them in as required. Click the Single Role option if prompted, then save the role to proceed.
Define the menu for the role
Click the Menu tab. This tab lets you specify which transaction codes the users assigned to this role can execute.
Add transaction codes to the role menu
In the Menu tab, click the Transaction button (the icon with a yellow highlight). The Assign Transactions dialog appears. Enter the transaction codes you want to authorize for this role, for example:
- SU01 (User Maintenance)
- PFCG (Role Maintenance)
Use the dropdown or type additional codes as needed, then click Assign Transactions to confirm.
Save the role and proceed to authorization data
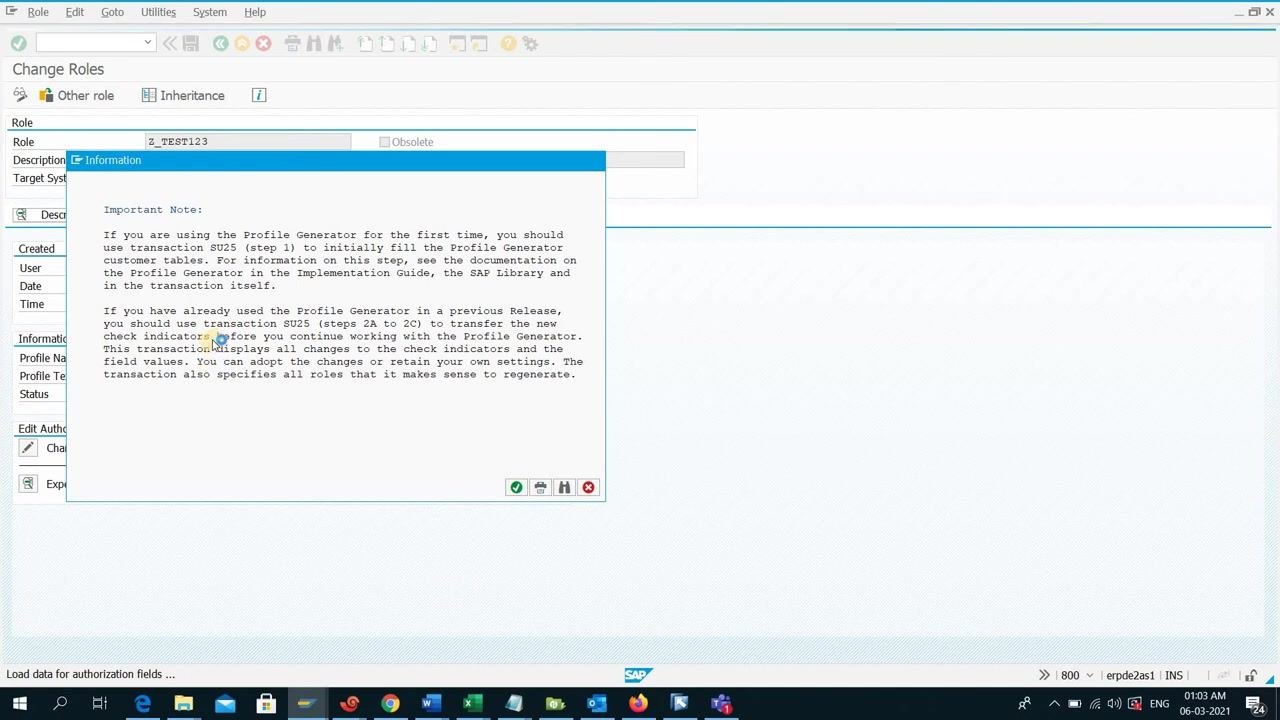
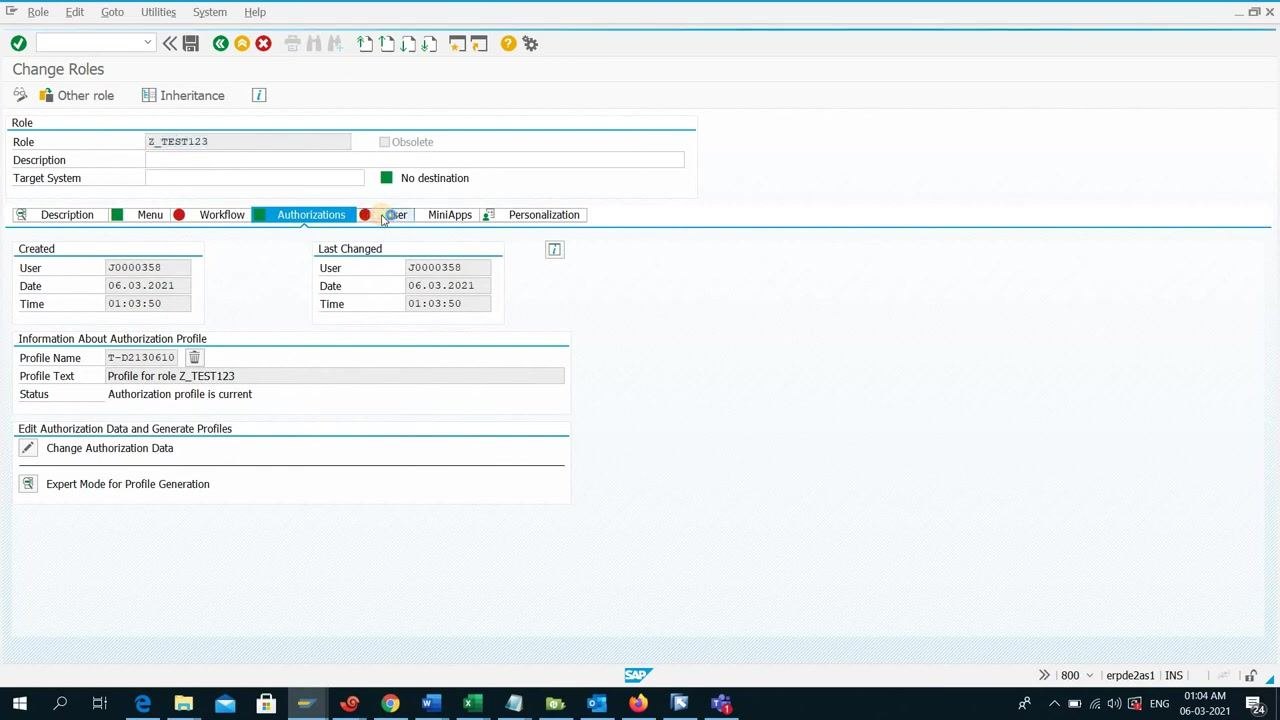
After assigning transactions, switch to the Authorizations tab. The screen displays sections for Created, Last Changed, and Information About Authorization Profile. Click Change Authorization Data to edit the authorization data for the role.
Handle organizational levels (if prompted)
If prompted with a Define Organizational Levels dialog, you may see fields such as "Plan Version." If you do not need to specify any values, leave the fields blank, then click Save to continue.
Generate the authorization profile
If a popup appears stating "Open org. levels exist. There are open authorizations," you have the following options:
- Click Generate to proceed with profile generation.
- Click Maintain if you need to adjust authorizations further.
- Click Cancel to abort.
For this guide, click Generate.
Assign the newly created role to a user
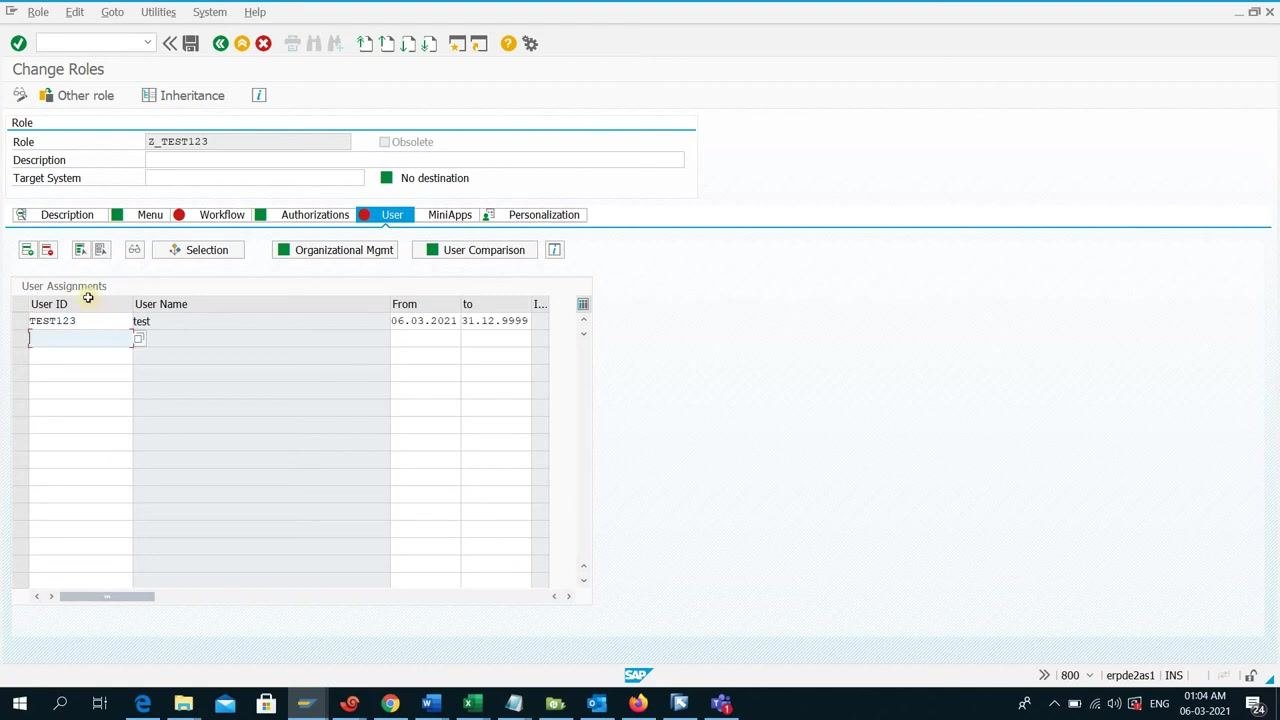
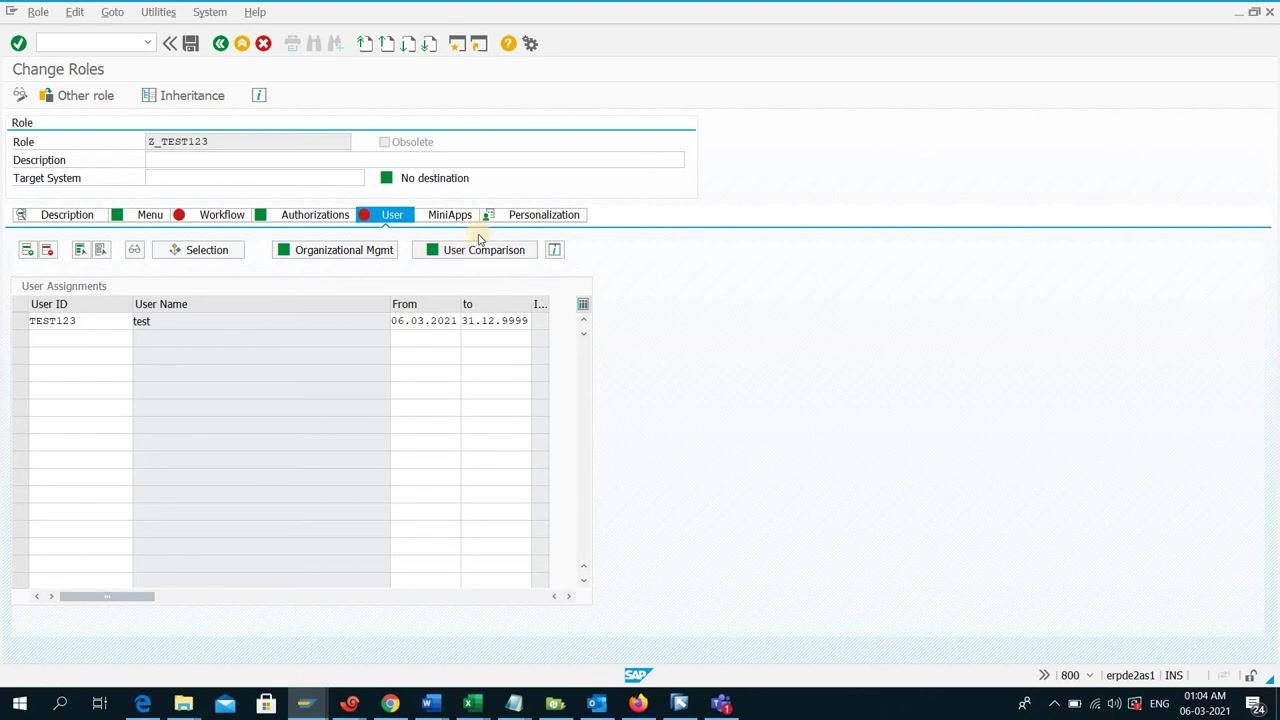
Click the User tab in the Change Roles screen. This prepares the interface for assigning the role Z_TEST123 to a specific SAP user.
At this point, you have defined the menu for the new SAP role, assigned transaction codes, and generated the authorization profile. Continue with the steps below to complete the user assignment.
Assign the role to the user and perform a user comparison
On the Change Roles screen, make sure you are on the User tab. Under User Assignments, verify that the User ID TEST123 and User Name test are listed. Click User Comparison to synchronize the role assignment with the user master record — this ensures the new authorizations become active for the user.
When prompted, click Yes to proceed with the user comparison, then close the dialog after the comparison completes. The role Z_TEST123 is now fully assigned to user TEST123.
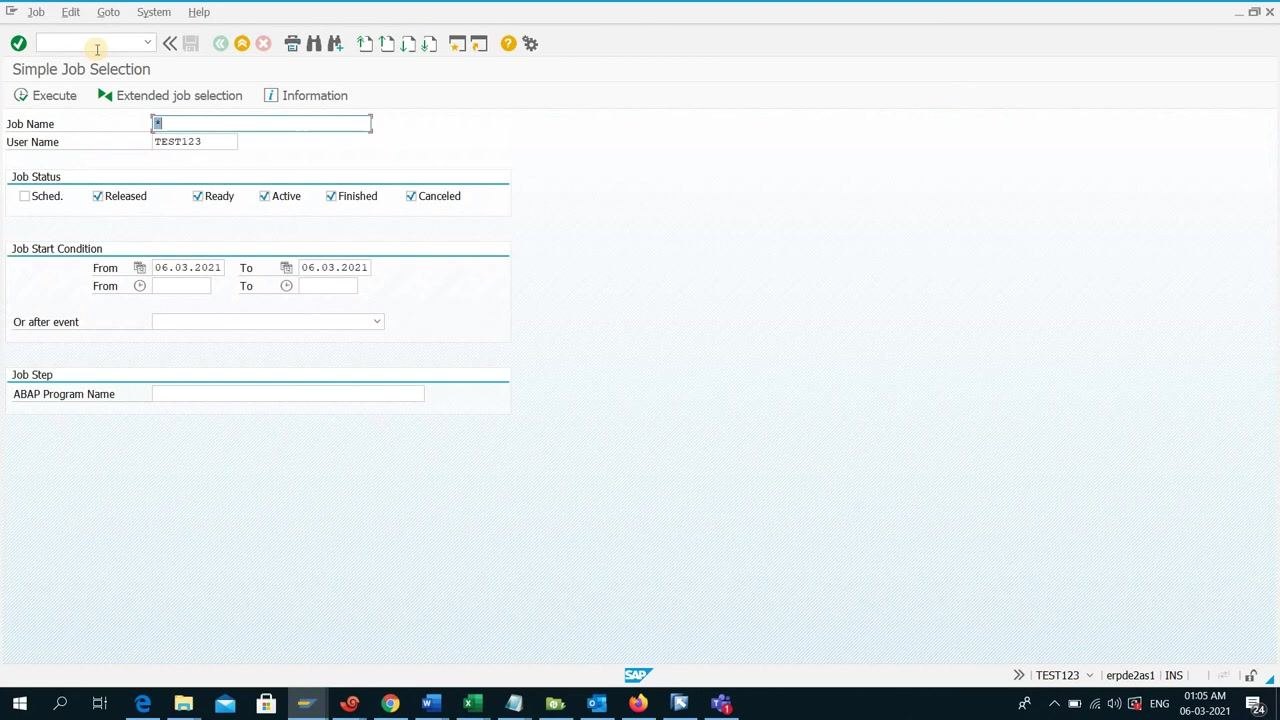
Enter and execute transaction code SU01
In the command field, type su01 and press Enter. If the role assignment was successful, the system grants access to the SU01 transaction.
Assign the SAP_ALL profile to a user
Open user maintenance for the new user
Navigate to the user maintenance transaction (e.g., SU01) and enter the username of the user you created (e.g., TEST123). The top of the screen displays "Maintain Users," and the user field shows "TEST123." Tabs such as Documentation, Address, Logon Data, SNC, Defaults, Parameters, Roles, Profiles, Groups, Personalization, and Lic. Data are visible. With the Address tab selected, you can see the user details (Last name: test, Full Name: test, Company: E A Juffali Brothers / SA, etc.).
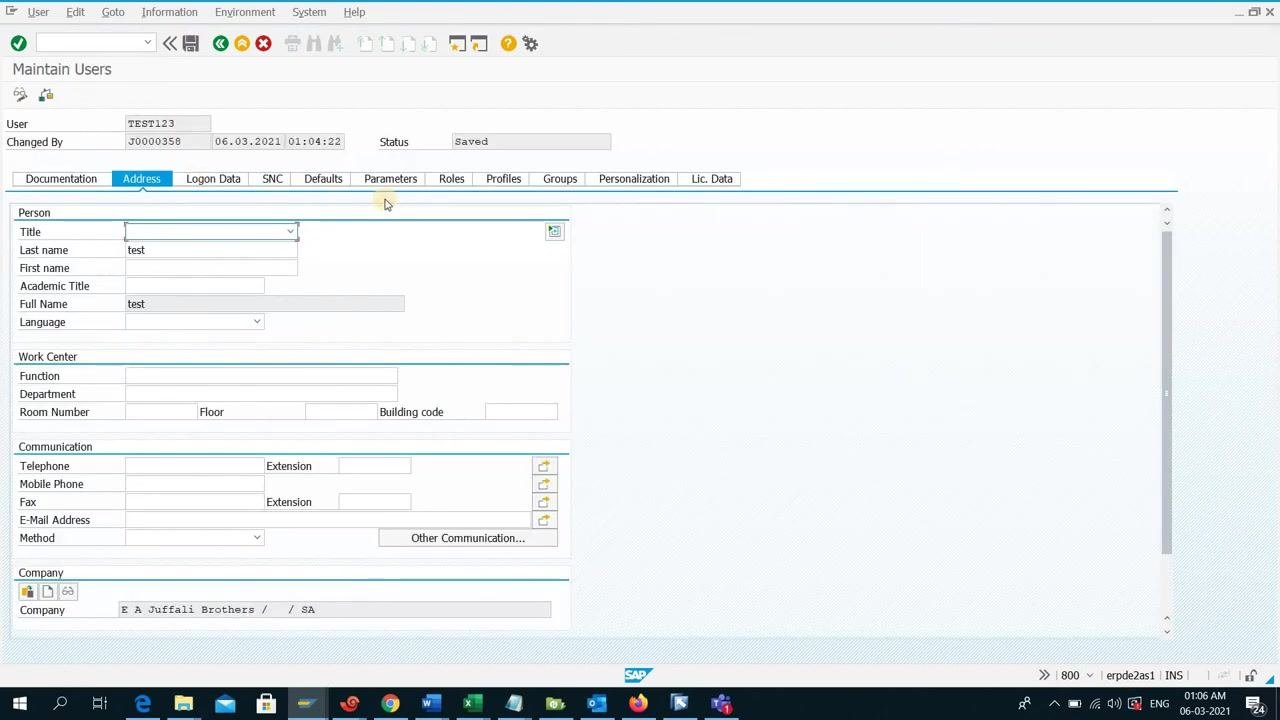
Assign the SAP_ALL profile
Click the Profiles tab to manage authorization profiles for the user. In the Assigned Authorization Profiles section, add the profile SAP_ALL. This profile grants all SAP system authorizations. The list should now include:
- T-D2130610: Profile for role Z_TEST123
- SAP_ALL: All SAP System authorizations
Save the changes
Click the Save button to save the changes to the user profile. The user field still displays TEST123, and the status updates to "Revised."
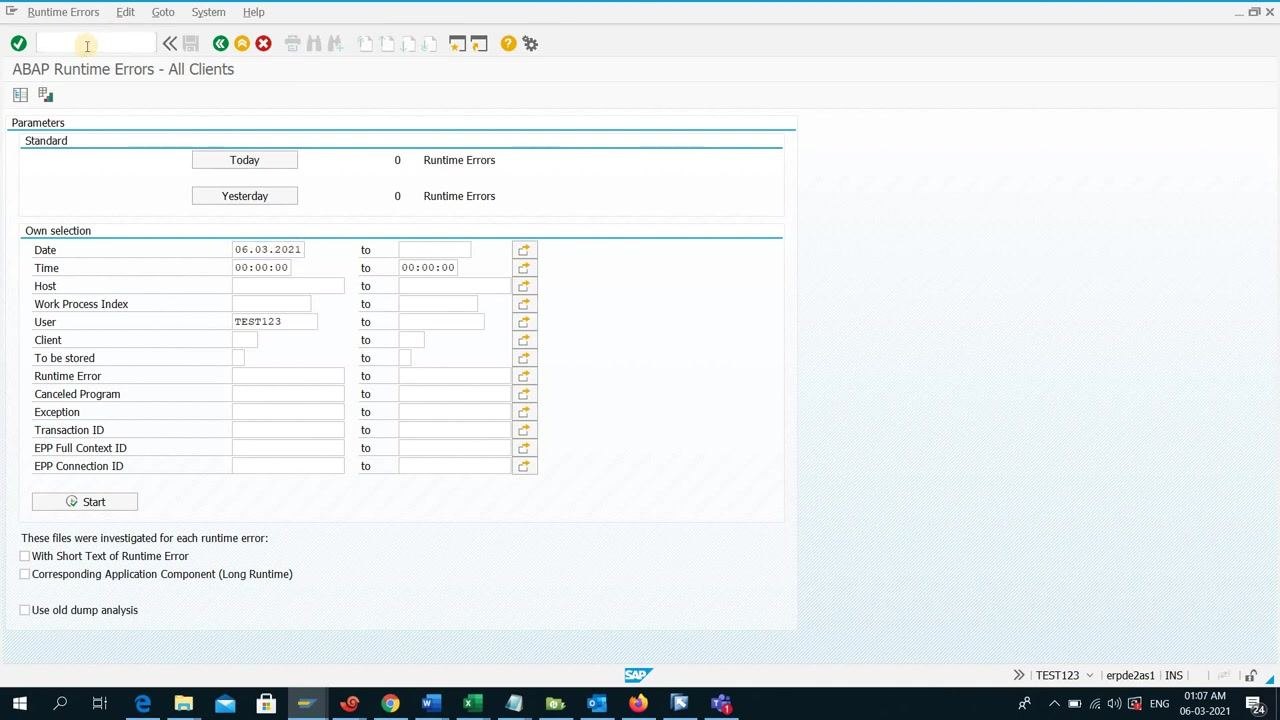
Test the new authorizations
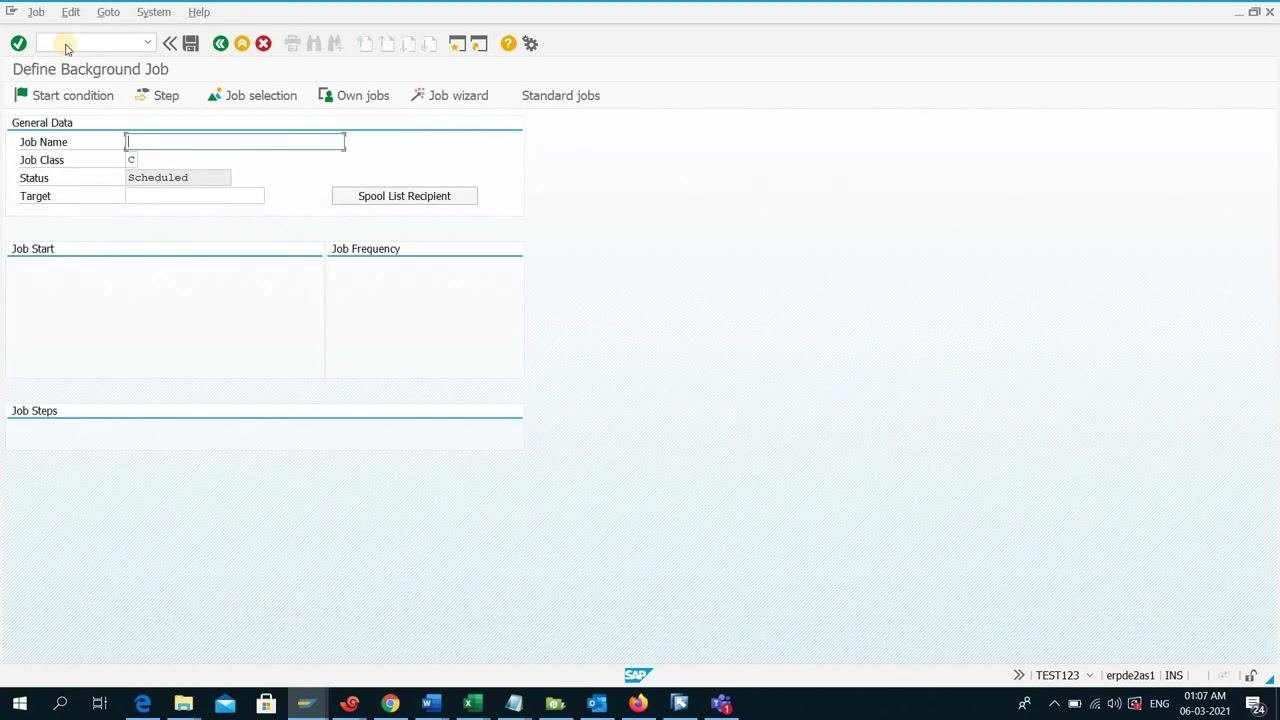
Log in as the user (TEST123) and execute a transaction code (e.g., SM36) to test the new authorizations. Enter the transaction code in the command field and execute it. The ABAP Runtime Errors screen appears, indicating access to the transaction, and displays parameters for runtime error analysis with the user field set to TEST123.
By completing these steps, you have assigned the SAP_ALL profile to a user, granted access to all SAP system authorizations, and verified the access by executing a transaction code.
Test access to a functional transaction code
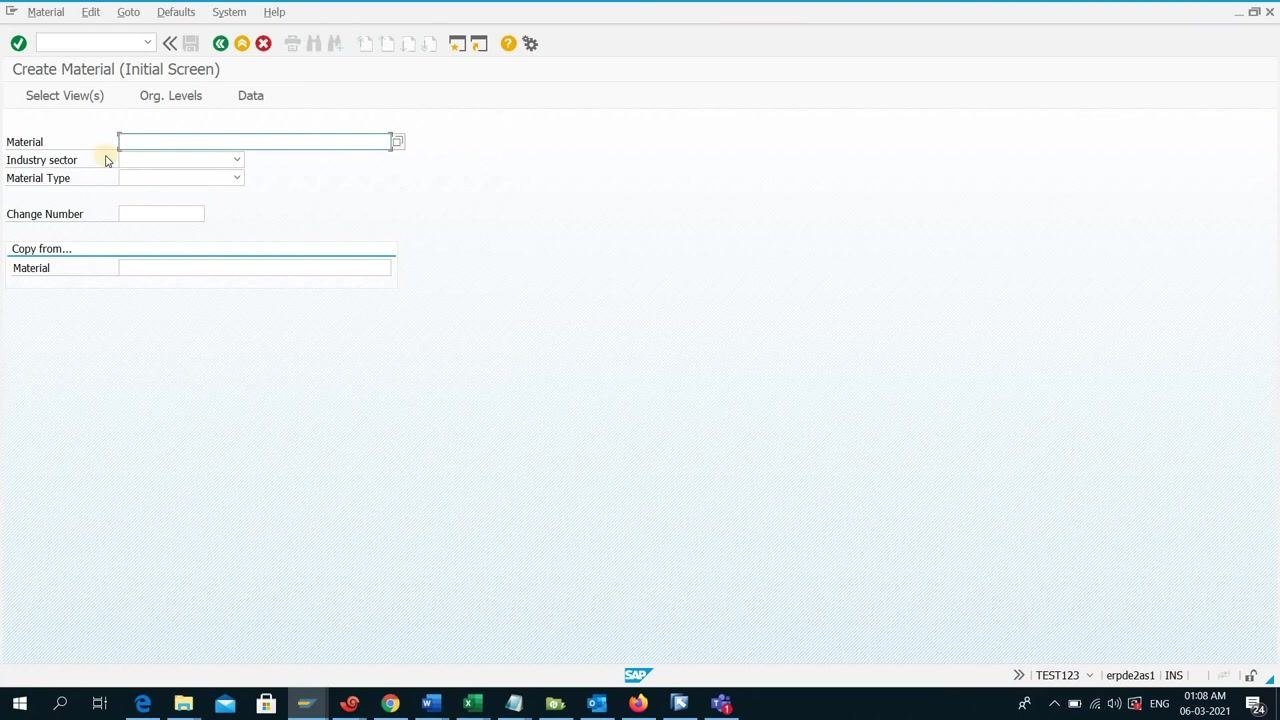
Confirm access to a transaction such as MM01
While logged in as the user (e.g., TEST123), enter the transaction code MM01 in the SAP command field and execute it. If a background job transaction (e.g., SM36) was tested previously, the "Define Background Job" screen may appear first. This screen displays fields such as Job Name, Job Class (set to "C"), Status (Scheduled), Target, Spool List Recipient, Job Start, Job Frequency, and Job Steps.
The Create Material (Initial Screen) then appears, with the following fields visible:
- Material (input field)
- Industry sector (dropdown)
- Material Type (dropdown)
- Change Number (input field)
- Copy from... Material (input field)
Tabs at the top include Select View(s), Org. Levels, and Data. Reaching this screen confirms that the user has the necessary authorization to execute MM01.
Summary
You have now created a new SAP user with SU01, configured their logon data and defaults, created and assigned a custom role through PFCG, and granted the SAP_ALL profile for full authorization. Finally, you verified the user's access by successfully executing both background job and functional transactions (SM36 and MM01).
Generation details: cost, quality tiers
Docsie billed 6,500 credits ($4.55) to analyze this 13-minute video at standard quality. The rewrite, template fill and Word/PDF exports were included. The same video at each quality tier:
| Quality | Frames sampled | Credits | Approx. cost |
|---|---|---|---|
| Draft | every 16-30 s | 3,250 | $2.27 |
| Standard (this guide) | every 8-15 s | 6,500 | $4.55 |
| Detailed | every 4-7 s | 13,000 | $9.10 |
| Ultra | every 1-3 s | 26,000 | $18.20 |
Credits priced at $0.70 per 1,000; plans include a monthly allowance. Enterprise customers on on-premise or bring-your-own-model deployments run this on their own inference and pay no per-video credits.
Generated by Docsie Video-to-Docs on 2026-10-11 from a 12-minute video. Screenshots are frames from the source video and belong to their creator, The SAP Basis, whose original is embedded above. If you own this video and want the guide removed or credited differently, contact us and we will act within one business day.