
How to Terminate an Employee in Paylocity
This guide explains how to terminate an employee in Paylocity, covering the full separation process from locating the employee record to submitting the request for approval. Following these steps ensures a complete and compliant employee separation, including proper documentation, approval routing, and management of system access.
Video: How to Separate an Employee in Paylocity Using an Employee Action Form by HR SSPRD (2021). All credit for the demonstration goes to the creator; watch the original on YouTube. The written guide below was generated from this video by Docsie. Creator? Request a change or removal.
This guide explains how to terminate an employee in Paylocity, covering the full separation process from locating the employee record to submitting the request for approval. Following these steps ensures a complete and compliant employee separation, including proper documentation, approval routing, and management of system access.
Prerequisites
Before you begin, make sure you have the following:
- Access to the HR & Payroll section of Paylocity.
- The employee's name or Employee ID for the search.
- The termination date and the reason for separation.
- Any supporting documentation, such as a resignation letter, email, or printed text message from the employee.
Finding the employee record
Navigate to Employee Search
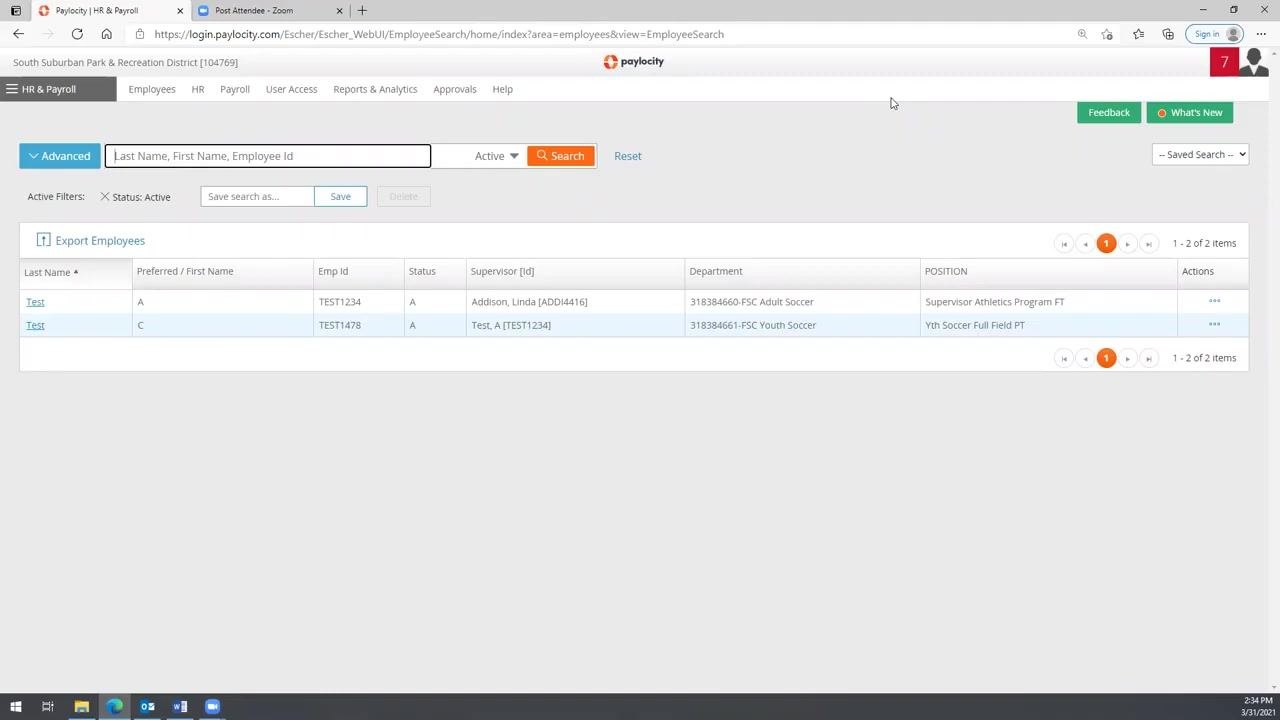
Open the HR & Payroll section of Paylocity and confirm you are on the Employee Search page. Here you will see a list of employees with columns for Last Name, Preferred/First Name, Emp ID, Status, Supervisor, Department, Position, and Actions.
Locate the employee you wish to separate
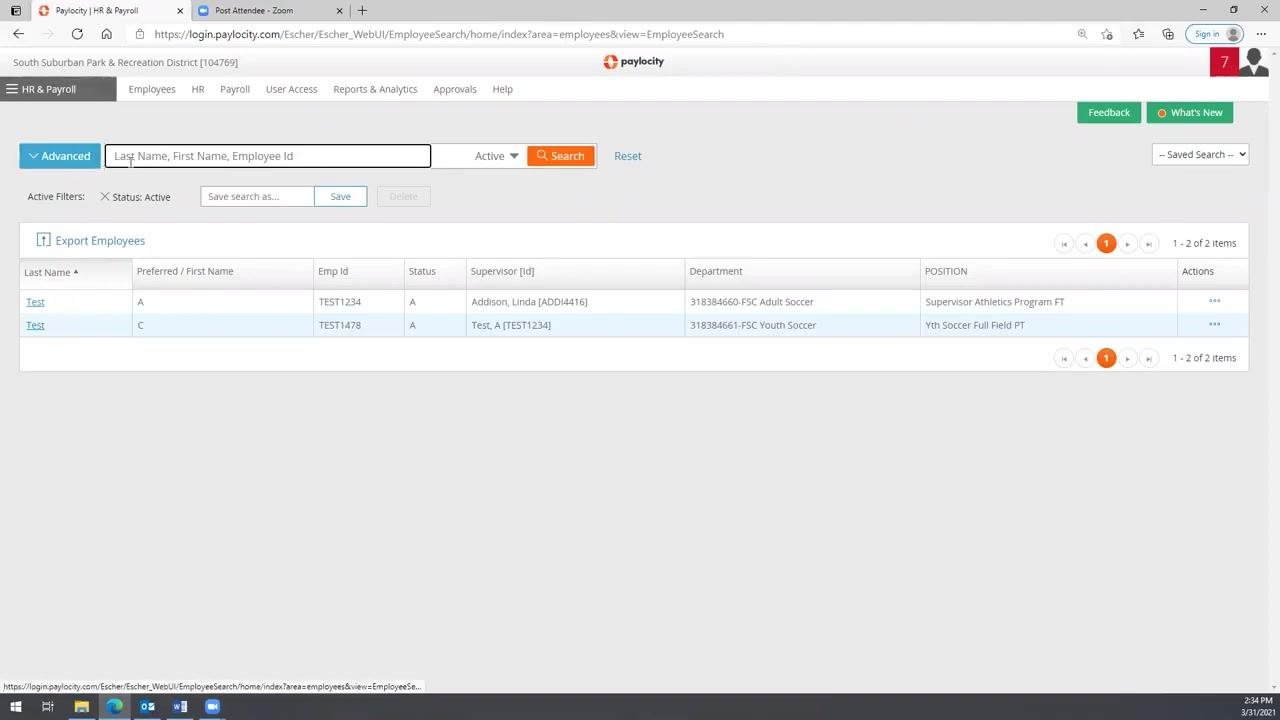
Use the search bar at the top to search by Last Name, First Name, or Employee ID. If your employee list is short, you can also find the employee visually in the table. In this example, the employee "Test C" (Emp ID: TEST1478) is selected.
Open the Employee Action Form
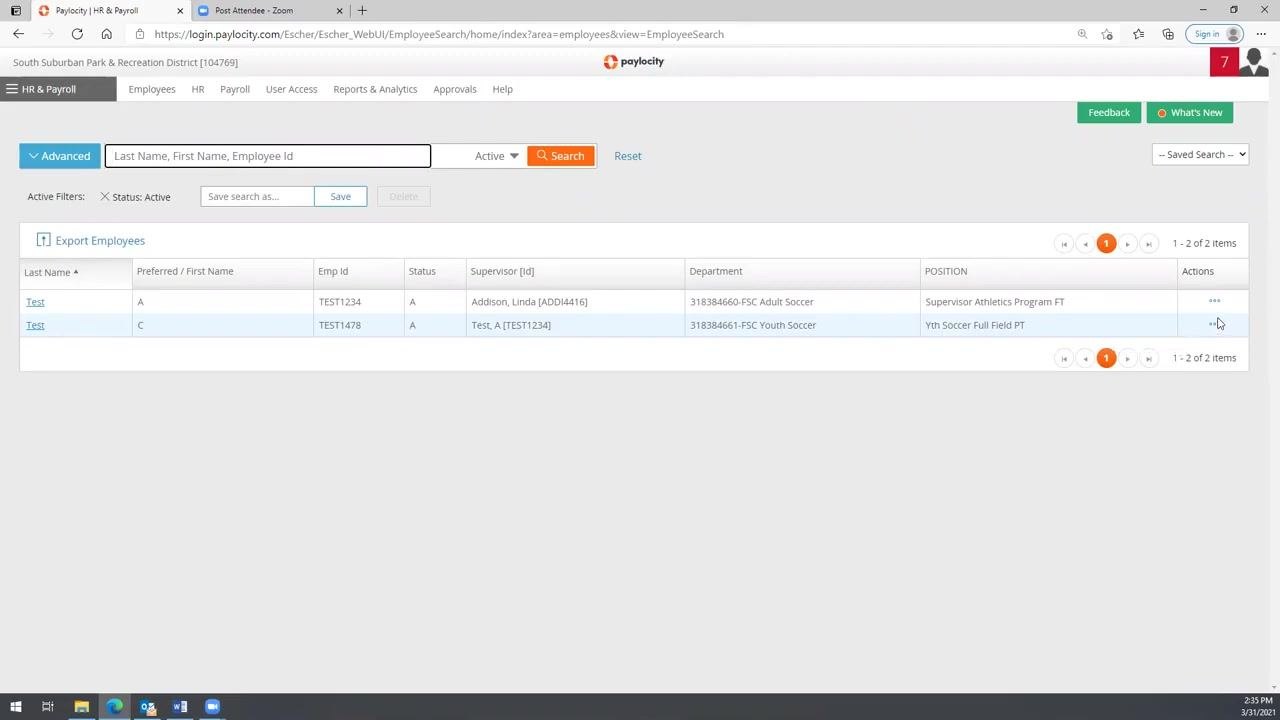
In the Actions column on the right side of the employee row, click the three vertical dots ("...") to open the actions menu. Select Employee Action Form from the dropdown menu.
Entering the separation details
Select the HR Action
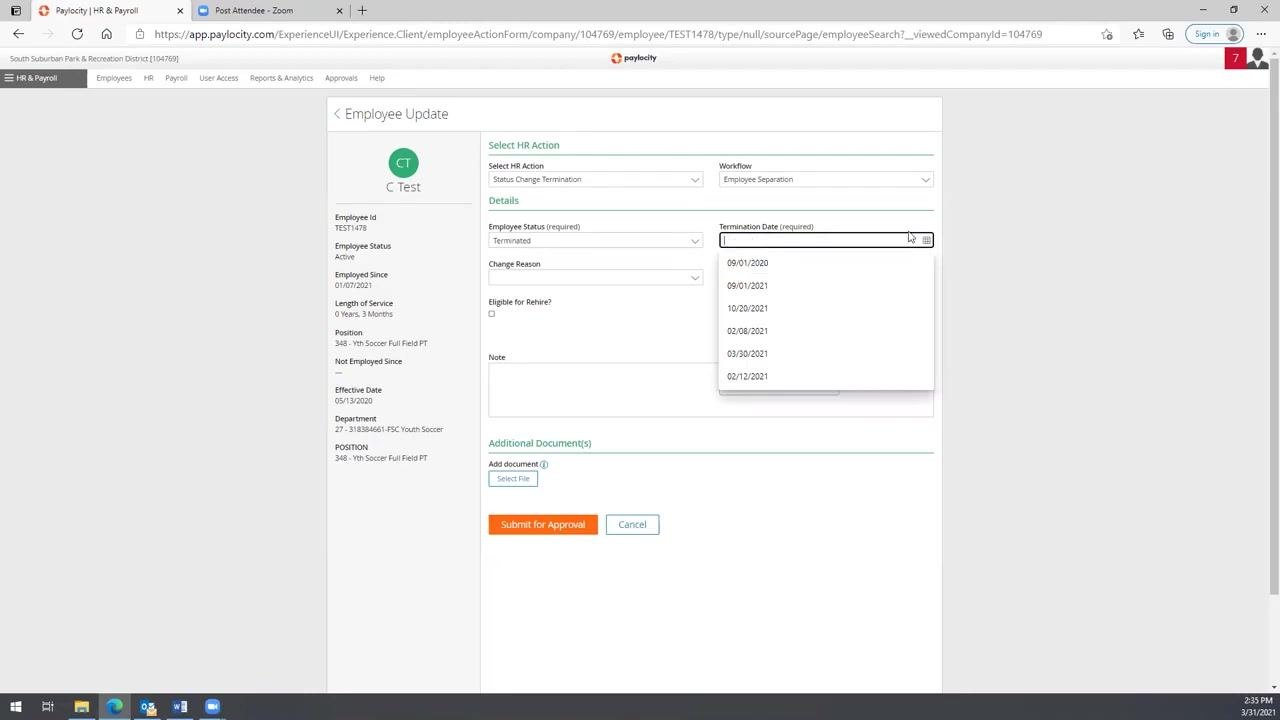
In the Employee Update window, set Select HR Action to Status Change Termination. Confirm that the Workflow field automatically updates to Employee Separation.
Set the employee status and termination date
Set Employee Status to Terminated. Enter the Termination Date—for example, 03/31/2021—either by typing it directly or selecting it from the calendar picker.
Review the auto-populated fields
After entering the termination date, two fields will populate automatically:
- Begin Check Date, based on the termination date (for example, 04/15/2021 - Bi-Weekly). Do not change this value.
- User Access End Date (for example, 05/01/2022), which is the last date the employee can log in to Paylocity to retrieve pay stubs and access their W-2.
Select the reason for separation
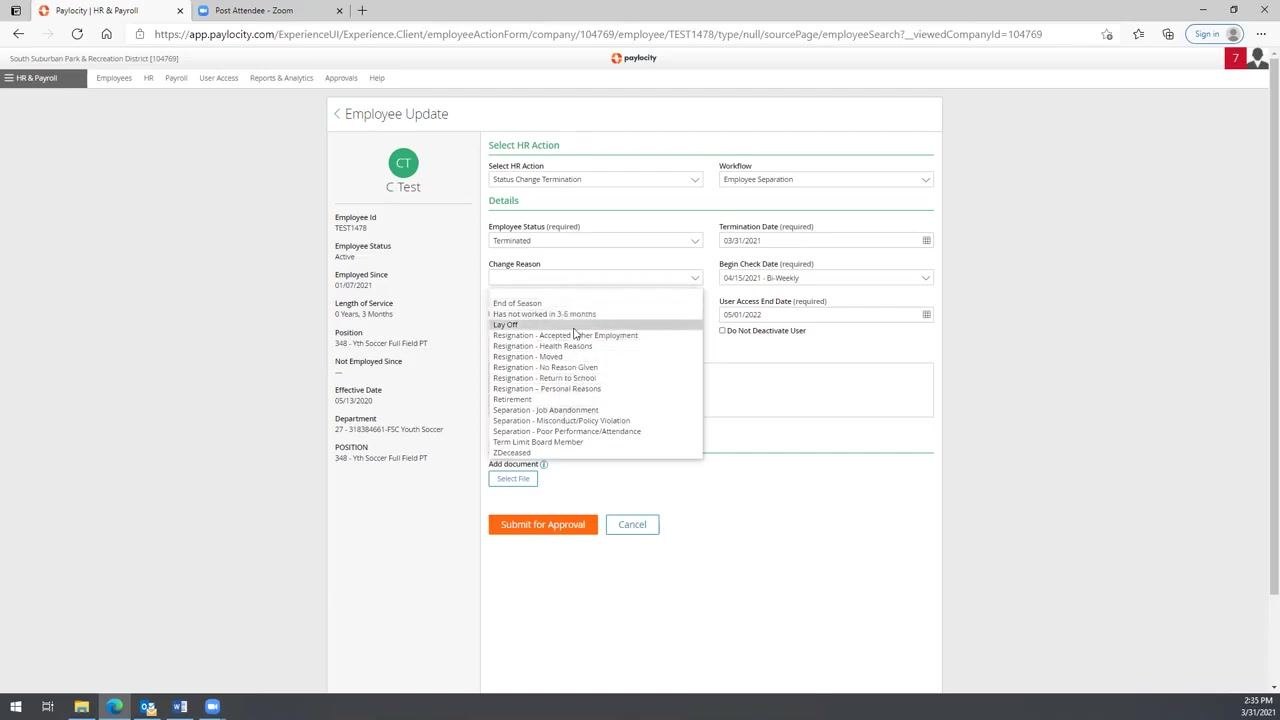
Click the Change Reason dropdown and choose the appropriate reason, such as "End of Season." Other available options include various resignation and separation reasons, such as Lay Off, Resignation - Accepted Other Employment, and Separation - Job Abandonment.
Set rehire eligibility
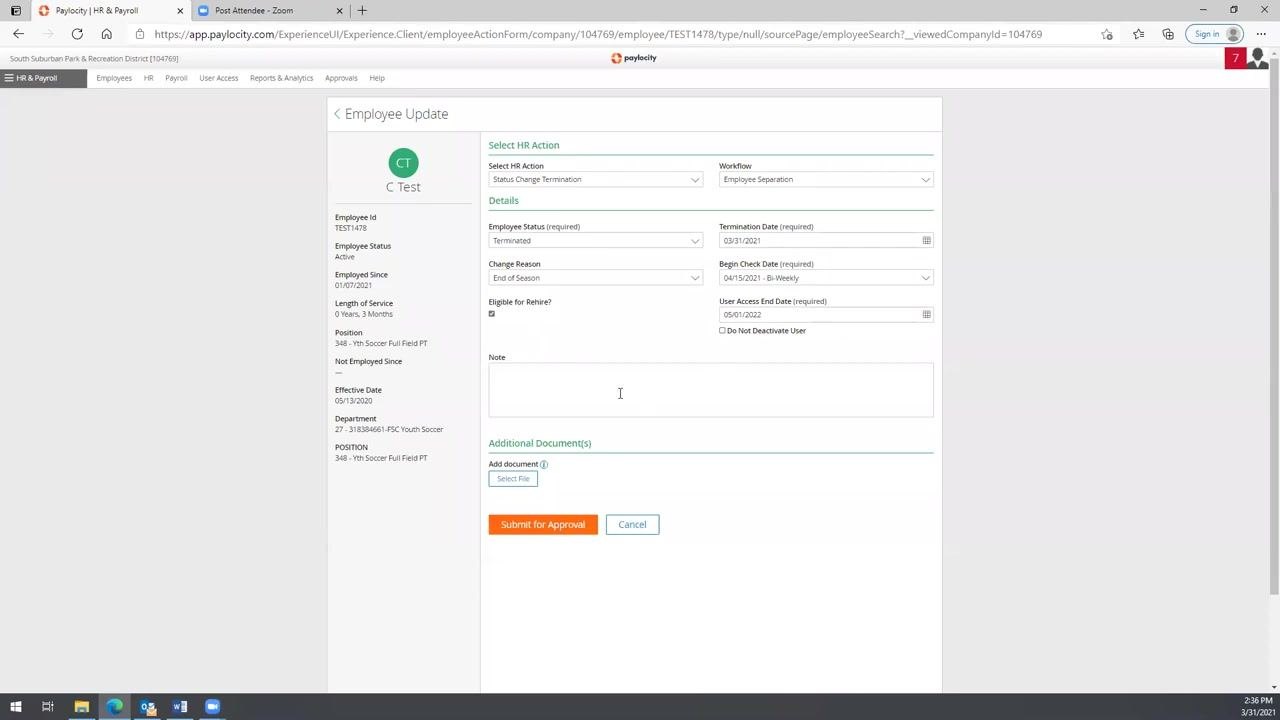
Under the Details section of the Employee Update form, check the Eligible for Rehire? box if the employee qualifies for rehire. If not, leave the box unchecked.
Add notes
Enter any relevant notes in the Note field. Keep in mind that notes are accessible to other HR personnel, so ensure the content remains professional and appropriate.
Upload supporting documentation
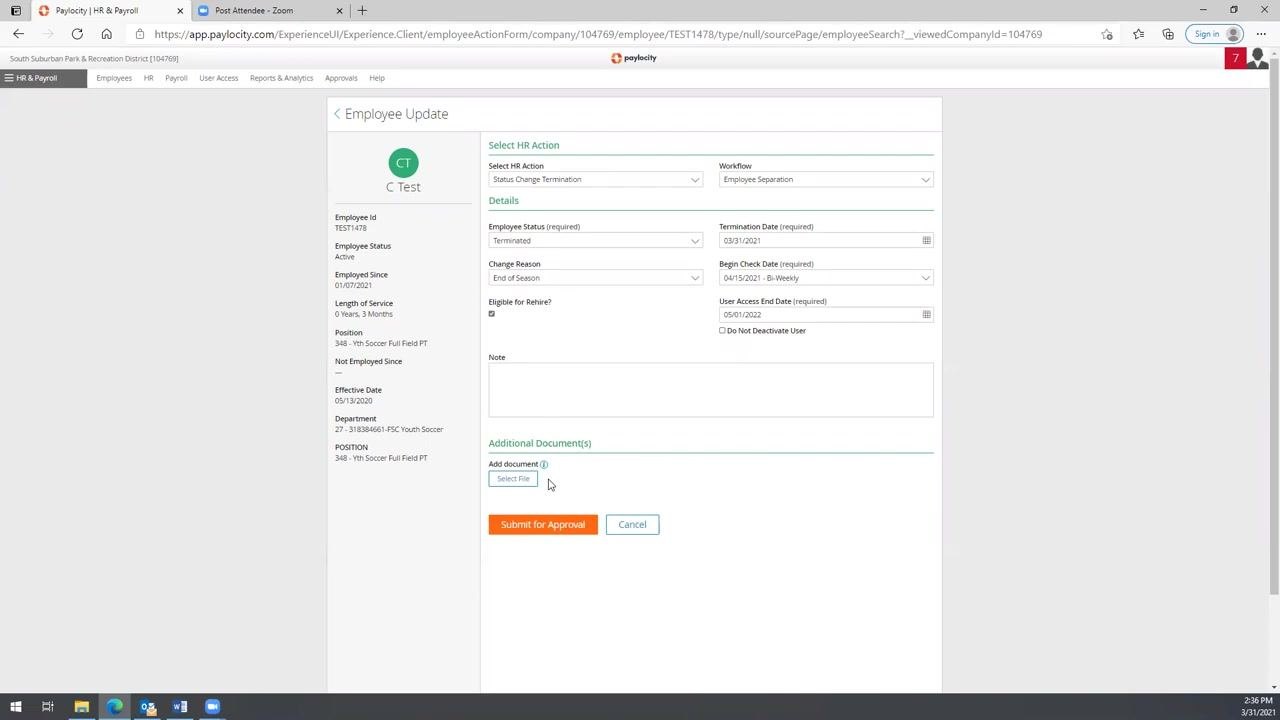
If you have supporting documentation—such as a resignation letter, email, or printed text message from the employee—click Select File under Additional Document(s) and choose the file from your computer to attach it to the separation record.
Review entered information for accuracy
Before submitting, verify that the following details are correct:
- HR Action: Status Change Termination
- Workflow: Employee Separation
- Employee Status: Terminated
- Termination Date: 03/31/2021
- Change Reason: End of Season
- Begin Check Date: 04/15/2021 - Bi-Weekly
- User Access End Date: 05/01/2022
- Eligible for Rehire: checked or unchecked as appropriate
- Notes and any uploaded documents
Submitting for approval
Submit the request
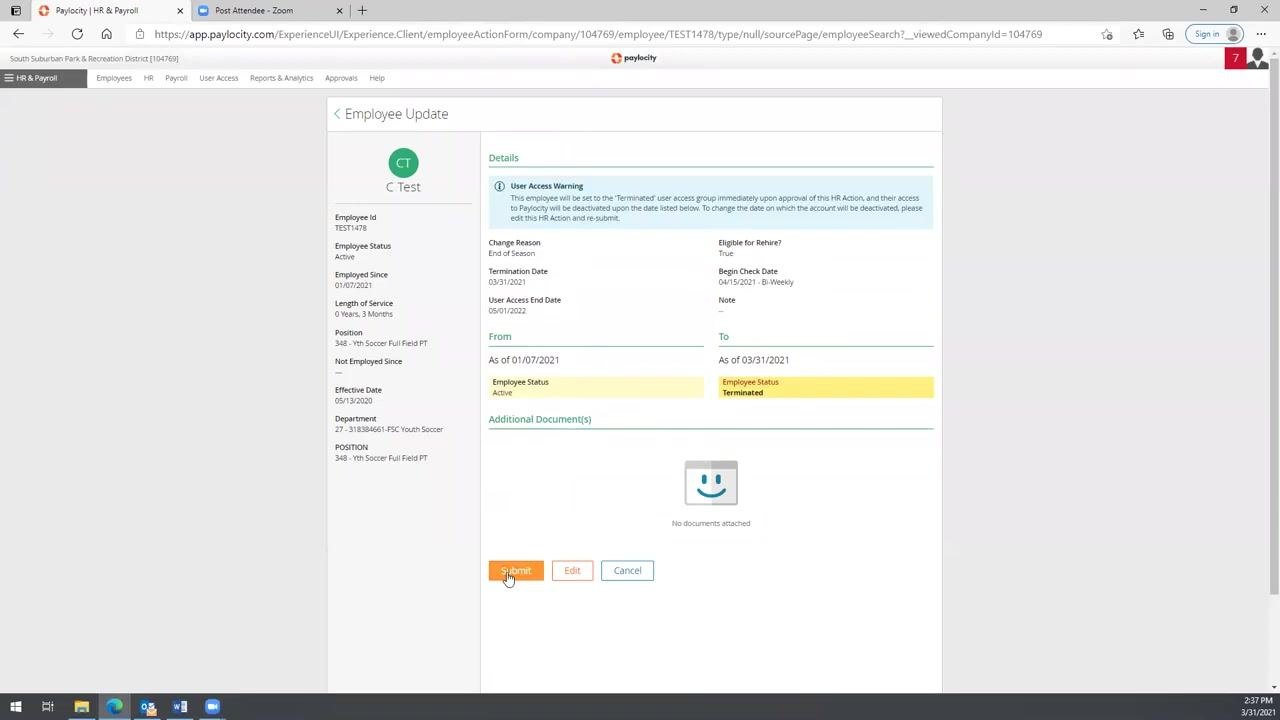
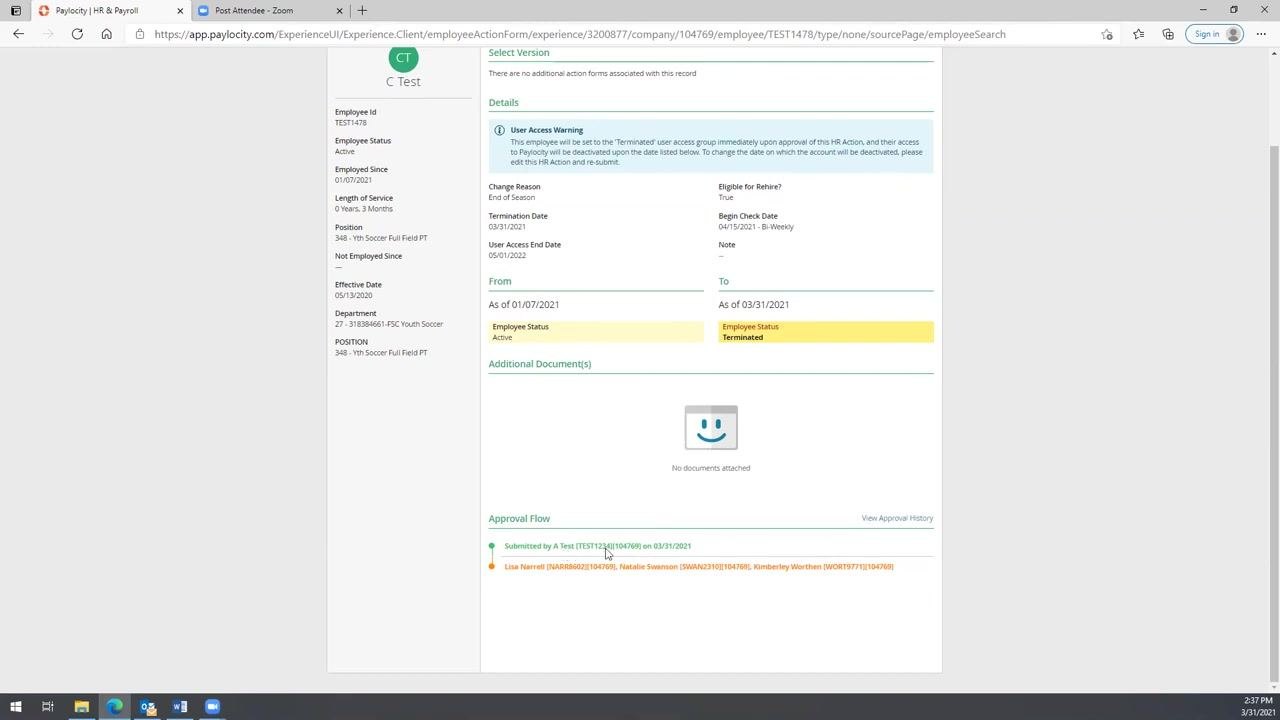
Click Submit for Approval to proceed. The system displays a summary of all the information you have entered.
Confirm or edit the summary
Review the summary screen to confirm all details are correct. If changes are needed, click Edit to return to the previous screen. If everything is correct, click Submit to finalize the separation request.
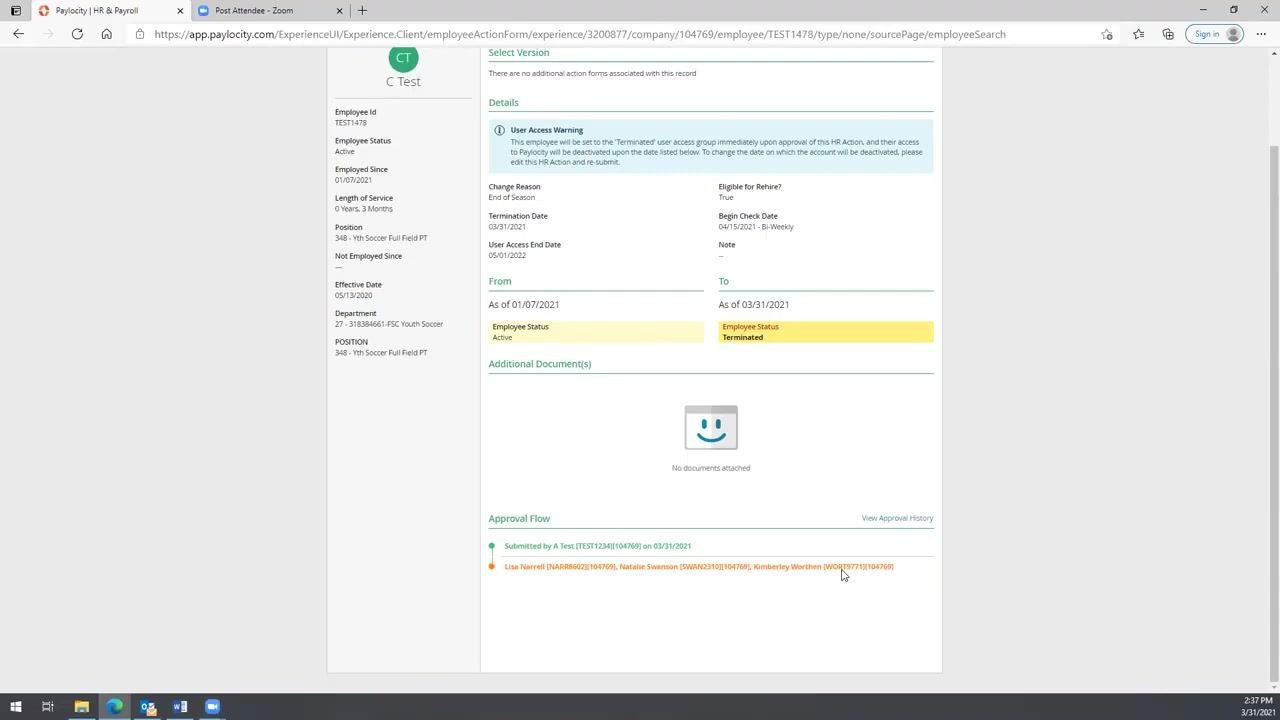
After submission, the approval flow appears at the bottom of the screen, showing the request as "Submitted by [Supervisor Name]" and routed to HR staff for final approval.
After submission
HR approval and list removal
Once HR staff approve the separation, the employee is removed from the supervisor's HR & Payroll list.
Manage access for advance terminations
If the separation was entered in advance of the employee's actual departure date, the employee retains access to time and labor systems until the effective termination date. The supervisor can continue to enter and approve hours worked up to the termination date.
Complete the process
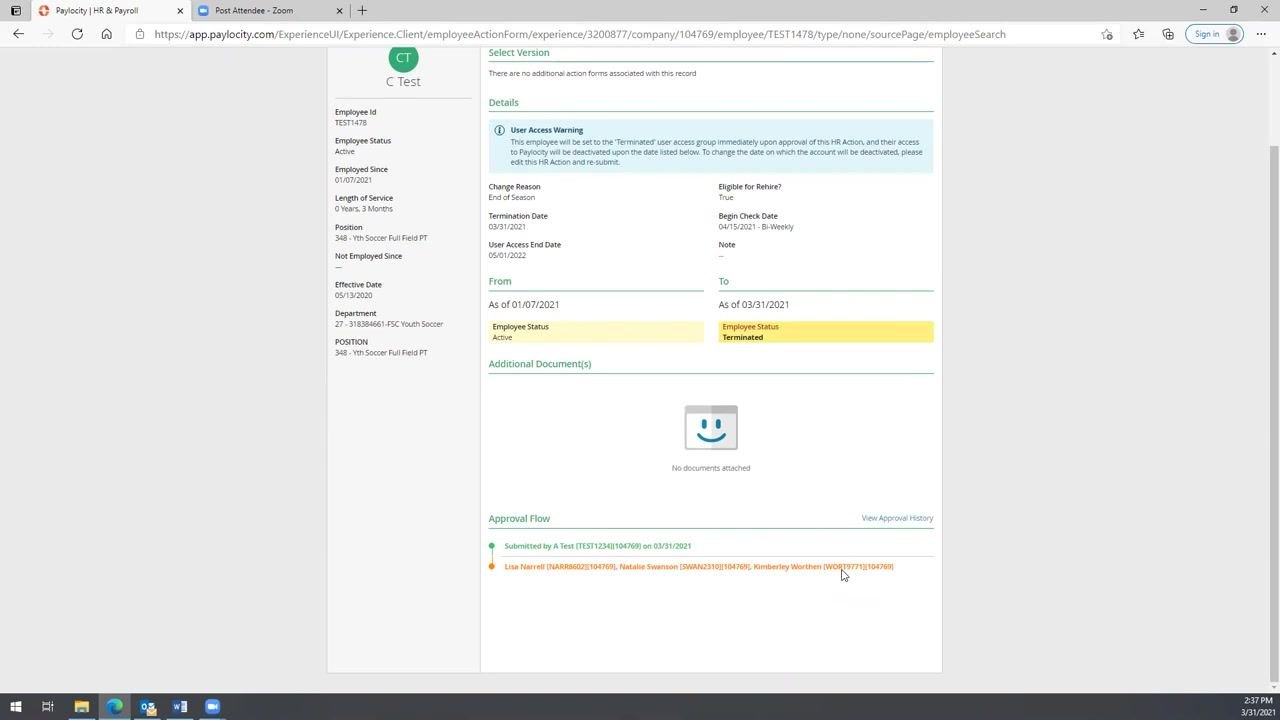
After submitting and confirming the separation request, close the Paylocity HR & Payroll application or log out as appropriate. You may see a confirmation or summary screen indicating that the process is complete.
Summary
By following these steps, you can terminate an employee in Paylocity while maintaining a complete and compliant separation process. This includes accurate documentation, proper approval routing through HR, and appropriate management of the employee's ongoing system access through their effective termination date.
Generation details: cost, quality tiers
Docsie billed 2,000 credits ($1.40) to analyze this 4-minute video at standard quality. The rewrite, template fill and Word/PDF exports were included. The same video at each quality tier:
| Quality | Frames sampled | Credits | Approx. cost |
|---|---|---|---|
| Draft | every 16-30 s | 1,000 | $0.70 |
| Standard (this guide) | every 8-15 s | 2,000 | $1.40 |
| Detailed | every 4-7 s | 4,000 | $2.80 |
| Ultra | every 1-3 s | 8,000 | $5.60 |
Credits priced at $0.70 per 1,000; plans include a monthly allowance. Enterprise customers on on-premise or bring-your-own-model deployments run this on their own inference and pay no per-video credits.
Generated by Docsie Video-to-Docs on 2026-10-11 from a 3-minute video. Screenshots are frames from the source video and belong to their creator, HR SSPRD, whose original is embedded above. If you own this video and want the guide removed or credited differently, contact us and we will act within one business day.