
How to Set Up Direct Deposit in Paylocity
Setting up direct deposit in Paylocity allows employees to have their paychecks deposited directly into one or more bank accounts, rather than receiving a paper check. This guide walks you through how to set up direct deposit in Paylocity, including adding a primary bank account and allocating a portion of a paycheck to a secondary account.
Video: End User FAQs Self-Service Portal: Add or Edit Direct Deposit by Paylocity (2024). All credit for the demonstration goes to the creator; watch the original on YouTube. The written guide below was generated from this video by Docsie. Creator? Request a change or removal.
Setting up direct deposit in Paylocity allows employees to have their paychecks deposited directly into one or more bank accounts, rather than receiving a paper check. This guide walks you through how to set up direct deposit in Paylocity, including adding a primary bank account and allocating a portion of a paycheck to a secondary account.
Prerequisites
- Access to the Paylocity self-service portal with valid login credentials.
- Permission to manage direct deposit settings for the relevant employee.
- The employee's bank account details, including routing number and account number.
Accessing direct deposit accounts
Log in to the self-service portal
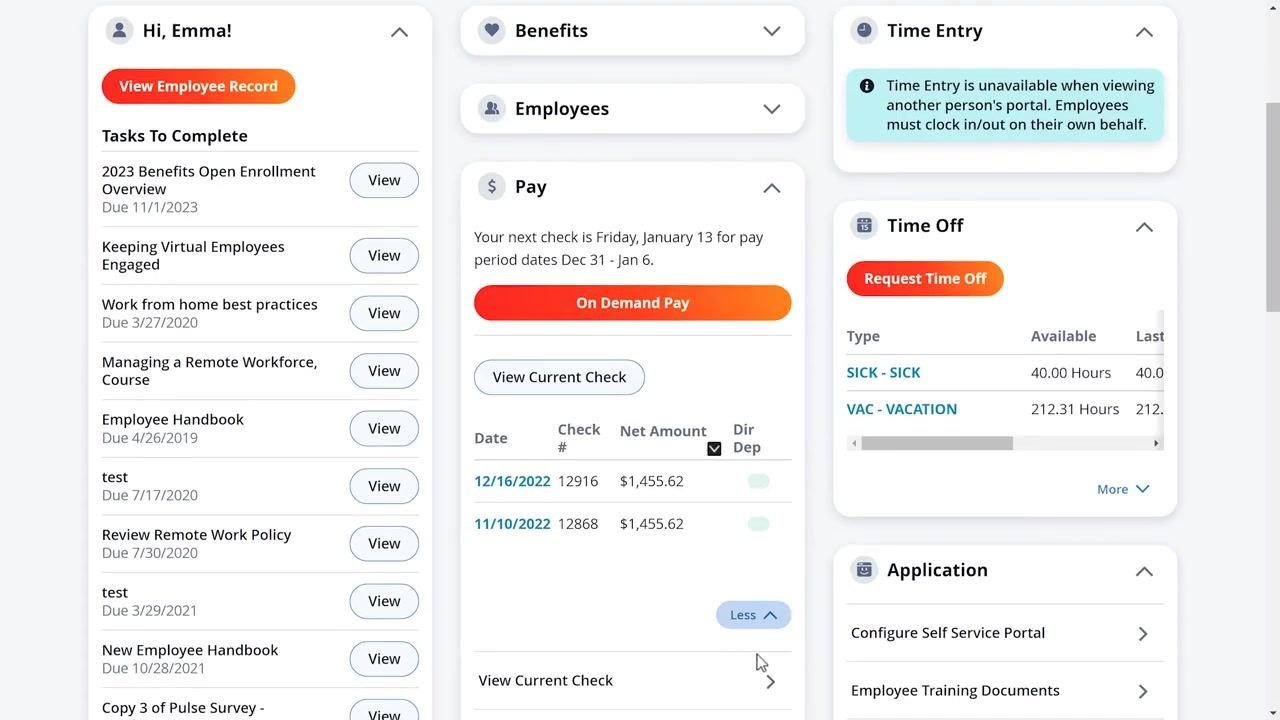
Access the Paylocity self-service portal using your credentials. Confirm you are on the main dashboard, which displays widgets such as Company, Time Entry, Calendar, Pay, and Time Off.
Switch to the desired employee
Locate the employee drop-down menu at the top left of the dashboard. Click the drop-down and select the employee for whom you want to add a direct deposit account (for example, "Emily Alba" or "Emma Frost").
Expand the Pay card
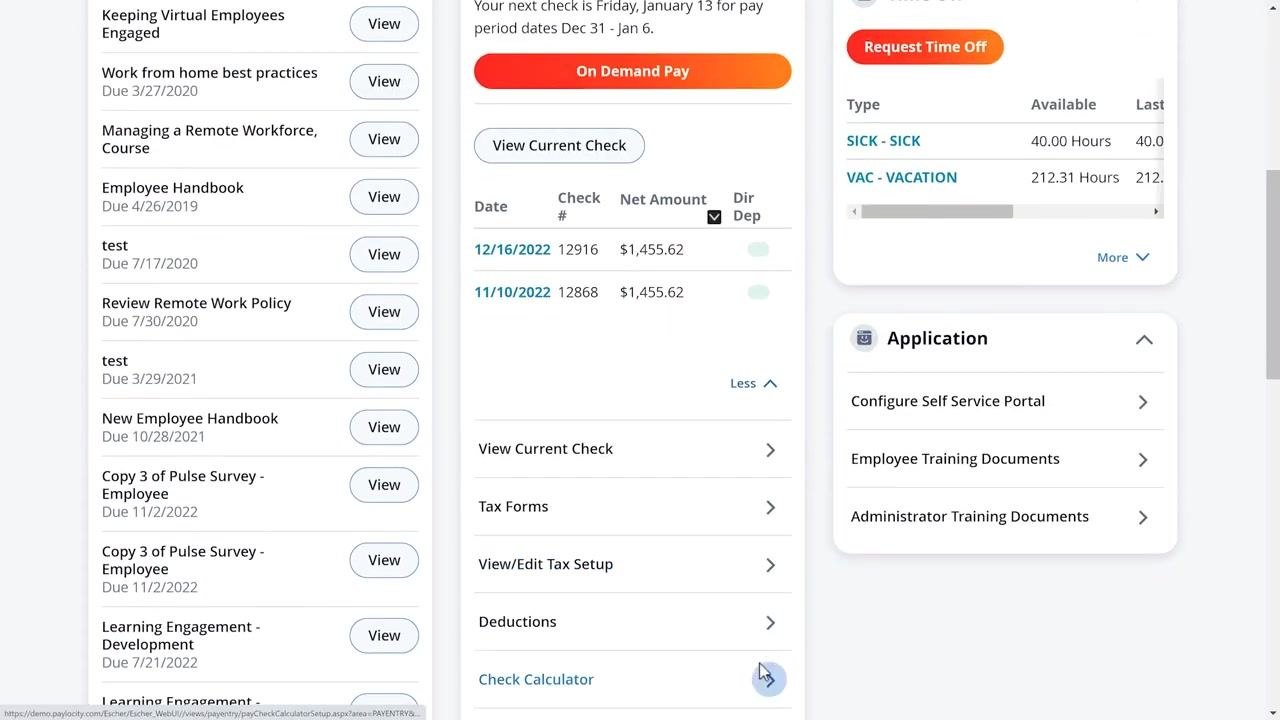
Find the Pay card on the dashboard and click to expand it if it is not already open. Review pay details such as next check date, check history, and options like On Demand Pay and View Current Check.
Open direct deposit accounts
Scroll within the Pay card section and click Direct Deposit Accounts to manage or add accounts.
Adding a bank account
Start adding a new bank account
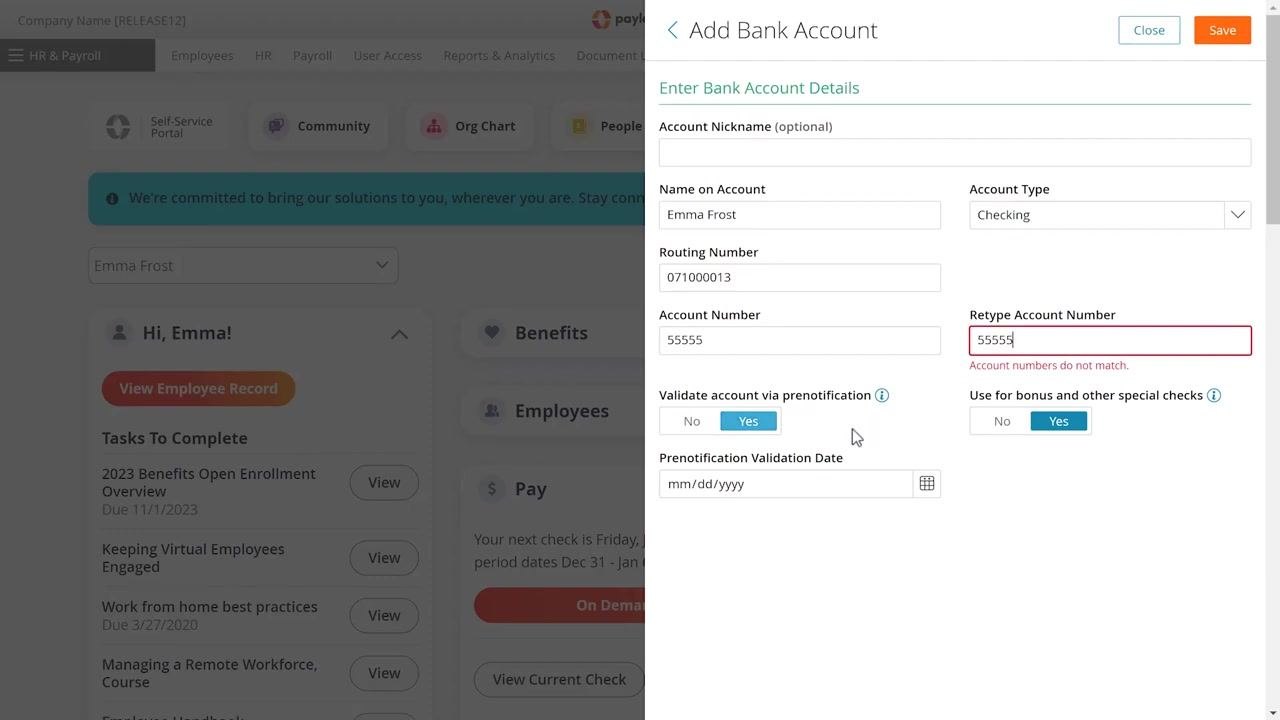
Click Add Bank Account. A form titled "Add Bank Account" appears.
Enter bank account details
Fill in the following fields:
- Account Nickname (optional): Enter a nickname to help identify the account, especially useful if you have multiple accounts at the same bank.
- Name on Account: This auto-fills with the employee's name (for example, "Emma Frost").
- Routing Number: Enter the bank's routing number (for example, "071000013").
- Account Number: Enter the account number (for example, "55555").
- Retype Account Number: Re-enter the account number to confirm it matches.
- Account Type: Select the account type from the drop-down (Checking, Savings, or Pay Card).
The system automatically checks the routing number to ensure it matches a valid bank.
Set validation preferences
By default, the toggle for Validate account via prenotification is set to "Yes." This sends a pre-notification to the bank to confirm the account information is valid. The Prenotification Validation Date auto-fills with the check date that initiates the validation process. If you manually enter a date in this field, it prevents the pre-notification file from being sent to the receiving bank.
Set the special checks preference for the main account
Toggle Use for bonus and other special checks to "Yes" or "No" as needed. This toggle defaults to "Yes" for the main account, ensuring all special checks, such as bonuses, are deposited into the main account unless you change it.
Save the main bank account
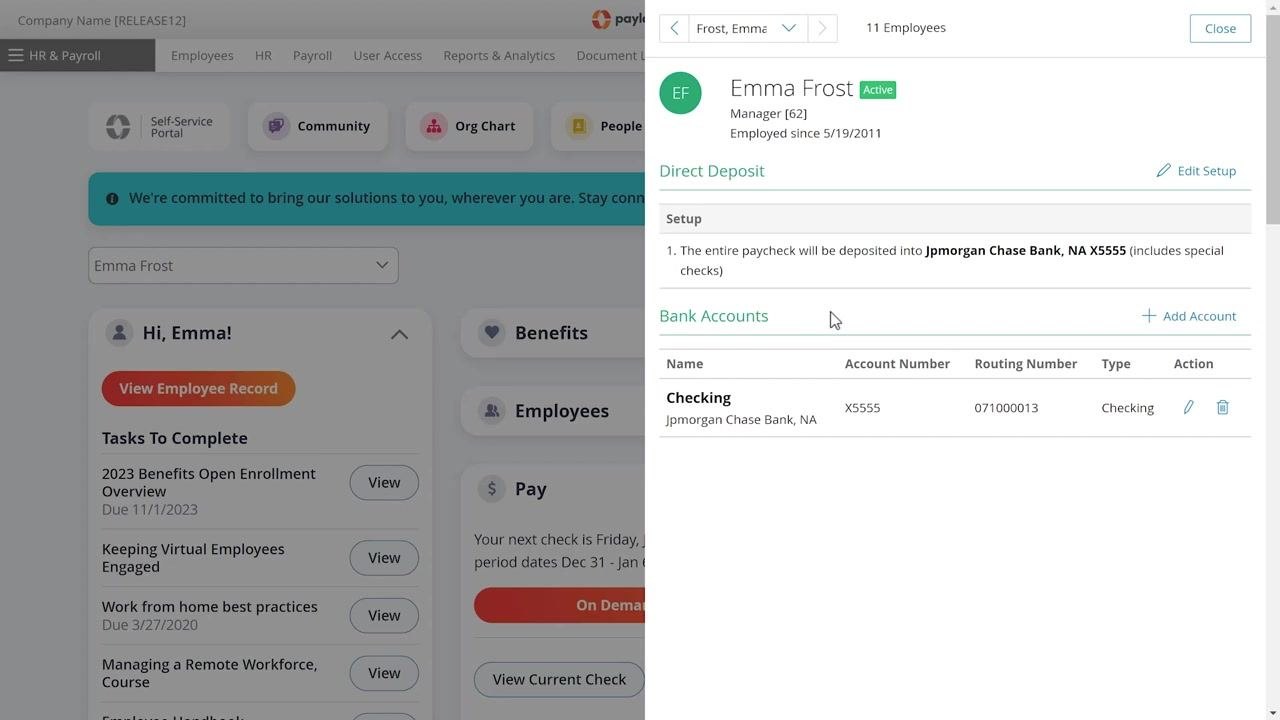
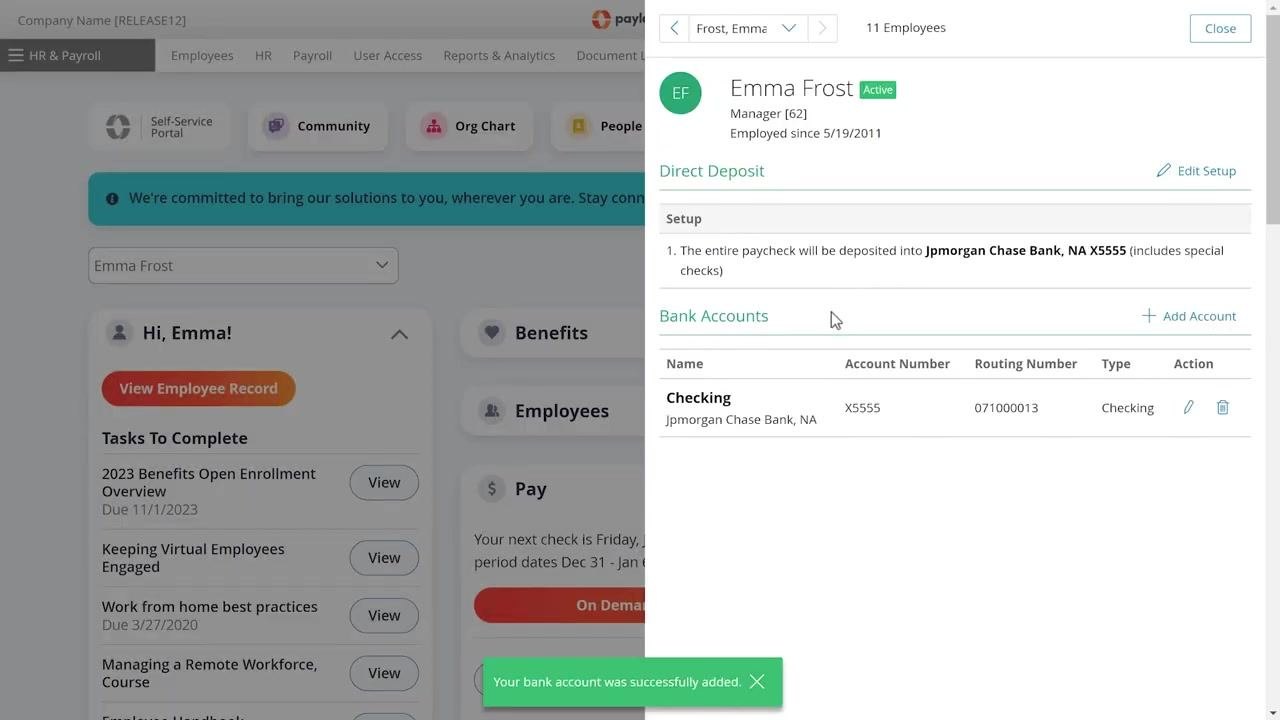
Click Save at the top right of the Add Bank Account form. The system displays the direct deposit setup screen, listing all bank accounts associated with the employee, along with a confirmation message: "Your bank account was successfully added."
Until the bank account is verified with the bank through the prenotification process, the employee receives a paper check. This process typically takes around 10 business days. Once verification is complete, the entire paycheck is deposited into the main account.
Close the setup if only one account is needed
If the employee wants their entire paycheck deposited into the main account, click Close to finish.
Allocating a portion of a paycheck to an additional account
Add a secondary account
If the employee wants to allocate a portion of their paycheck (for example, $100) to another account, click + Add Account in the Bank Accounts section. The "Step 1. Add Bank Account" form appears.
Enter secondary bank account details
Fill in the following fields:
- Account Nickname (optional): Enter a nickname if desired.
- Name on Account: This auto-fills with the employee's name (for example, "Emma Frost").
- Routing Number: Enter the routing number for the secondary bank (for example, "071000013").
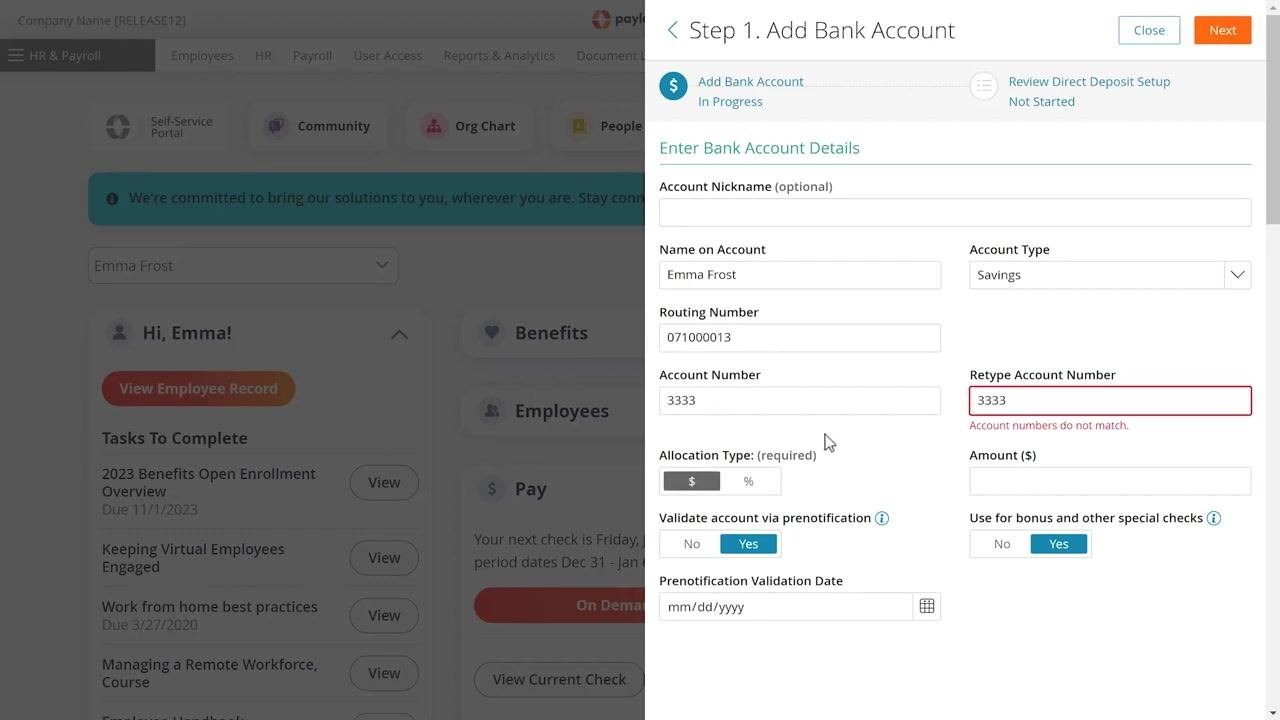
- Account Number: Enter the account number (for example, "3333").
- Retype Account Number: Re-enter the account number to confirm.
- Account Type: Select the account type from the drop-down (for example, "Savings").
If the account numbers do not match, an error message appears: "Account numbers do not match."
Set the allocation type and amount
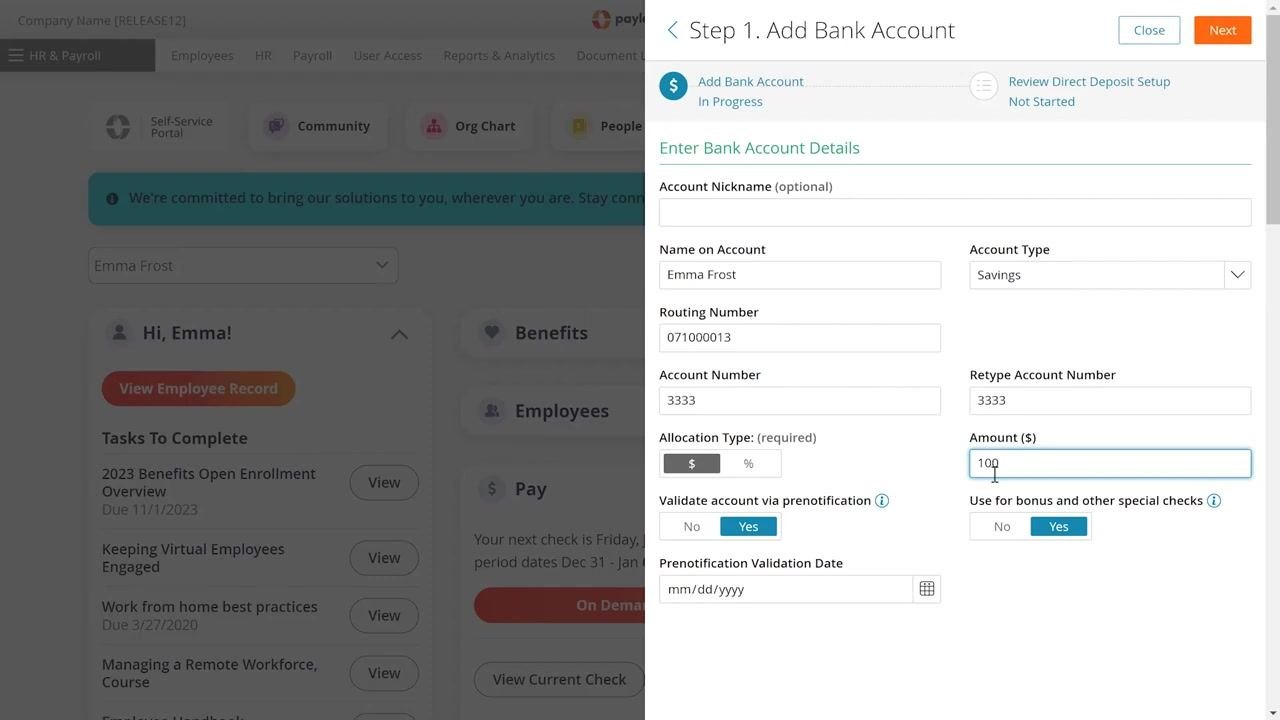
Under Allocation Type (required), select the "$" (dollar amount) option. In the Amount ($) field, enter the amount to allocate each paycheck (for example, "100"). Only numeric characters are allowed—enter "100," not "100.00."
Set validation and special checks preferences for the secondary account
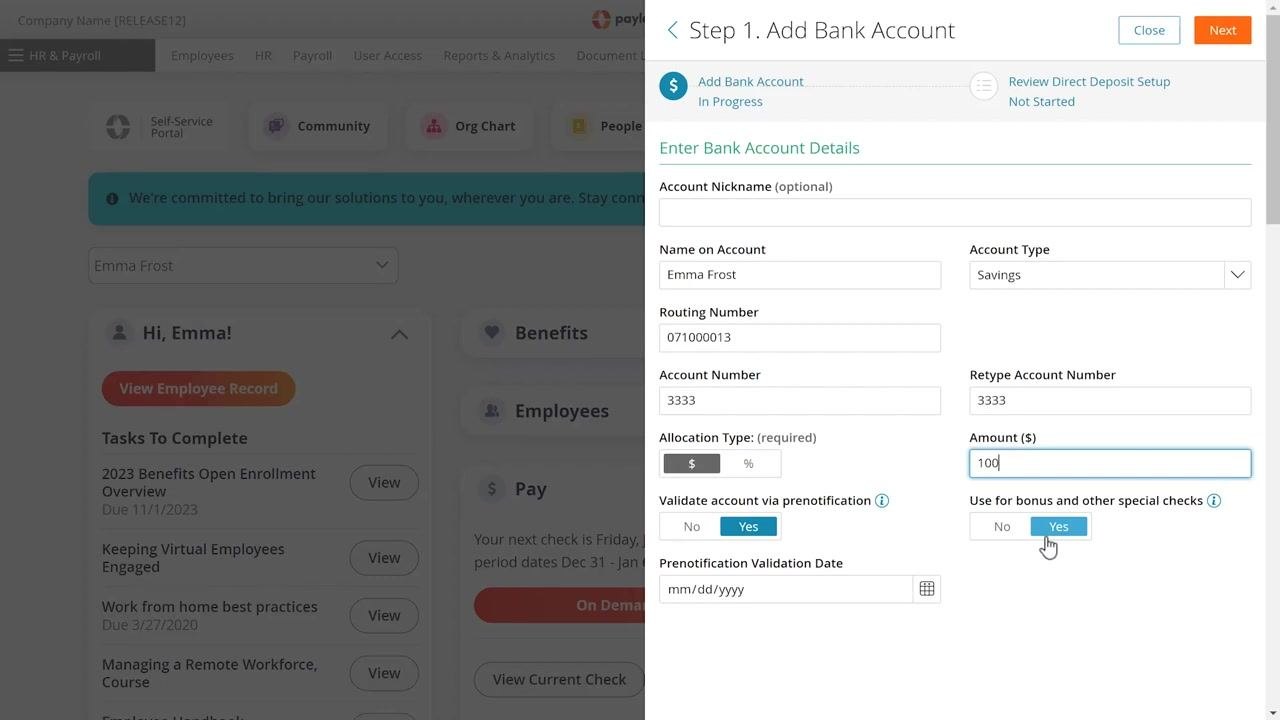
Ensure Validate account via prenotification is set to "Yes" unless you have a specific reason to change it. The Use for bonus and other special checks toggle defaults to "Yes." If you want all special checks to go to the main account instead of this secondary account, change this toggle to "No."
Proceed to review the account setup
After entering all secondary account details and preferences, click Next at the top right of the "Step 1. Add Bank Account" form. This advances you to the review stage, where you can confirm your allocation choices.
Review the allocation summary
On the "Step 2. Edit Direct Deposit Setup" screen, verify the following:
- The Savings account (ending in 3333) is set to receive a fixed amount of $100 per paycheck.
- The Checking account (ending in X5555) is set to receive the remaining balance of the paycheck.
- The Special Checks toggle is off for the savings account, ensuring bonuses and special checks go to the main checking account.
If changes are needed, use the available options to edit allocations. Click Save at the top right to confirm your setup.
Reviewing the complete direct deposit setup
View the full setup summary
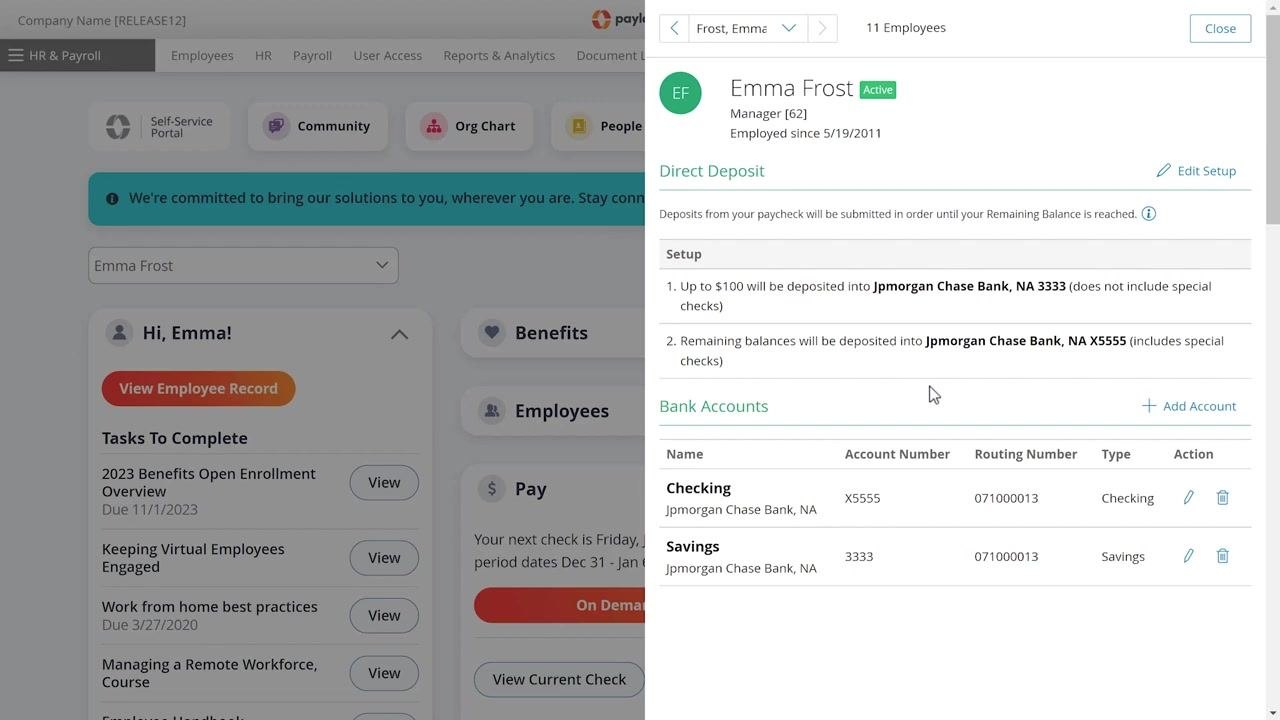
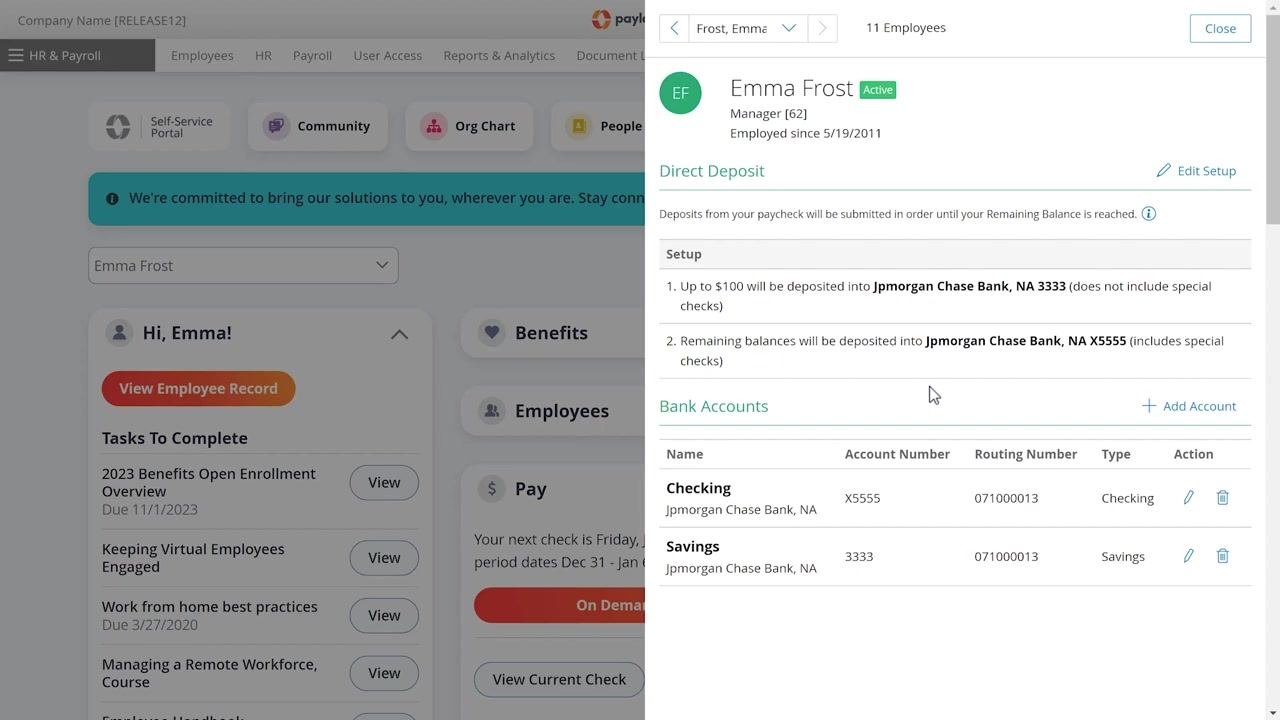
After saving, the system displays a summary screen listing all direct deposit allocations and associated bank accounts. The "Setup" section states:
- "Up to $100 will be deposited into Jpmorgan Chase Bank, NA 3333 (does not include special checks)"
- "Remaining balances will be deposited into Jpmorgan Chase Bank, NA X5555 (includes special checks)"
The "Bank Accounts" section lists each account, account number, routing number, and type, and provides options to edit or delete. To add more accounts, click + Add Account and repeat the previous steps as needed.
Return to the self-service portal
When finished, click Close at the top right of the summary screen. You return to the main self-service portal dashboard, confirming that your direct deposit setup is complete.
Summary
By following these steps, you can set up direct deposit in Paylocity for an employee's main account and, if needed, allocate a fixed dollar amount from each paycheck to a secondary account, such as a savings account, while controlling where bonuses and special checks are deposited.
Generation details: cost, quality tiers
Docsie billed 2,500 credits ($1.75) to analyze this 5-minute video at standard quality. The rewrite, template fill and Word/PDF exports were included. The same video at each quality tier:
| Quality | Frames sampled | Credits | Approx. cost |
|---|---|---|---|
| Draft | every 16-30 s | 1,250 | $0.88 |
| Standard (this guide) | every 8-15 s | 2,500 | $1.75 |
| Detailed | every 4-7 s | 5,000 | $3.50 |
| Ultra | every 1-3 s | 10,000 | $7.00 |
Credits priced at $0.70 per 1,000; plans include a monthly allowance. Enterprise customers on on-premise or bring-your-own-model deployments run this on their own inference and pay no per-video credits.
Generated by Docsie Video-to-Docs on 2026-10-11 from a 4-minute video. Screenshots are frames from the source video and belong to their creator, Paylocity, whose original is embedded above. If you own this video and want the guide removed or credited differently, contact us and we will act within one business day.