
How to Add a Printer in Opera PMS
This guide walks you through the process of adding a printer in Opera PMS and managing related print tasks within MICROS OPERA Full Service. You will learn how to log in to the application, navigate to the printer and workstation configuration screens, assign print tasks, and use the available tools to create, edit, or remove printers.
Video: Opera PMS Setup Printer كيفيه تعريف الطابعه والطابعه من على نظام اوبرا للفنادق by LST Egypt - Information Technology - ال اس تى (2018). All credit for the demonstration goes to the creator; watch the original on YouTube. The written guide below was generated from this video by Docsie. Creator? Request a change or removal.
This guide walks you through the process of adding a printer in Opera PMS and managing related print tasks within MICROS OPERA Full Service. You will learn how to log in to the application, navigate to the printer and workstation configuration screens, assign print tasks, and use the available tools to create, edit, or remove printers.
Prerequisites
- Access to MICROS OPERA Full Service with a valid username and password.
- A Schema value (for example, Production) and a Domain value (for example, OPERA User) assigned to your account.
- Permission to allow pop-ups from your OPERA site, since the application relies on pop-up windows to display configuration screens.
Logging in to MICROS OPERA Full Service
Allow pop-ups from the OPERA site
When you open OPERA, your browser may display a dialog box asking, "Allow pop-ups from this site?" Select Yes to allow pop-ups from your OPERA site. This step is necessary for the application to display its windows correctly.
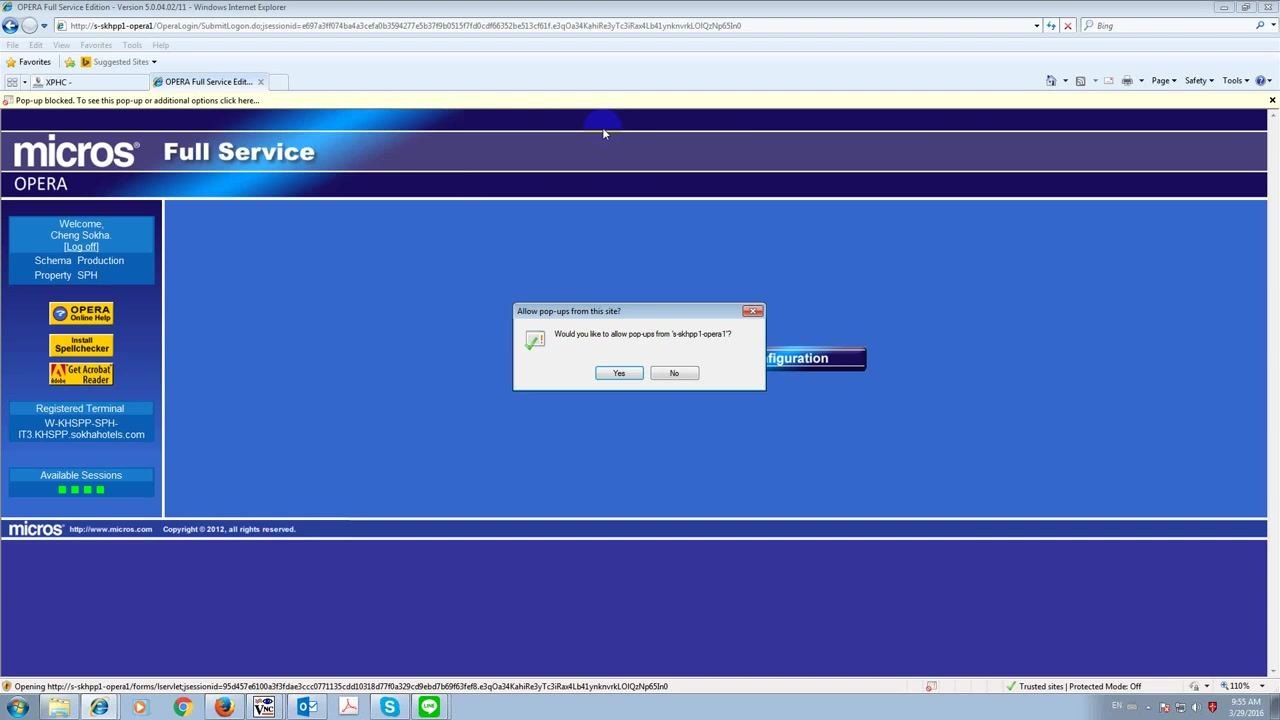
Log in to OPERA
On the login screen, enter your Username, your Password (the field is masked), and select your Schema and Domain from the dropdown menus. Click Login to proceed.
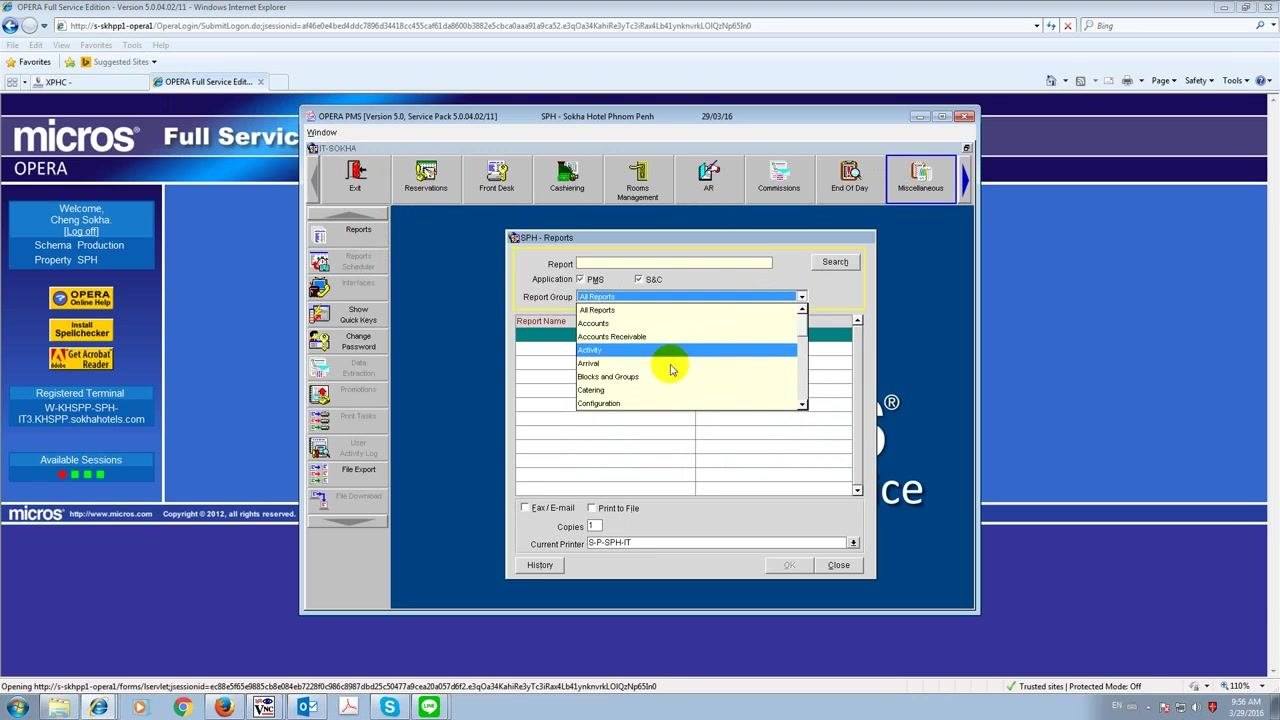
Opening the Reports module
Select the application module and open Reports
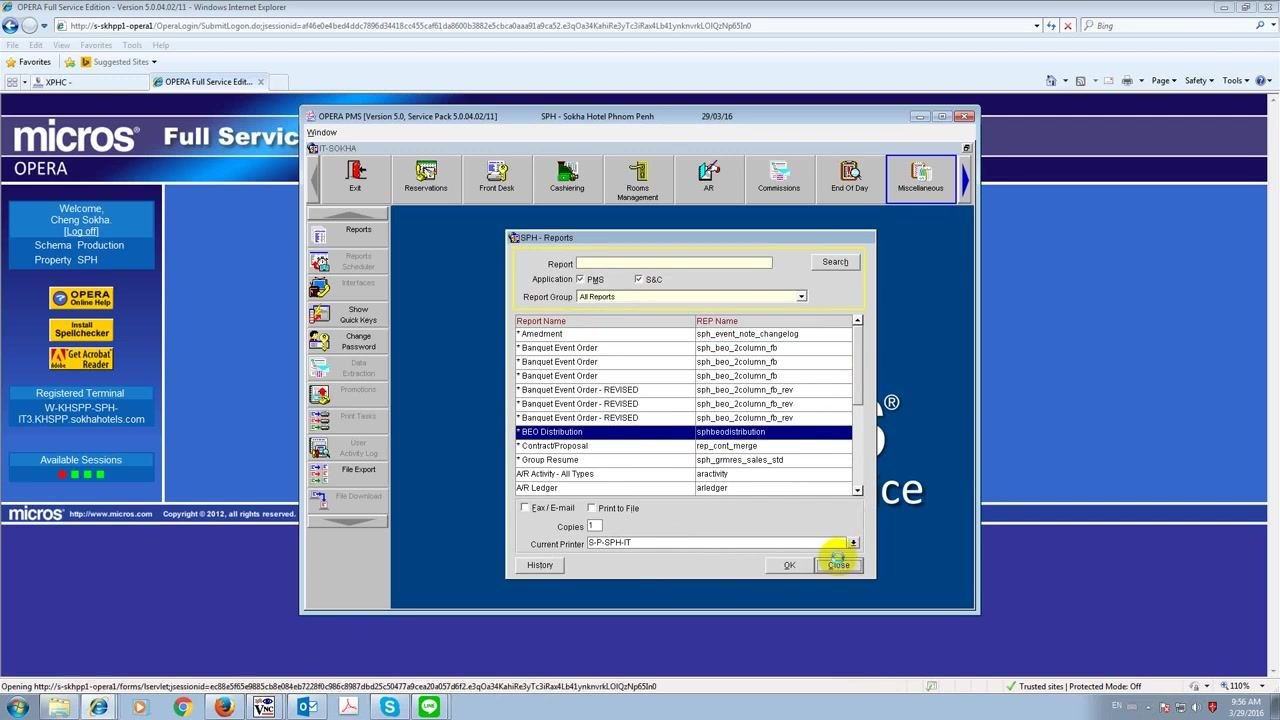
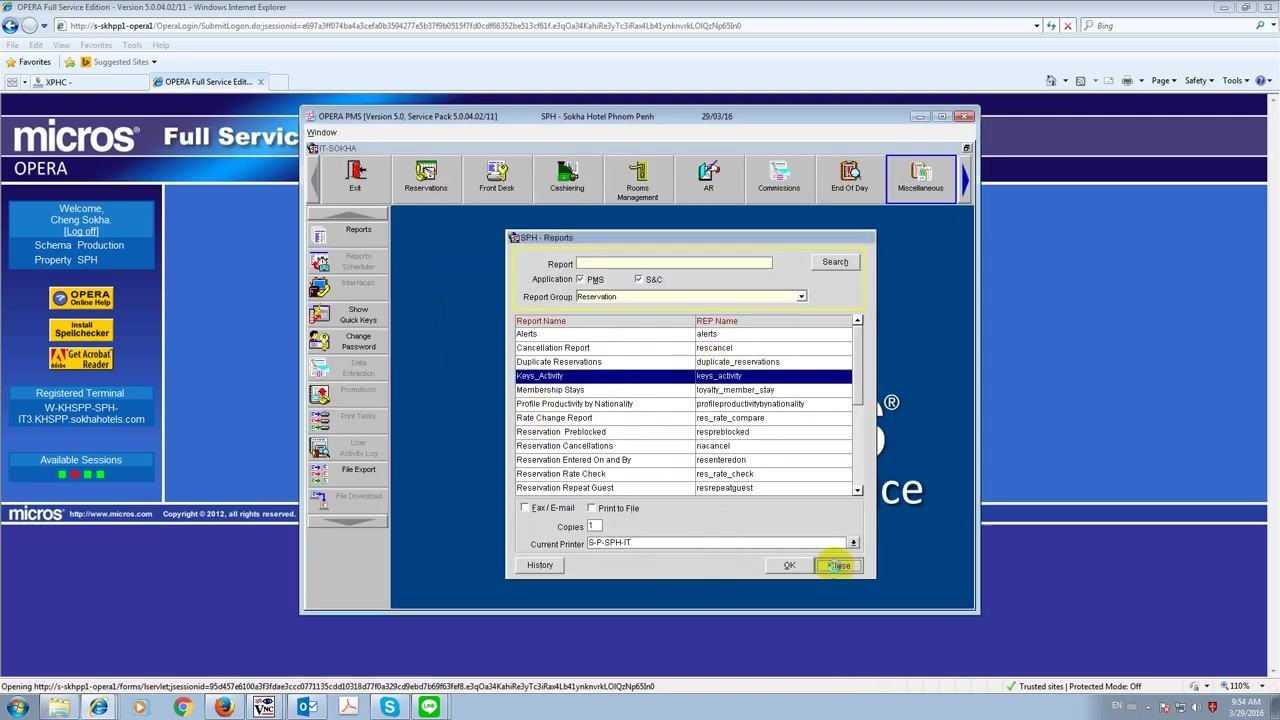
After logging in, you see two main options: PMS and Configuration. Click PMS to access the Property Management System features. The OPERA PMS main window opens, showing modules such as Reservations, Front Desk, Cashiering, Rooms Management, AR, Commissions, End Of Day, and Miscellaneous. In the left sidebar, click Reports to open the reports window.
Select a report group and report
In the Reports window, confirm that Application is set to PMS (checked by default). In the Report Group dropdown, select All Reports. In the Report Name dropdown, scroll and select the desired report group, such as "Activity."
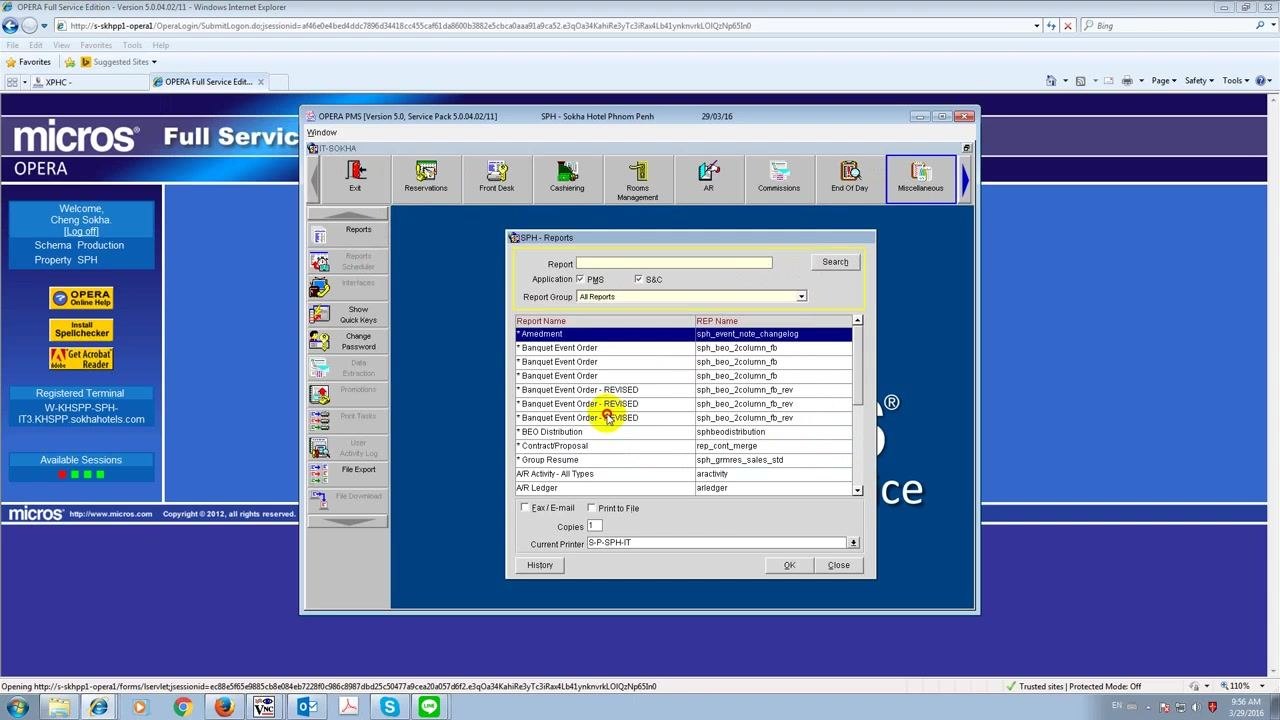
View and select a specific report
After selecting a report group, a list of available reports appears. Click the report you want, for example "BEO Distribution" (REP Name: "sphbeodistribution"). Other reports in the list may include "Banquet Event Order - REVISED" and "Contract/Proposal."
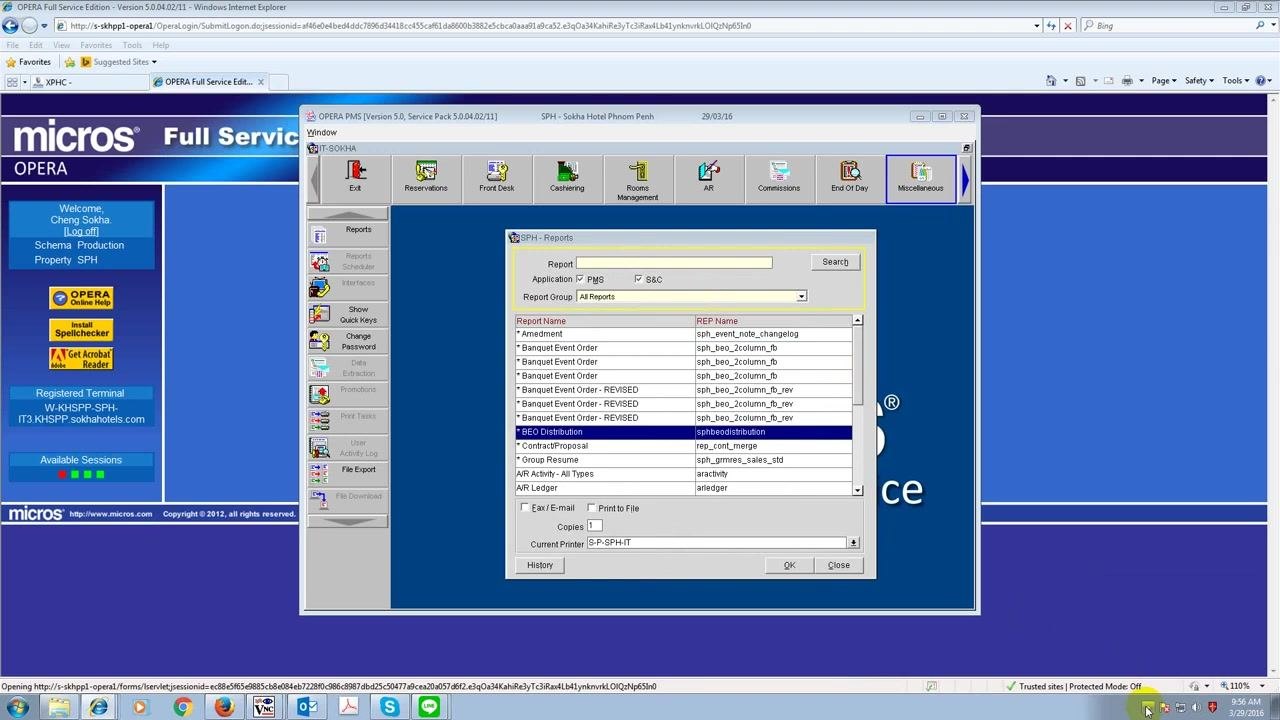
Close the Reports window
Once you are done viewing or selecting reports, click Close at the bottom right of the window to exit the reports module.
Accessing workstation print tasks
Open the Workstations setup
In the OPERA Configuration window, you see a menu bar with options including Reservations, Profile, Rate Management, Cashiering, AR, Commissions, End of Day, Database, Catering, Property, and Exit. Click the Setup menu to open its dropdown, then select Workstations under the "Property Interfaces" section.
View and select a workstation
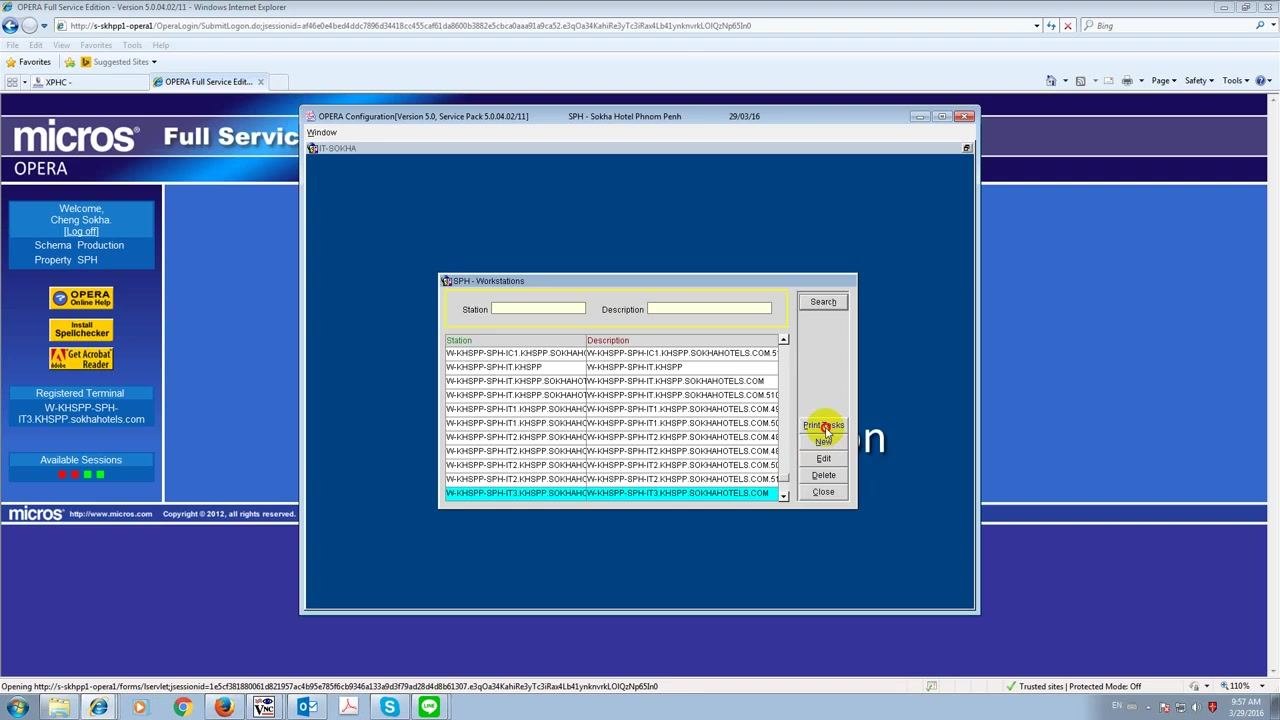
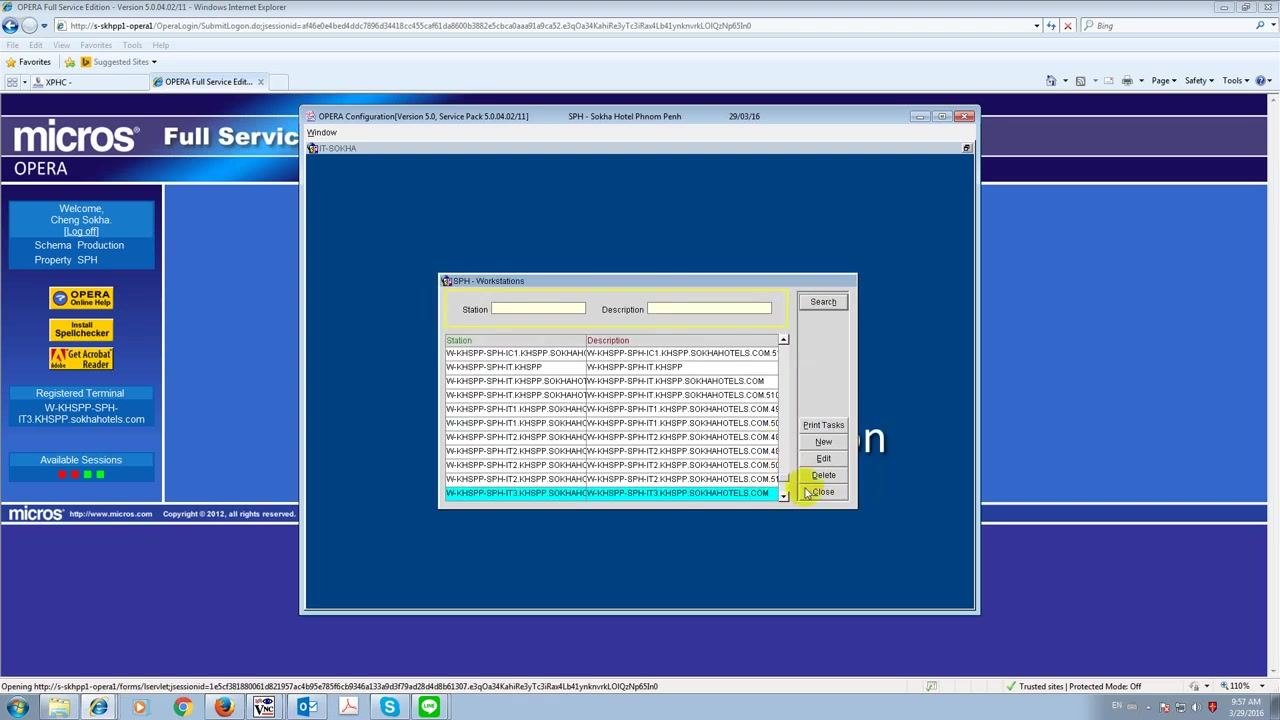
The SPH - Workstations window lists all configured workstations, with columns for Station and Description. Use the search fields at the top to filter by station or description. Select the workstation you want to manage, then click Print Tasks on the right panel.
Edit a print task
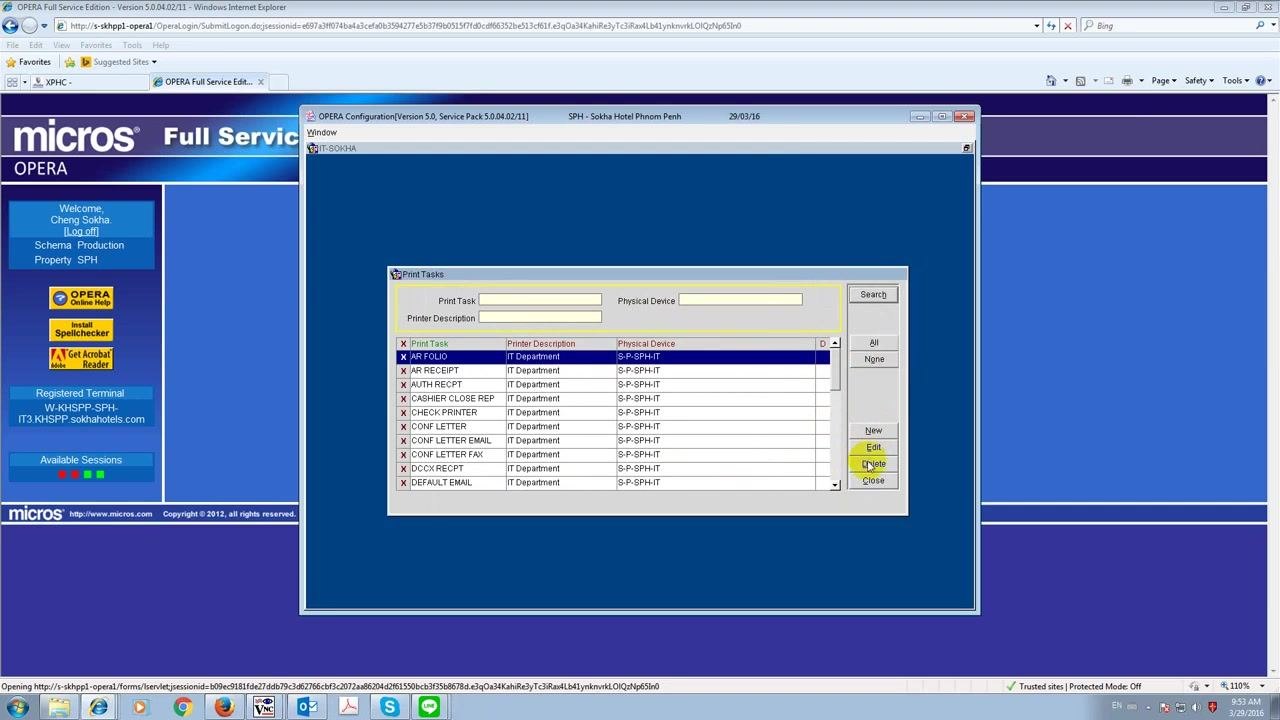
After confirming a printer selection, you return to the Print Tasks configuration window, which displays the list of print tasks, printer descriptions, and physical devices. Click Edit on the right side of the window to modify the selected print task.
Selecting a network printer for a print task
Browse the printer list
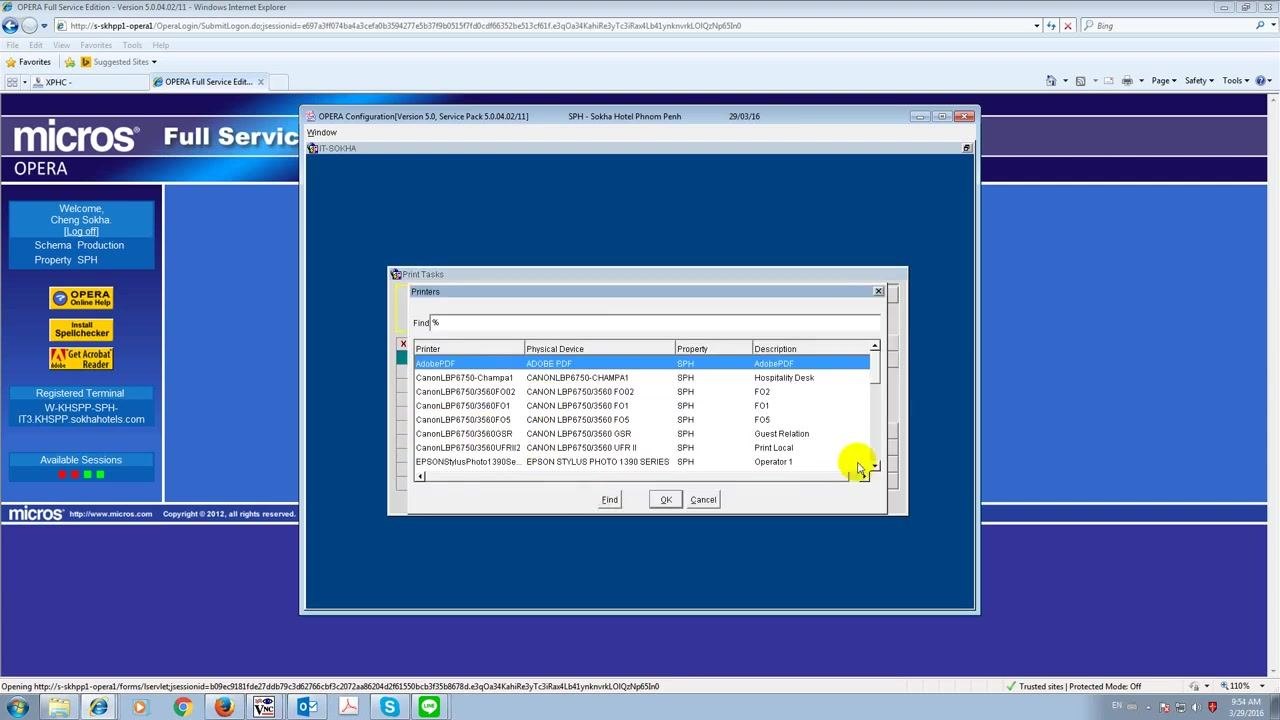
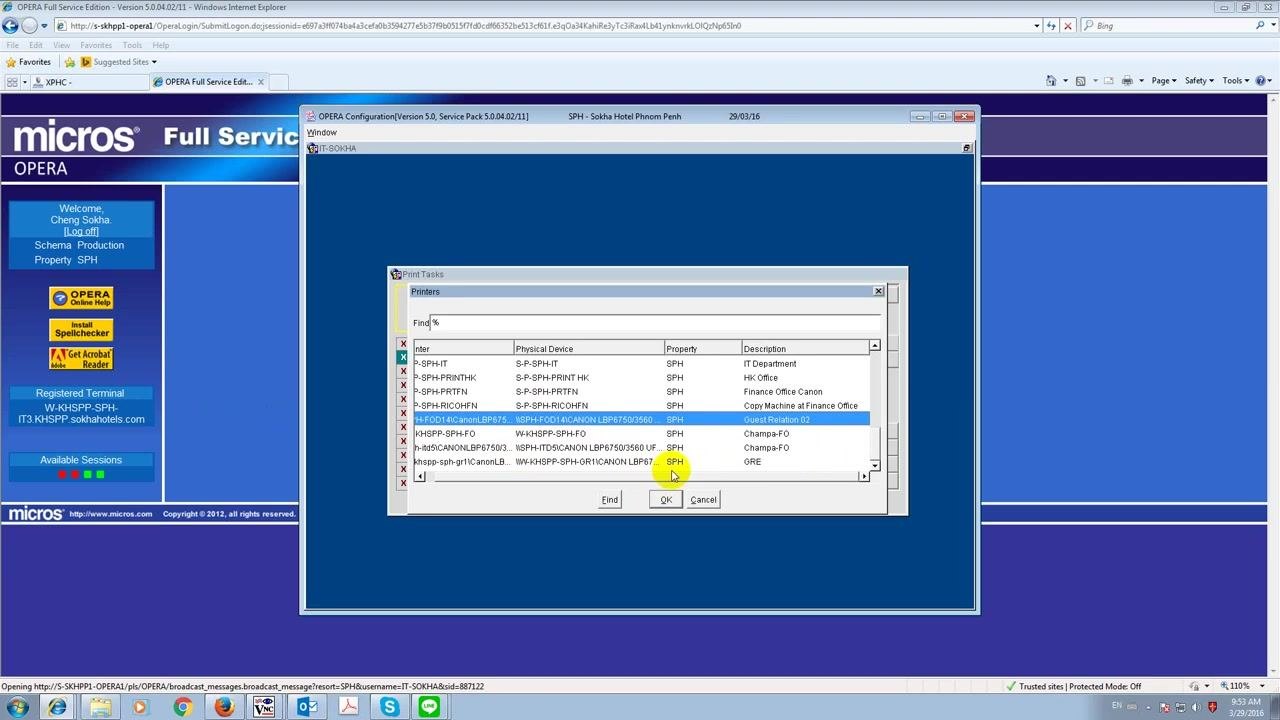
Editing a print task reopens the Printers selection dialog, titled "Print Tasks," which lists available printers. Use the Find field at the top to search using wildcards (for example, "%"). The list shows columns for Printer, Physical Device, Property, and Description. Scroll through the list to view entries such as "AdobePDF," "CanonLBP6750-CHAMPA1," "CanonLBP6750/3560F02," and "EPSONStylusPhoto1380SE."
Continue scrolling to view network printers identified by network paths, such as "B-P-SPH-IT" (IT Department), "B-P-SPH-PRINT-HK" (HK Office), "B-P-SPH-PRTFN" (Finance Office Canon), and "B-P-SPH-RICOH-FN" (Copy Machine at Finance Office), as well as entries like "W-KHSPP-SPH-FO" (Champa-FO) and "w-khspp-sph-gr1\CanonLBP..." (GRE).
Confirm the printer selection
With the desired printer highlighted — for example, "vk-hkspp-sph-gr1\CanonLBP..." — click OK at the bottom of the dialog to confirm your selection and proceed.
Assigning printer tasks
Review the Printer Tasks assignment dialog
The Printer Tasks assignment dialog contains fields for Printer Task and Description at the top. Radio buttons let you filter the list by Selected, Non Selected, or Both (Both is selected by default). The list displays printer tasks and their descriptions, including entries such as:
- AR FOLIO (AR Folios)
- AR RECEIPT (AR Payment Receipt)
- AUTH RECEIPT (Authorization Receipt)
- CASHIER CLOSE REP (Cashier Closure Reports)
- CHECK PRINTER (Commission checks)
- CONF LETTER (Confirmation Letters)
- CONF LETTER EMAIL (Confirmation Letter Email task)
- CONF LETTER FAX (Confirmation Letter Faxing task)
- DCCX RECEIPT (DCC Exchange Receipt)
- DEFAULT EMAIL (Default email for the resort)
- DEFAULT FAX (Default fax for the resort)
Scroll through the list using the scrollbar to review additional tasks.
Managing print tasks for a workstation
View, filter, and manage print tasks
The Print Tasks window displays the list of print tasks associated with the selected workstation, with columns for Print Task, Printer Description, and Physical Device. Use the search fields to filter by print task or printer description. Click All or None to select or deselect all tasks. Use New, Edit, or Delete to create, modify, or remove a print task. When finished, click Close to return to the previous window.
Return to the Workstations window
After managing print tasks, you return to the SPH - Workstations window. Click Close at the bottom right to exit this window.
Adding and managing printers
Open the Printers window
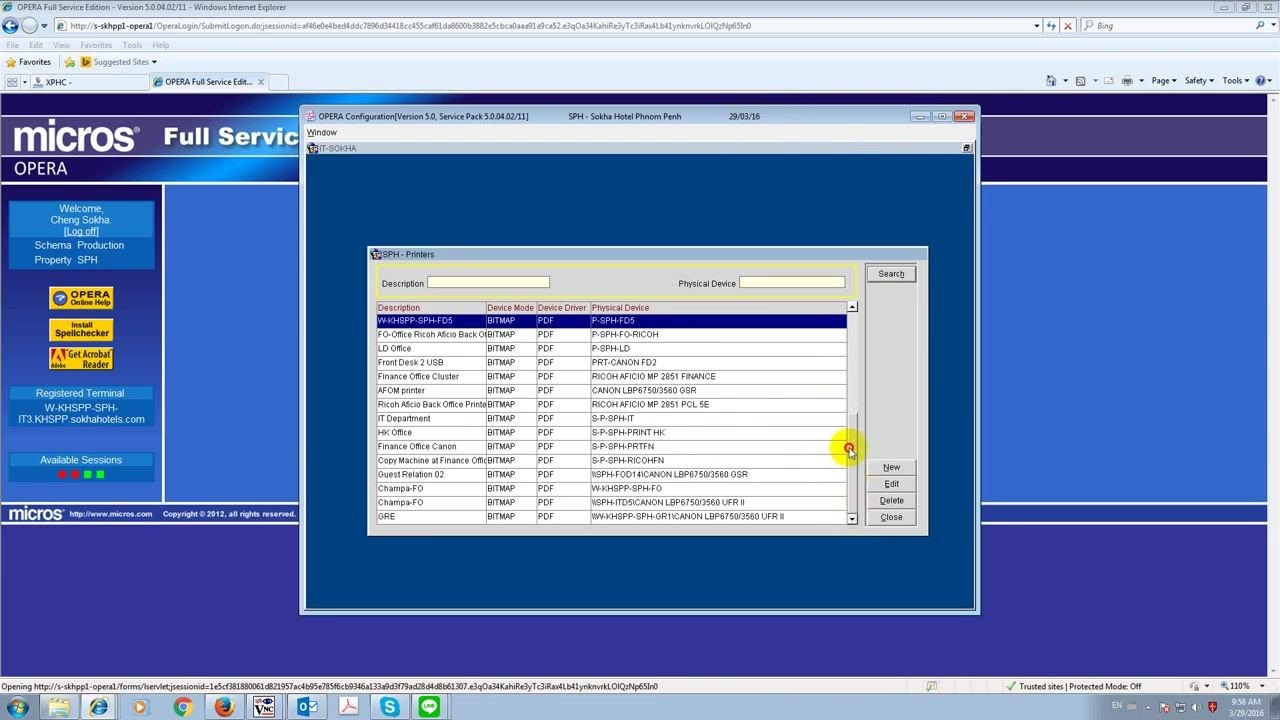
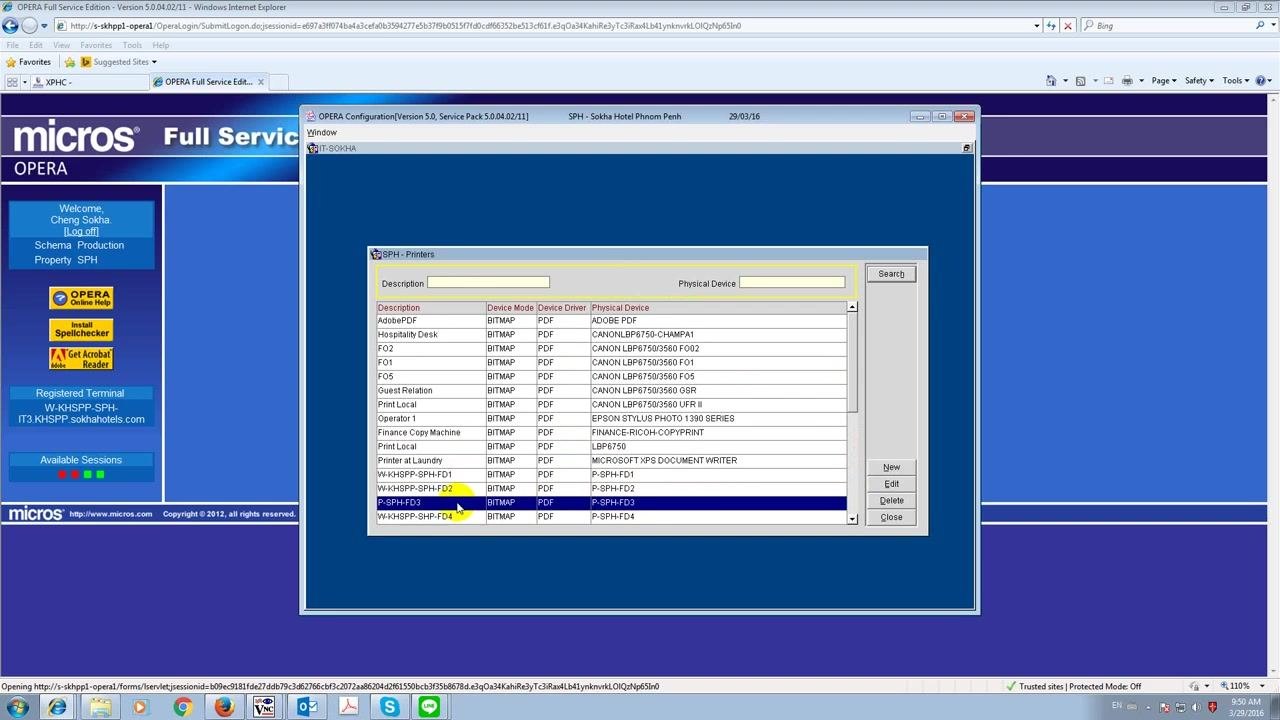
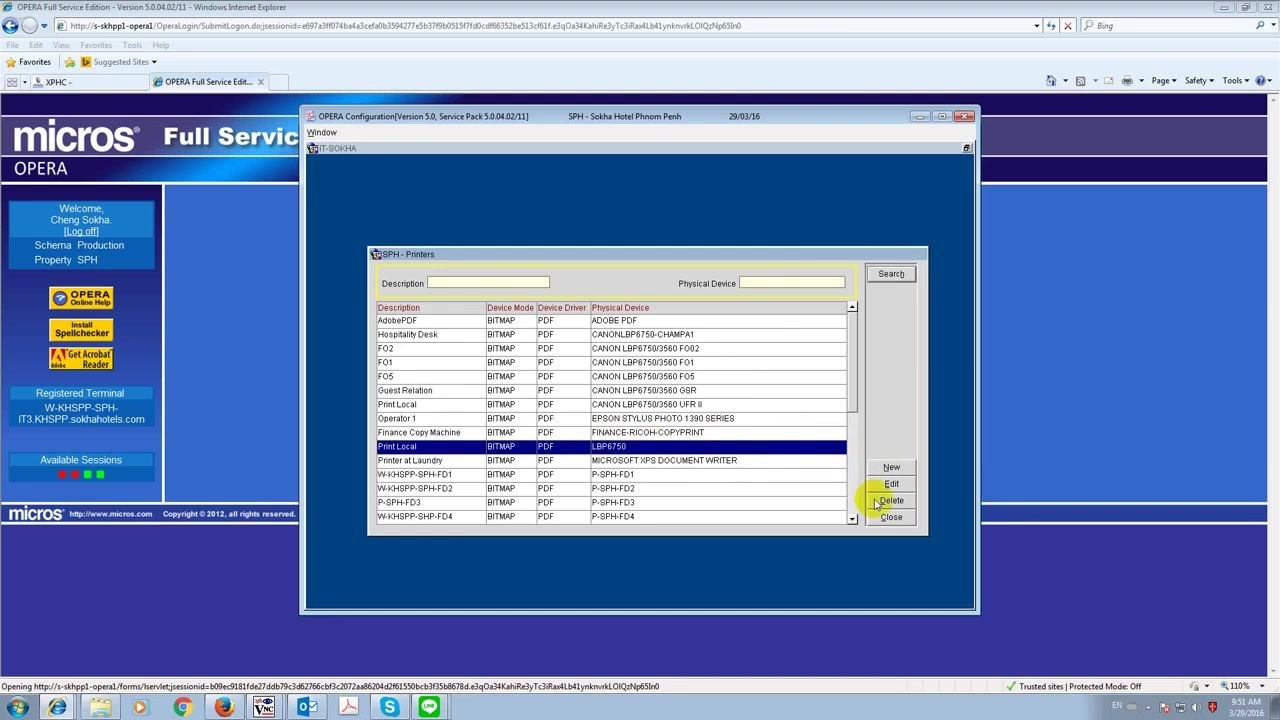
The SPH - Printers window lists all configured printers, with columns for Description, Device Mode, Device Driver, and Physical Device. Use the search fields to filter printers by description or physical device. Scroll through the list to view networked and local devices, such as "AdobePDF," "Hospitality Desk," "Finance Office Cluster," and "HK Office." To add a printer, click New; to modify an existing entry, click Edit; to remove one, click Delete. When finished, click Close to exit the window.
Select a printer from the list
Scroll through the printer list and click the entry you want to work with. The selected row is highlighted in blue to indicate it is active. In this example, "P-SHP-FD3" is selected.
Delete a printer
With the desired printer selected — for example, "Print Local" — move the cursor to the Delete button on the right side of the window. Clicking Delete removes the selected printer from the configuration.
Summary
This guide covered how to log in to MICROS OPERA Full Service, navigate the Reports module, and manage workstations, print tasks, and printers. You learned how to access the Workstations and Printers windows, assign and edit print tasks, select a network printer, and use the New, Edit, and Delete buttons to add, modify, or remove printers.
Note: - Always confirm you have selected the correct workstation or printer before making changes. - Use the search and filter fields to quickly locate specific devices or tasks. - Changes to workstation or printer configurations can affect printing and device availability throughout the property.
What's next
Continue to the next configuration section or return to the main OPERA Configuration window to apply further changes to your property's printer and workstation setup.
Generation details: cost, quality tiers
Docsie billed 5,500 credits ($3.85) to analyze this 11-minute video at standard quality. The rewrite, template fill and Word/PDF exports were included. The same video at each quality tier:
| Quality | Frames sampled | Credits | Approx. cost |
|---|---|---|---|
| Draft | every 16-30 s | 2,750 | $1.92 |
| Standard (this guide) | every 8-15 s | 5,500 | $3.85 |
| Detailed | every 4-7 s | 11,000 | $7.70 |
| Ultra | every 1-3 s | 22,000 | $15.40 |
Credits priced at $0.70 per 1,000; plans include a monthly allowance. Enterprise customers on on-premise or bring-your-own-model deployments run this on their own inference and pay no per-video credits.
Generated by Docsie Video-to-Docs on 2026-10-11 from a 10-minute video. Screenshots are frames from the source video and belong to their creator, LST Egypt - Information Technology - ال اس تى , whose original is embedded above. If you own this video and want the guide removed or credited differently, contact us and we will act within one business day.