
How to Use a Serological Pipette
This SOP describes how to use a serological pipette correctly, with emphasis on interpreting the zero and 10 mL markings across different pipette brands and dispensing liquid with precision. Following this procedure ensures that laboratory personnel deliver accurate volumes and avoid common measurement errors associated with pipette tip volume.
Video: Technique: Reading Serological Pipette by ISU General Chemistry Laboratory Experiments (2020). All credit for the demonstration goes to the creator; watch the original on YouTube. The written guide below was generated from this video by Docsie. Creator? Request a change or removal.
This SOP describes how to use a serological pipette correctly, with emphasis on interpreting the zero and 10 mL markings across different pipette brands and dispensing liquid with precision. Following this procedure ensures that laboratory personnel deliver accurate volumes and avoid common measurement errors associated with pipette tip volume.
Purpose
This method describes the correct technique for reading graduation markings on serological pipettes and for using a special glass pipette to deliver an accurate 10 mL volume of liquid. The intended analytical use is precise liquid volume measurement in laboratory procedures where accuracy of delivered volume is critical.
Scope
This procedure applies to liquid samples such as water, dispensed using serological pipettes in a laboratory setting.
- Sample type: Liquids (demonstrated with water)
- Instruments: Fischer brand glass pipette, a second brand of glass pipette (ending at 9 mL), and a special glass pipette provided for a specific experiment
- Consumables: Pipette bulb, beaker
- Analysts: Laboratory personnel wearing lab coats and gloves
- Exclusions: Standard serological pipettes from general trays must not be used when the procedure specifies the special glass pipette; only the provided special glass pipette is calibrated for that experiment.
Principle
Serological pipettes are graduated instruments used to measure and deliver precise liquid volumes. The method relies on correctly identifying the zero marking and the highest graduation marking, then determining whether the pipette tip volume must be included in the total measured volume.
Pipette brands differ in how they account for the volume held in the tip:
- Pipettes marked with a 10 mL end marking already account for the tip volume; the tip does not need to be counted separately.
- Pipettes that end at a 9 mL marking have a tip that holds an additional 1 mL. In this case, the tip volume must be added to reach the true total of 10 mL.
Correctly interpreting these markings and stopping at the appropriate graduation ensures the pipette delivers exactly the calibrated volume, rather than an inflated volume caused by expelling the tip contents unnecessarily.
Materials and reagents
| Item | Purpose | Notes |
|---|---|---|
| Fischer brand glass pipette | Reference pipette with 10 mL end marking | Zero and 10 mL markings both visible |
| Second brand glass pipette | Comparison pipette ending at 9 mL | Tip holds an additional 1 mL |
| Special glass pipette | Calibrated instrument for the specific experiment | Use only this pipette for the designated procedure; do not substitute standard tray pipettes |
| Pipette bulb | Used to draw up and control liquid in the pipette | Required for both drawing liquid to the zero mark and dispensing to the 10 mL mark |
| Water | Liquid used to demonstrate volume measurement | Held in a beaker on the laboratory bench |
| Beaker | Vessel to hold the liquid being measured and dispensed | Used as both the source and receiving vessel during demonstration |
Procedure
Part A: Interpreting pipette measurement markings
- Understand the purpose of the reading process This procedure explains how to interpret measurements on different brands of serological pipettes, with focus on the significance of the zero and 10 mL markings.

-
Identify the pipette brand and markings Examine the pipette to determine its brand and the location of its measurement markings. In this example, a Fischer brand glass pipette is used, designed for high precision.
-
Locate the zero and 10 mL markings Find the zero marking, typically located near the top of the pipette. On the Fischer pipette, the zero marking is clearly visible, and a 10 mL marking is present at the opposite end.
-
Compare a second pipette brand Obtain a different brand of pipette for comparison. Note that this second pipette also has a zero marking, but it ends at 9 mL instead of 10 mL.
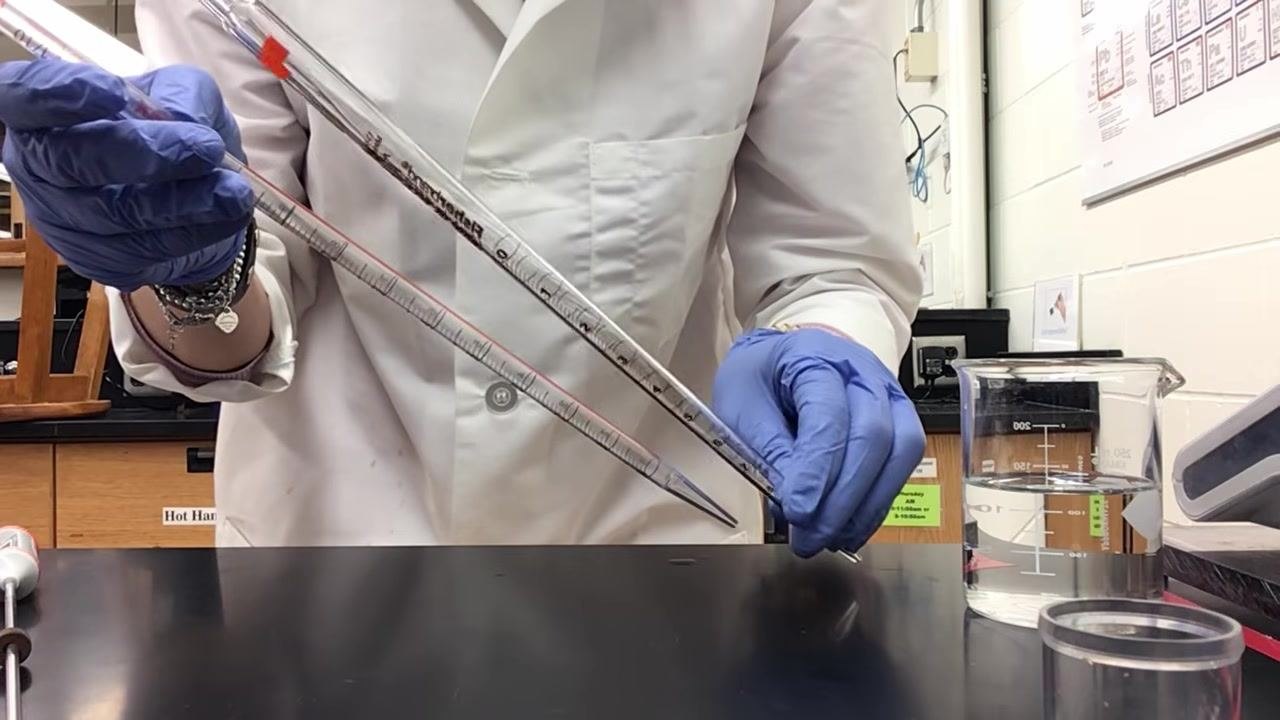
- Interpret the absence of a 10 mL marking If a pipette ends at 9 mL, the tip itself holds exactly 1 mL. Therefore, the total volume delivered when the pipette is fully emptied to the tip is 10 mL, even though the highest printed marking is 9 mL.
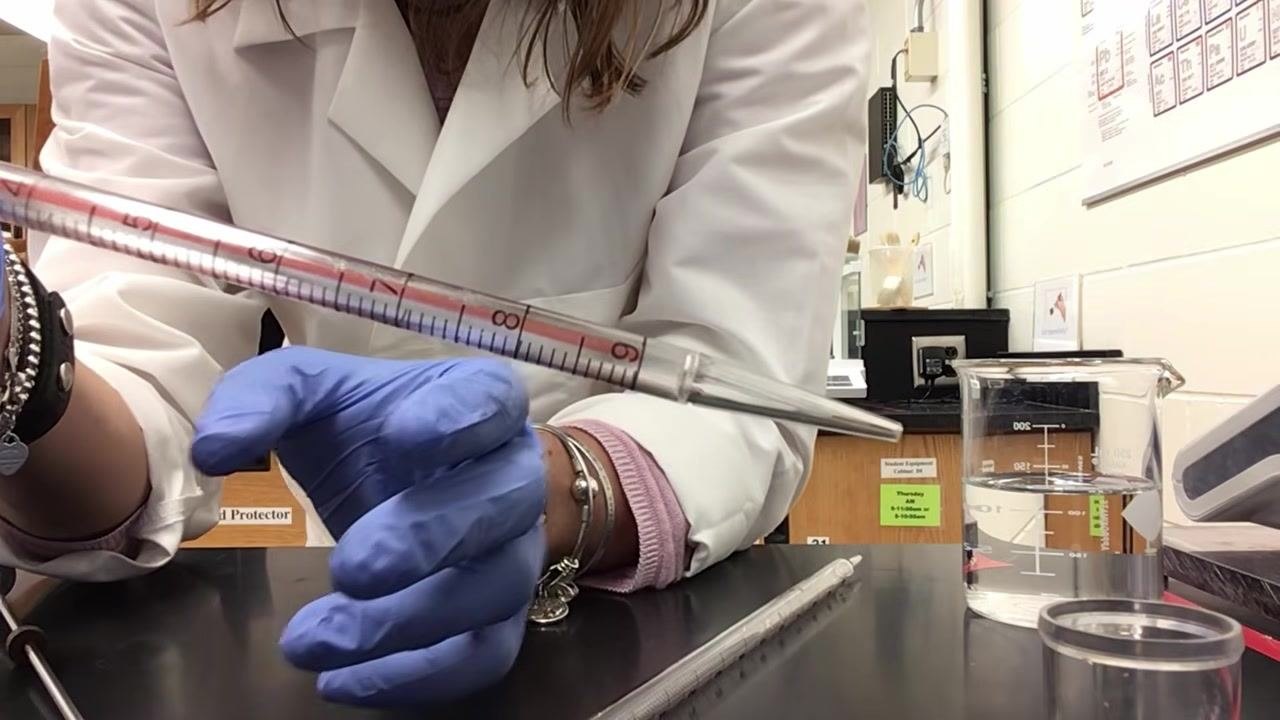
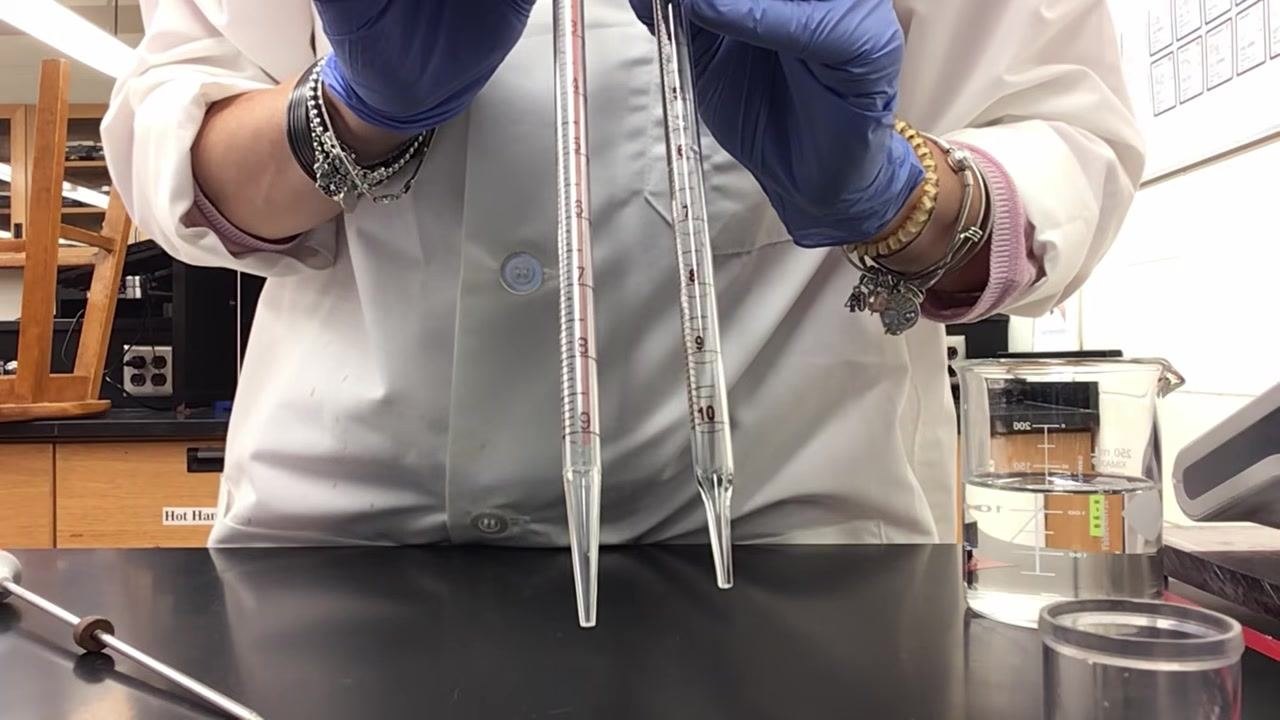
- Recognize when to include the tip volume For pipettes without a 10 mL marking, always include the 1 mL tip volume in your total measurement. For pipettes with a 10 mL marking, the tip does not need to be counted separately.
-
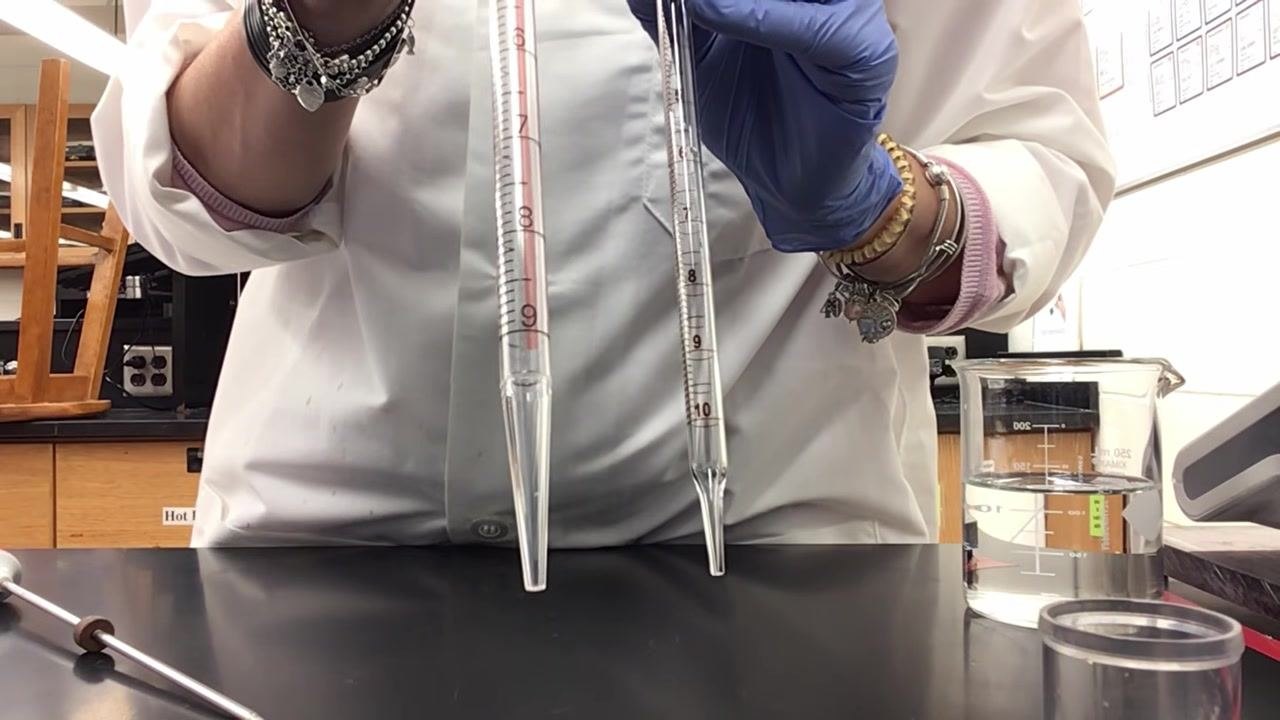
Compare both pipettes side by side Hold both pipettes side by side to visually compare their markings and tips. The pipette with the 10 mL marking does not require the tip to be counted, while the pipette ending at 9 mL does.
-
Summarize the key differences If the pipette has a 10 mL marking, do not add the tip volume separately. If the pipette ends at 9 mL, add 1 mL for the tip to reach a total of 10 mL.
Part B: Using the special glass pipette to dispense 10 mL
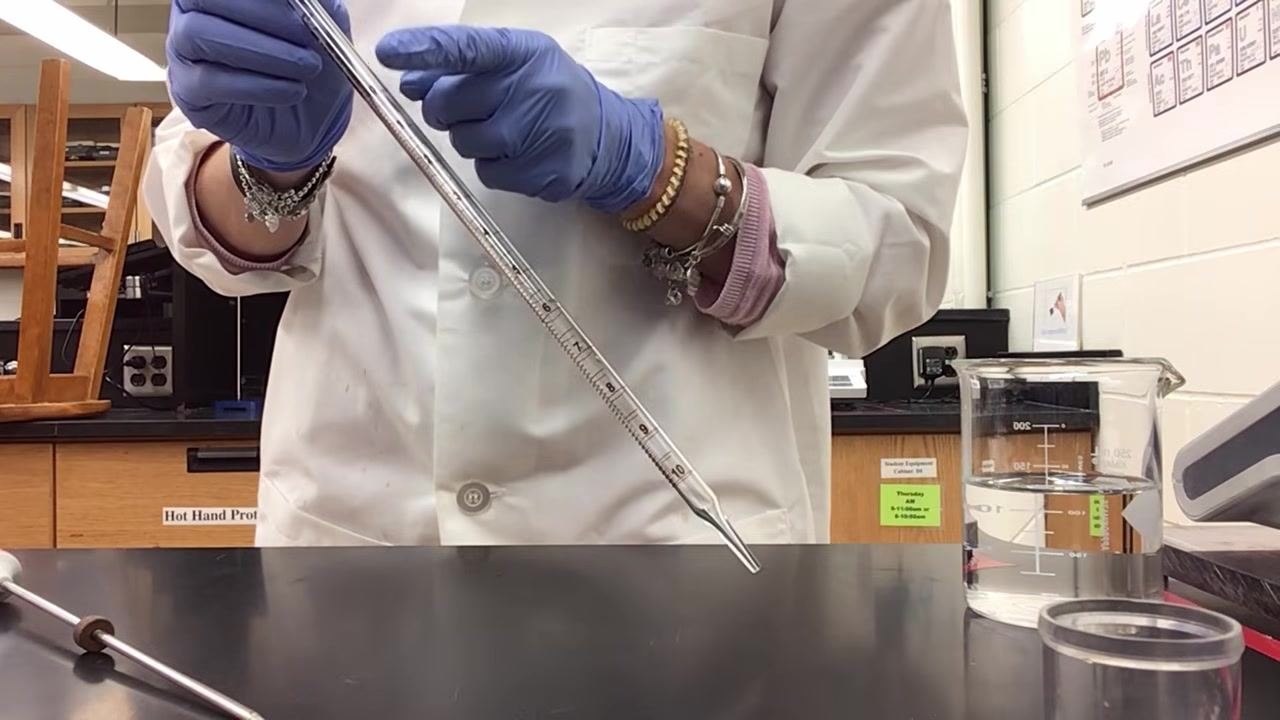
- Withdraw water to the zero mark Hold the special glass pipette vertically with the tip submerged in the liquid. Use a pipette bulb to draw water up to the zero mark, ensuring the meniscus aligns precisely with the zero marking.
-
Prepare to dispense 10 mL Position the pipette over the receiving vessel and prepare to release the liquid by gently squeezing the pipette bulb. Confirm that dispensing will start from the zero mark.
-
Dispense water down to the 10 mL mark Gradually squeeze the bulb to release liquid, allowing it to flow down the pipette past each graduation until it reaches the 10 mL mark. Stop dispensing as soon as the meniscus aligns with the 10 mL mark—do not expel the liquid remaining in the tip.
-
Do not expel the tip volume After reaching the 10 mL mark, do not continue to force out the remaining liquid held in the tip. Stopping at the 10 mL mark ensures exactly 10 mL is delivered as calibrated.
-
Understand the consequence of over-dispensing Dispensing the entire volume, including the tip, results in inaccurate measurement and can deliver 10.7–11 mL instead of the intended 10 mL. Always stop at the 10 mL mark for precise results.
-
Confirm pipette calibration The pipette is calibrated to deliver the specified volume when stopped at the 10 mL mark, not when emptied completely. This ensures consistency and accuracy in results.
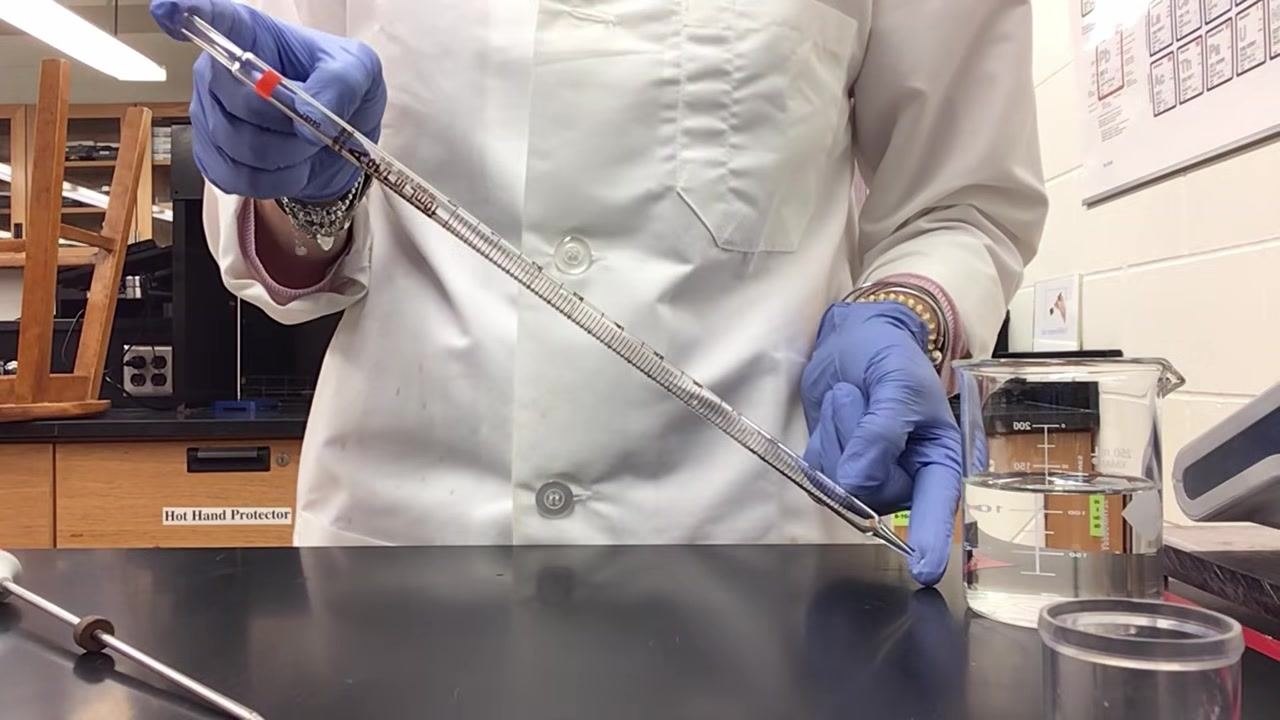
- Use only the designated special glass pipette For this specific procedure, do not use standard serological pipettes from the general trays. Use only the special glass pipette provided, as it is calibrated for this experiment.
Calculations
Determine the delivered volume according to the pipette type used:
- Pipette with a 10 mL end marking: Delivered volume = reading at the stopping graduation (no tip volume added).
- Pipette ending at 9 mL (no 10 mL marking): Delivered volume = reading at the stopping graduation + 1 mL tip volume, giving a total of 10 mL when emptied to the tip.
- Over-dispensed volume (tip forced out unnecessarily): Reported delivered volume may range from 10.7 mL to 11 mL instead of the intended 10 mL; this result is not acceptable and must be discarded.
Report delivered volume in milliliters (mL), consistent with the graduation markings on the pipette used.
Quality controls
| Control point | Acceptance criterion | Action if not met |
|---|---|---|
| Meniscus alignment at zero mark | Meniscus must align precisely with the zero marking before dispensing | Re-draw liquid until alignment is correct |
| Meniscus alignment at 10 mL mark | Dispensing must stop exactly when the meniscus reaches the 10 mL mark | Discontinue dispensing immediately; do not force out tip contents |
| Tip volume accounting | For 9 mL-ending pipettes, tip volume (1 mL) must be included in total volume calculation | Recalculate delivered volume to include tip volume |
| Pipette selection | Only the special glass pipette provided may be used for the designated experiment | Discard results obtained with standard tray pipettes for this experiment and repeat with the correct pipette |
| Over-dispensing check | Delivered volume must not exceed 10 mL due to forced expulsion of tip contents | If over-dispensing occurs (10.7–11 mL), the run is invalid and must be repeated |
Generation details: cost, quality tiers, downloads
Docsie billed 2,000 credits ($1.40) to analyze this 4-minute video at standard quality. The rewrite, template fill and Word/PDF exports were included. The same video at each quality tier:
| Quality | Frames sampled | Credits | Approx. cost |
|---|---|---|---|
| Draft | every 16-30 s | 1,000 | $0.70 |
| Standard (this guide) | every 8-15 s | 2,000 | $1.40 |
| Detailed | every 4-7 s | 4,000 | $2.80 |
| Ultra | every 1-3 s | 8,000 | $5.60 |
Credits priced at $0.70 per 1,000; plans include a monthly allowance. Enterprise customers on on-premise or bring-your-own-model deployments run this on their own inference and pay no per-video credits.
Generated by Docsie Video-to-Docs on 2026-09-20 from a 3-minute video. It was generated straight into Docsie's Lab Method SOP template, so every section of that template is filled from the video. Screenshots are frames from the source video and belong to their creator, ISU General Chemistry Laboratory Experiments, whose original is embedded above. If you own this video and want the guide removed or credited differently, contact us and we will act within one business day.