
How to Chart Supernumerary Teeth in Eaglesoft
Supernumerary teeth require a custom draw type and condition before you can chart them on a patient's odontogram. This guide walks you through creating a custom supernumerary draw type in Eaglesoft, customizing it for individual teeth, attaching it to a clinical condition, and charting a supernumerary tooth on a patient chart.
Video: Eaglesoft Training: Andre shows you How to Draw a Supernumerary Tooth by Andre Shirdan / The Crew Process (2021). All credit for the demonstration goes to the creator; watch the original on YouTube. The written guide below was generated from this video by Docsie. Creator? Request a change or removal.
Supernumerary teeth require a custom draw type and condition before you can chart them on a patient's odontogram. This guide walks you through creating a custom supernumerary draw type in Eaglesoft, customizing it for individual teeth, attaching it to a clinical condition, and charting a supernumerary tooth on a patient chart.
Prerequisites
- You must be working in the Clinical screen of Eaglesoft before you begin.
Create a custom draw type
Open the Draw Types list
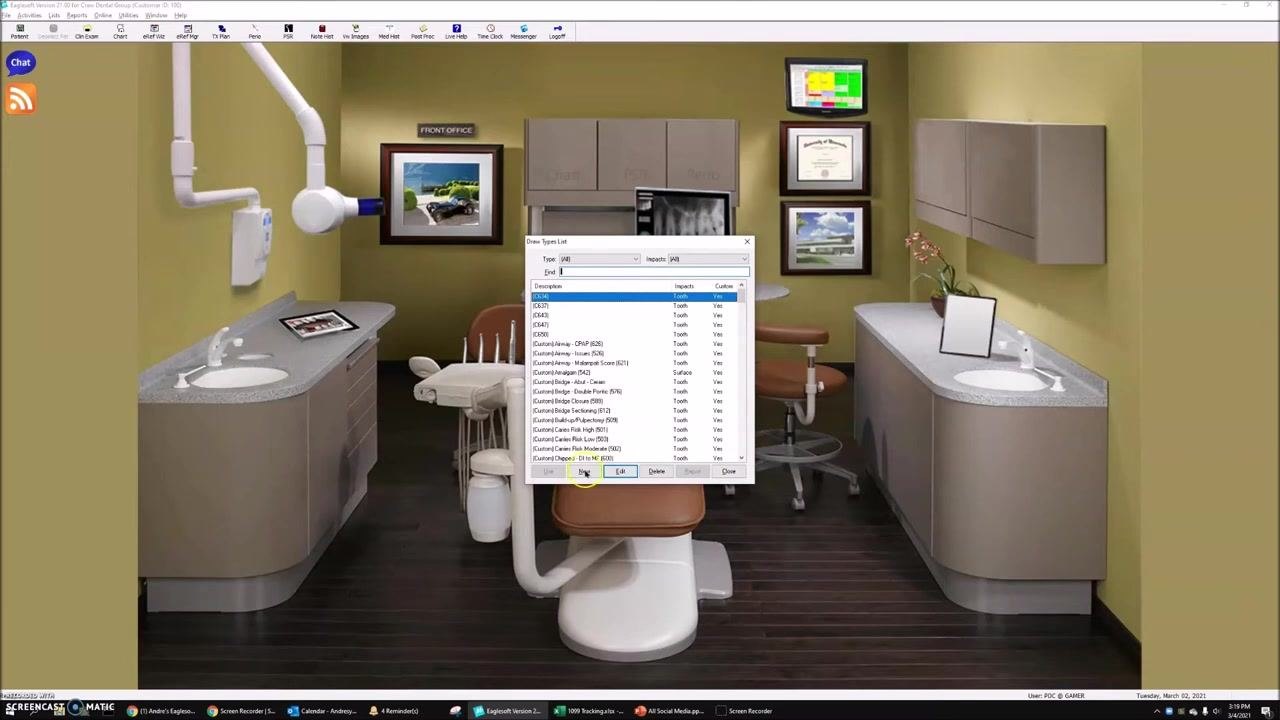
Go to the List menu and select Draw Types. In the Draw Types List window, click New to create a new draw type.
Name the custom draw type
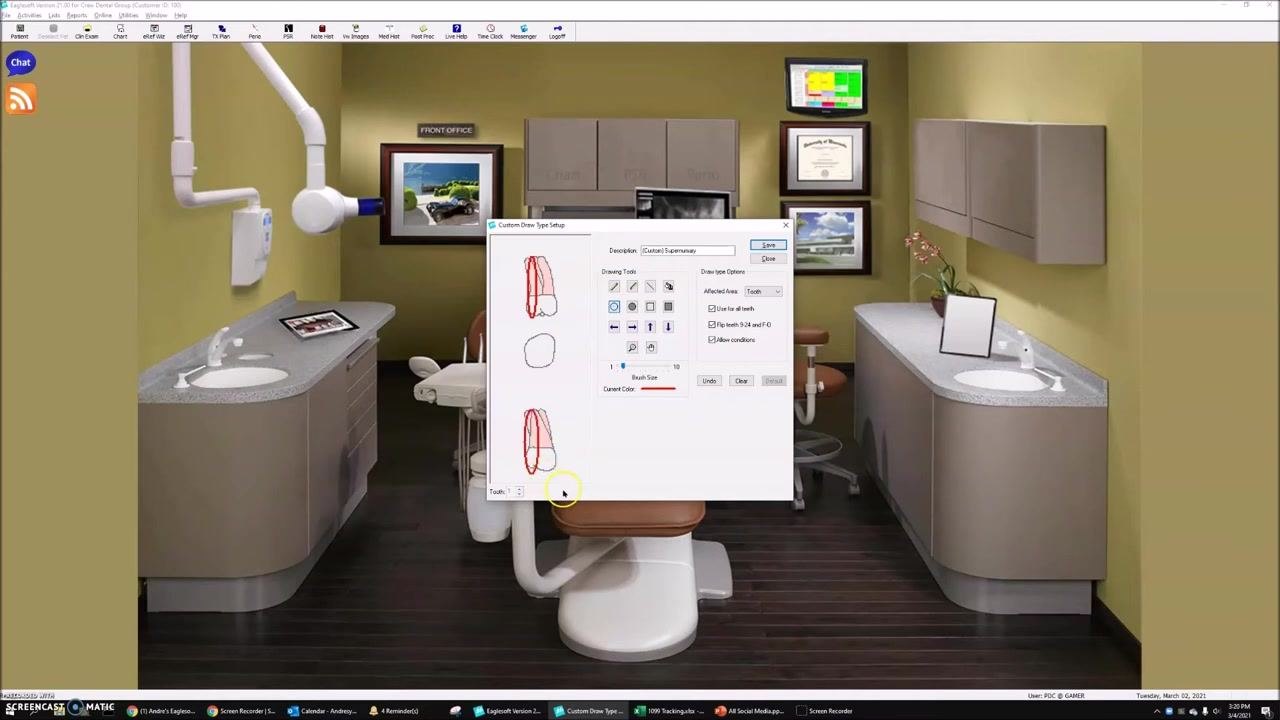
In the Custom Draw Type Setup window, enter a name for your new draw type in the Description field. Use the format [Custom] Supernumerary.
Configure the draw type options
- Set the draw type to be based on a Tooth in the Draw Type Options section.
- For demonstration purposes, select the option to use it for all teeth.
- If any existing drawings appear, click Clear to remove them.
Set the brush size
Adjust the Brush Size to 2 for finer drawing control.
Draw the arch circles
Select the circle tool in the Drawing Tools section. Using the drawing area on the left side of the Custom Draw Type Setup window, draw two circles: one to represent the upper arch and one to represent the lower arch.
![Custom Draw Type Setup window with two red circles drawn, brush size set to 2, and the description field showing "[Custom] Supernumerary". The dental operatory background is visible.](
)
Save and verify the draw type
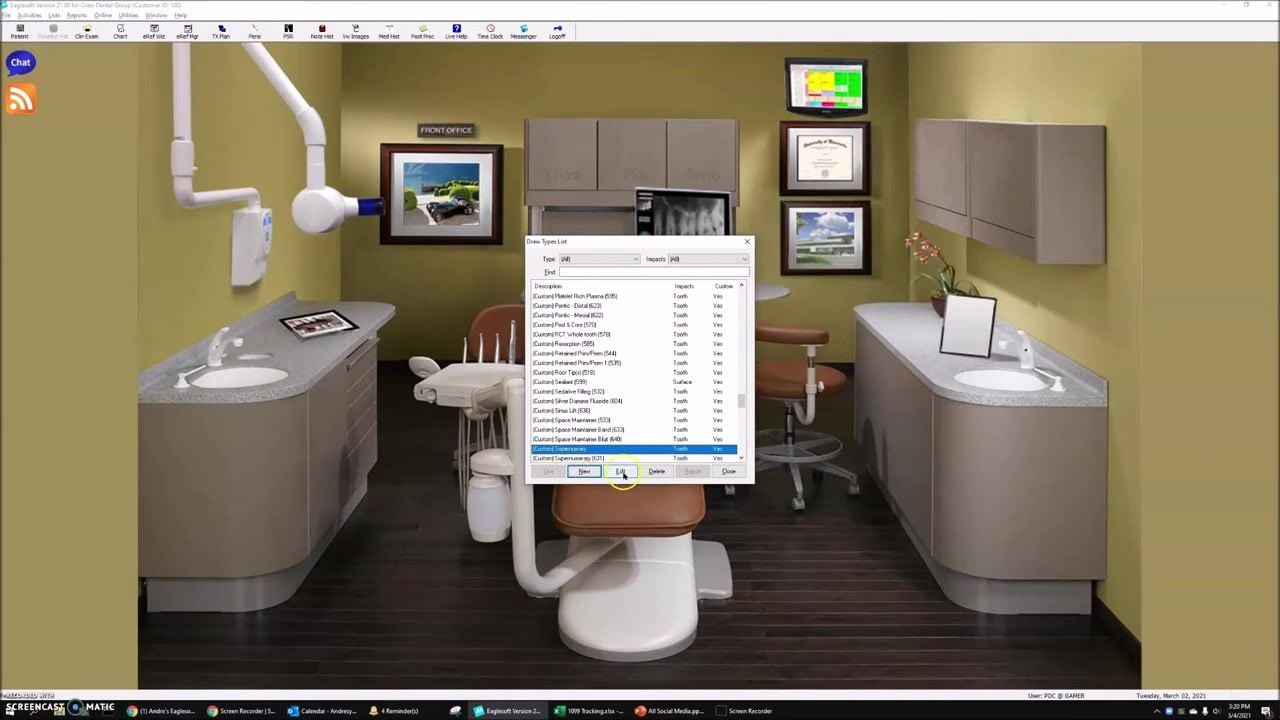
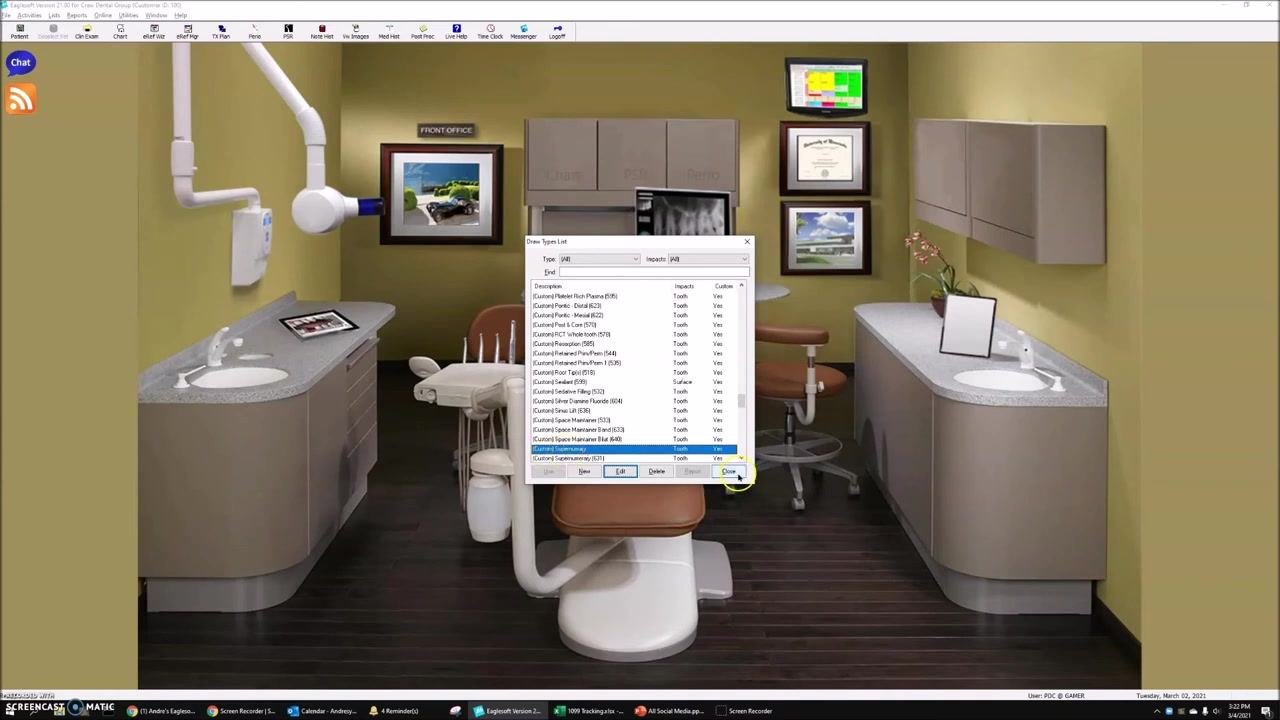
Click Save, then click Close to exit the Custom Draw Type Setup window. Confirm that your new [Custom] Supernumerary draw type now appears in the Draw Types List.
Customize the draw type for individual teeth
With the base draw type created, refine it so each tooth shows only the arch circle that applies to it.
Edit the custom draw type
In the Draw Types List window, select [Custom] Supernumerary and click Edit to reopen the Custom Draw Type Setup window.
Enable per-tooth customization
In the Custom Draw Type Setup window, uncheck Use for all teeth to allow customization for individual teeth.
Select the eraser tool
Click the eraser tool in the Drawing Tools section and increase the brush size to the maximum (super large) setting for efficient erasing.
Erase the lower arch from upper teeth
For each of the 16 upper teeth, erase the lower arch drawing so only the upper arch circle remains. You only need to do this for the 16 upper teeth, not all 32.
Erase the upper arch from lower teeth
For each of the 16 lower teeth, erase the upper arch drawing so only the lower arch circle remains. Repeat this for all lower teeth.
Repeat for primary teeth, if applicable
If you are also customizing for primary teeth, follow the same process: erase the lower drawing from upper primary teeth, and erase the upper drawing from lower primary teeth.
Review your work
Check that each upper tooth shows only the upper arch drawing, and each lower tooth shows only the lower arch drawing.
Save your changes
Click Save, then Close to exit the Custom Draw Type Setup window. In the Draw Types List window, click Done to return to the main screen.
Attach the custom draw type to a condition
Open the Conditions list
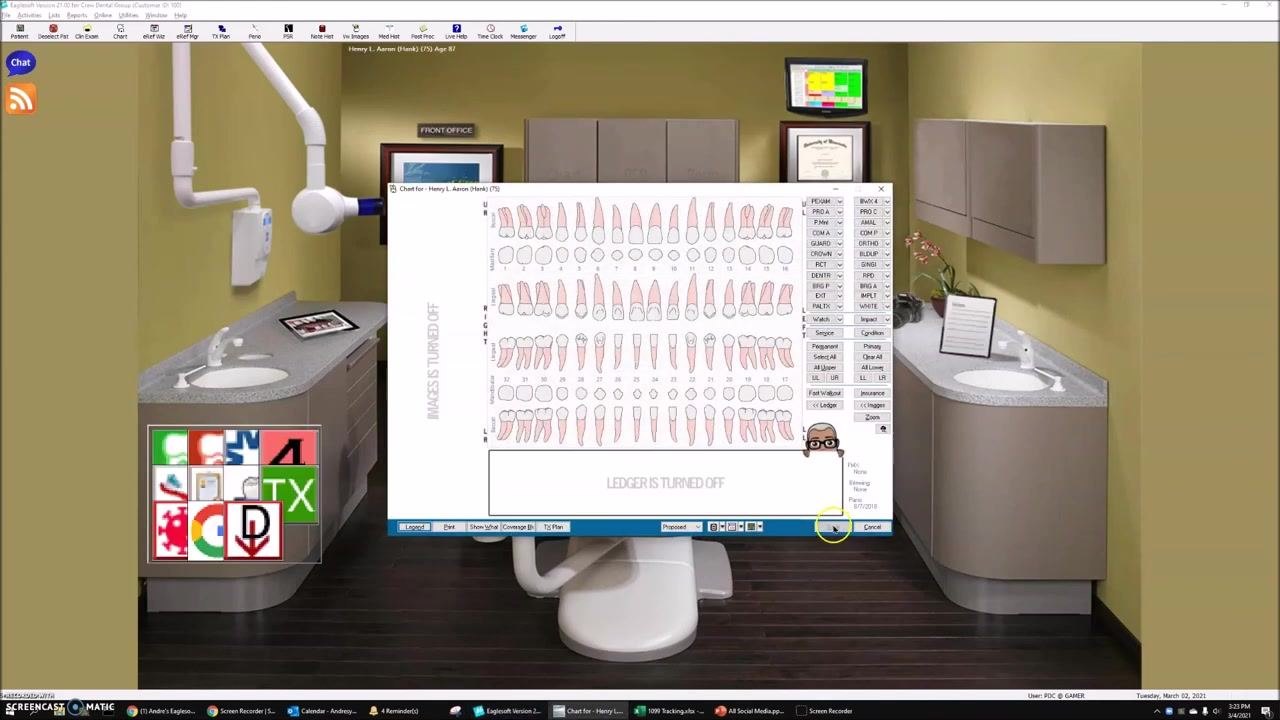
From the main Eaglesoft screen, go to the List menu and select Conditions to open the Conditions List window.
Edit or create the supernumerary condition
If a supernumerary condition already exists, select it from the Conditions List and click Edit. Otherwise, click New to create one. In the Edit Condition window:
- Enter Supernumerary (or your preferred spelling) in the Description field.
- Enter Super in the Display Abbr field.
- In the Draw Type dropdown, select [Custom] Supernumerary (IST) (or the name of your custom draw type).
- Leave other fields at their default values unless you have specific preferences.
Click OK to save the condition.
Verify the condition is linked to the custom draw type
Confirm that the condition you just edited or created appears in the Conditions List with the correct draw type attached. If you have multiple similar conditions, verify the correct one by spelling or draw type selection.
Chart a patient with a supernumerary tooth
Open a patient chart
Navigate to the patient's chart where you want to document a supernumerary tooth. The chart should display a full odontogram with all teeth visible.
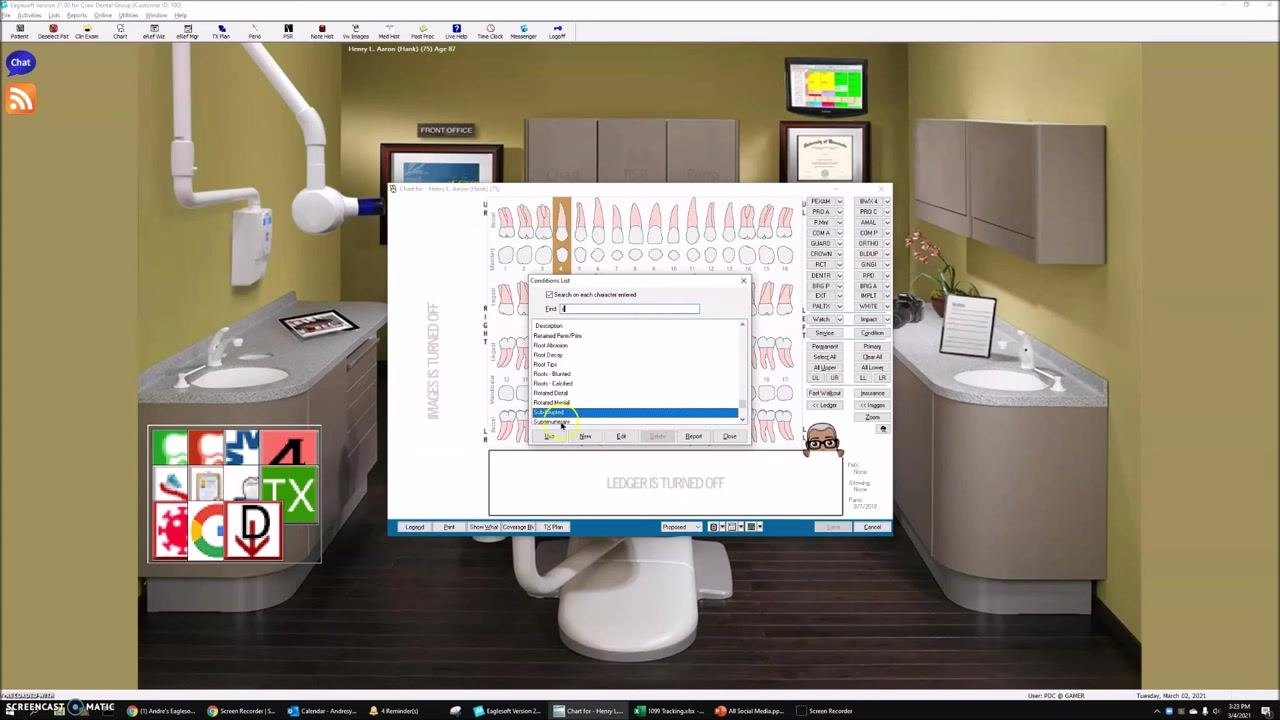
Chart the supernumerary tooth
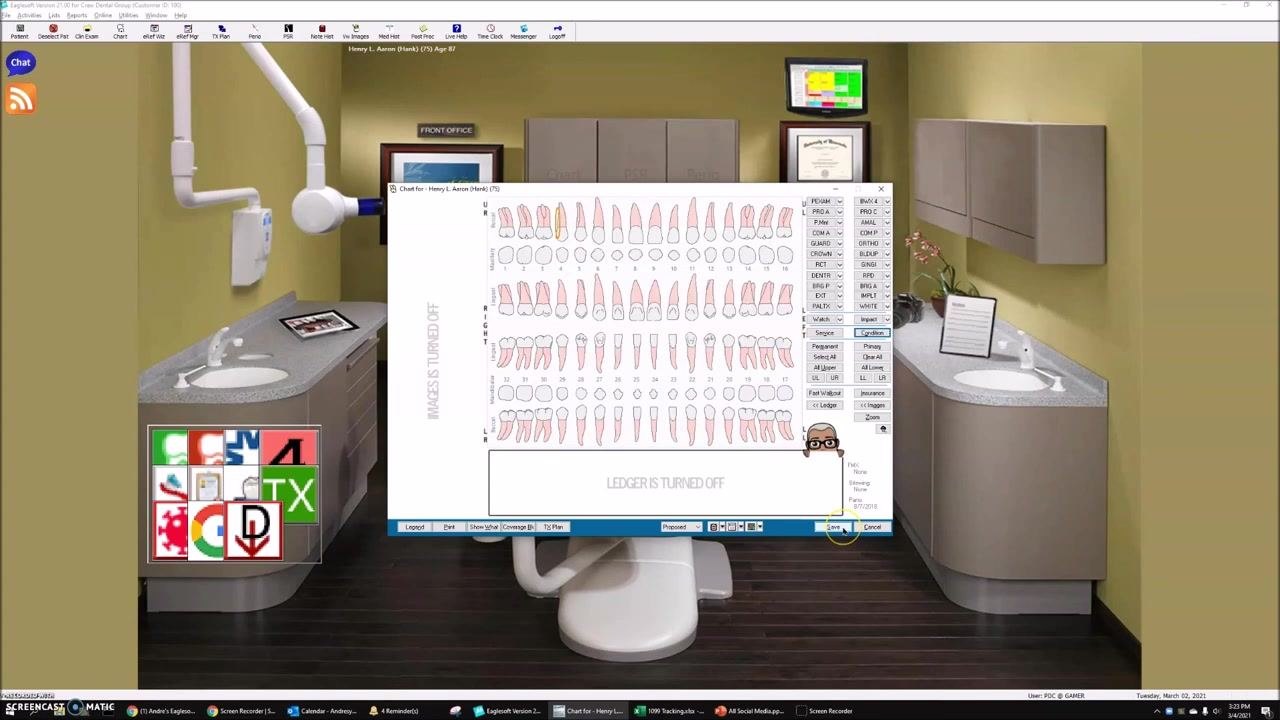
Identify the tooth number where the supernumerary tooth is present (for example, tooth 4). Supernumerary teeth are typically charted on the distal side of the referenced tooth. Select the Condition tool, choose Supernumerary from the list, and apply it to the appropriate tooth. Click OK or Save to confirm the charting.
Review the charted tooth
Confirm that the custom draw type appears correctly on the odontogram for the selected tooth, with the supernumerary indicator visible on the distal side of the tooth. Repeat the process for additional teeth or patients as needed.
Summary
You have now created a custom [Custom] Supernumerary draw type, customized it for individual teeth, attached it to a clinical condition, and charted it for a patient in Eaglesoft. If you have questions or need further assistance, reach out to your Eaglesoft support contact.
Generation details: cost, quality tiers
Docsie billed 2,500 credits ($1.75) to analyze this 5-minute video at standard quality. The rewrite, template fill and Word/PDF exports were included. The same video at each quality tier:
| Quality | Frames sampled | Credits | Approx. cost |
|---|---|---|---|
| Draft | every 16-30 s | 1,250 | $0.88 |
| Standard (this guide) | every 8-15 s | 2,500 | $1.75 |
| Detailed | every 4-7 s | 5,000 | $3.50 |
| Ultra | every 1-3 s | 10,000 | $7.00 |
Credits priced at $0.70 per 1,000; plans include a monthly allowance. Enterprise customers on on-premise or bring-your-own-model deployments run this on their own inference and pay no per-video credits.
Generated by Docsie Video-to-Docs on 2026-10-11 from a 4-minute video. Screenshots are frames from the source video and belong to their creator, Andre Shirdan / The Crew Process, whose original is embedded above. If you own this video and want the guide removed or credited differently, contact us and we will act within one business day.