
How to Create a Business Process in Workday
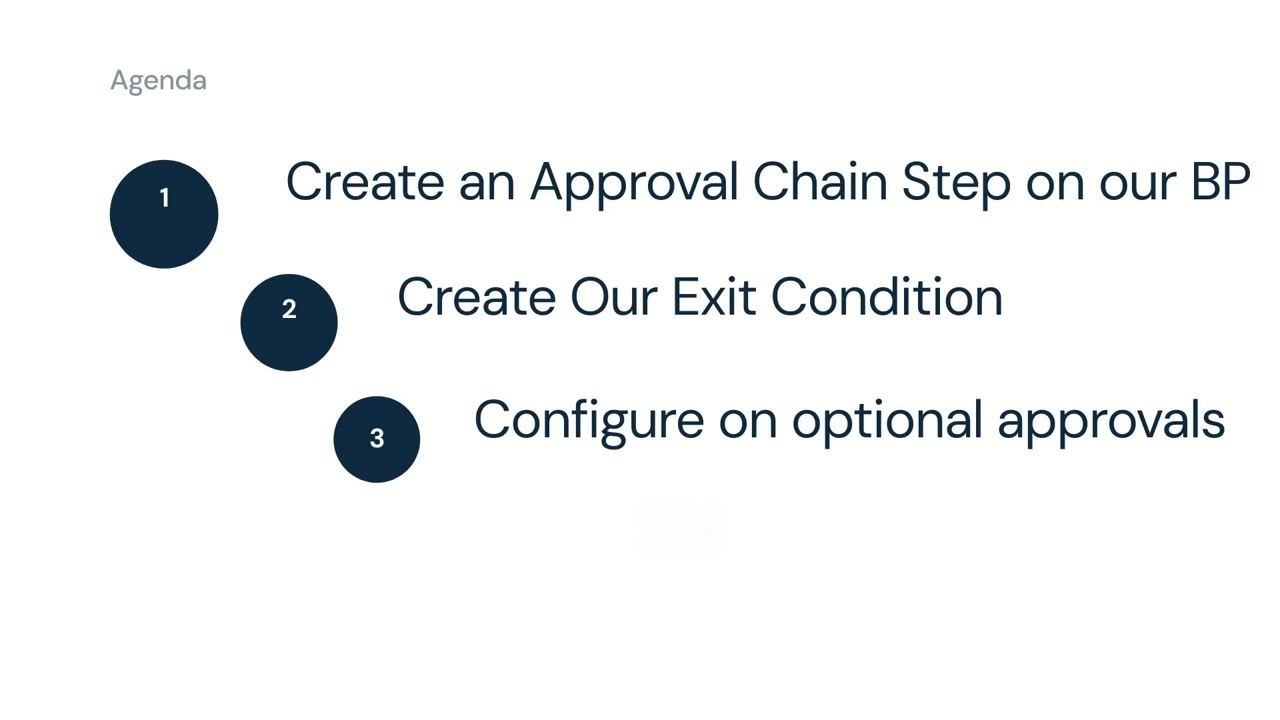
This guide shows how to create a business process in Workday that includes an approval chain step, so that changes route through multiple levels of management before completion. This configuration is commonly used for compliance purposes—such as SOX requirements—where compensation-related changes need multi-level approval. You will learn how to add the step, limit it to a specific approval level, prevent redundant approvals, and optionally trigger the step only under certain conditions.
Video: Workday Business Process: Add third level approver on a Workday Business Process by HeRoiC HRIS Solutions (2024). All credit for the demonstration goes to the creator; watch the original on YouTube. The written guide below was generated from this video by Docsie. Creator? Request a change or removal.
This guide shows how to create a business process in Workday that includes an approval chain step, so that changes route through multiple levels of management before completion. This configuration is commonly used for compliance purposes—such as SOX requirements—where compensation-related changes need multi-level approval. You will learn how to add the step, limit it to a specific approval level, prevent redundant approvals, and optionally trigger the step only under certain conditions.
Prerequisites
- Access to edit the business process definition (BP) you want to configure.
- Familiarity with the Related Actions menu in Workday.
- A specific business process identified for this configuration (this guide uses the Offer business process as an example).
Open the business process for editing
Navigate to the business process where you want to add the approval chain step. For this example, the Offer business process is used.
At the top of the business process screen, click Related Actions. Scroll down and select Edit Definition to begin editing the process. If a pop-up window appears, click OK to proceed.
Add a new step to the business process
In the process editor, locate the steps list and click the plus (+) button in the top left corner to add a new step. Assign an order value to the new step (for example, "c1") to determine its position in the sequence.
Set the step type to Approval Chain
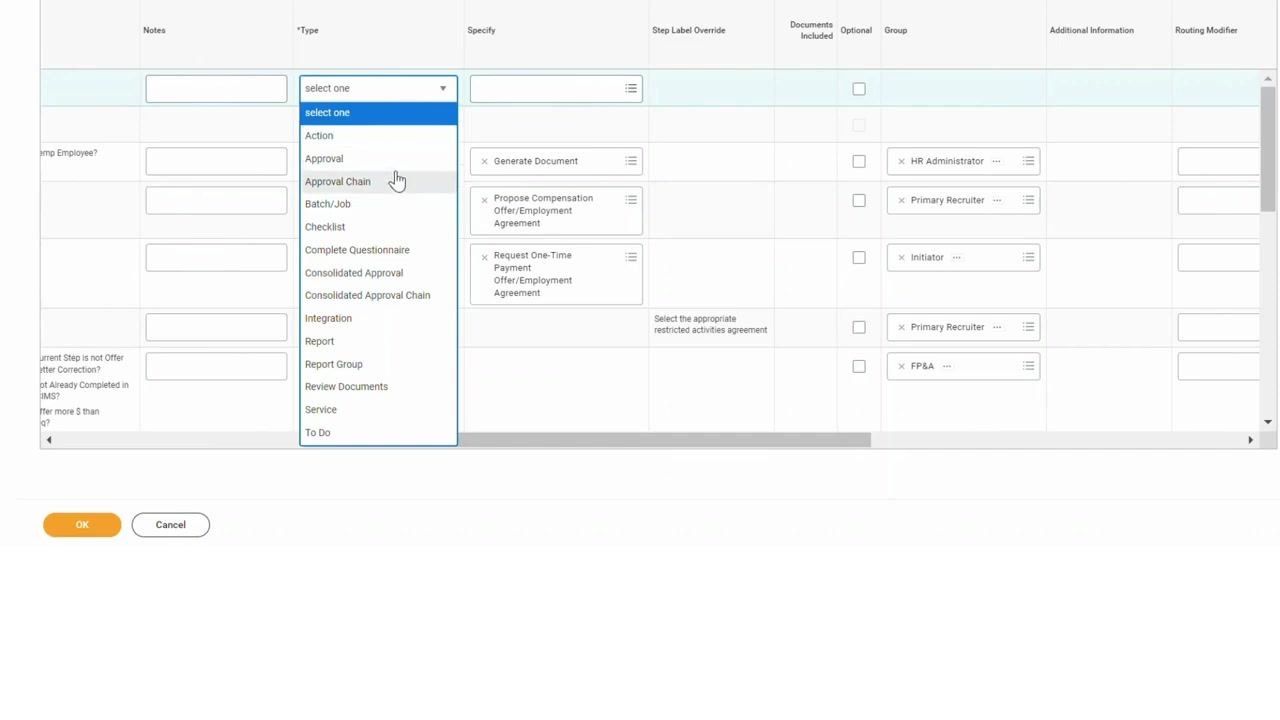
Scroll right in the steps table to reach the Type column. Open the Type dropdown and select Approval Chain as the step type.
Set the number of levels in the management chain that must approve (for example, 3 for three levels of approval).
Set the routing modifier to Proposed
In the Routing Modifier column for your Approval Chain step, click the dropdown and select Proposed instead of Current. This ensures the step routes through the management chain proposed in the process rather than the worker's current management chain—an important distinction for offers going through a requisition or a change job process.
Confirm that your Approval Chain step now appears correctly in the steps list, with the right order (for example, "c1") and type ("Approval Chain").
Create a condition rule to limit the approval level
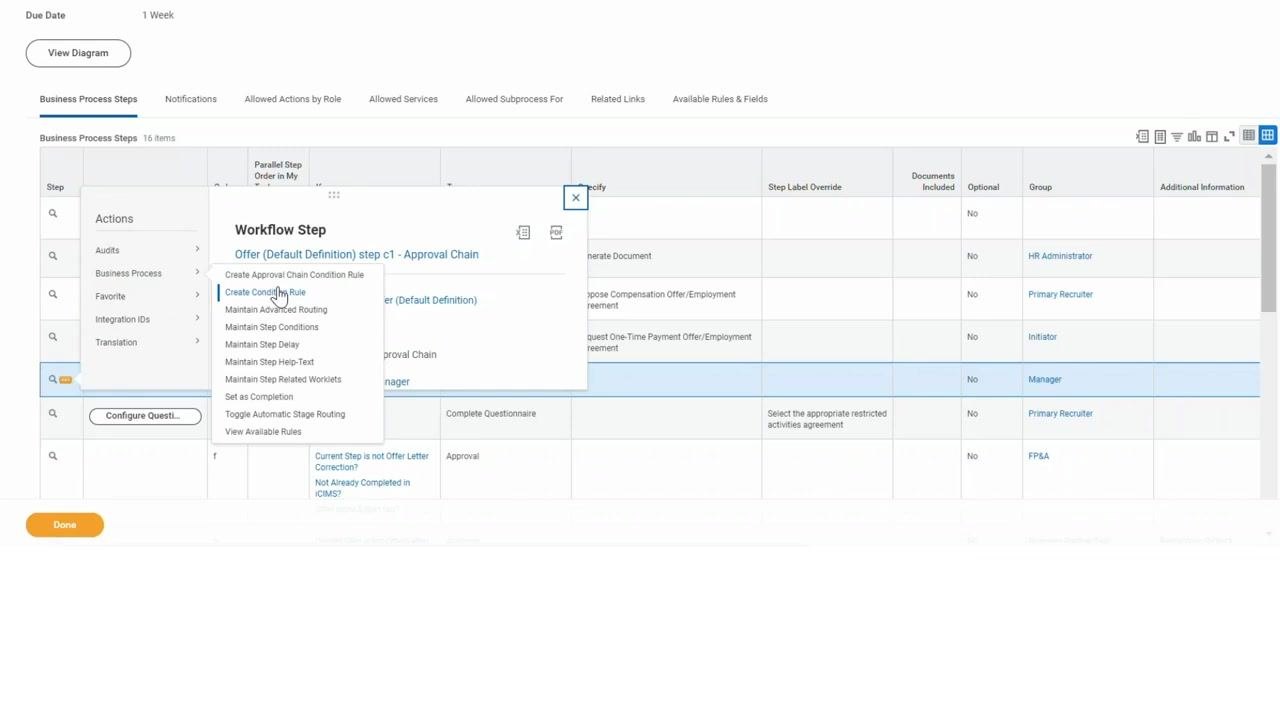
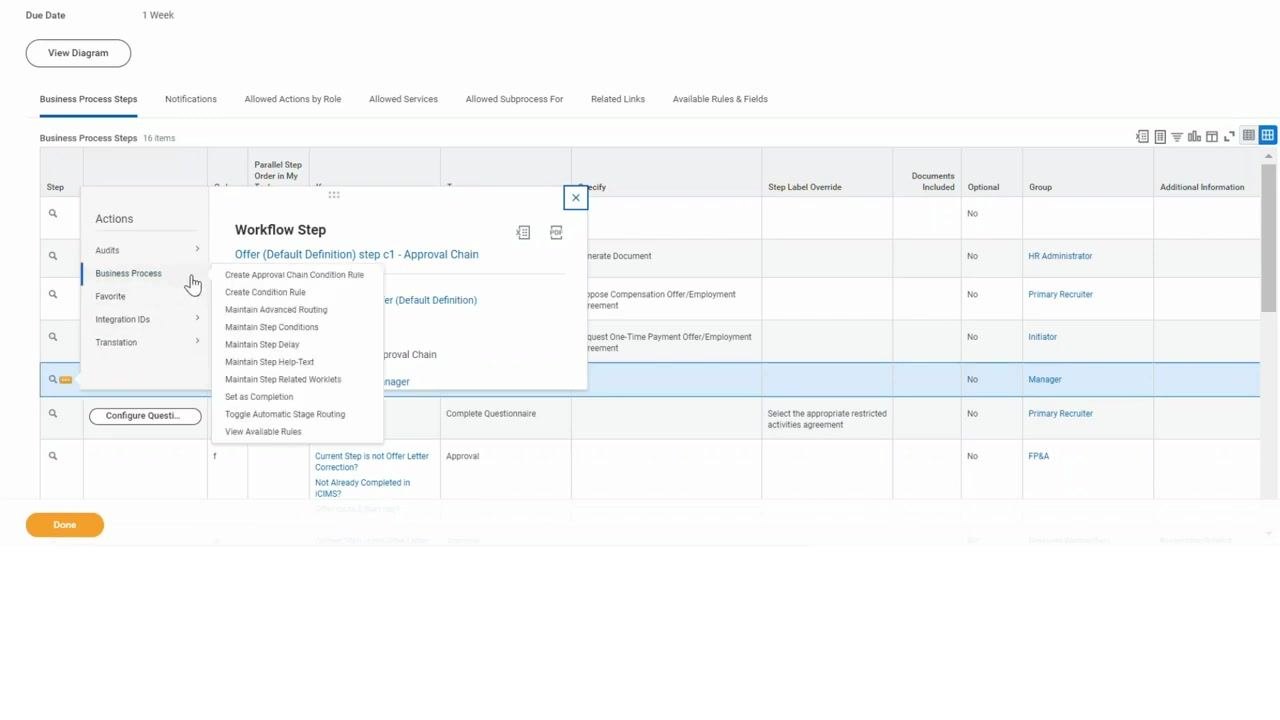
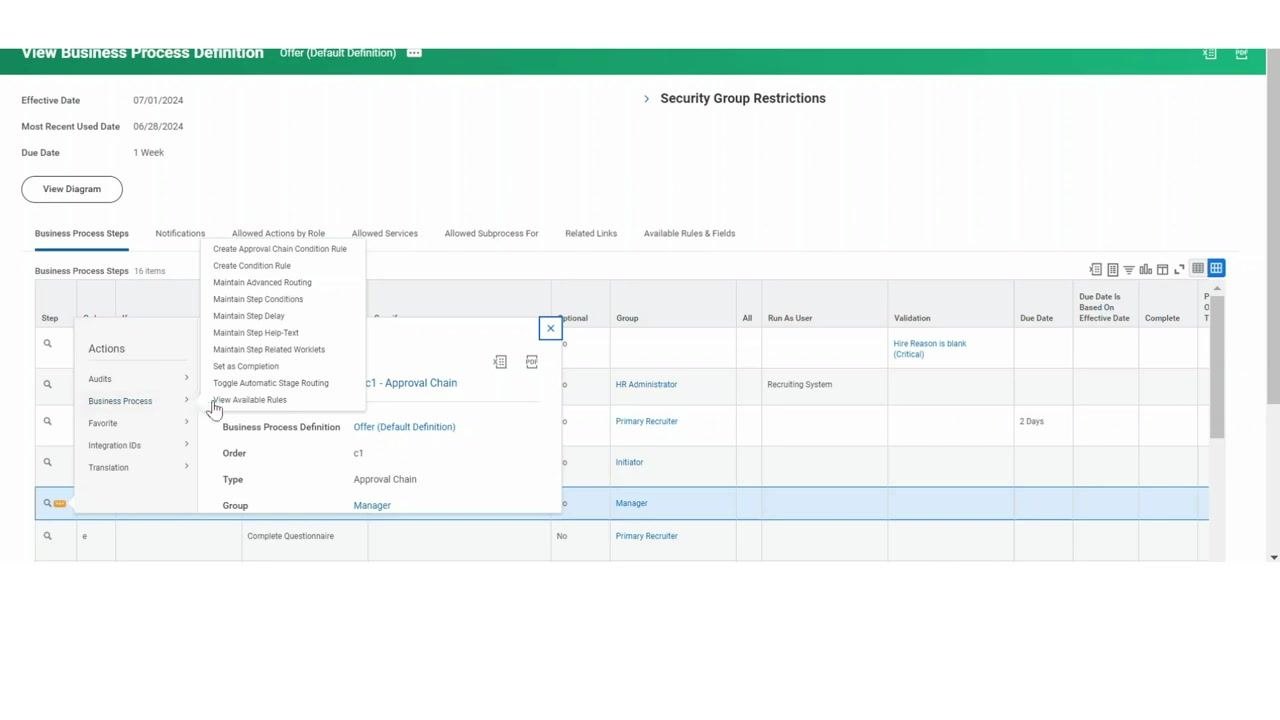
Click the Related Actions button (three dots) next to your Approval Chain step. Hover over Business Process in the menu, then click Create Condition Rule from the submenu.
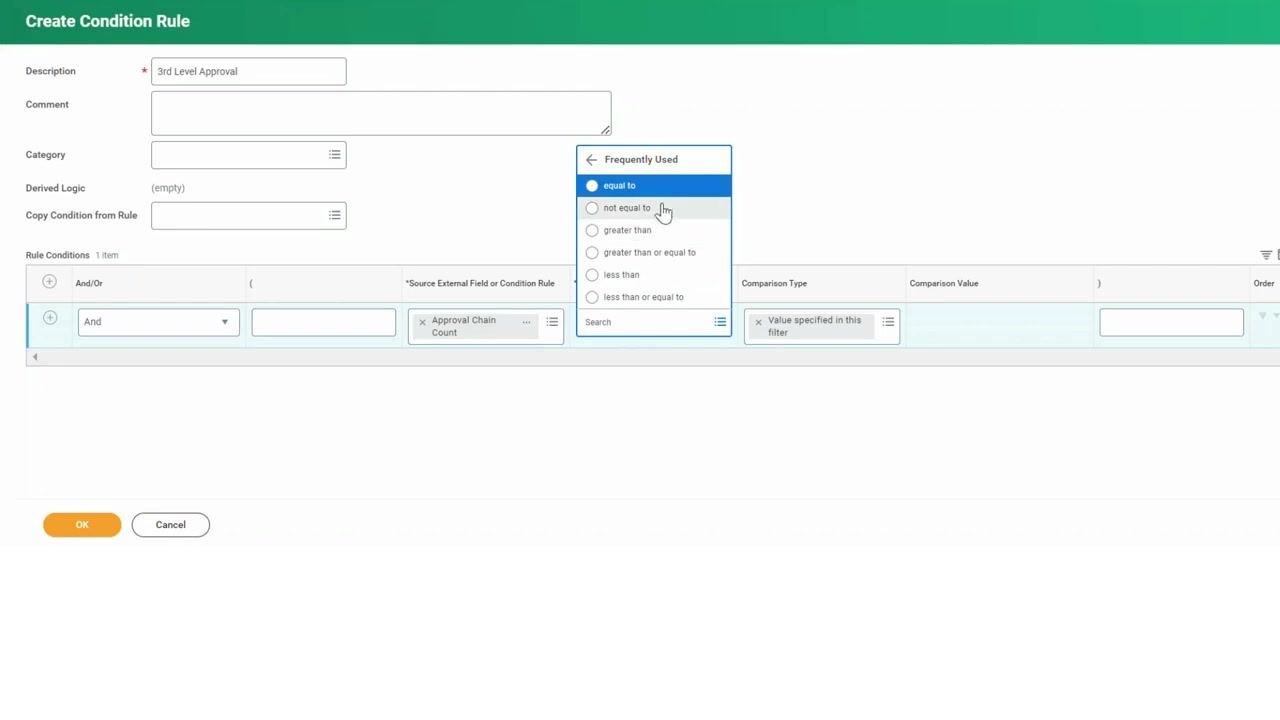
In the Create Condition Rule window, enter 3rd Level Approval in the Description field.
Configure the rule condition
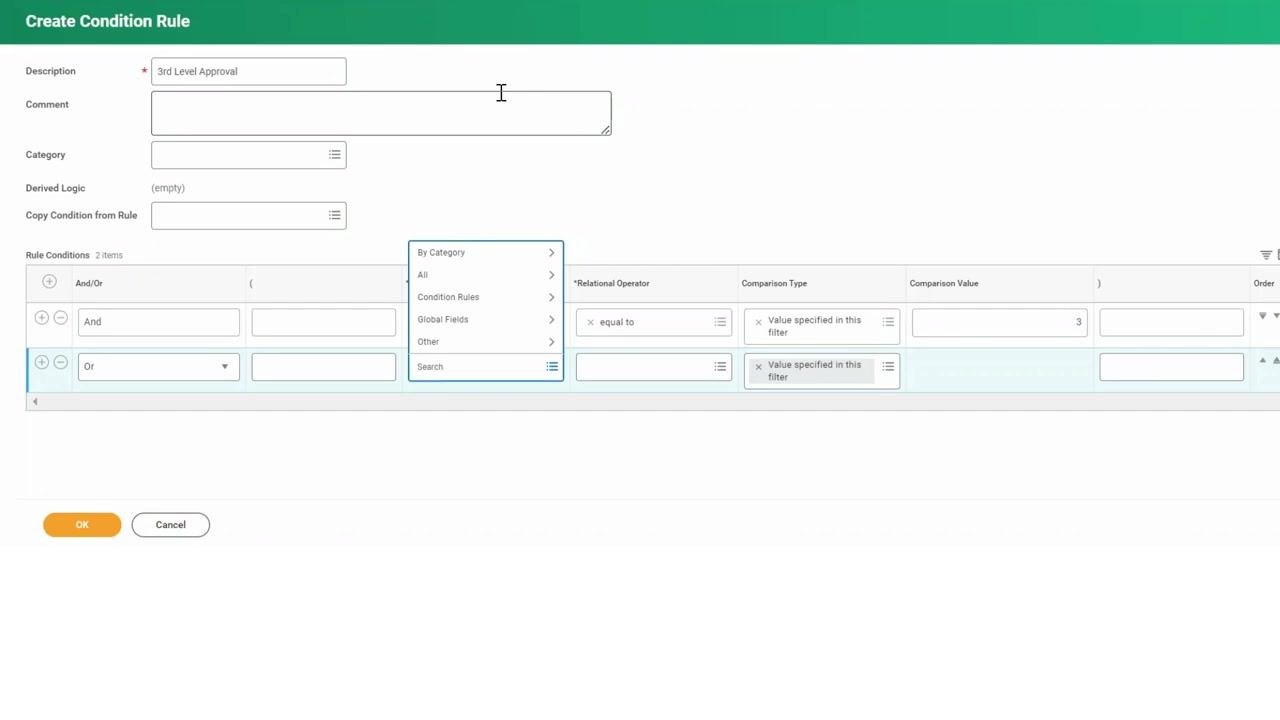
In the Rule Conditions section, click the field under Source External Field or Condition Rule. Select Search and look for Approval Chain Count.
In the Relational Operator field, select equal to. In the Comparison Value field, enter 3. This ensures the rule applies only when the approval chain count is exactly three levels.
If you want to prevent the approval chain from reaching certain management levels (for example, CEO or C-suite), you can add an additional condition specifying that the management level is not CEO or C-suite. This example does not add that condition.
Save the condition rule
Confirm your rule is set as follows:
- Description: 3rd Level Approval
- Rule Condition: Approval Chain Count equal to 3
Remove any extra, unused, or incomplete condition rows to avoid errors, then click OK to save.
After saving, the View Condition Rule screen displays. Copy the name of the rule you just created (3rd Level Approval) for use in the next step. The rule should show Approval Chain Count as the source field, equal to as the relational operator, and 3 as the comparison value.
Apply the condition rule as an exit condition
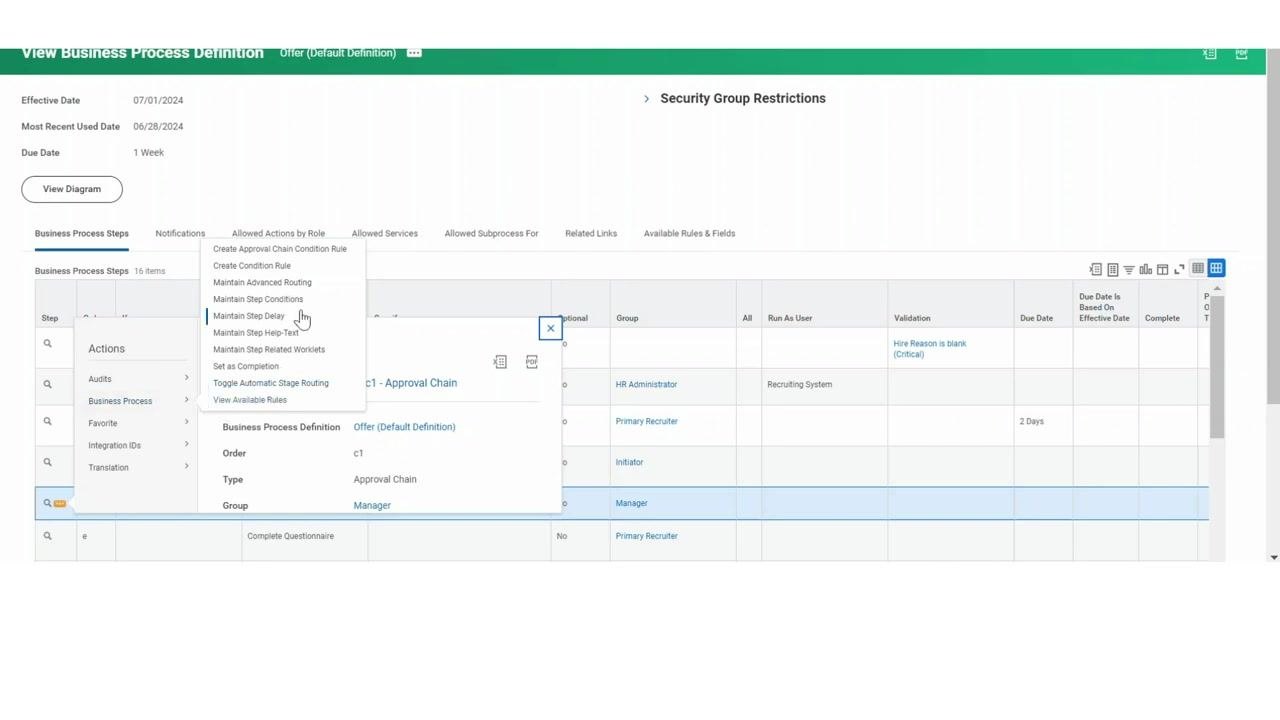
Return to your business process definition where the approval chain step is listed. Locate your step (for example, order "c1"), click Related Actions (three dots) next to it, hover over Business Process, and click Maintain Step Conditions from the submenu.
In the Maintain Step Conditions dialog, verify the Effective Date and Workflow Step, then click OK to proceed.
Go to the Exit Conditions tab and click the plus sign (+) to add a new input row. In the new row, enter the name of the rule you created (3rd Level Approval) in the Business Process Condition field.
Click OK to save the exit condition. Your approval chain is now limited to three levels, and the process will exit the step once that condition is met.
Verify the step in the business process
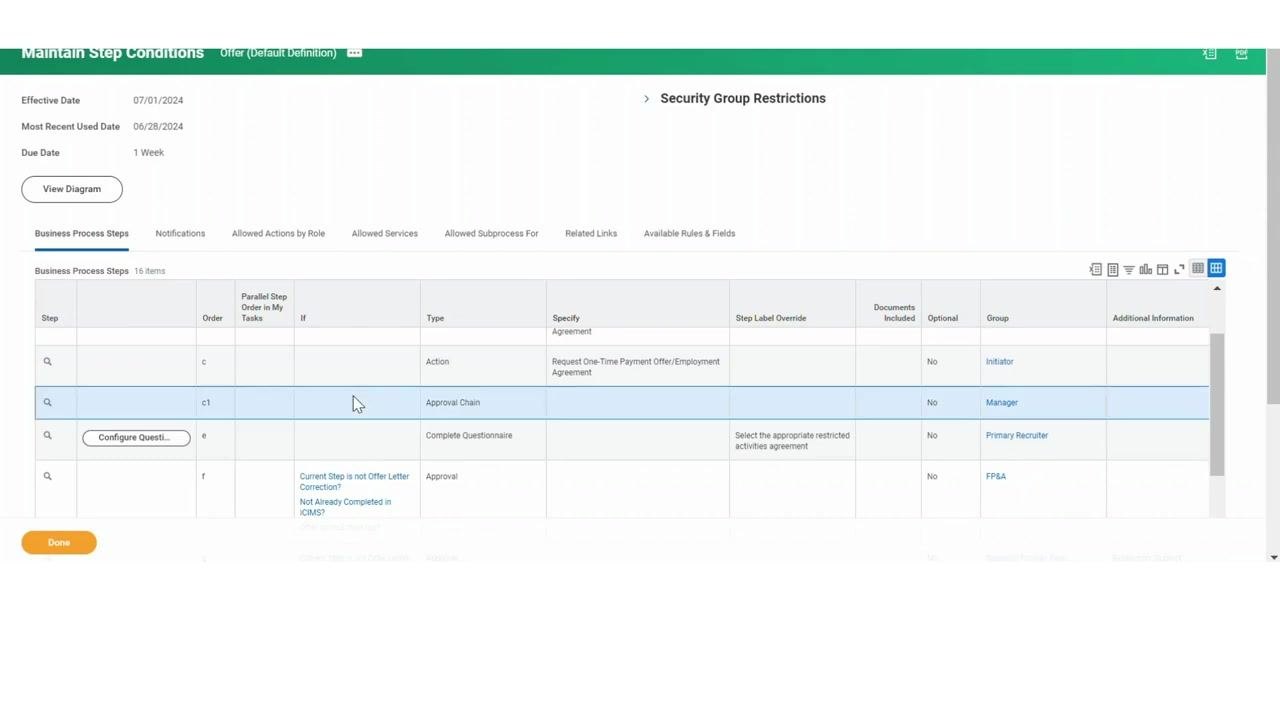
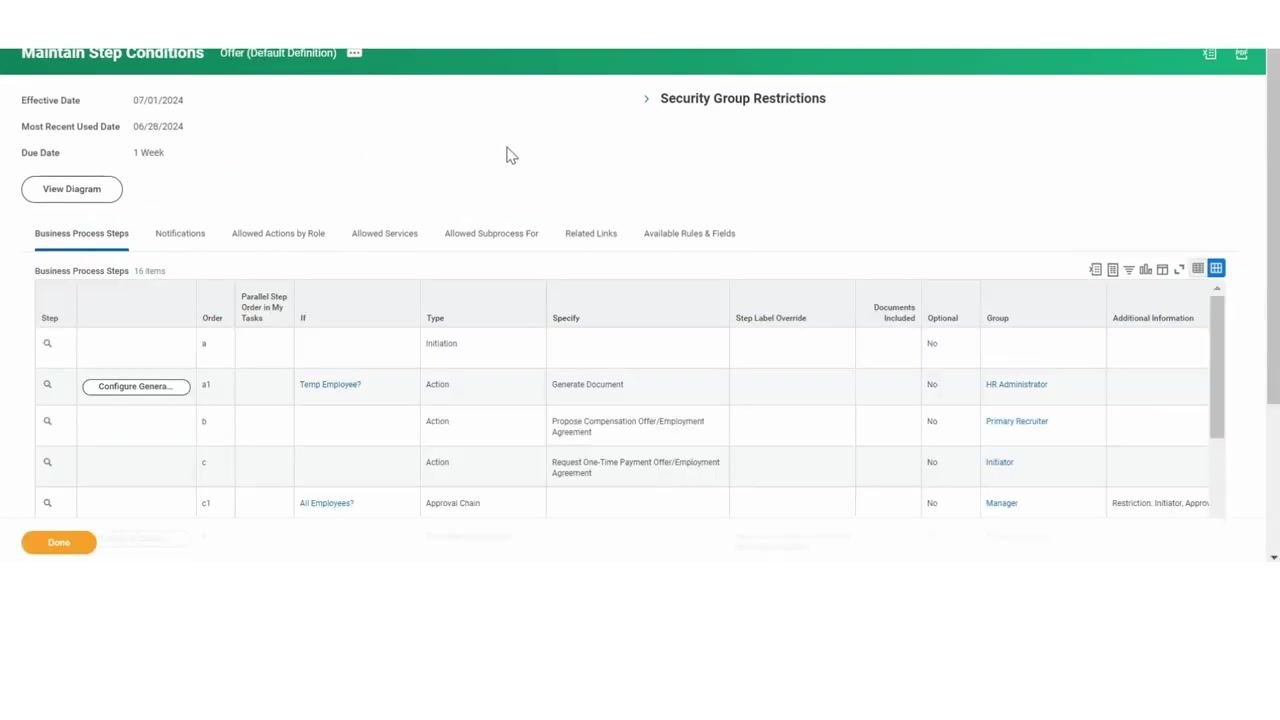
Return to the business process steps overview and confirm your new step appears with these details:
- Step Order: c1
- Type: Approval Chain
- Group: Manager
- Positioned after step "c" and before step "e"
The process now routes through the management chain and exits at the third-level approver.
Scroll through the remaining steps to review their routing logic. Notice the options available for skipping individuals who have already approved the process, ensuring no one has to approve the same step more than once.
Open advanced routing options
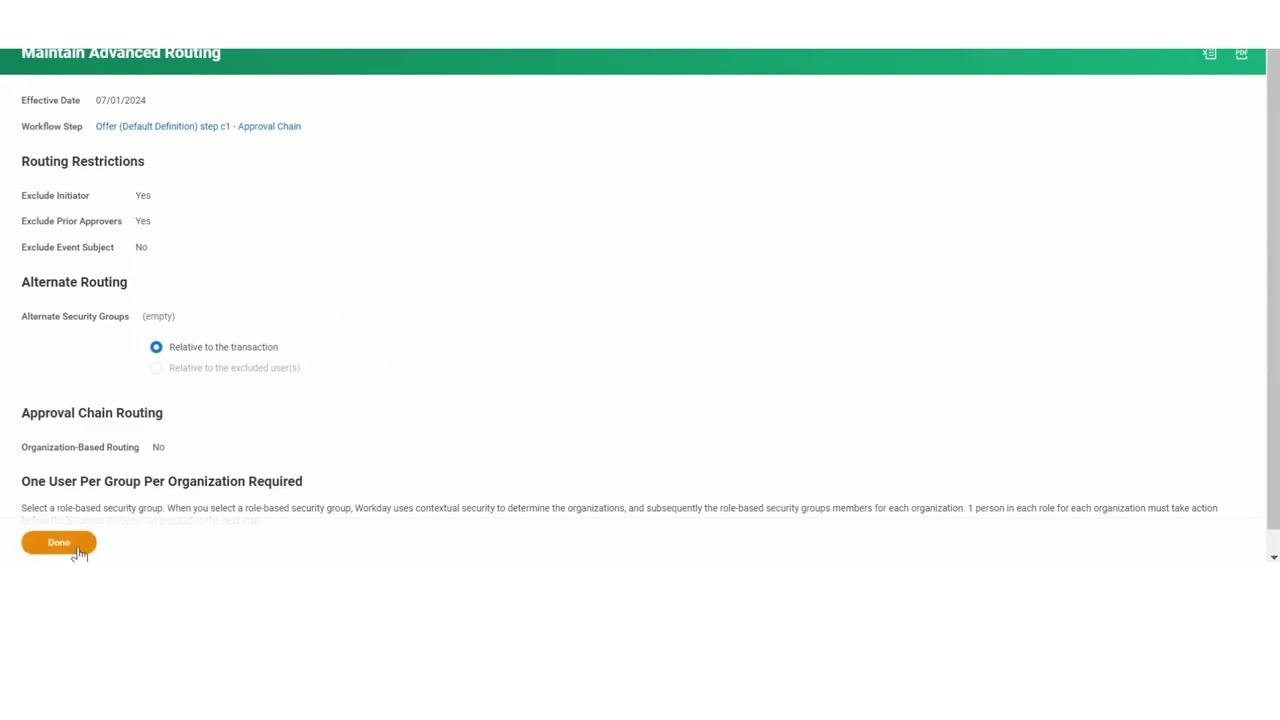
Hover over the Business Process menu and, under Actions for your workflow step (for example, step c1 - Approval Chain), select Maintain Advanced Routing.
Configure routing restrictions
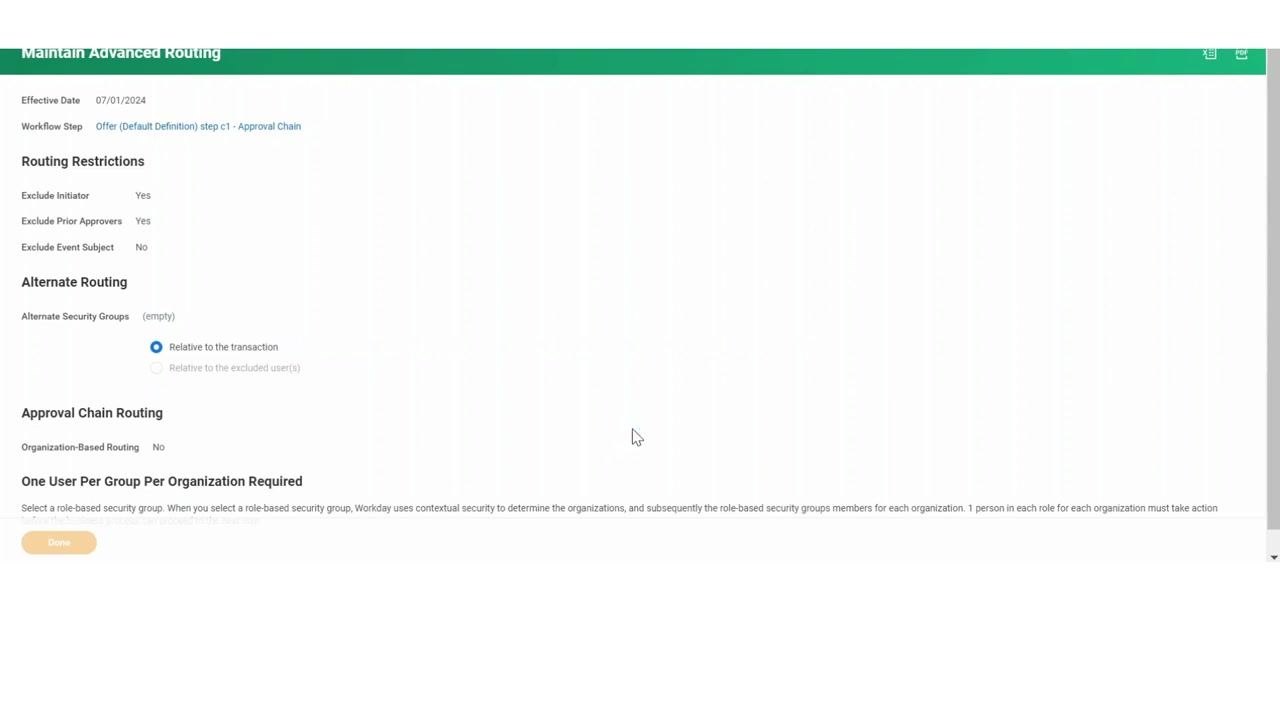
On the Maintain Advanced Routing screen, locate the Routing Restrictions section:
- Check Exclude Initiator so the person who initiates the process does not have to approve it again.
- Check Exclude Prior Approvers so anyone who already approved earlier in the process is not required to approve again.
- Leave Exclude Event Subject unchecked unless you want to exclude the event subject from approval.
Click OK to save your advanced routing settings, then click Done on the confirmation screen to finalize.
Verify the applied restrictions
Return to the business process steps overview and confirm the new step (c1 - Approval Chain) now displays the applied restrictions, such as "Exclude Initiator: Yes" and "Exclude Prior Approvers: Yes." This confirms the routing restrictions are active.
(Optional) Add entry conditions to trigger the step
If you want the step to trigger only in specific scenarios, use the If column to specify the condition under which this step should kick off (for example, only for certain employee types or offer amounts).
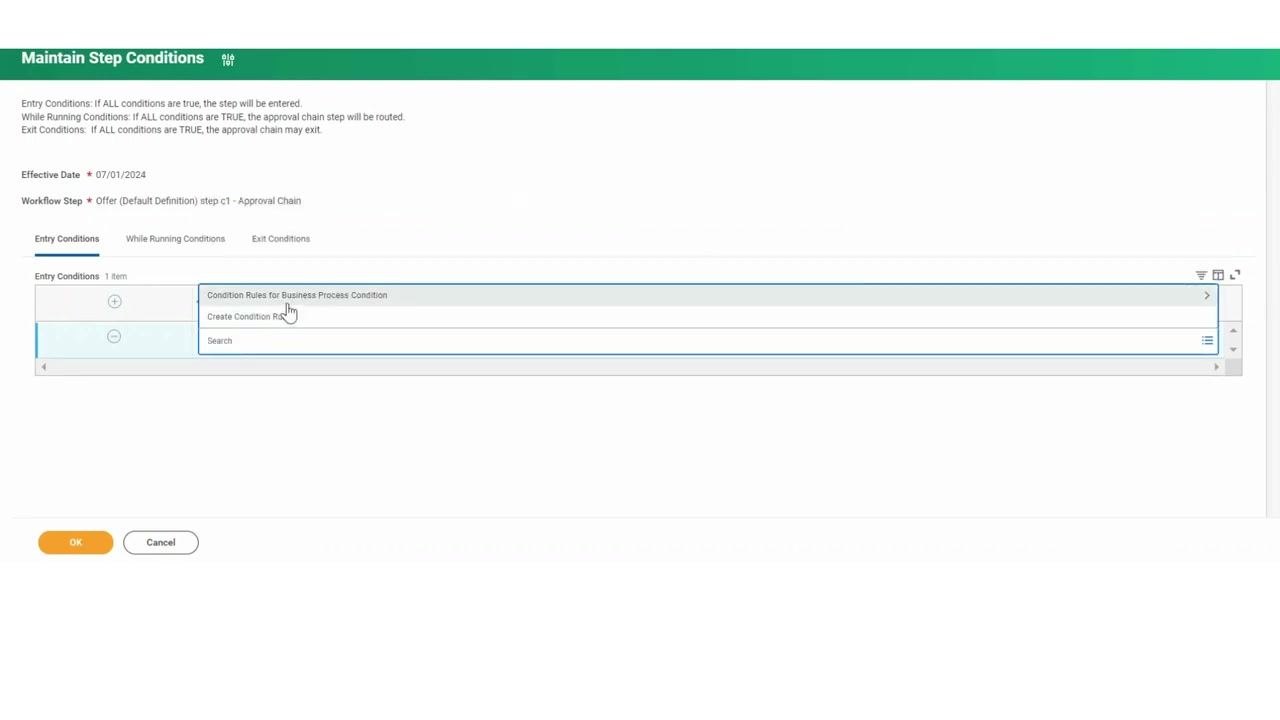
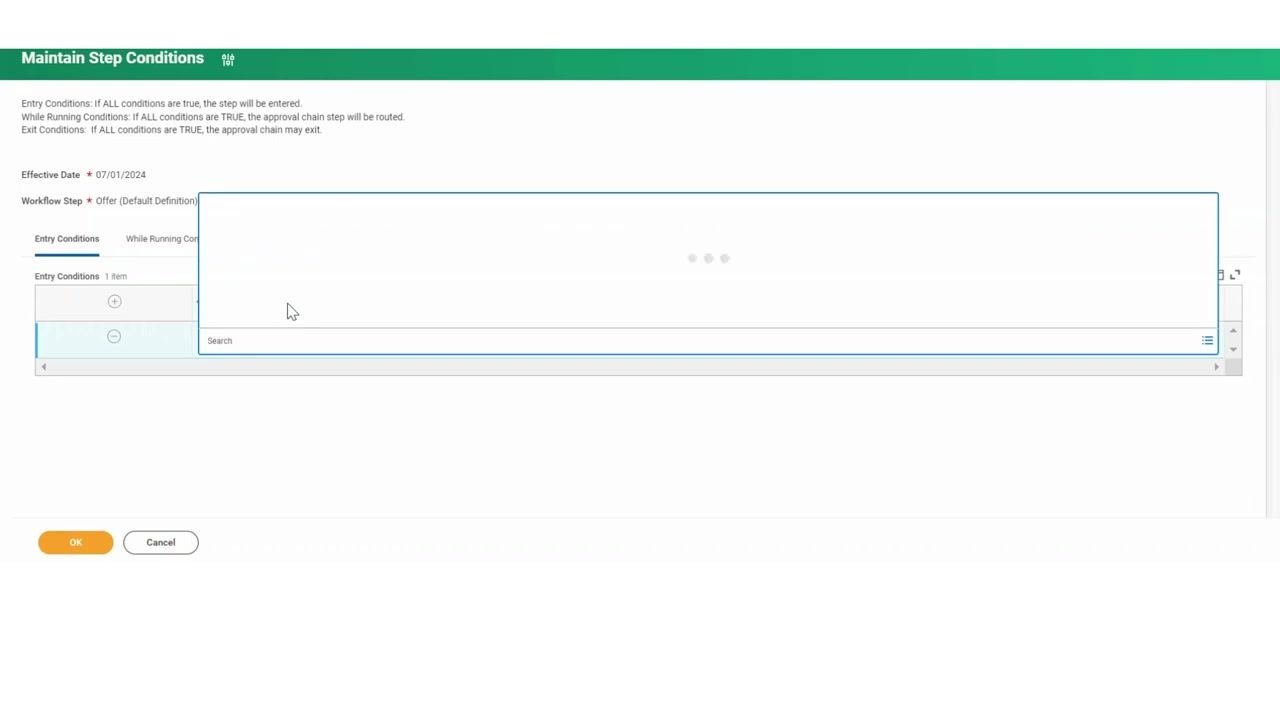
Under the Actions dropdown for your workflow step (for example, step c1 - Approval Chain), hover over Business Process and click Maintain Step Conditions to open the configuration screen.
On the Maintain Step Conditions screen, make sure you are on the Entry Conditions tab. Click the plus (+) sign to add a new input row, then select or create a condition rule that determines when the step should be triggered. Use the search box if you need to find an existing rule.
If prompted, use the search field to locate the appropriate condition rule and select it from the list to apply it as the entry condition.
Review and save your configuration
Return to the Business Process Steps overview and confirm your step (for example, c1 - Approval Chain) now displays the entry condition in the If column (for example, "All Employees?"). Review the other columns to ensure all details and restrictions are correct, then click Done to save.
Perform a final review of all business process steps to confirm every configuration, condition, and restriction is correctly applied, then click Done to complete the process and exit the configuration screen.
Summary
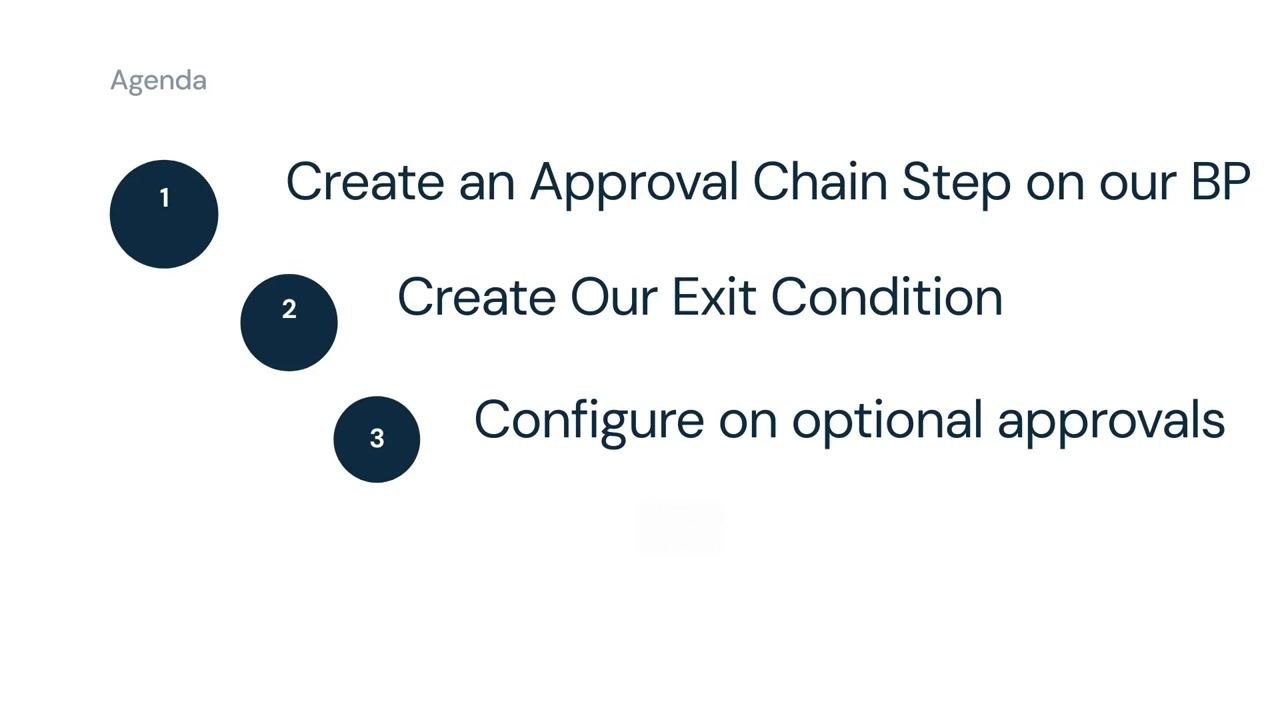
You have now created a business process in Workday with a fully configured approval chain step. This includes:
- Adding an Approval Chain step and setting it to route through three levels of management using the proposed management chain.
- Creating and applying a condition rule ("3rd Level Approval") as an exit condition to limit the chain to three levels.
- Configuring advanced routing restrictions to exclude the initiator and prior approvers from having to approve the step again.
- Optionally adding an entry condition so the step only triggers under specific scenarios.
What's next
Review other business process steps and consider whether similar approval chain, exit condition, or advanced routing configurations are needed elsewhere in your workflow. For additional guidance on setting up specific limiting conditions, such as excluding CEO or C-suite levels, or on configuring entry conditions in more detail, consult further training resources.
Generation details: cost, quality tiers
Docsie billed 4,000 credits ($2.80) to analyze this 8-minute video at standard quality. The rewrite, template fill and Word/PDF exports were included. The same video at each quality tier:
| Quality | Frames sampled | Credits | Approx. cost |
|---|---|---|---|
| Draft | every 16-30 s | 2,000 | $1.40 |
| Standard (this guide) | every 8-15 s | 4,000 | $2.80 |
| Detailed | every 4-7 s | 8,000 | $5.60 |
| Ultra | every 1-3 s | 16,000 | $11.20 |
Credits priced at $0.70 per 1,000; plans include a monthly allowance. Enterprise customers on on-premise or bring-your-own-model deployments run this on their own inference and pay no per-video credits.
Generated by Docsie Video-to-Docs on 2026-09-14 from a 7-minute video. Screenshots are frames from the source video and belong to their creator, HeRoiC HRIS Solutions, whose original is embedded above. If you own this video and want the guide removed or credited differently, contact us and we will act within one business day.