
How to Create a Vendor Master in SAP
Creating a vendor master record in SAP is a foundational step in Materials Management (MM) that enables your organization to procure goods and services from a supplier. This guide walks you through how to create a vendor master in SAP, from preparing the required data to saving and confirming the finished record, using transaction code XK01.
Video: How to create a Vendor Master Record in SAP MM by Expert Coaching in SAP MM, WM, SRM, EWM and ALE. All credit for the demonstration goes to the creator; watch the original on YouTube. The written guide below was generated from this video by Docsie. Creator? Request a change or removal.
Creating a vendor master record in SAP is a foundational step in Materials Management (MM) that enables your organization to procure goods and services from a supplier. This guide walks you through how to create a vendor master in SAP, from preparing the required data to saving and confirming the finished record, using transaction code XK01.
Prerequisites
Before creating any master data in SAP—whether a material master, vendor master, or info record—you must gather all required information into a structured data sheet. This ensures accuracy and completeness during data entry.
Prepare a data sheet
Collect the following information for the vendor master record:
- Organization levels (Company Code, Purchasing Organization)
- Account group
- Vendor name and search term
- Address (street, city, postal code)
- Country and region
- Language
- Reconciliation account
- Cash management group
- Payment terms
- Currency
- Contact person and contact number
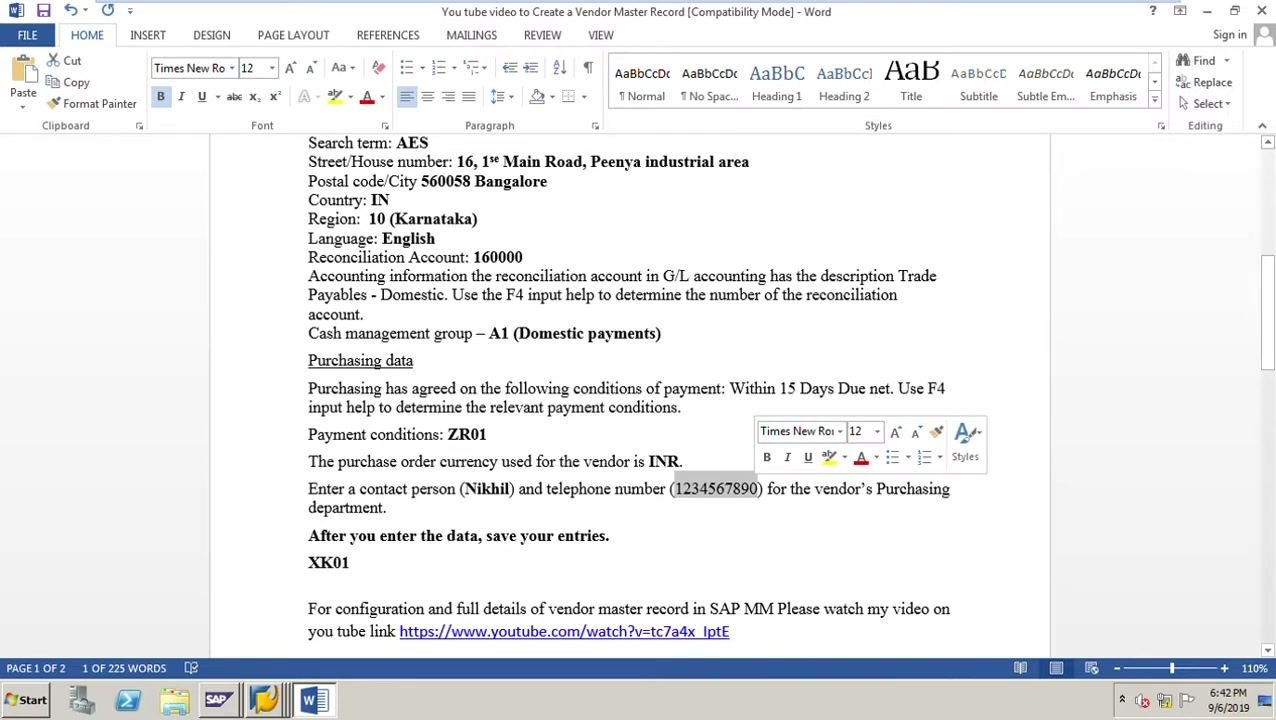
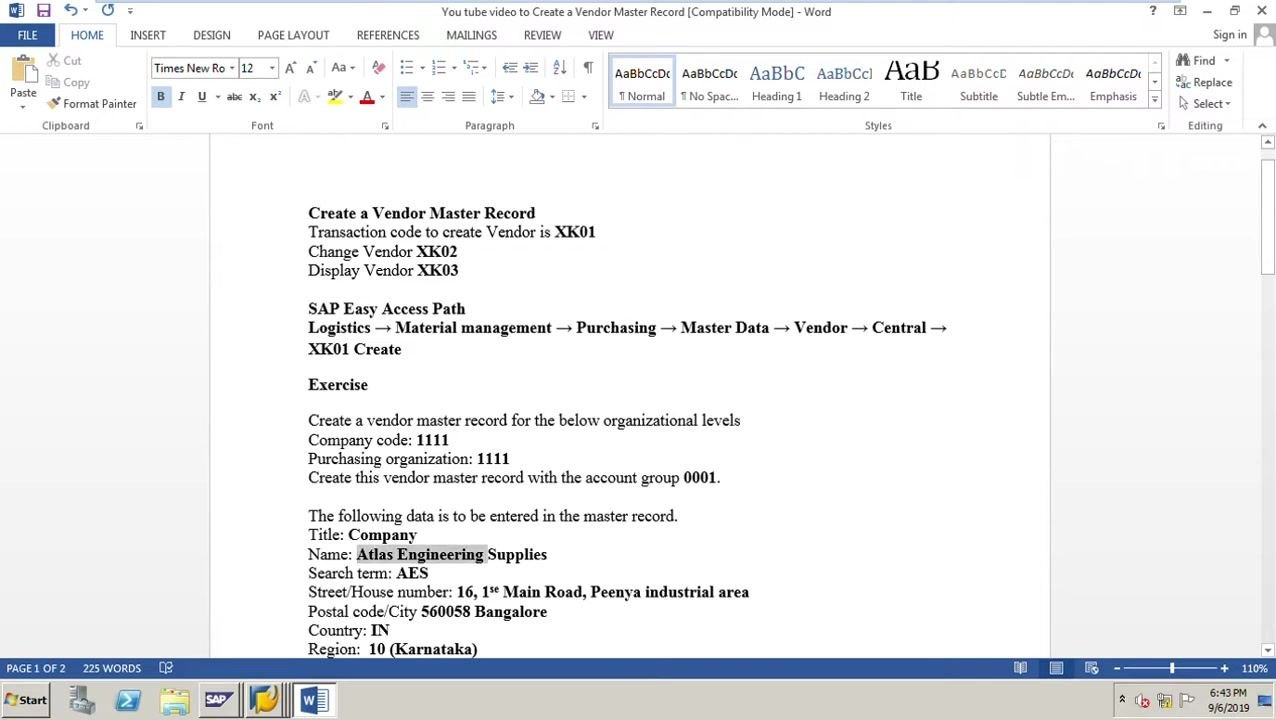
The example used throughout this guide is based on the following sample data sheet:
- Company Code: 1111
- Purchasing Organization: 1111
- Account Group: 0001
- Vendor Name: Atlas Engineering Supplies
- Search Term: AES
- Street/House Number: 16, 1st Main Road, Peenya industrial area
- Postal Code/City: 560058 Bangalore
- Country: IN
- Region: 10 (Karnataka)
- Language: English
- Reconciliation Account: 160000
- Cash Management Group: A1 (Domestic payments)
- Payment Terms: ZR01 (Within 15 Days Due net)
- Currency: INR
- Contact Person: Nikhil
- Contact Number: 1234567890
Know the relevant transaction codes and navigation path
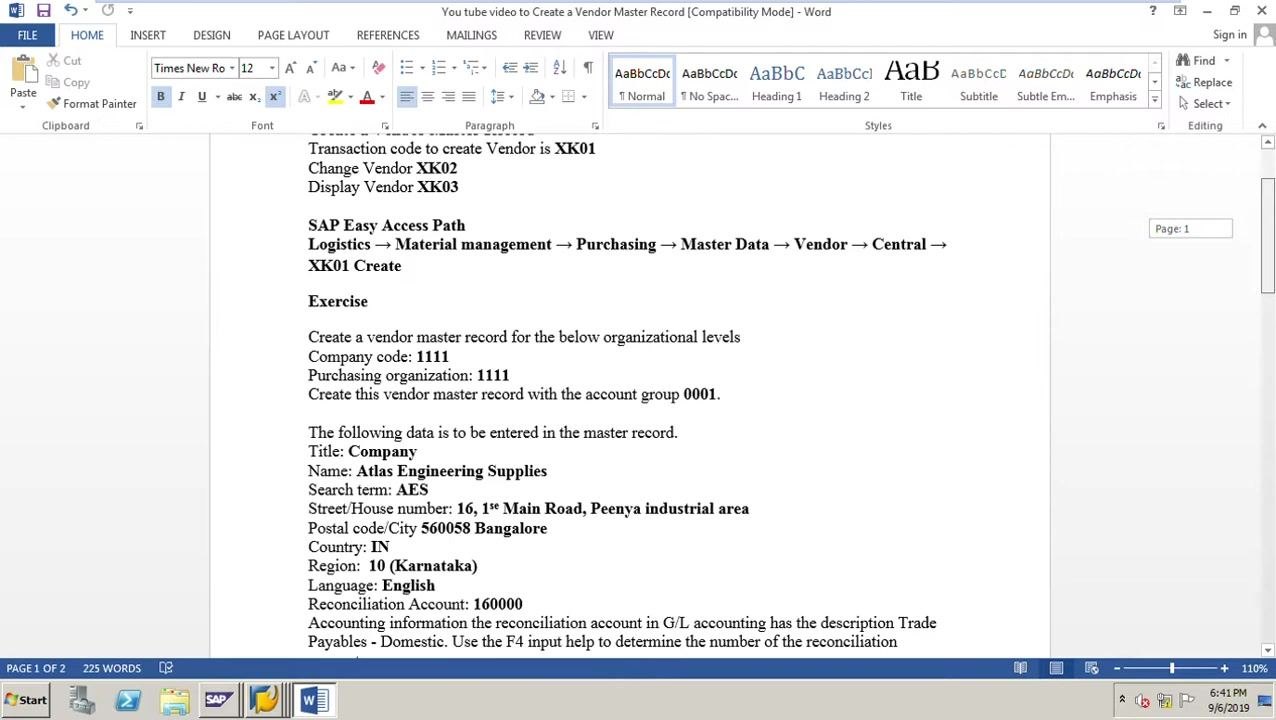
SAP provides the following transaction codes for vendor master data:
- Create Vendor: XK01
- Change Vendor: XK02
- Display Vendor: XK03
You can also reach the creation screen through the SAP Easy Access menu path:
Logistics → Material Management → Purchasing → Master Data → Vendor → Central → Create (XK01)
Before proceeding, double-check every field in your data sheet for accuracy, confirm you have all required values as shown in the example above, and save the data sheet for reference during data entry.
Navigate to vendor master creation
Open the SAP Easy Access screen and expand the following menu path:
Logistics → Materials Management → Purchasing → Master Data → Vendor → Central
Double-click XK01 - Create to start the vendor creation process.
Enter organizational data
On the Create Vendor: Initial Screen, enter the following details:
- Company Code: 1111
- Purchasing Organization: 1111
- Account Group: 0001
Leave the Vendor field blank so the system assigns the vendor number automatically, then press Enter to proceed.
Enter vendor name and search term
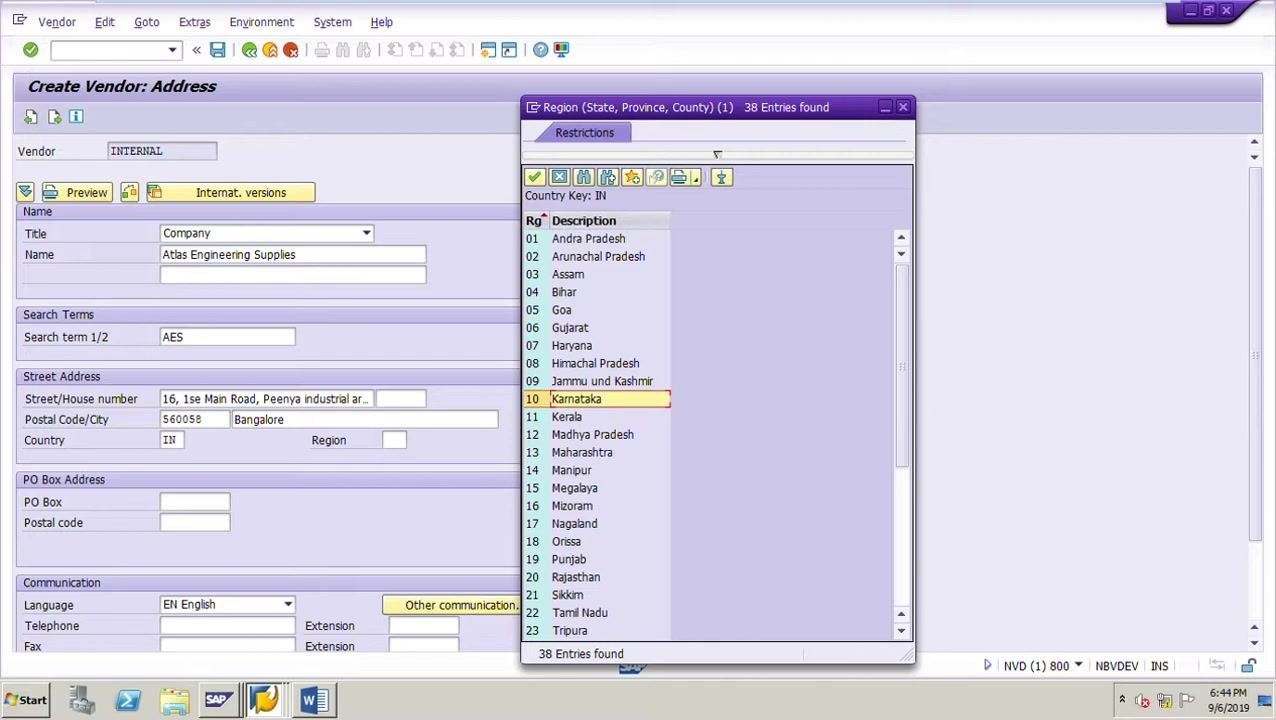
On the Create Vendor: Address screen:
- Set Title to: Company
- Enter Name as: Atlas Engineering Supplies (copy from your data sheet)
- Enter Search term 1/2 as: AES
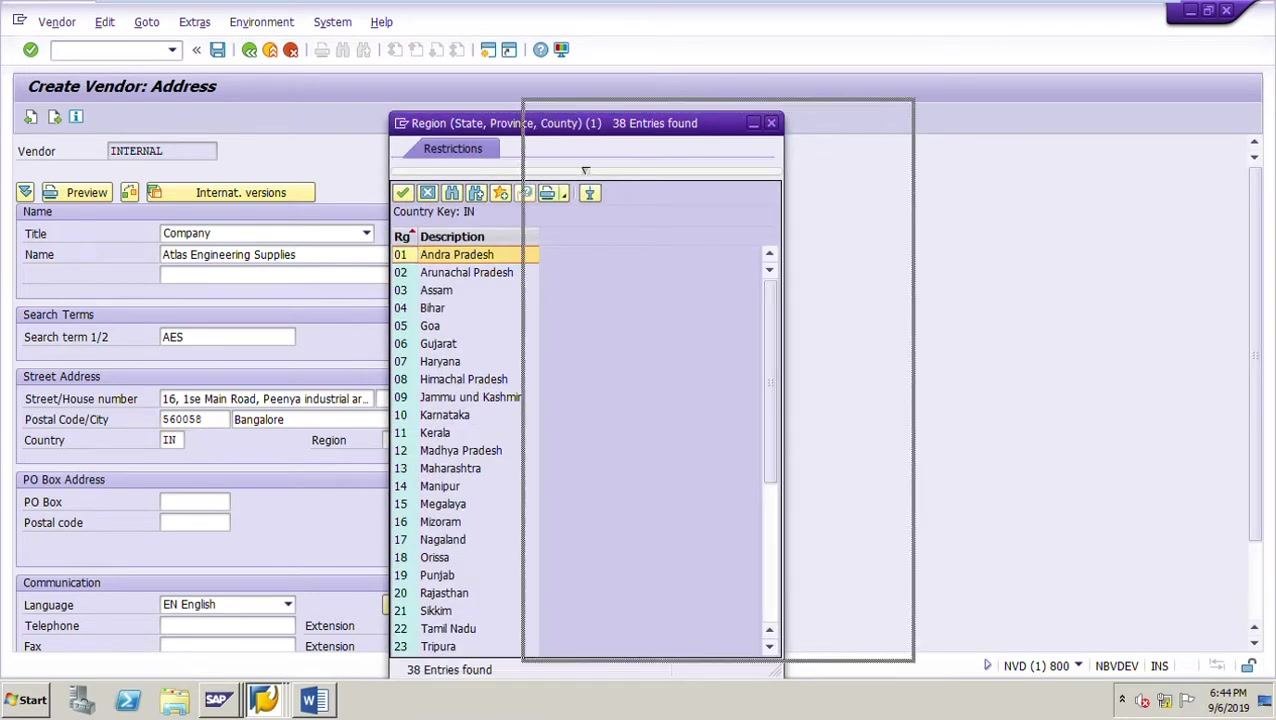
Enter address details
Enter the following address information:
- Street/House number: 16, 1st Main Road, Peenya industrial area (copy from your data sheet)
- Postal Code/City: 560058 / Bangalore
- Country: IN
- Region: 10 (Karnataka)
If needed, use the F4 help (search function) to select the correct region code. For vendors in another state, choose the appropriate region code from the list.
Enter communication details
Set Language to EN English. Leave Telephone, Fax, and other communication fields blank for now unless you have this information.
Skip finance-specific tabs
Press Enter to move through the next screens, reviewing and continuing past any warning messages that appear. On the Create Vendor: Control screen, leave the Control and Payment Transactions tabs blank, since these sections are typically completed by finance personnel rather than MM users.
Skip contact person and payment transactions
On the Contact Person screen, leave all fields blank and proceed to the next step. On the Create Vendor: Payment transactions screen, leave all fields blank as well, unless you have specific payment data for the vendor.
Enter accounting information
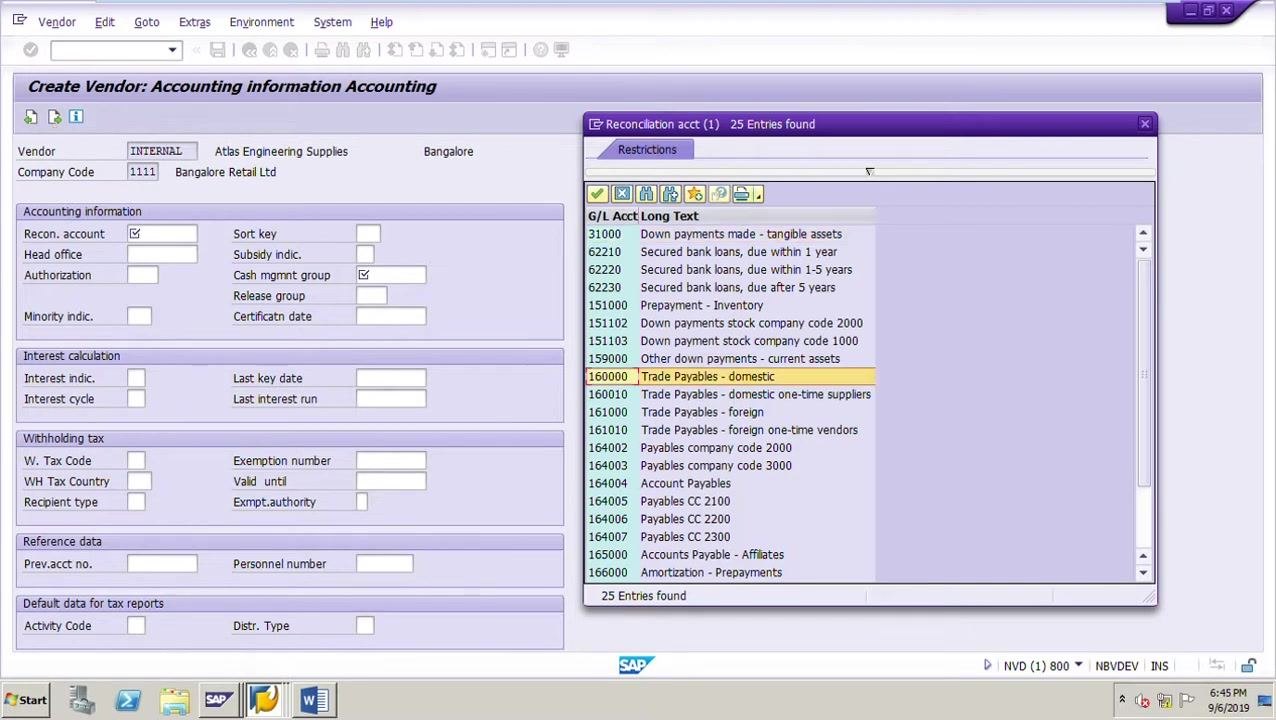
On the Create Vendor: Accounting information Accounting screen, enter:
-
Recon. account: 160000 (Trade Payables - domestic, as per the data sheet). Use the F4 help if needed and choose 160000 Trade Payables - domestic from the selection list.
-
Cash mgmt group: A1 (Domestic payments, as per the data sheet). Use the F4 help to select A1 Domestic from the planning group list.
Leave all other fields in the Accounting information, Interest calculation, Withholding tax, Reference data, and Default data for tax reports sections blank unless instructed otherwise by your finance team.
Enter purchasing data
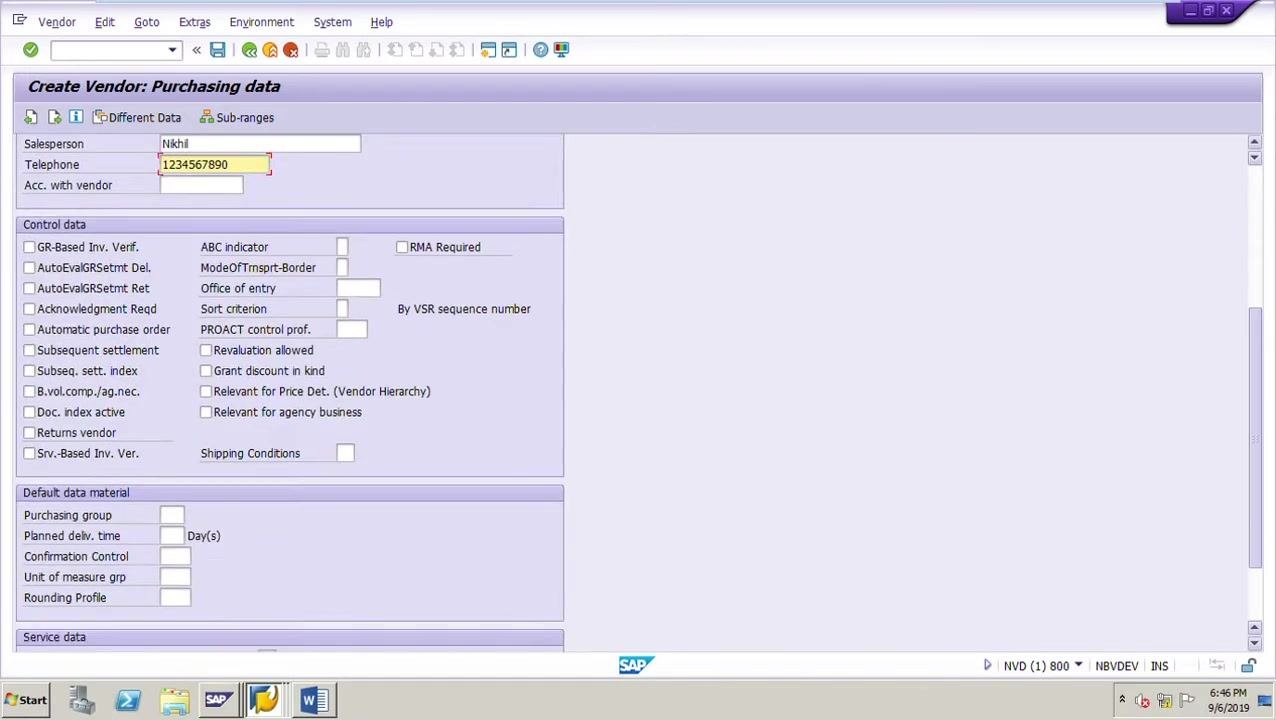
On the Create Vendor: Purchasing data screen, enter:
- Order currency: INR
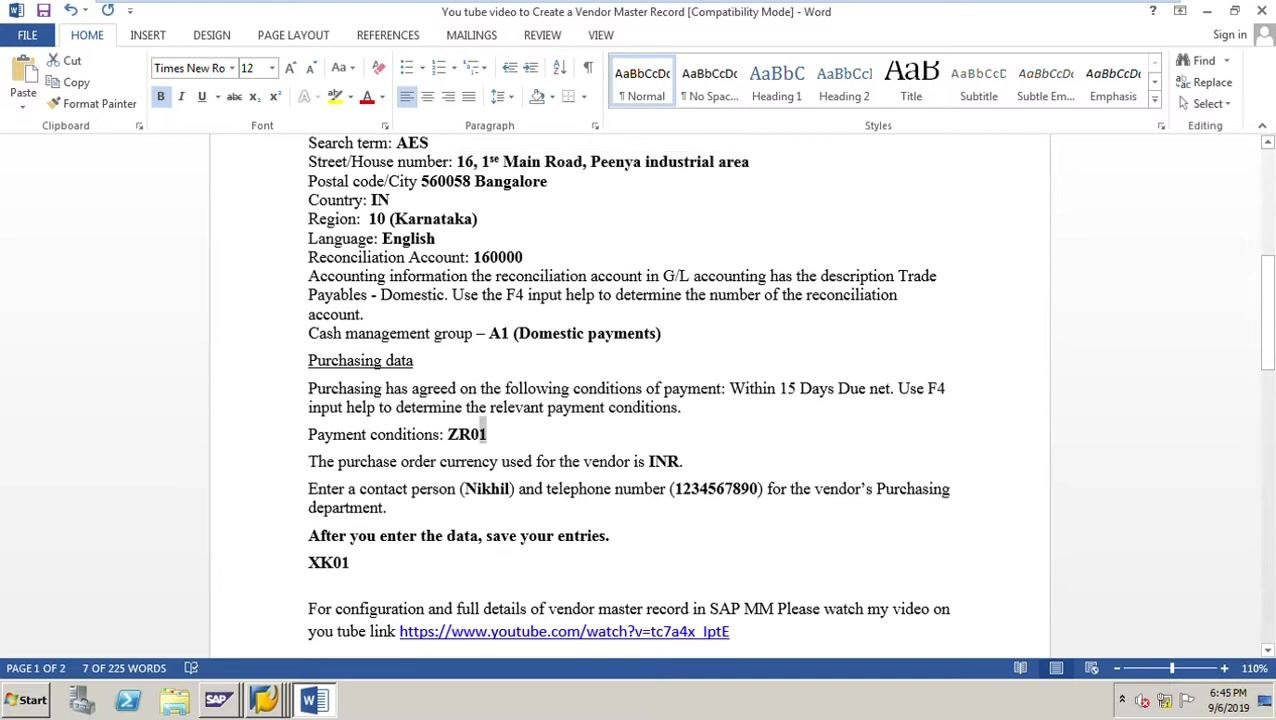
- Terms of payment: ZR01 (Within 15 days Due net, as per the data sheet). Use the F4 help to open the list of payment terms and select ZR01 within 15 days Due net.
Leave Incoterms, Minimum order value, Schema Group, Vendor, Pricing Date Control, and Order optim.rest. blank unless you have specific information to enter.
In the Sales data section, enter:
- Salesperson: Nikhil
- Telephone: 1234567890
Leave Acc. with vendor and all Control data fields blank unless otherwise specified.
Review the entered data
Before saving, double-check all entered data against your data sheet:
- Reconciliation Account: 160000
- Cash Management Group: A1
- Order Currency: INR
- Terms of Payment: ZR01 (Within 15 days Due net)
- Salesperson: Nikhil
- Telephone: 1234567890
Enter the partner function
On the Create Vendor: Partner functions screen, confirm the partner function is set to VN (Vendor), which is the default and standard partner function for vendors in SAP. The table under Partner Functions should display:
- Partner function: VN
- Name: Vendor
No additional partner functions are required unless your business process specifies otherwise.
Save the vendor master record
After confirming the partner function, attempt to proceed or exit the screen. A dialog box titled "Last data screen reached" appears with the message "Editing will be ended. Should the data be saved first?" Click Yes to save the entered vendor data.
Confirm the vendor creation
After saving, you return to the Create Vendor: Initial Screen. Check the message bar at the bottom of the screen for confirmation. You should see a message similar to:
"Vendor 0000500022 has been created for company code 1111 purchasing organization 1111"
Note the vendor number (50022 in this example) for future reference.
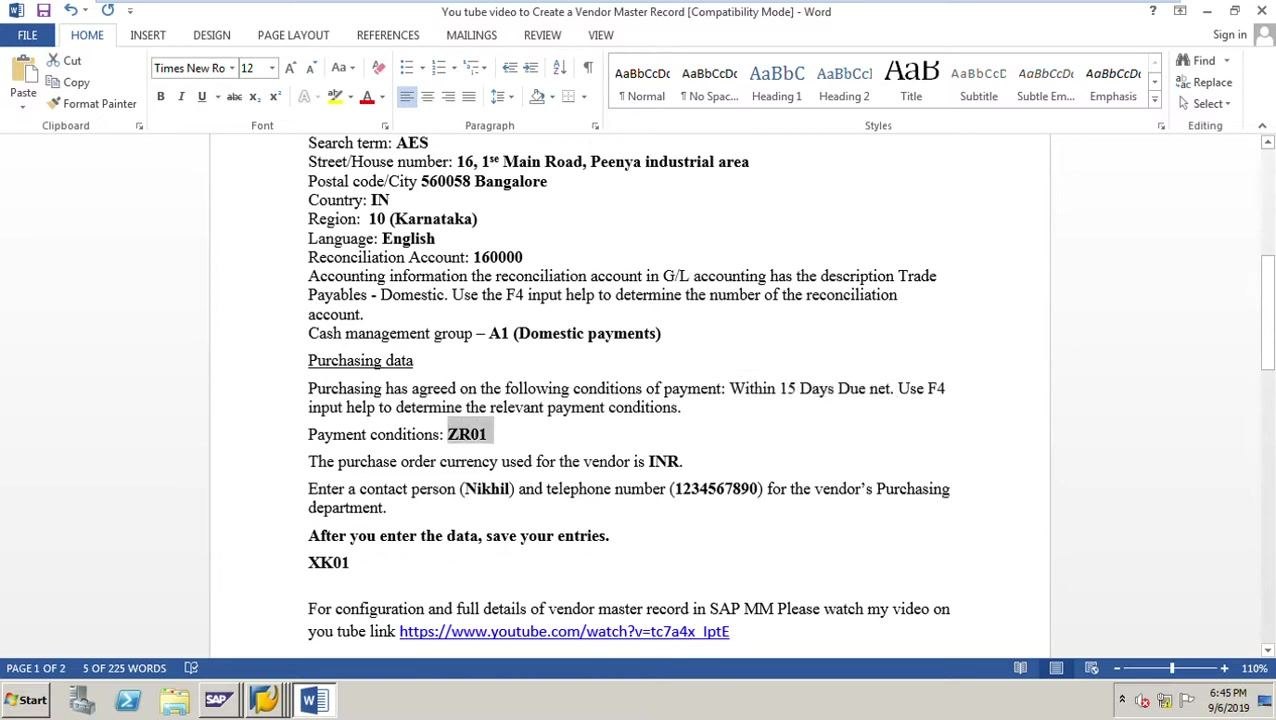
Verify against your data sheet
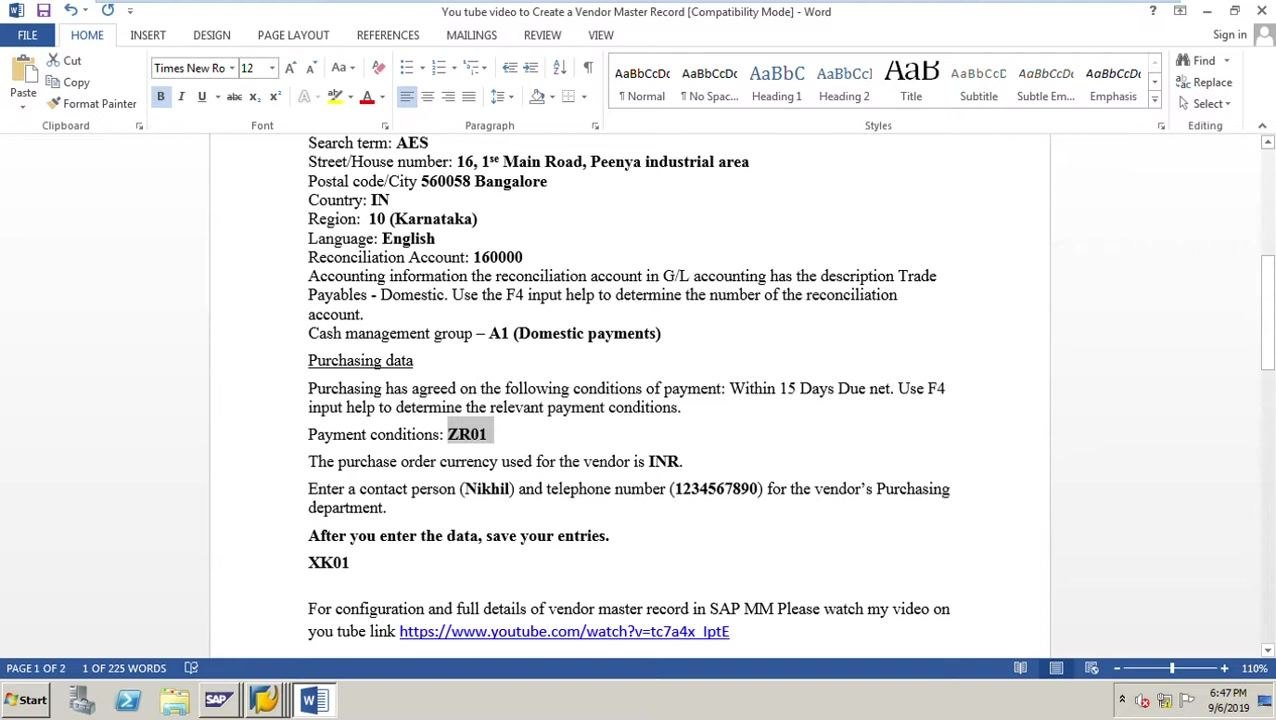
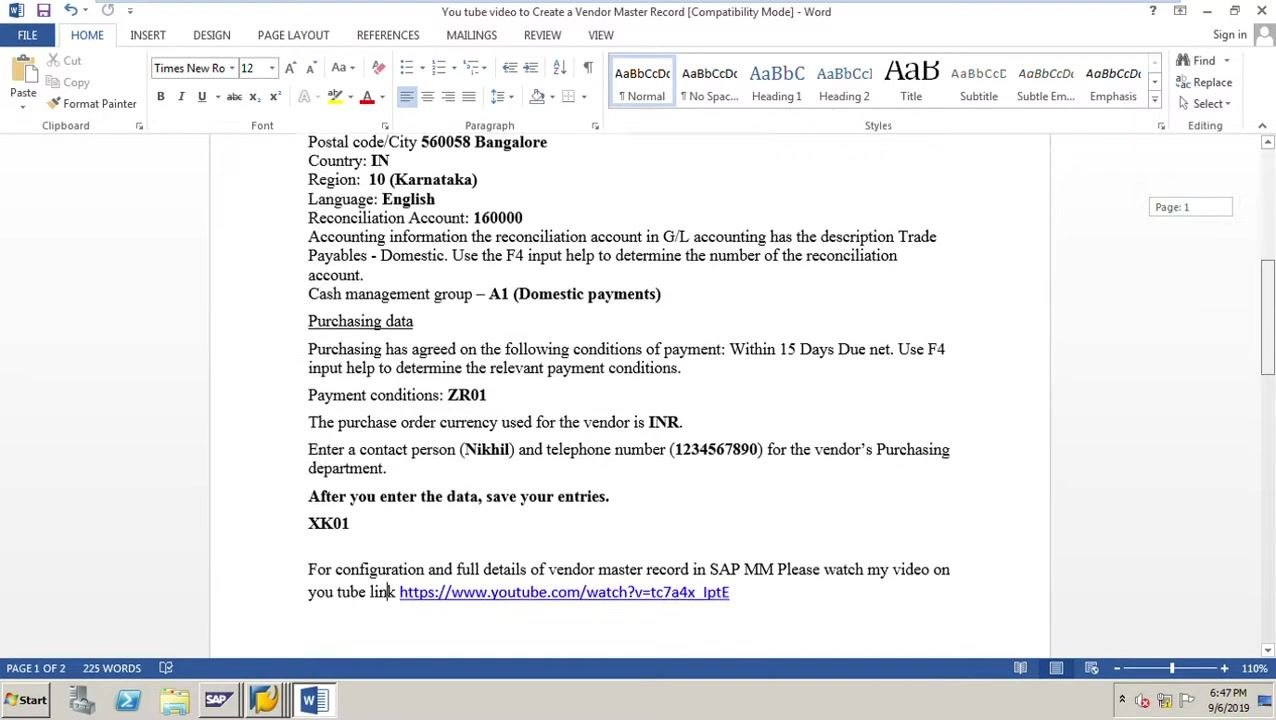
Refer back to your data sheet to confirm that all required details were entered correctly:
- Search term: AES
- Street/House number: 16, 1st Main Road, Peenya industrial area
- Postal code/City: 560058 Bangalore
- Country: IN
- Region: 10 (Karnataka)
- Language: English
- Reconciliation Account: 160000
- Cash management group: A1 (Domestic payments)
- Payment conditions: ZR01 (Within 15 Days Due net)
- Order currency: INR
- Contact person: Nikhil
- Telephone number: 1234567890
Double-check that:
- The reconciliation account in G/L accounting is set to 160000 Trade Payables - Domestic.
- The cash management group is set to A1 (Domestic payments).
- The payment conditions are set to ZR01 (Within 15 Days Due net).
- The purchase order currency is INR.
- The contact person and telephone number are entered as Nikhil and 1234567890 respectively.
Summary
You have now completed the process of creating a vendor master in SAP using transaction code XK01, including entering organizational, address, accounting, and purchasing data, confirming the partner function, saving the record, and verifying the vendor number in the confirmation message. Always document the vendor number for future reference and transactions.
What's next
For configuration details and further guidance on vendor master record creation in SAP MM, consult your organization's internal documentation.
Generation details: cost, quality tiers
Docsie billed 3,500 credits ($2.45) to analyze this 7-minute video at standard quality. The rewrite, template fill and Word/PDF exports were included. The same video at each quality tier:
| Quality | Frames sampled | Credits | Approx. cost |
|---|---|---|---|
| Draft | every 16-30 s | 1,750 | $1.22 |
| Standard (this guide) | every 8-15 s | 3,500 | $2.45 |
| Detailed | every 4-7 s | 7,000 | $4.90 |
| Ultra | every 1-3 s | 14,000 | $9.80 |
Credits priced at $0.70 per 1,000; plans include a monthly allowance. Enterprise customers on on-premise or bring-your-own-model deployments run this on their own inference and pay no per-video credits.
Generated by Docsie Video-to-Docs on 2026-10-01 from a 6-minute video. Screenshots are frames from the source video and belong to their creator, Expert Coaching in SAP MM, WM, SRM, EWM and ALE, whose original is embedded above. If you own this video and want the guide removed or credited differently, contact us and we will act within one business day.