
How to Create a Purchase Order in SAP ME21N
This guide walks you through how to create a purchase order in SAP ME21N, from opening the SAP Easy Access menu to saving a completed Standard PO. You will see how to enter vendor and organizational data, link an existing purchase requisition to your order, review item details, resolve common warnings, and confirm that the purchase order has been created successfully.
Video: SAP - Create a Purchase Order (ME21N) by MRW Tech & AI. All credit for the demonstration goes to the creator; watch the original on YouTube. The written guide below was generated from this video by Docsie. Creator? Request a change or removal.
This guide walks you through how to create a purchase order in SAP ME21N, from opening the SAP Easy Access menu to saving a completed Standard PO. You will see how to enter vendor and organizational data, link an existing purchase requisition to your order, review item details, resolve common warnings, and confirm that the purchase order has been created successfully.
Prerequisites
Before you begin, make sure you have:
- Access to SAP with valid login credentials
- The vendor ID for your purchase order (used in this example:
114127) - Your purchasing organization, purchasing group, and company code (used in this example:
US27,N27, andUS27) - A purchase requisition number if you plan to adopt an existing requisition (used in this example:
10000002)
Open SAP Easy Access
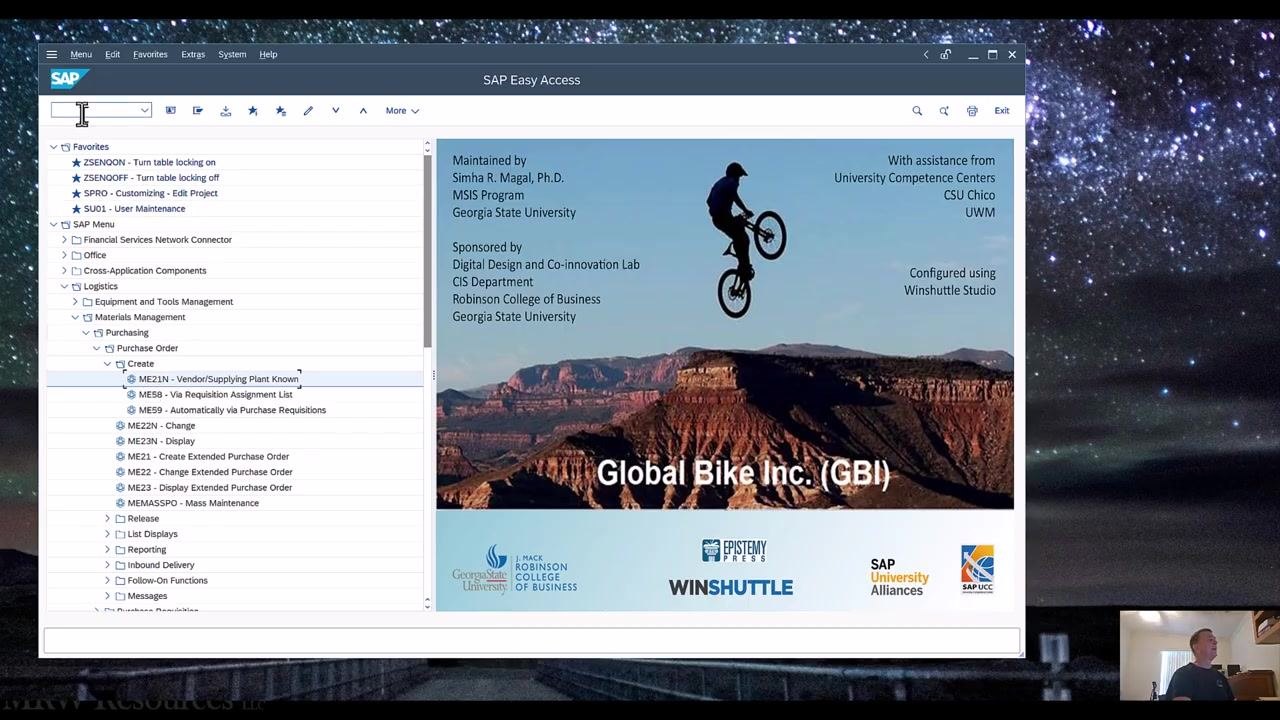
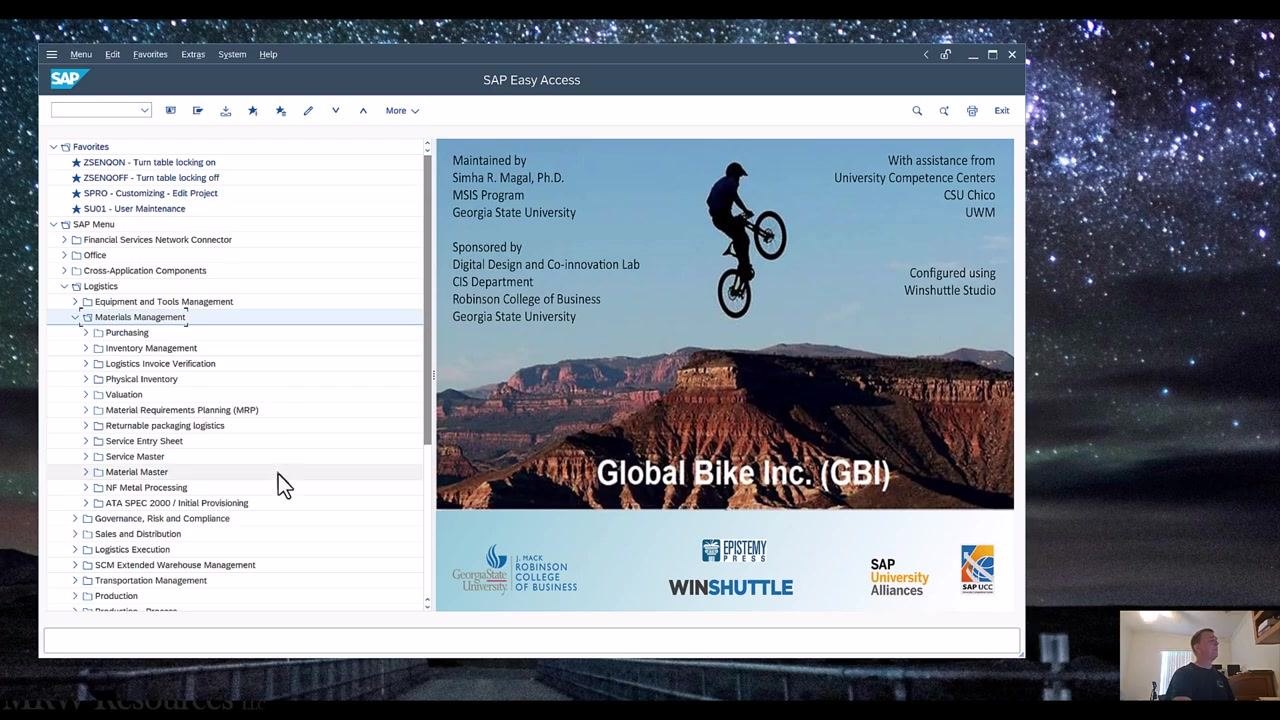
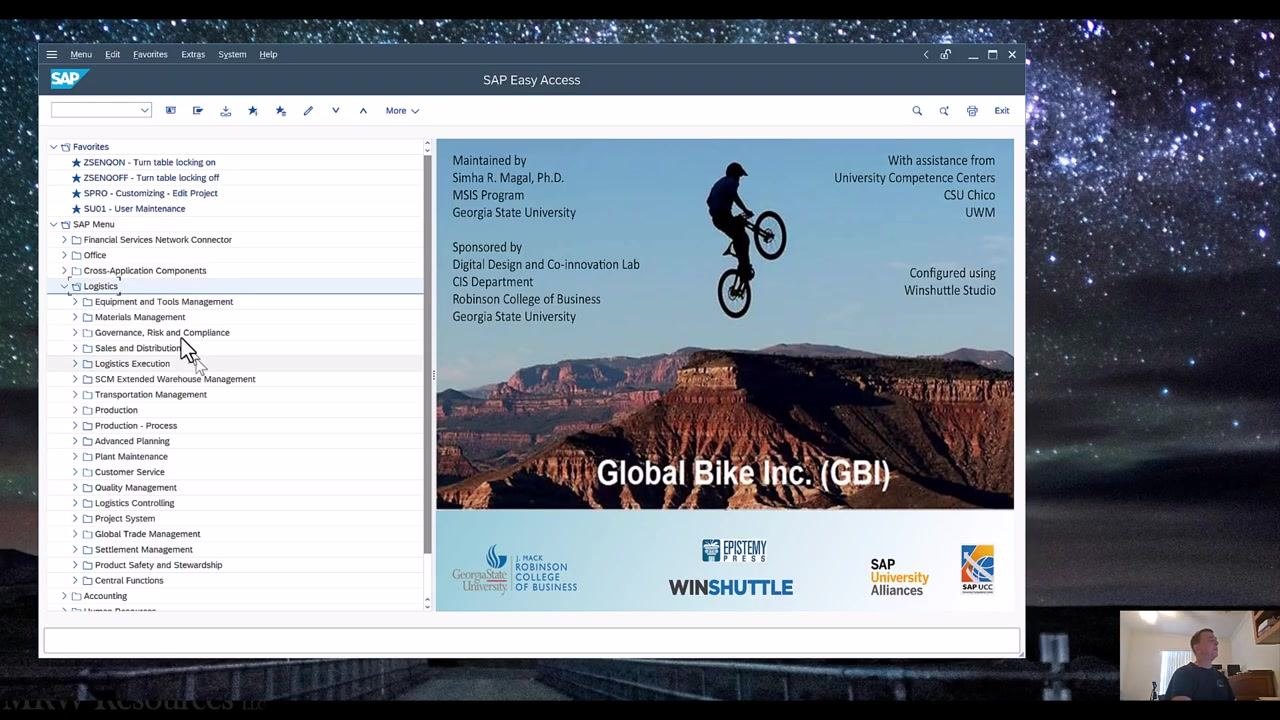
Log in to SAP to reach the SAP Easy Access screen. Confirm that you see the SAP Easy Access menu with the "Global Bike Inc. (GBI)" welcome screen and the menu tree on the left.
Navigate to the purchase order creation menu
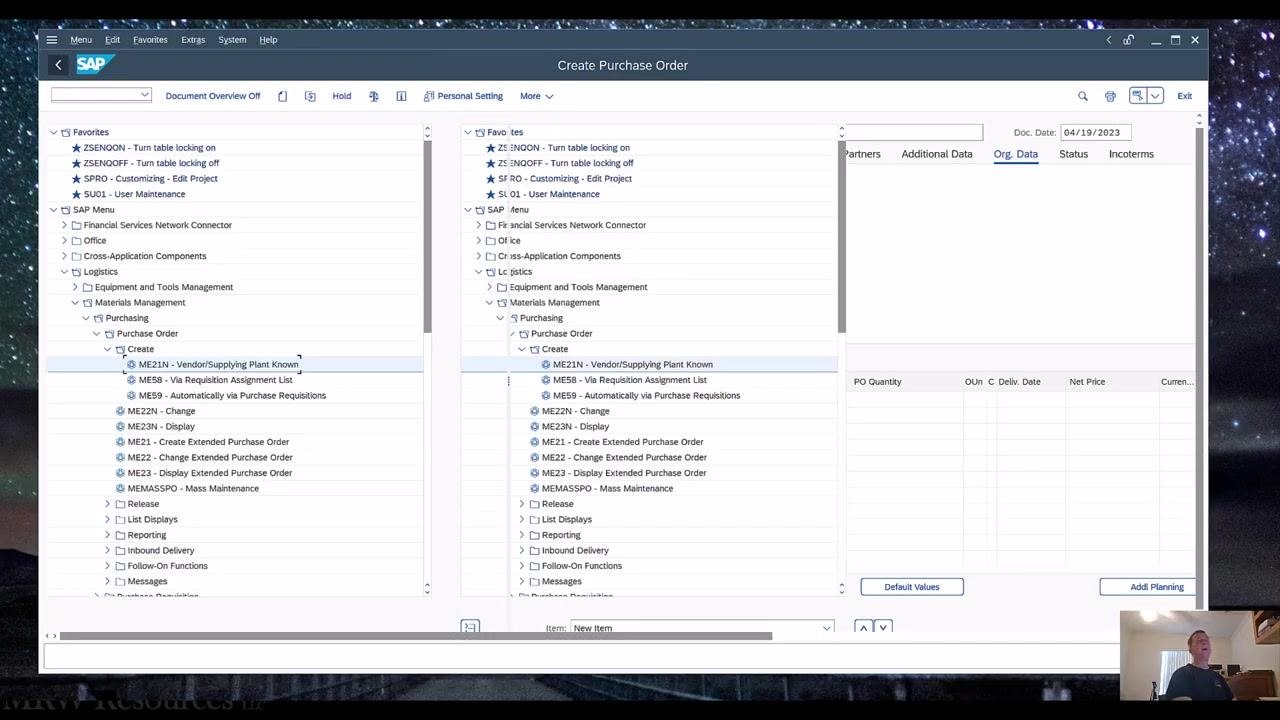
In the SAP menu tree on the left, expand the following folders in sequence: Logistics, Materials Management, Purchasing, Purchase Order, and Create.
Select the ME21N transaction
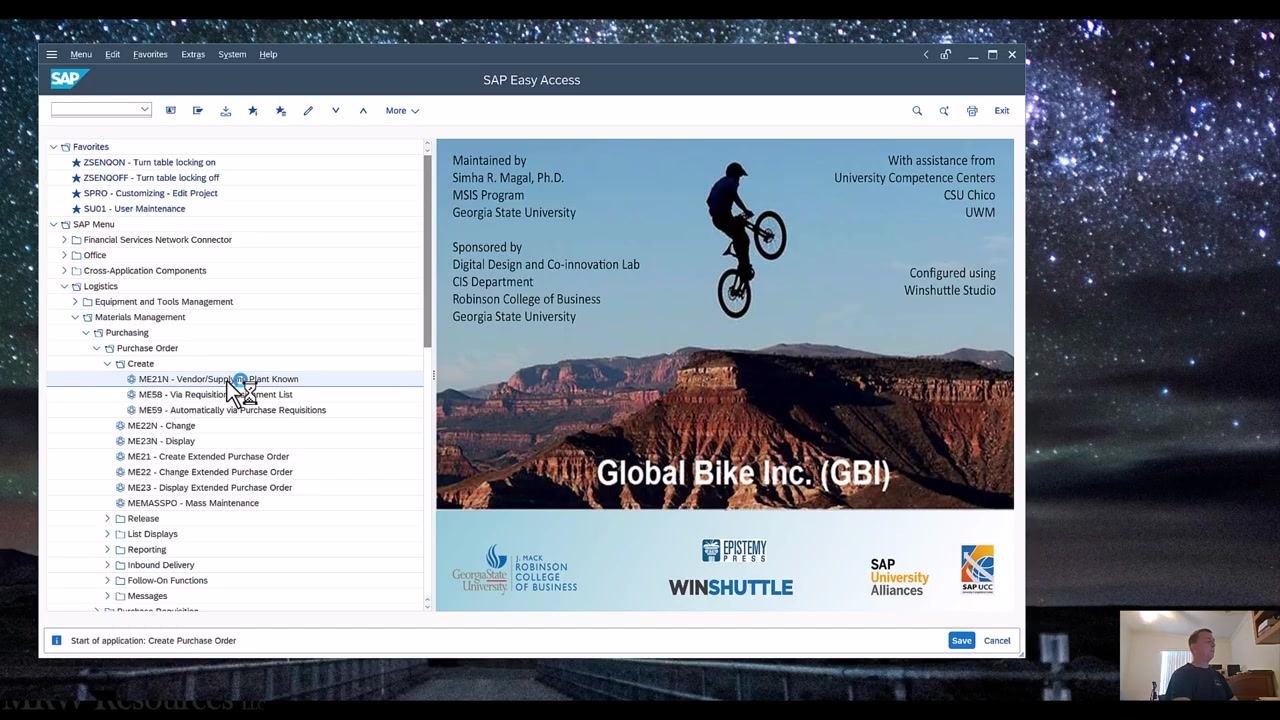
Under the Create menu, select ME21N - Vendor/Supplying Plant Known. Alternatively, type ME21N in the transaction code field at the top of the screen and press Enter.
Open the Create Purchase Order screen
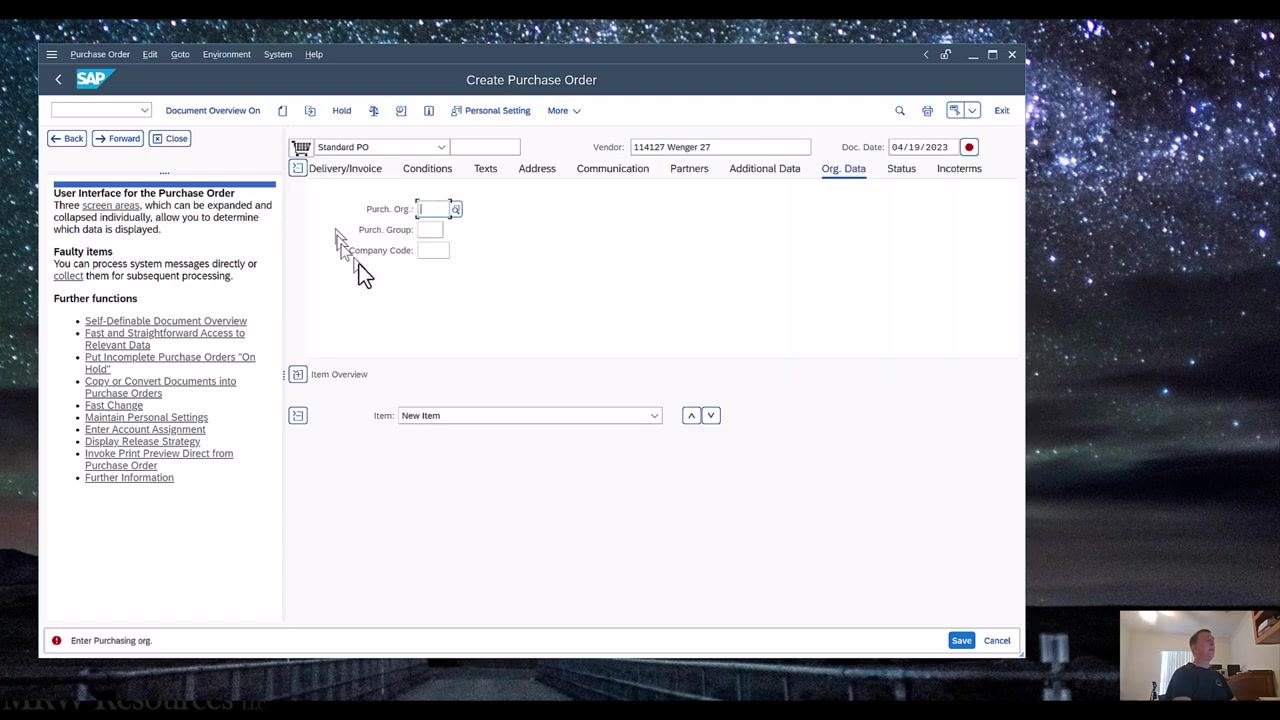
Wait for the "Create Purchase Order" screen to load. The screen displays fields for Standard PO, Vendor, Document Date, and an item overview. Leave the Purchase Order number field blank so the system generates it automatically.
Enter vendor information
In the Vendor field, enter the vendor ID (for example, 114127). Confirm that the Document Date shows today's date, such as 04/19/2023.
Expand the header to enter organizational data
Click the Header section or use the expand icon to reveal additional tabs, then select the Org. Data tab to enter organizational information.
Enter and validate organizational data
In the Org. Data tab, enter the following values, using the dropdowns or search help (...) buttons if you are unsure of your codes:
- Purch. Org.:
US27(or your own purchasing organization ID) - Purch. Group:
N27(or your own purchasing group code) - Company Code:
US27(or your own company code)
Press Enter to validate the entries. The system displays the full description next to each code, such as "27 GBI US" for Purch. Org., "27 North America" for Purch. Group, and "27 Global Bike Inc." for Company Code.
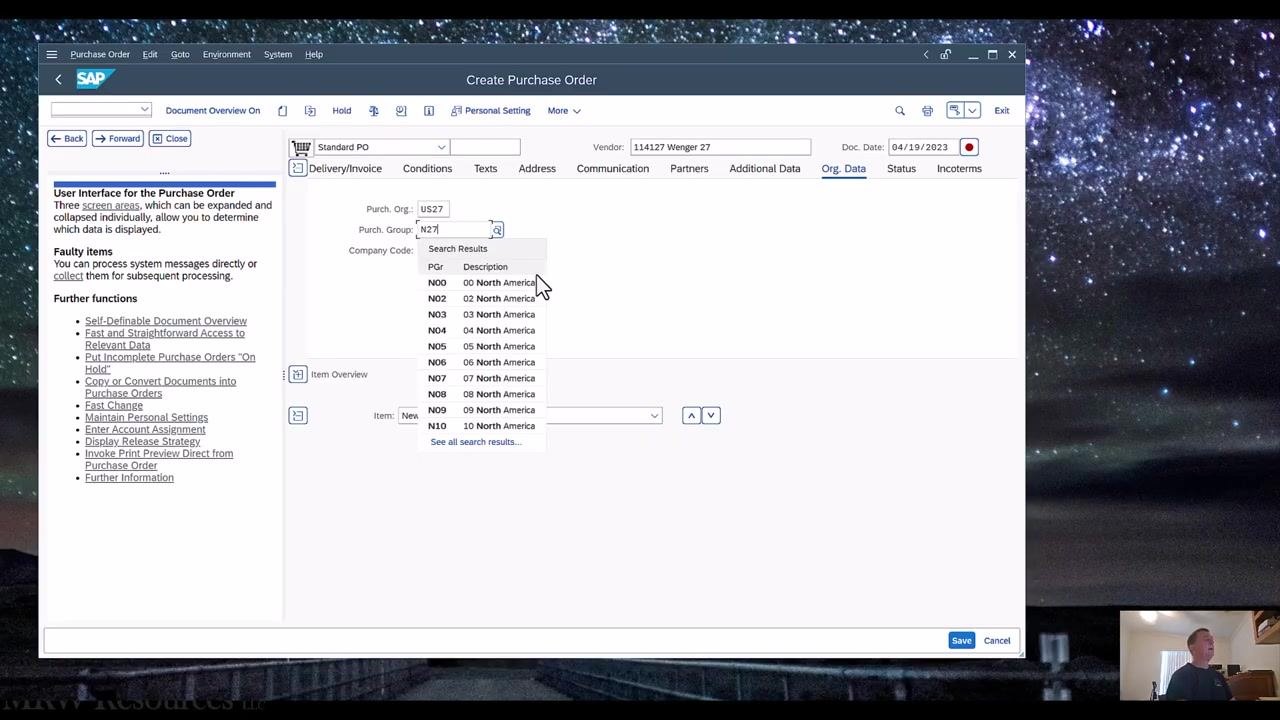
Open the document overview panel
Click the Document Overview On button at the top left of the screen. This opens a new panel on the left side of the screen for the document overview.
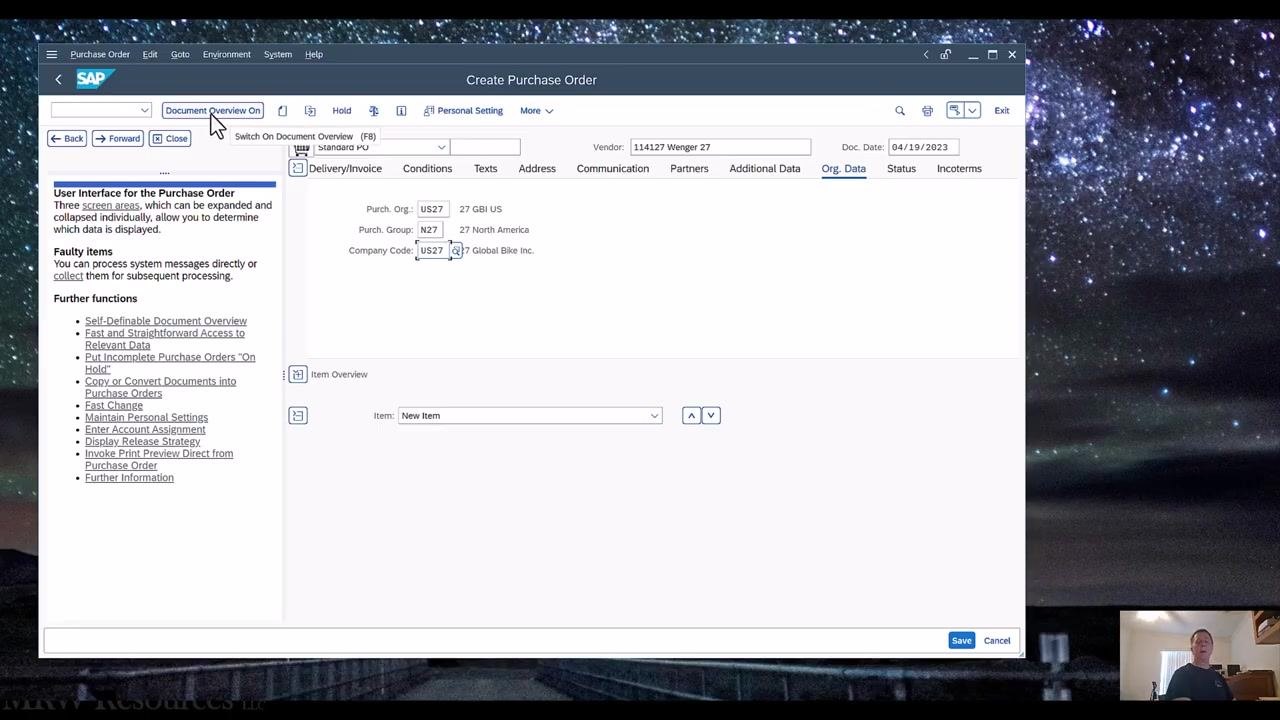
Adjust the document overview panel
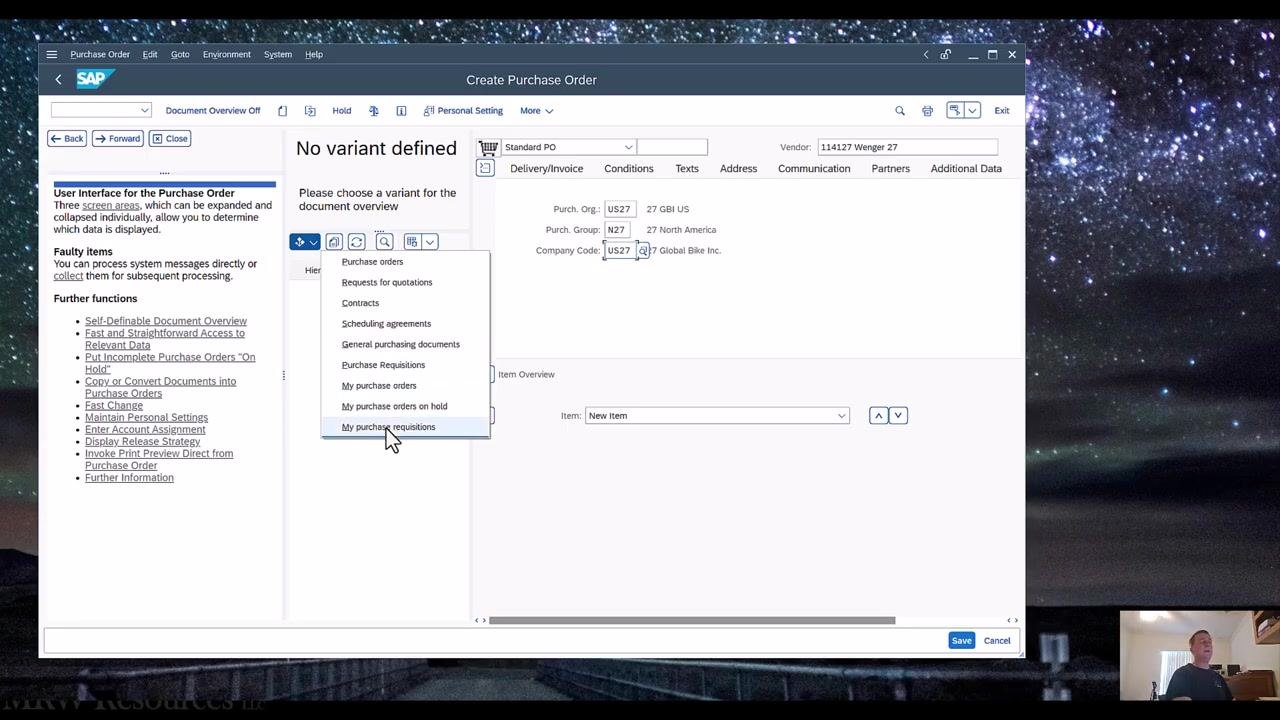
If needed, expand or resize the document overview panel by dragging its border to create more viewing space. The panel shows "No variant defined" and prompts you to choose a variant for the document overview.
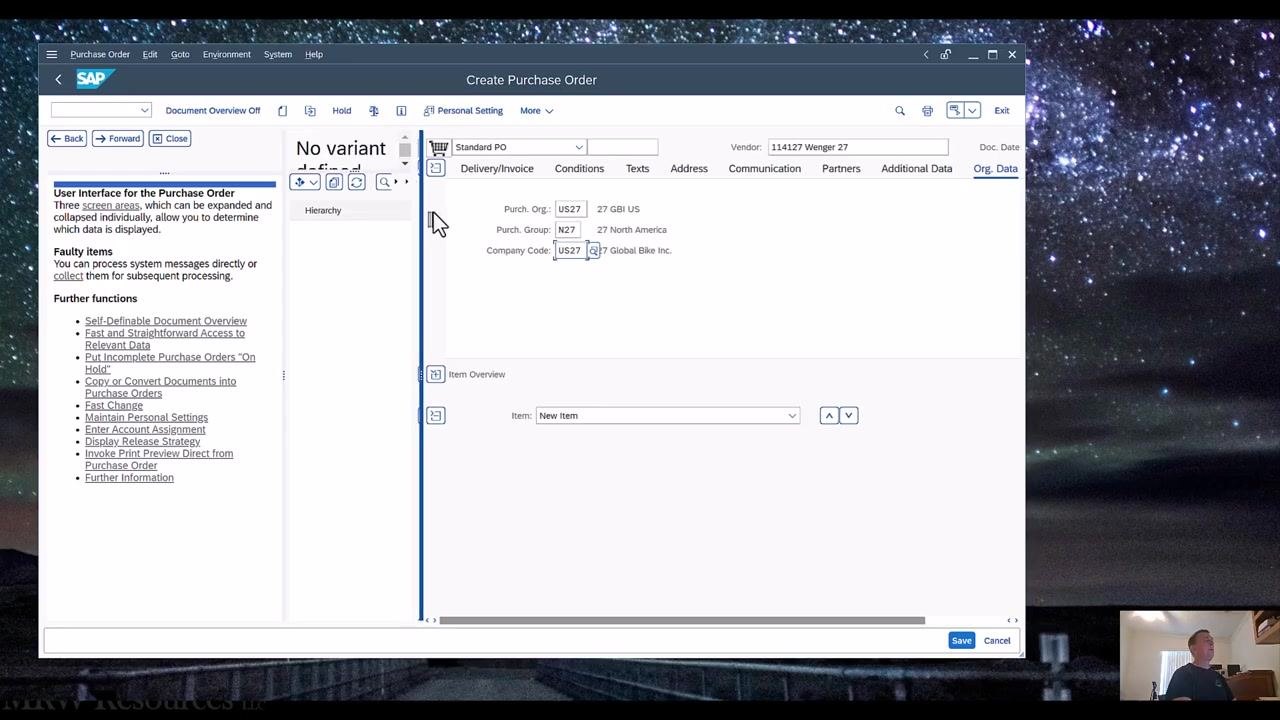
Select a variant for the document overview
In the document overview panel, click the Select Variant button (the icon with a hand and list). A dropdown menu appears with several options.
From the dropdown, select My purchase requisitions to display your previously created purchase requisitions. This allows you to pull an existing requisition into your purchase order.
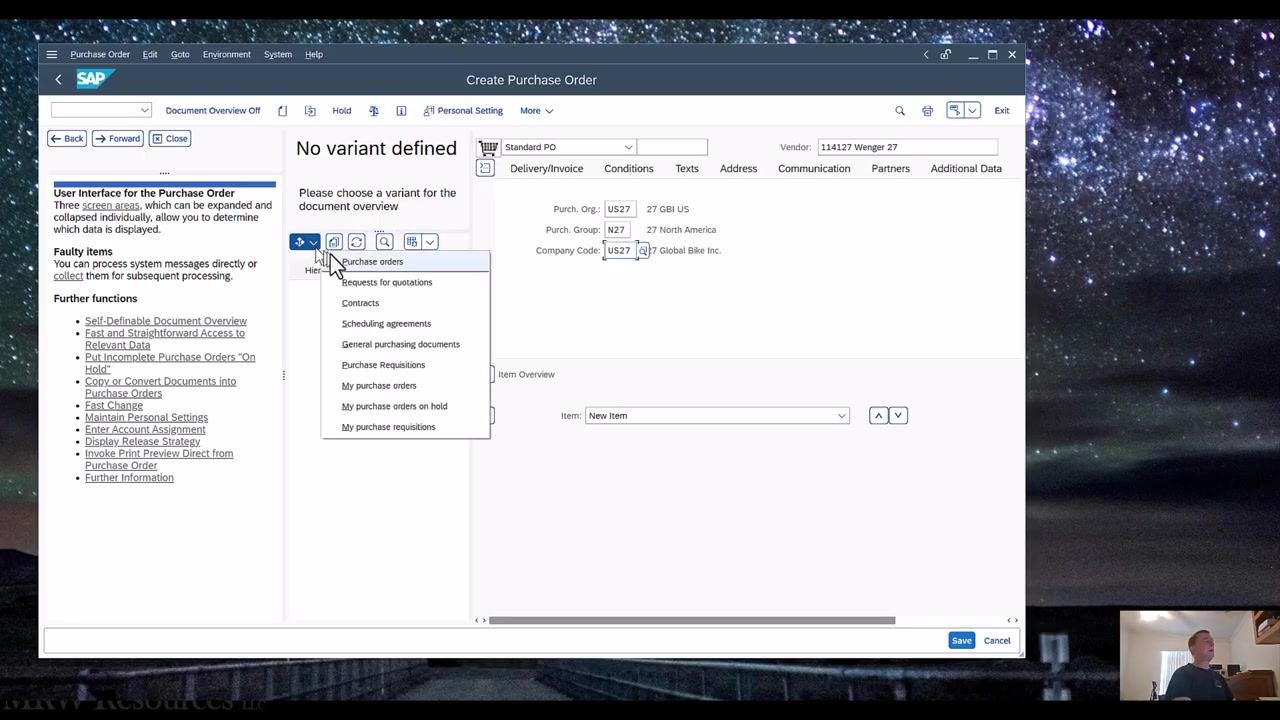
Link a purchase requisition to the purchase order
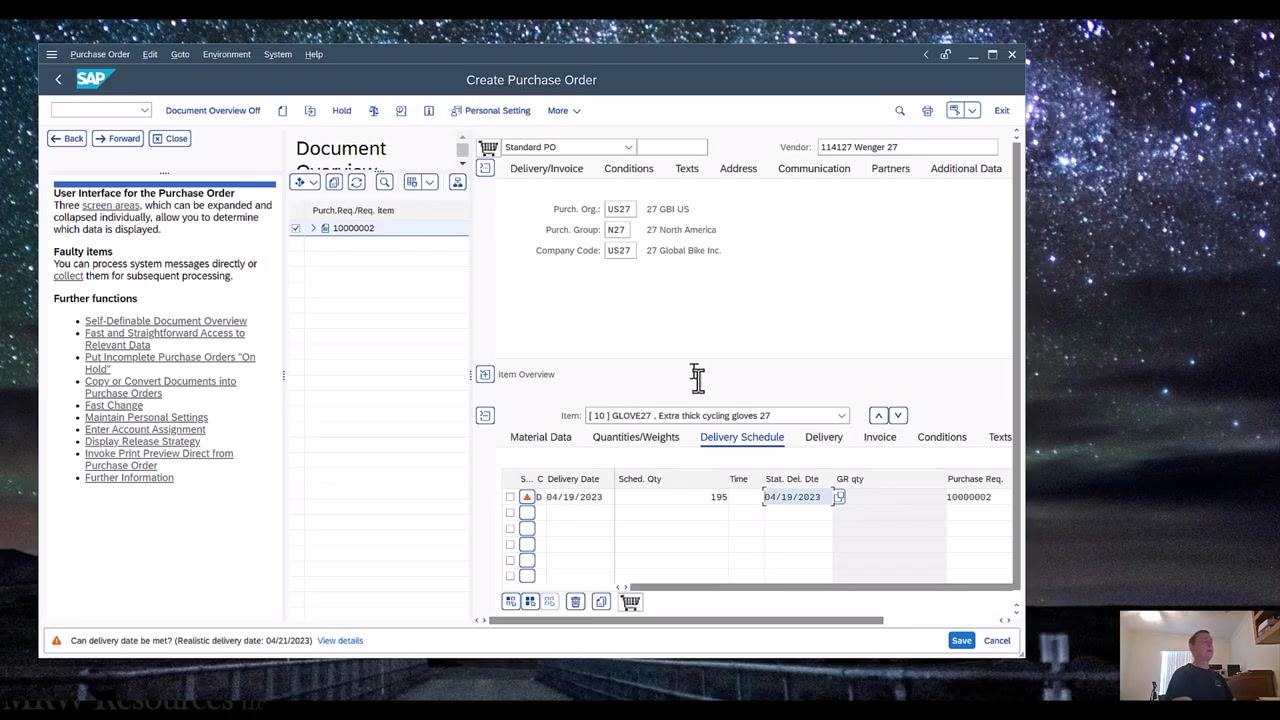
After selecting My purchase requisitions, review the list of available requisitions and locate the one you want to use (for example, 10000002).
Click the checkbox next to the requisition number you want to adopt, then click the Adopt button (often labeled "OK" or marked with a checkmark icon) at the top of the panel. This copies all relevant information from the selected requisition into your purchase order.
Review the copied item details
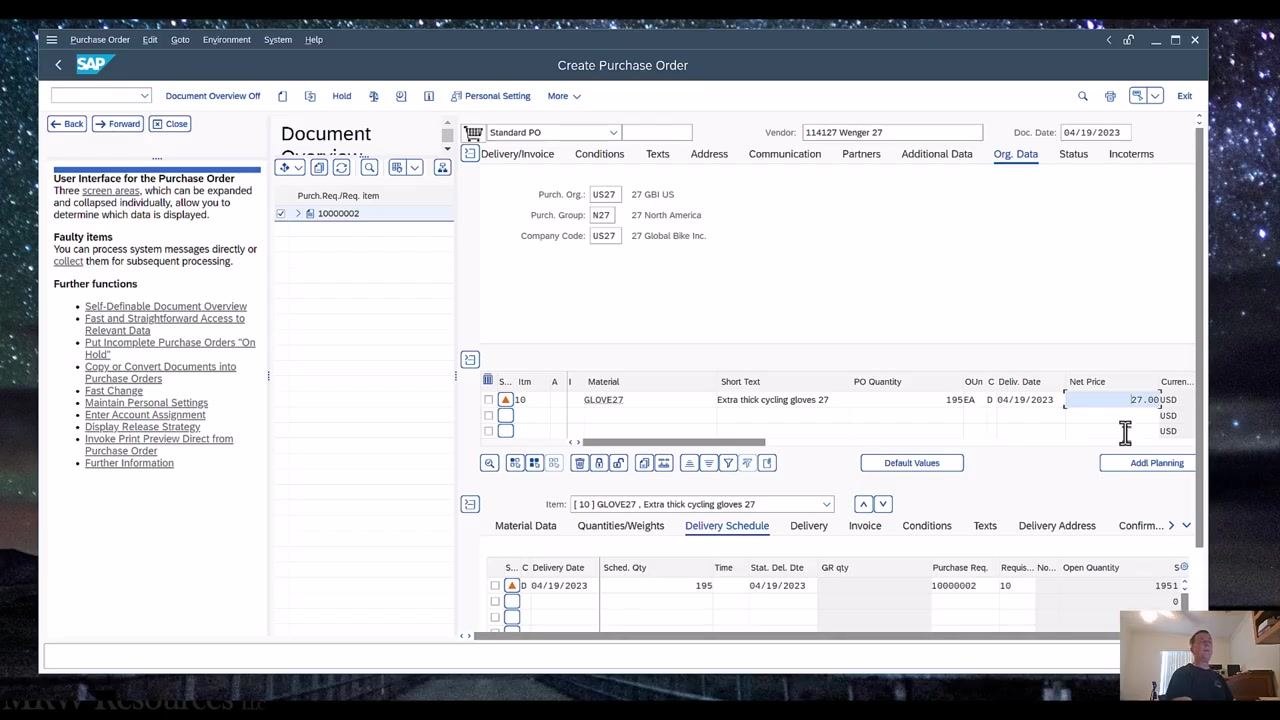
Confirm that the item or items from the purchase requisition now appear in the item overview section of the purchase order. Item details such as material number, description (for example, "GLOVE27, Extra thick cycling gloves 27"), scheduled quantity (for example, 195), and delivery date (for example, 04/19/2023) are filled in automatically.
Expand the SAP window for better visibility (optional)
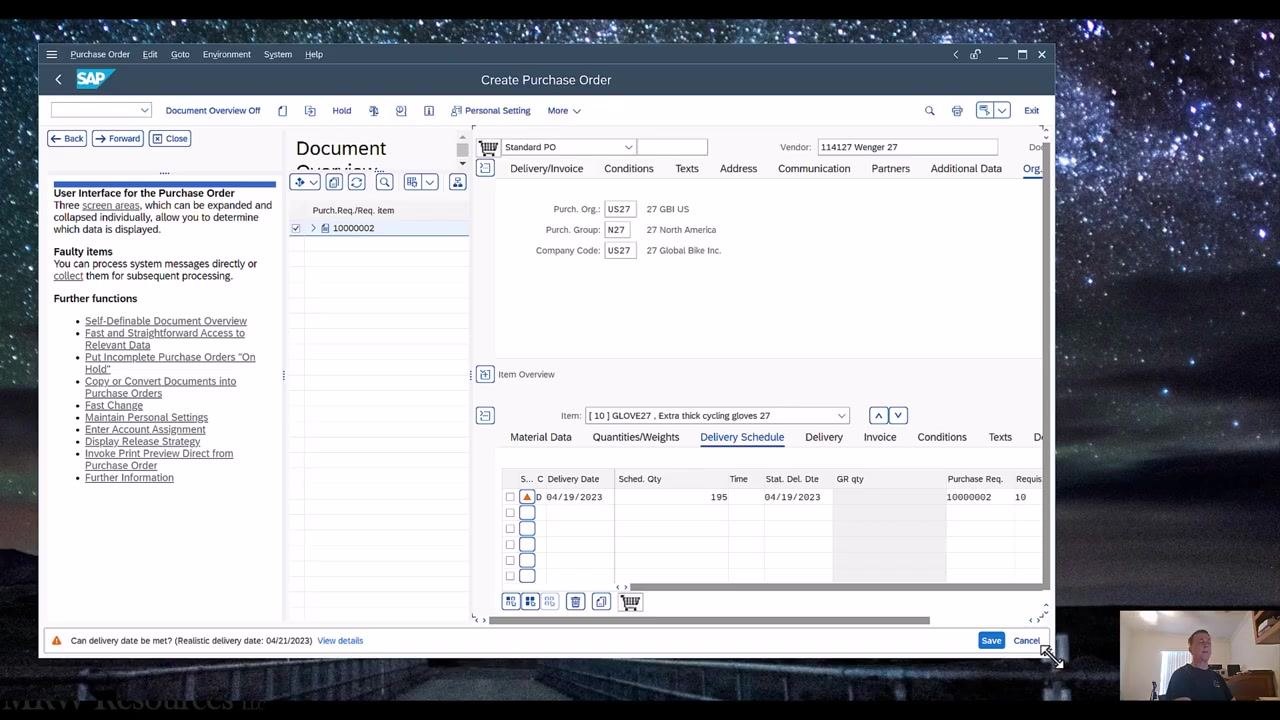
If needed, resize or maximize your SAP window by dragging the window borders or using the maximize button. A larger window is especially helpful for reviewing all item details and tabs, such as Material Data, Quantities/Weights, and Delivery Schedule.
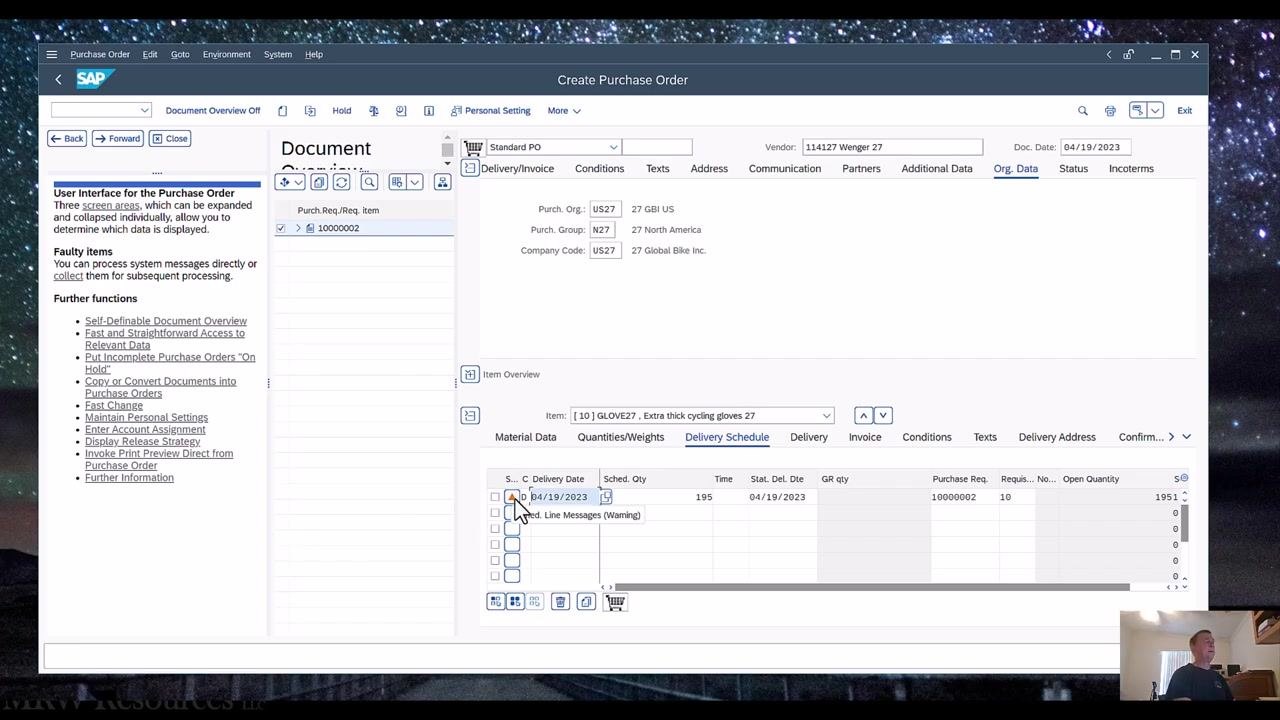
Check for system warnings
Look for any warning messages that appear after adopting the purchase requisition. For example, a warning such as "Can delivery date be met?" may appear if the scheduled delivery date is earlier than the realistic delivery date (for example, scheduled 04/19/2023 versus realistic 04/21/2023). Warning messages appear at the bottom of the screen and in the item overview under "Line Messages (Warning)".
In the item overview, click the Delivery Schedule tab to review the scheduled delivery date, quantity, and any warnings. Confirm that the Delivery Date, Scheduled Quantity, Stat. Del. Dte, and Purchase Req. fields are populated correctly. If a warning appears, consider adjusting the delivery date or reviewing the information record for expected delivery times.
Confirm organizational data and item details
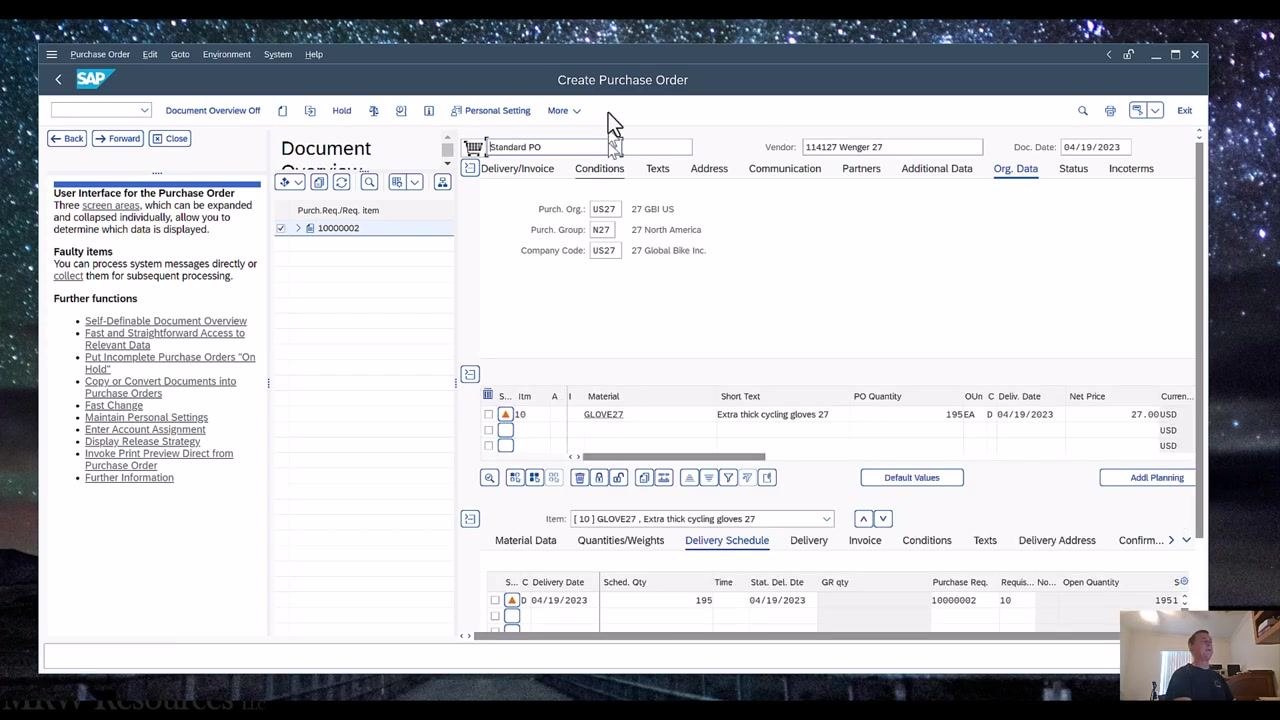
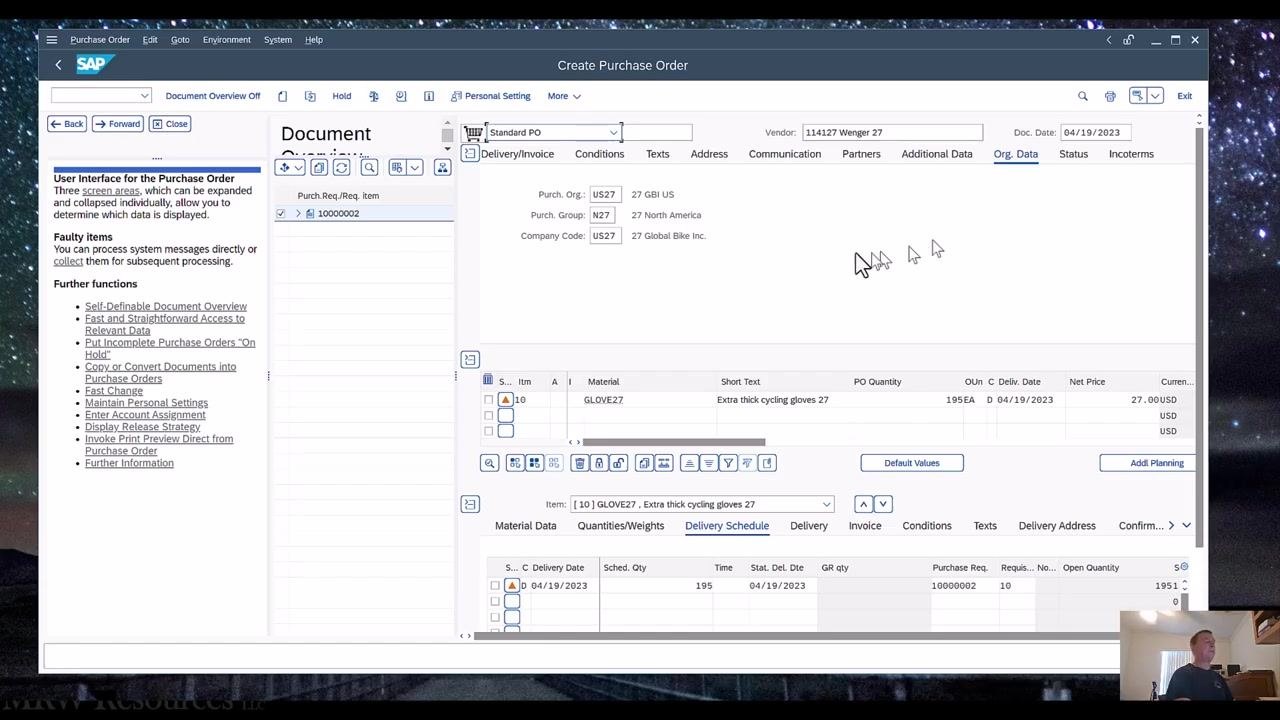
On the Create Purchase Order screen, confirm that the organizational data and item details are complete:
- Purch. Org.: US27 (27 GBI US)
- Purch. Group: N27 (27 North America)
- Company Code: US27 (27 Global Bike Inc.)
- Purchase order type: Standard PO
- Vendor: 114127 Wenger 27
- Document Date: 04/19/2023
- Material: GLOVE27
- Short Text: Extra thick cycling gloves 27
- PO Quantity: 195 EA
- Delivery Date: 04/19/2023
- Net Price: 27.00 USD
Resolve the net price error
If you see an error message stating "Net price must be greater than zero," ensure the Net Price field contains a value greater than zero, such as 27.00 USD.
Save the purchase order
After all required fields are filled in, click the Save button. A confirmation message appears at the bottom of the screen: "Standard PO created under the number 4500000002."
If needed, copy the purchase order number from the confirmation message or the Performance Assistant window for your records.
Return to the main menu
Once the purchase order is created, return to the SAP main menu to proceed with your next activity.
Summary
In this guide, you learned how to create a purchase order in SAP ME21N by:
- Navigating to Logistics > Materials Management > Purchasing > Purchase Order > Create and selecting ME21N
- Entering vendor information and organizational data (Purch. Org., Purch. Group, Company Code)
- Linking an existing purchase requisition to the purchase order through the document overview panel
- Reviewing copied item details and resolving delivery date and net price warnings
- Saving the purchase order and confirming the generated PO number
Key data used in this example:
- Material: GLOVE27
- Short Text: Extra thick cycling gloves 27
- PO Quantity: 195 EA
- Delivery Date: 04/19/2023
- Net Price: 27.00 USD
- Vendor: 114127 Wenger 27
- Purchase Org: US27
- Purchase Group: N27
- Company Code: US27
- PO Number Created: 4500000002
What's next
With your purchase order saved, you can proceed to related activities such as goods receipt or invoice verification in SAP Materials Management.
Generation details: cost, quality tiers
Docsie billed 3,500 credits ($2.45) to analyze this 7-minute video at standard quality. The rewrite, template fill and Word/PDF exports were included. The same video at each quality tier:
| Quality | Frames sampled | Credits | Approx. cost |
|---|---|---|---|
| Draft | every 16-30 s | 1,750 | $1.22 |
| Standard (this guide) | every 8-15 s | 3,500 | $2.45 |
| Detailed | every 4-7 s | 7,000 | $4.90 |
| Ultra | every 1-3 s | 14,000 | $9.80 |
Credits priced at $0.70 per 1,000; plans include a monthly allowance. Enterprise customers on on-premise or bring-your-own-model deployments run this on their own inference and pay no per-video credits.
Generated by Docsie Video-to-Docs on 2026-10-01 from a 6-minute video. Screenshots are frames from the source video and belong to their creator, MRW Tech & AI, whose original is embedded above. If you own this video and want the guide removed or credited differently, contact us and we will act within one business day.