
How to Read Micrometer
This guide explains how to read a metric micrometer accurately, covering the sleeve and thimble scales, vernier scales, and measurement ranges. Understanding how to read a micrometer correctly ensures your measurements are precise and reliable, whether you are working with a standard 0–25 mm tool or a larger-capacity instrument.
Video: HD How to Read a Metric Micrometer by Travers Tool Co (2013). All credit for the demonstration goes to the creator; watch the original on YouTube. The written guide below was generated from this video by Docsie. Creator? Request a change or removal.
This guide explains how to read a metric micrometer accurately, covering the sleeve and thimble scales, vernier scales, and measurement ranges. Understanding how to read a micrometer correctly ensures your measurements are precise and reliable, whether you are working with a standard 0–25 mm tool or a larger-capacity instrument.

Purpose
This procedure describes the steps required to read a metric micrometer correctly, combining the sleeve reading, thimble reading, and the tool's measurement range to arrive at an accurate total measurement.
Scope
This procedure applies to anyone using a metric micrometer to measure parts, including micrometers with standard 25 mm ranges, larger-capacity micrometers, and those equipped with vernier scales.
Required equipment
- Metric micrometer
- Part or component to be measured
- Part drawing or specification sheet with dimensions and tolerances (for verification)
Prerequisites
If you are not yet familiar with micrometer terminology, review introductory reference material before beginning this procedure.
Steps
1. Understand the pitch of the screw thread
The pitch of the micrometer's screw thread is 0.5 mm. This means one full revolution of the thimble moves the spindle exactly 0.50 mm.
2. Identify the reading line and graduations on the sleeve
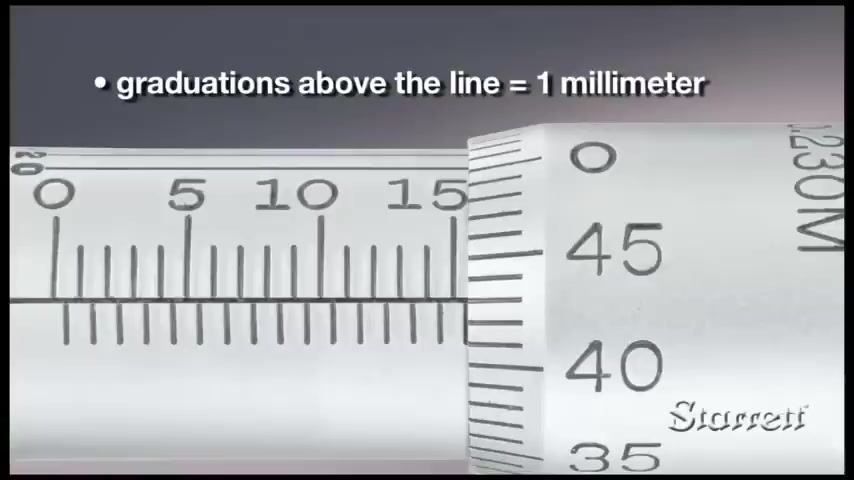
The reading line on the sleeve is graduated in millimeters above the line. Below the line, each millimeter is further divided in half, representing 0.5 mm increments.
3. Examine the thimble scale
The beveled edge of the thimble contains 50 graduations, with each graduation representing 0.01 mm. Every fifth line is numbered to make the scale easier to read.
4. Read the sleeve scale
Add the number of millimeters visible on the sleeve above the reading line. If the half-millimeter line below the main line is also visible, add 0.5 mm to this value.
For example, if the last visible sleeve line is the bottom line after the number 5, the sleeve value is 5.5 mm.
5. Read the thimble scale
Find the thimble graduation that aligns with the sleeve's reading line, then multiply this number by 0.01 mm to determine the hundredths-of-a-millimeter value.
For example, if the thimble scale value at the sleeve line is 28, the calculation is 28 × 0.01 mm = 0.28 mm.
6. Calculate the total measurement
Add the sleeve value and the thimble value together to obtain the total reading.
For example, 5.5 mm (sleeve) + 0.28 mm (thimble) = 5.78 mm.
7. Understand vernier scales, if present
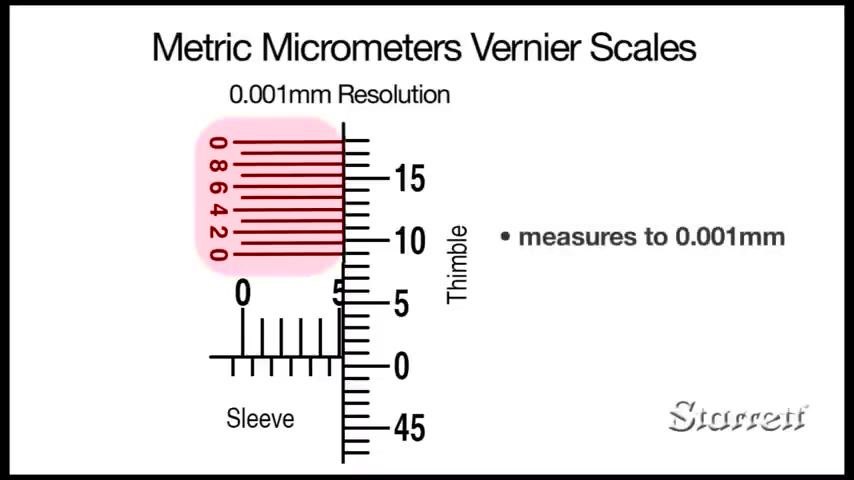
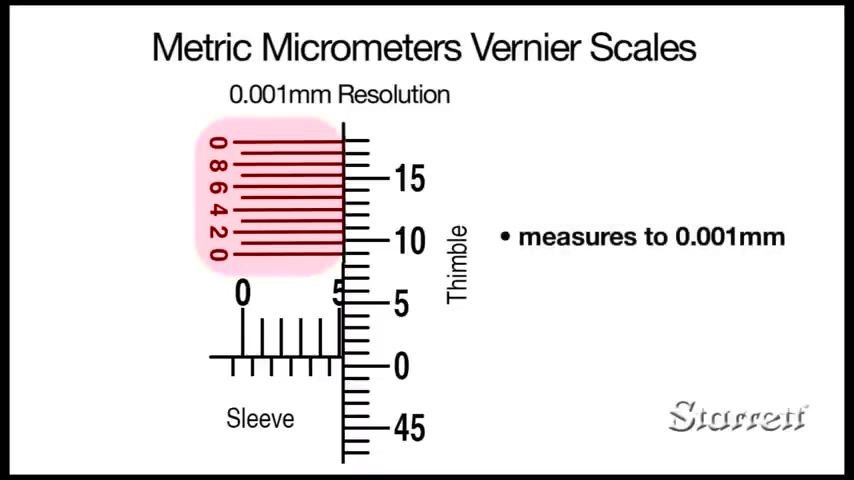
Some metric micrometers include horizontal lines above the sleeve scale that work with the thimble as a vernier scale. Two variants exist:
- A vernier scale with six lines, allowing measurement to the closest 0.002 mm
- A vernier scale with eleven lines, allowing measurement to the closest 0.001 mm
Note: Even when a vernier scale is present, read only to the closest 0.01 mm if the part's tolerance allows it.
8. Identify the micrometer's measurement range
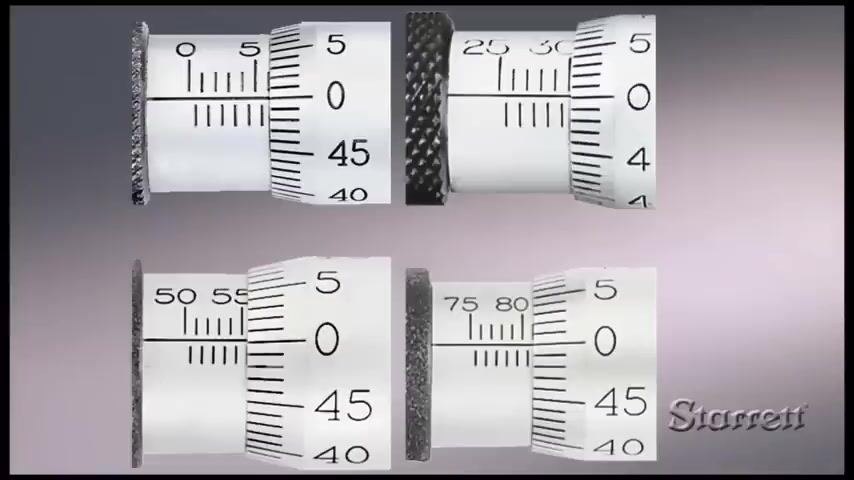
Each metric micrometer covers a 25 mm range. On larger-capacity tools, the sleeve scale will begin at 0, 25, 50, or 75 depending on the tool's overall range. For example:
- A 225–250 mm micrometer starts at 25
- A 150–175 mm micrometer starts at 50
- A 175–200 mm micrometer starts at 75
9. Add the micrometer's range to your reading
For any measurement, add the starting value of the micrometer's range (0, 25, 50, or 75 mm) to your combined sleeve and thimble reading.
For example, if you are using a 25–50 mm micrometer and your sleeve/thimble reading is 28.32 mm, the total measurement is 25 mm + 28.32 mm = 53.32 mm.
10. Apply proper micrometer technique
Hold the micrometer and the part securely while measuring. Turn the spindle with just the right amount of force — avoid over-tightening or under-tightening, as this can distort the reading. Carefully interpret the sleeve and thimble scales to ensure an accurate result.
Verification
11. Verify your measurement against part specifications
Compare your measured value against the required dimensions and tolerances specified for the part.
For example, if the drawing specifies a width of 11.75 mm ±0.02 mm, confirm that your measurement falls within this range.
Summary
By following these steps, you can accurately read measurements from a metric micrometer, including tools with vernier scales and different measurement ranges. Combine the sleeve reading, the thimble reading, and the tool's range starting value, then verify the result against the part's required tolerances. With practice, you will consistently achieve accurate and reliable measurements using a metric micrometer.
What's next
For additional guidance on reading a micrometer, consult the manufacturer's documentation or training materials for your specific tool.