How to Schedule Email in Outlook in Microsoft 365
Outlook lets you compose a message now and have it sent automatically at a later date and time. This is useful when you want your communications to go out while you're unavailable, or you simply want to guarantee timely delivery without relying on your own memory. This guide walks you through how to schedule an email in Outlook, from composing your message to confirming it was sent as planned.
Video: How to Schedule an Email in Outlook by Intellezy Learning (2025). All credit for the demonstration goes to the creator; watch the original on YouTube. The written guide below was generated from this video by Docsie. Creator? Request a change or removal.
Outlook lets you compose a message now and have it sent automatically at a later date and time. This is useful when you want your communications to go out while you're unavailable, or you simply want to guarantee timely delivery without relying on your own memory. This guide walks you through how to schedule an email in Outlook, from composing your message to confirming it was sent as planned.
Prerequisites
- Microsoft Outlook installed as part of Microsoft 365.
- An active connection to Microsoft Exchange or Outlook.com, since Outlook needs this connection to send your scheduled email even if you're not actively using the application.
Step 1: Open Outlook and go to your inbox
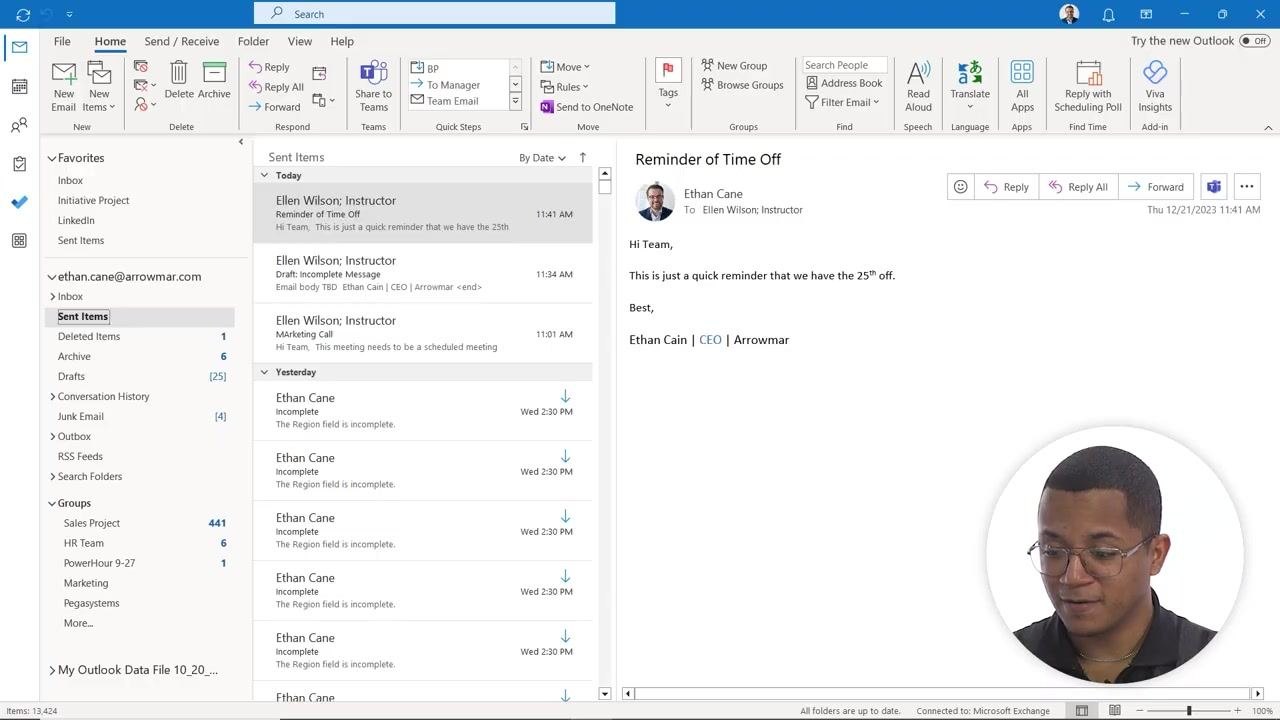
Launch Outlook and navigate to your Inbox or Sent Items. Make sure you're working in the correct account and folder before composing your message.
Step 2: Start a new email
Click New Email in the top-left corner of the Outlook ribbon. A new message window opens, ready for you to compose your email.
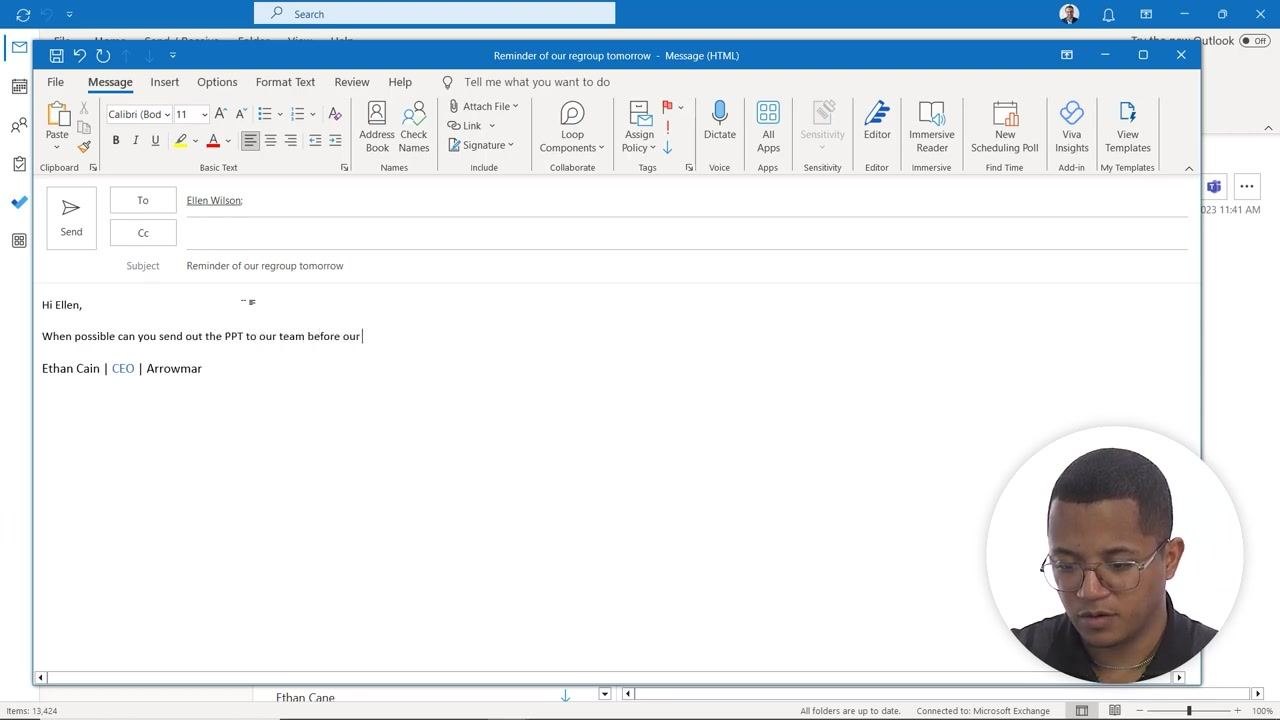
Step 3: Compose your email
Fill in the standard fields for your message:
- To: Enter the recipient's email address, for example "Ellen Wilson".
- Subject: Enter a subject line, for example "Reminder of our regroup tomorrow".
- Body: Write your message, for example:
- "Hi Ellen,"
- "When possible, can you send out the PPT to our team before our noon meeting?"
- "Thanks,"
- "Ethan Cain | CEO | Arrowmar"
Do not click Send yet — the next steps set up the scheduled delivery.
Step 4: Open the Options tab
In the new email window, locate the ribbon at the top and click the Options tab to access advanced email settings.
Step 5: Access Delay Delivery settings
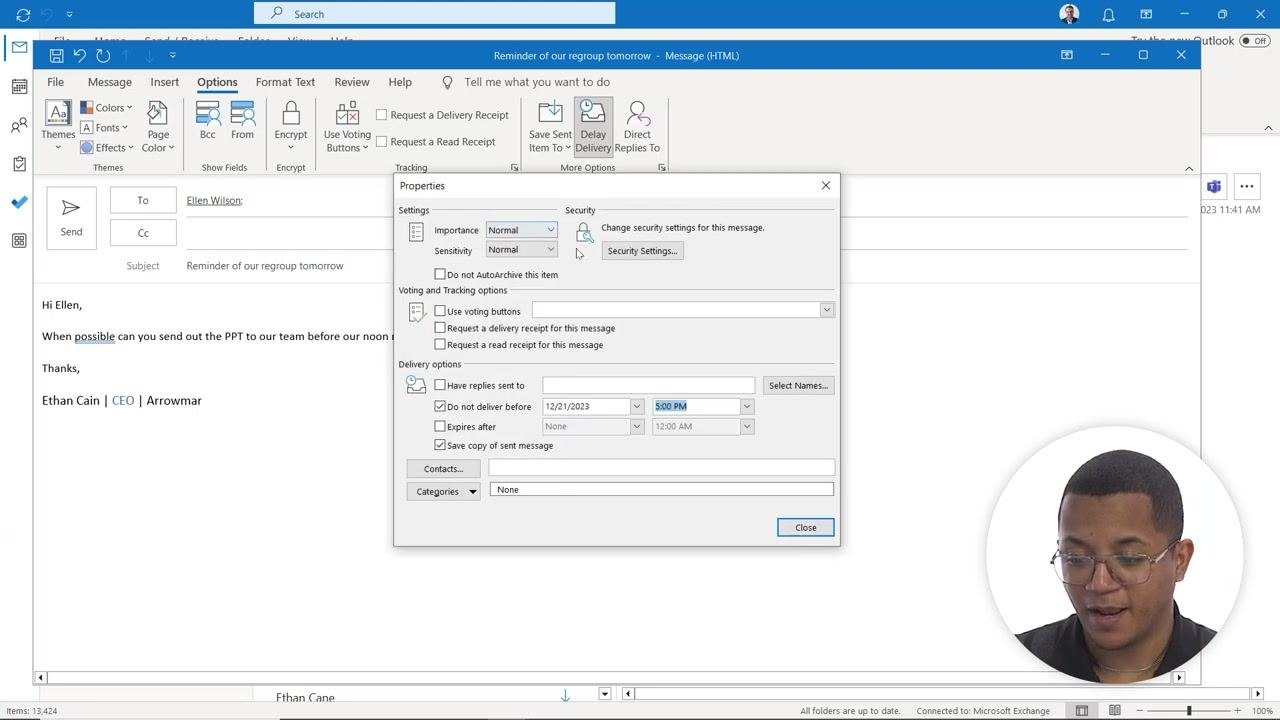
In the Options tab, look to the far right under the More Options group and click Delay Delivery. This opens the Properties dialog for the message.
Step 6: Set the delivery date and time
In the Properties dialog, go to the Delivery options section and check Do not deliver before. Then set the date and time you want the email sent:
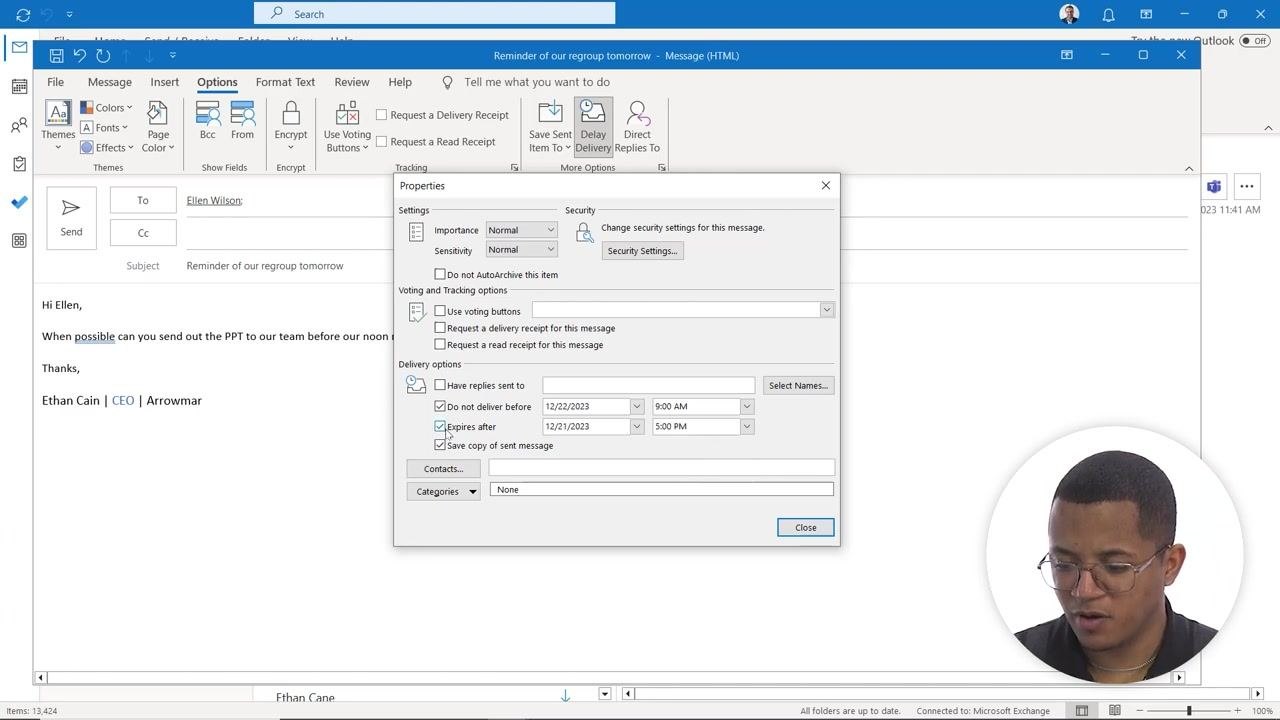
- Click the date field and select your intended date, for example 12/22/2023.
- Click the time dropdown and select your intended time, for example 9:00 AM, so the email arrives after recipients have settled in for the day.
Step 7: Set additional message properties (optional)
While still in the Properties dialog, you can configure other message settings as needed:
- Importance: Choose Normal, Low, or High from the dropdown.
- Voting Buttons: Check Use voting buttons and select a type if you want to collect responses.
- Read/Delivery Receipts: Check Request a delivery receipt for this message or Request a read receipt for this message to track when the email is delivered or read.
- Have replies sent to: By default, replies go to the sender; specify a different recipient if needed.
- Expires after: Check this box and set a date/time if you want the email to expire after a certain period.
- Save copy of sent message: Keep this checked to retain a record in your Sent Items.
Step 8: Close the Properties dialog
Review your delivery settings to confirm they're correct, for example "Do not deliver before: 12/22/2023, 9:00 AM." Then click Close at the bottom of the dialog to save your settings and return to your email draft. Double-check the rest of your message details before proceeding.
Step 9: Send the scheduled email
Click Send in your email window just as you would for any normal email. Outlook holds the message and automatically sends it at the scheduled date and time. You don't need to keep Outlook open for this to happen, as long as you remain connected to Microsoft Exchange or Outlook.com.
Step 10: Verify the scheduled email in Sent Items
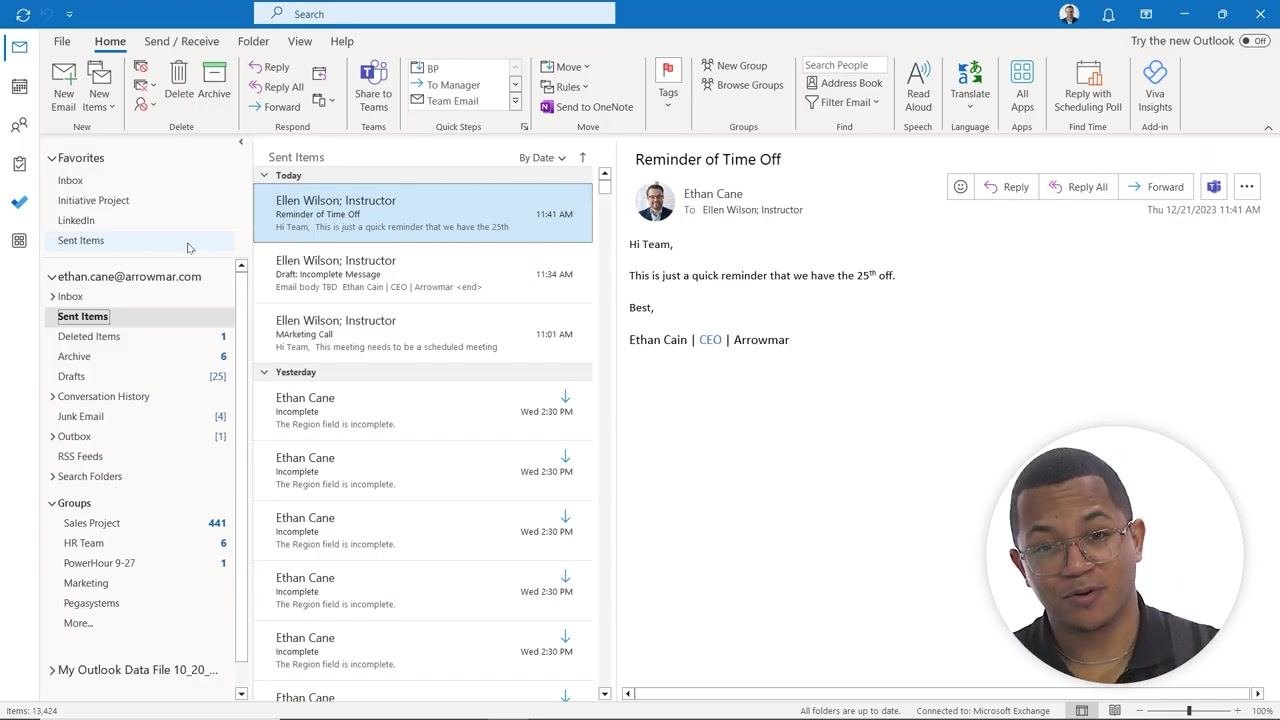
Navigate to the Sent Items folder to confirm your email was delivered. Until the scheduled time arrives, the message stays in your Outbox; once sent, it moves to Sent Items. Check the recipient and content to make sure everything is correct.
Tips for using delayed delivery
- Schedule emails in advance for times when you know you'll be unavailable or traveling.
- Queue up multiple emails ahead of time to maintain communication without needing to be at your computer.
- Use delayed delivery to automate routine messages, reminders, or meeting requests.
- Once you've scheduled an email, no additional effort is required — Outlook handles the rest.
What's next
Now that you know how to schedule an email in Outlook, you can apply the Delay Delivery feature to routine communications, reminders, and meeting requests to keep your correspondence timely even when you're away from your desk.